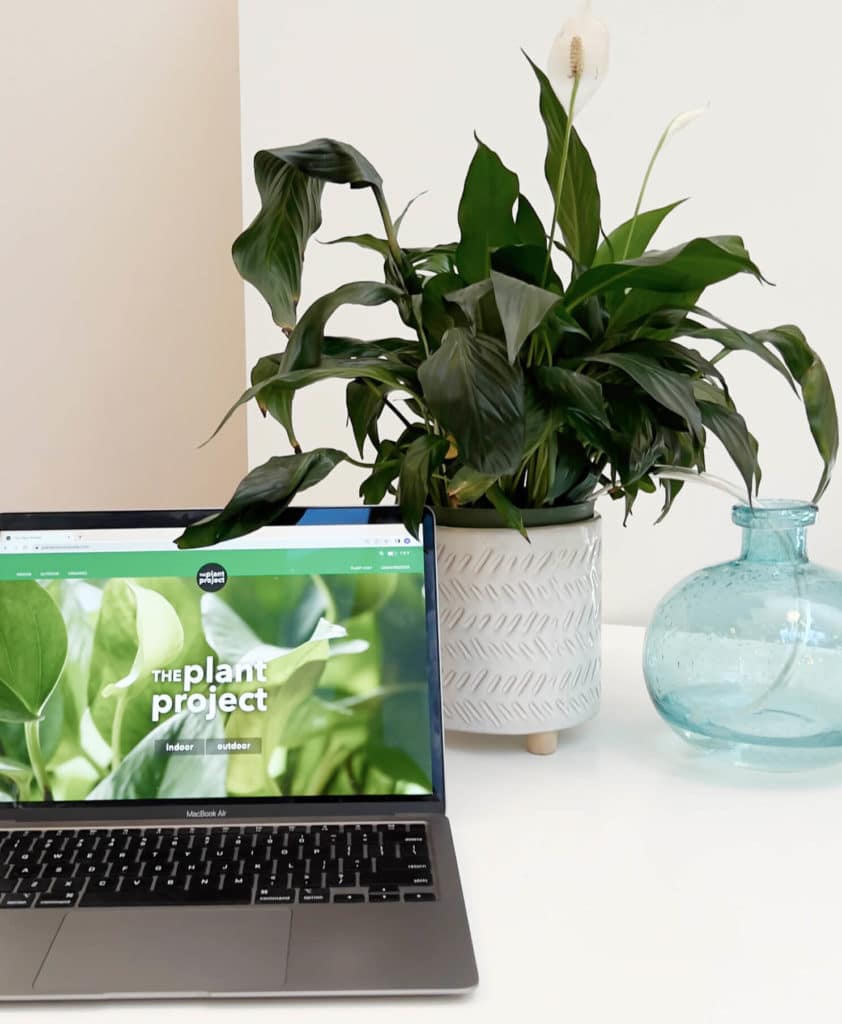
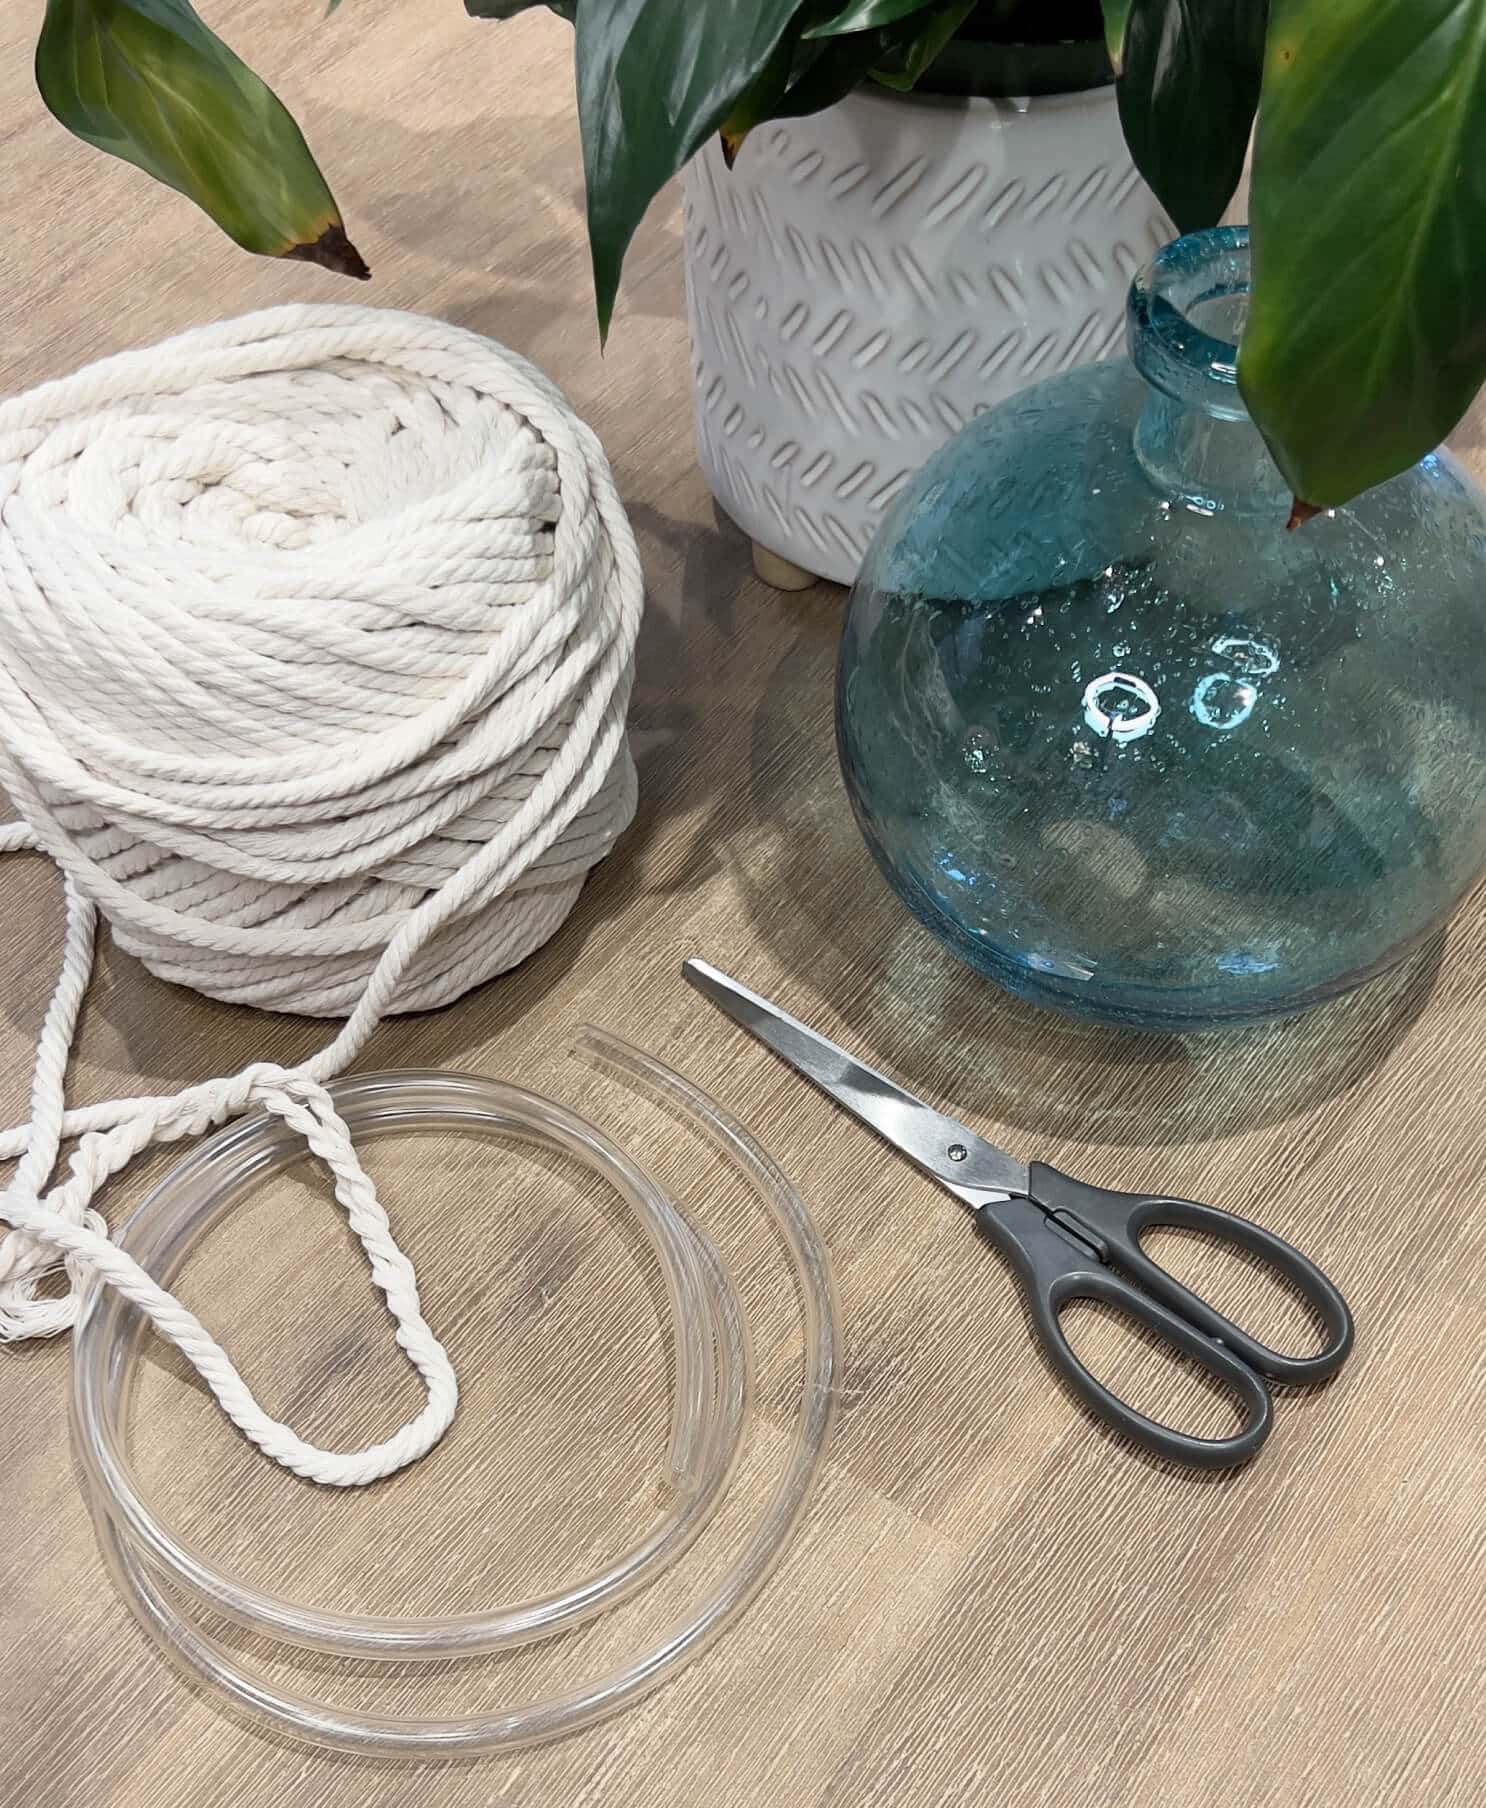
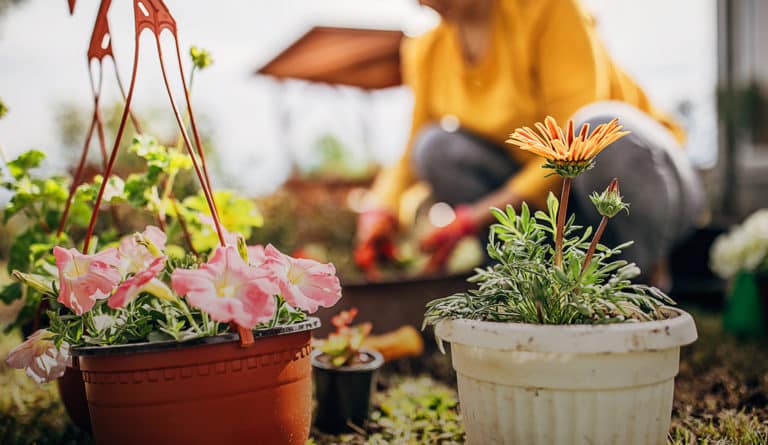
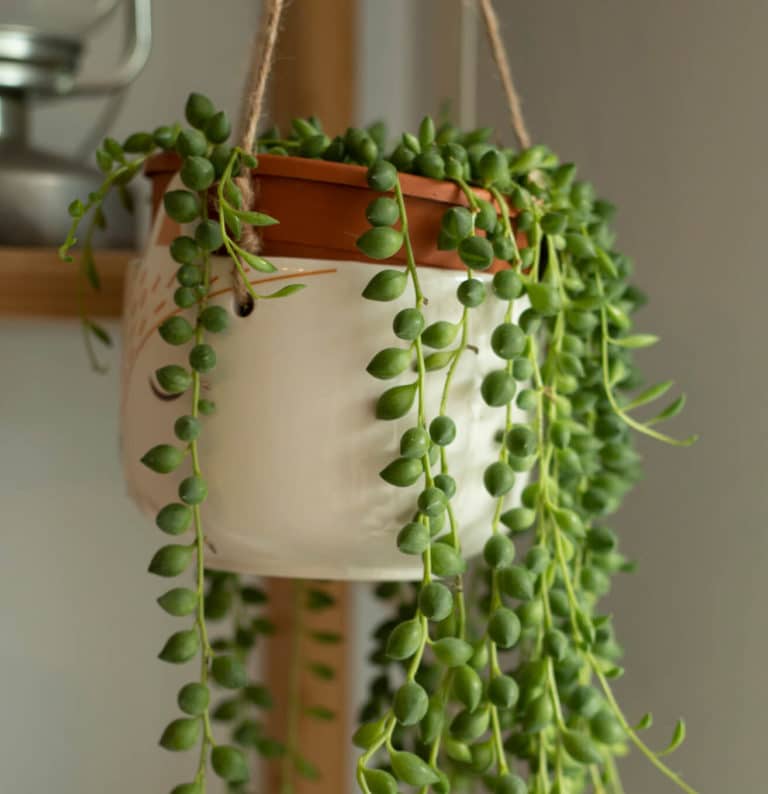
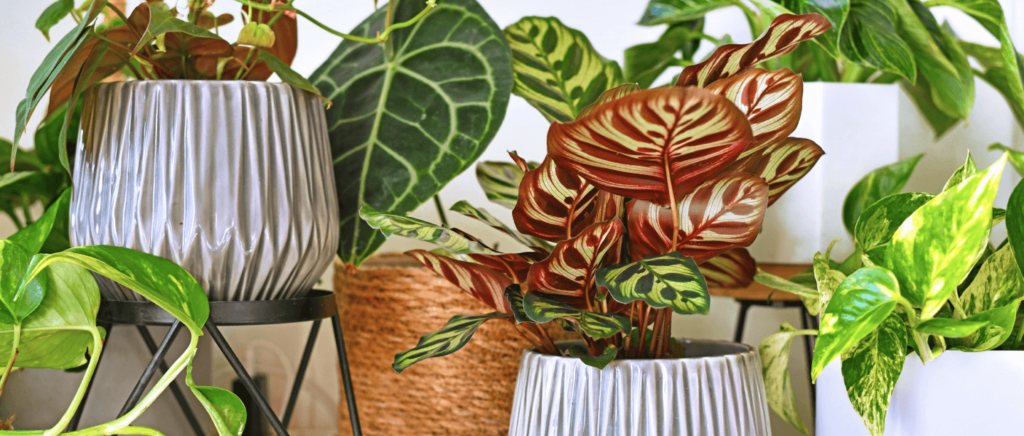
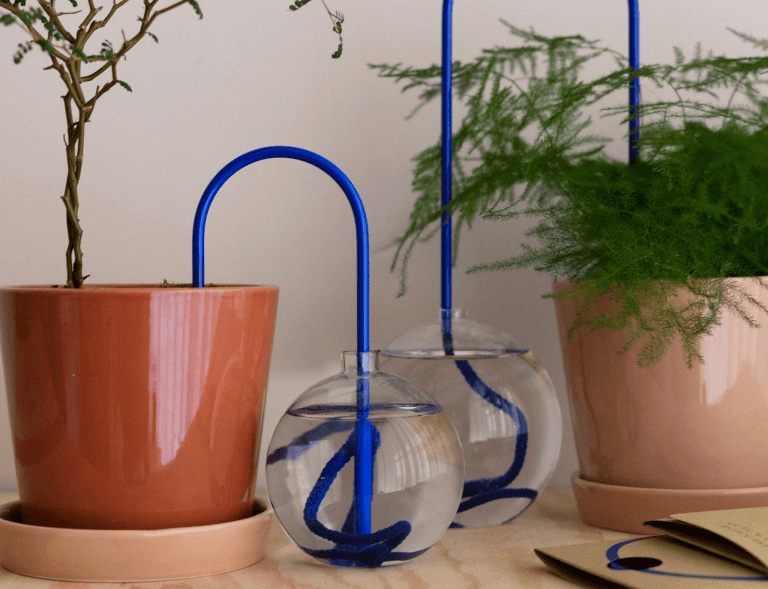
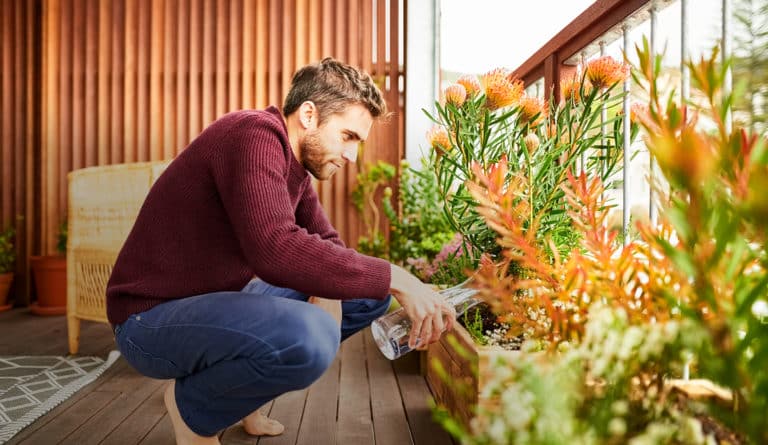
- A plant tube of your choice
- A cotton cord that is a several inches longer than your tube
- A glass vessel
- And – obviously – water!
let’s be honest: watering plants can feel a bit like a chore sometimes. We love our plant babies, but life just gets in the way.
but do not fear – plant straws are here. This simple, easy to install self-watering plant straw system is your key to plant-watering freedom. So, whether you forget to water your plants, or you are planning a getaway and want to make sure yours are taken care of, then this post is for you.
thirst things first: what are plant straws?
Plant straws are made using two simple things : a long cotton cord, and a thin metal tube. One end of the cord is buried in the soil of a plant, while the other end lies in a vessel of water. The cord draws out moisture from the vessel and releases it into a plant’s soil. The thin metal tube, which the cord is strung through, keeps the cord stable – and makes the entire system look chic. So, expect LOTS of compliments pouring in once you have set up your plant straw.
how do plant straws work?
If you are shaking your head furiously and thinking, “this can’t be real,” you are not alone. The idea of a cotton cord watering your plants can seem too good to be true. But don’t click away just yet! There’s a scientific explanation to how all this works.
The cord inside the tube wants to stay evenly moist, so it constantly draws out water from the vessel you placed it in. Meanwhile, your soil instinctively absorbs moisture from the wet cord when it needs a dose of hydration.
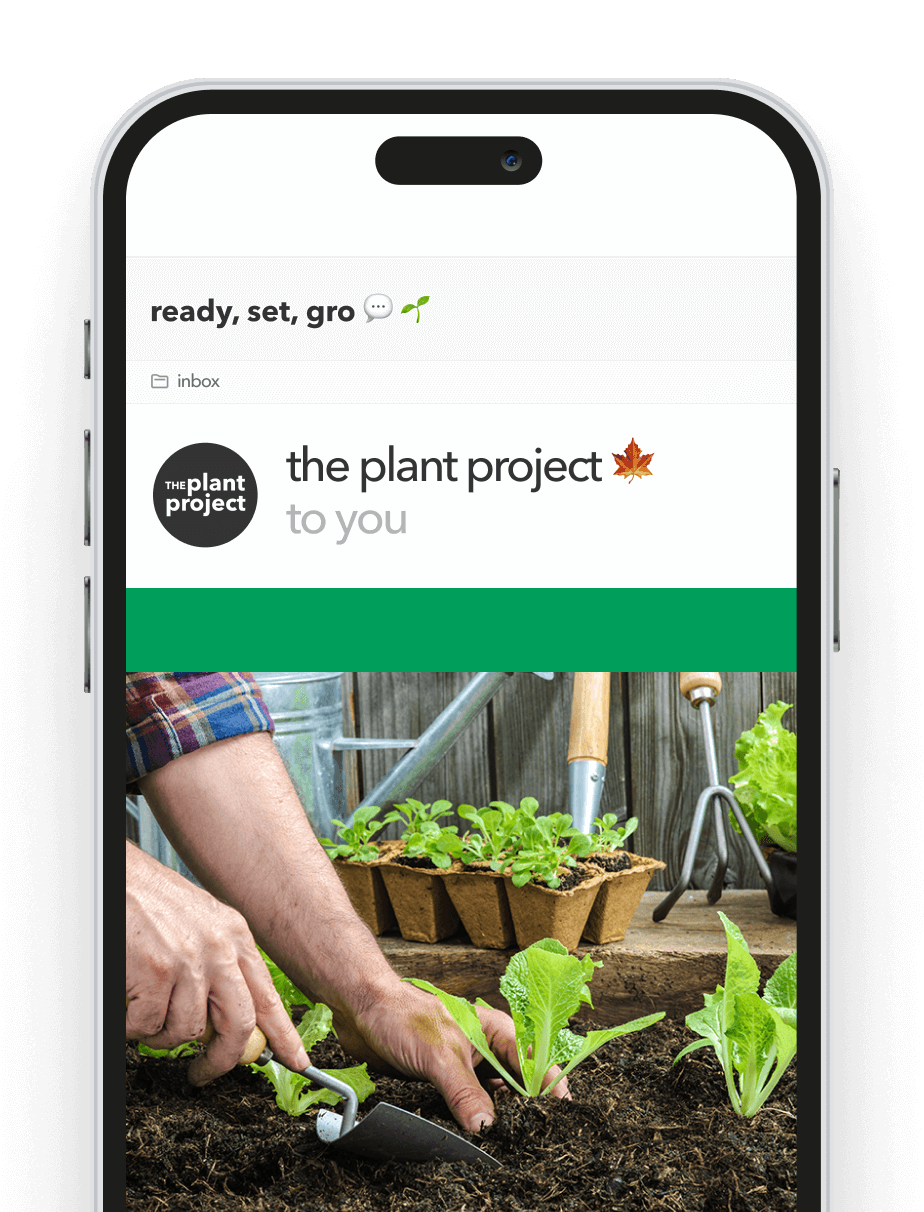
ready? let’s gro.
step one. measure twice, cut once.
Start by measuring how much of the cotton cord and tube you need. Be sure to leave a few inches that can sit in your plant as well as in the water of your vessel.


step two. H2O is the way to go
Next up, wet your cotton cord in water until it is fully soaked. Then, squeeze out the excess.
step three. show us your roots
Feed your cord through the tube. Take one end of your cord and push it several inches below the soil’s surface. Depending on how much water your plant needs, you might want to bury more of your cord within.
step four. just add water
Feed what is left of your cord through your tube. Then, fill up a glass vessel with water, and place the remaining end of the cord in it.
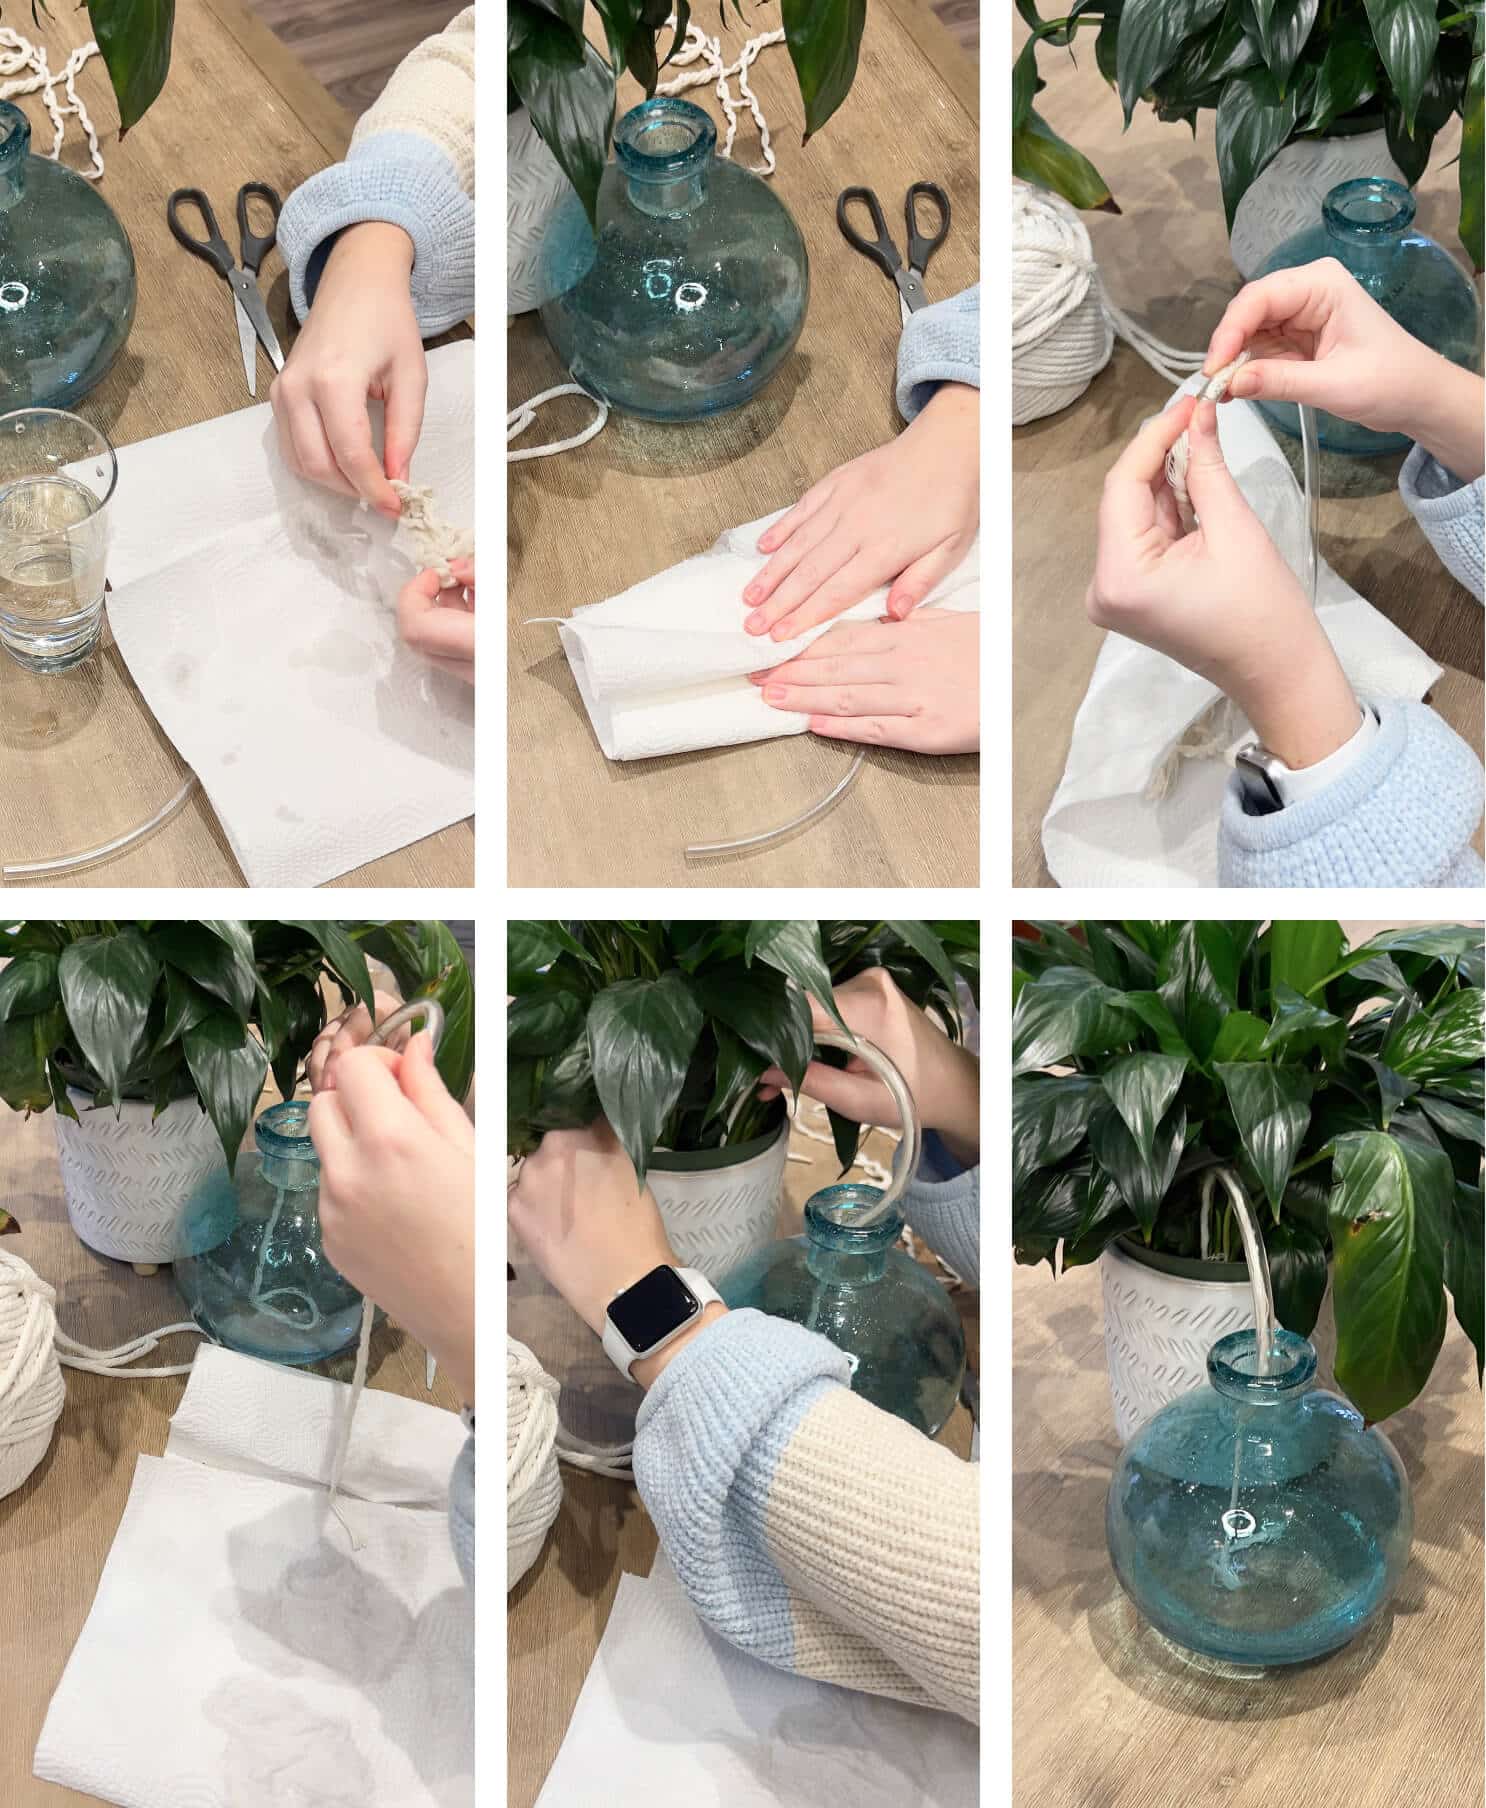
step five. sip sip, hooray
Cheers to crossing “water my plants” off your to-do list for good! Now that you have set up your self-watering plant straw system, the only time you will need to think about watering your plants is when it’s time to feed them, or when you need to refill your vessel.
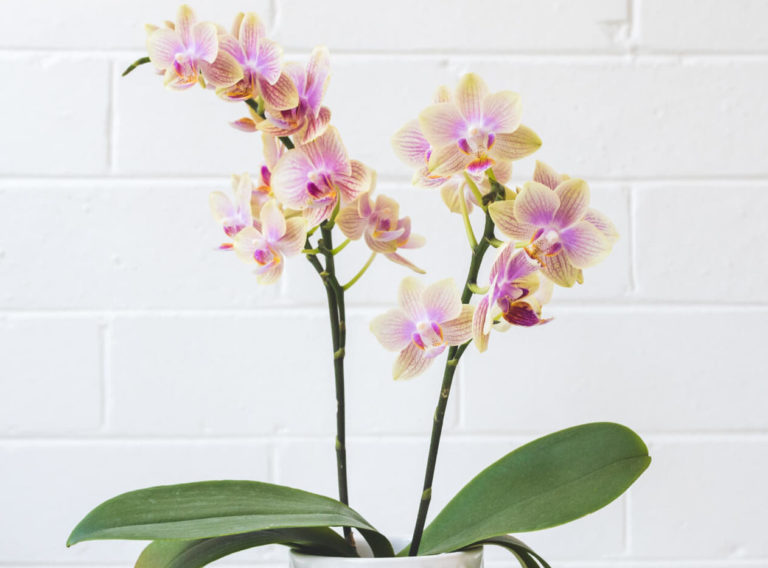
Do your plants actually need a straw?
The answer: it depends. The thirstier your plant is, the more we recommend you invest in a plant straw! For example, if you have got a Monstera Deliciosa or Monstera Adansonii, a plant straw could really benefit their extra hydration needs.
Got more questions about plant straws? Or just want to chat? Come hang out with us and our plant experts in the Plant Chat.
#easypeasy
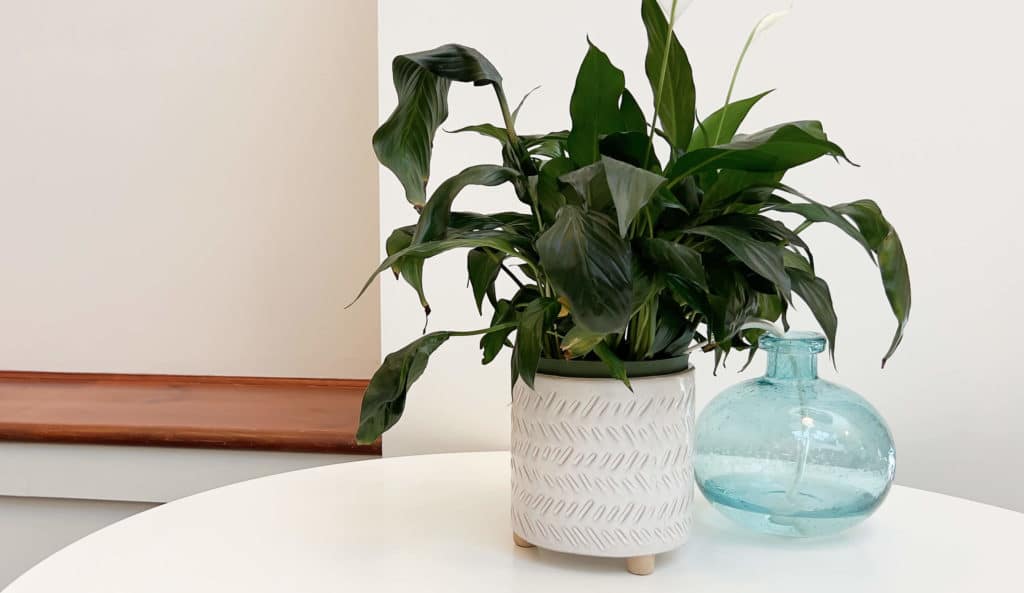
plant straw sstem
plant straw
plant straw
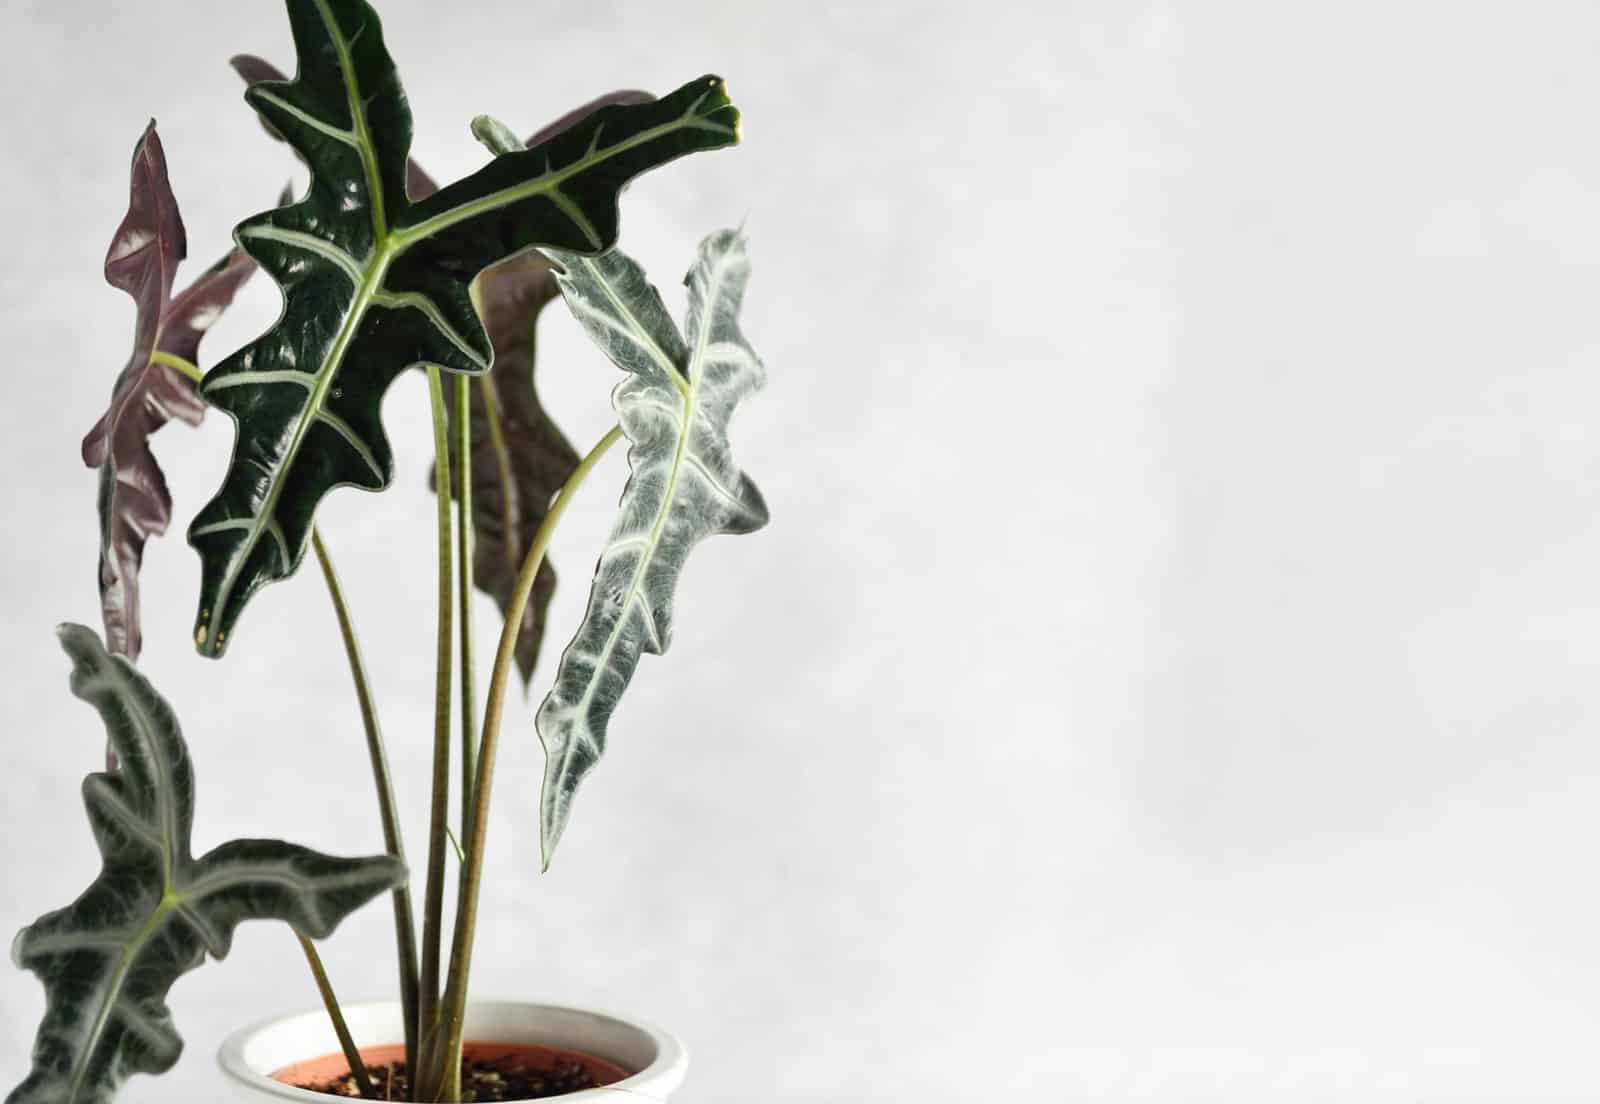
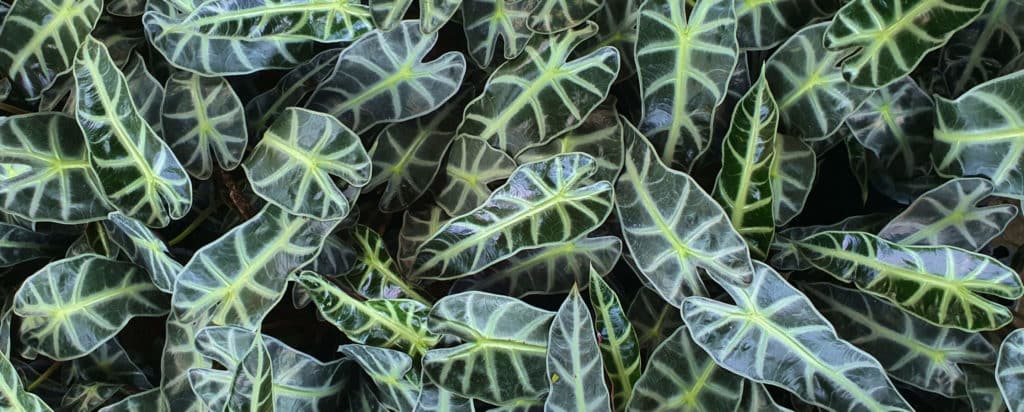
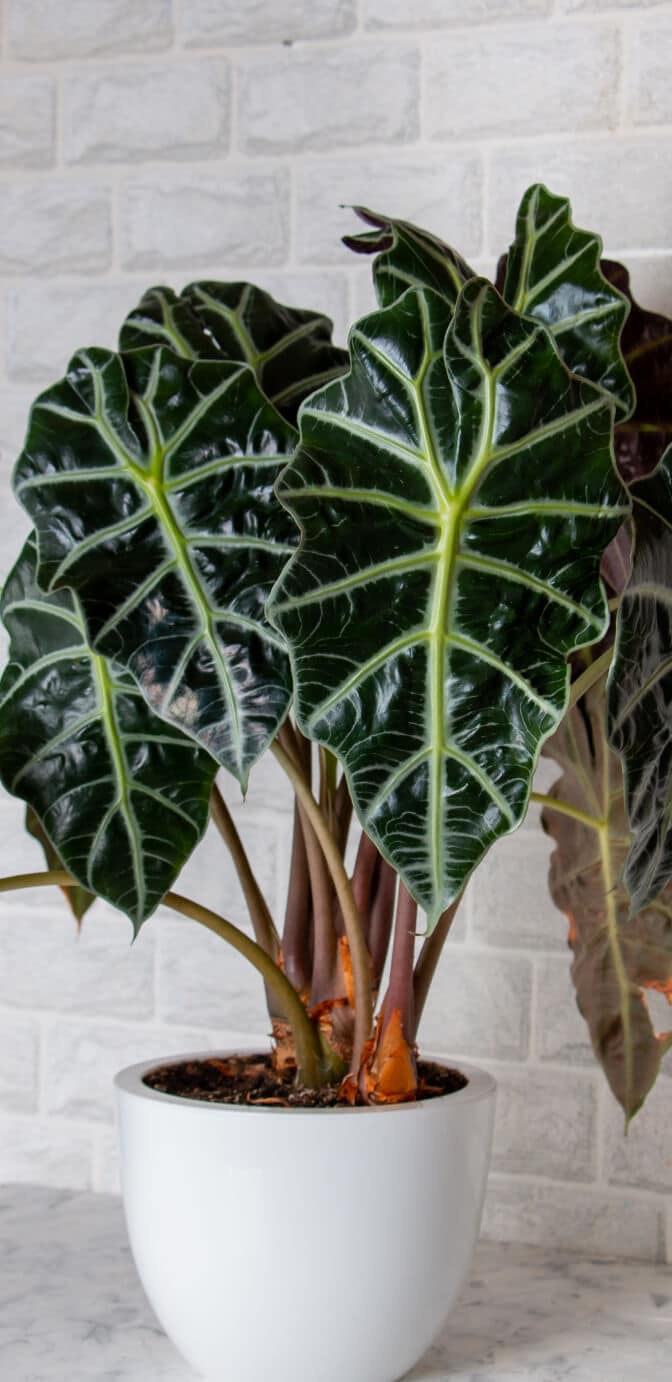
alocasia
aka alocasia
The Alocasia family contains about 70 different variations. They’re tuberous perennials with long stalks. Alocasia leaves vary between being arrow and heart-shaped, and may be interestingly decorated
variations
Alocasia amazonica ‘Polly’, Alocasia amazonica ‘Bambino’, Alocasia amazonica ‘Ivory Coast’, Alocasia micholitziana ‘Frydek’, Alocasia reginula ‘Black Velvet’, Alocasia infernalis ‘Black Magic’, Alocasia rugosa ‘Melo’, Alocasia maharani ‘Grey Dragon’

light
indirect
Place in a spot where it’ll get 6 – 8 hours of indirect light.

water + feeding
not too thirsty
Water until it flows through the drainage hole.

toxic
yes
Should be kept away from your fury friends.

location
a little picky
For spaces that may not get enough light, use a grow light.

humidity
love it
They love high humidity.

size
medium
They can grow between 2 – 6 feet.

pro tip
dry as a bone?
Keep the soil pretty dry throughout the winter, giving it a little water at every 2 weeks.

fun fact
need light and dark
The short days and long nights of fall and winter are perfect for poinsettia. It’s actually what causes them to bloom.


beyond the basics
-
soil + potting
Your Alocasia needs a well-draining potting mix. The Miracle-Gro® Indoor Potting Mix contains coconut coir and perlite to hold onto and release moisture as your plant needs it. If you find that your plant is wanting a little extra, you can add in some Miracle-Gro® Cactus, Palm & Succulent Potting Mix. Adding this succulent mix helps keep your soil light and airy.
-
when to repot
Like most indoor tropical plants, the best time to repot is in the spring or summer, when your plant is strong. Your alocasia will likely want to be repotted every 18 – 24 months. When you’re selecting its new pot, choose one that is about 2 – 4” bigger than its current one.
-
propagation
To propagate your alocasia, use the division method. Remove the plant from its pot and separate a small clump of roots from the main rootball. Replant the small clump into a new pot with fresh soil. Make sure it’s buried at the same depth as the original plant.
-
pest control
Your alocasia may be more prone to spidermites than your other indoor plants. To help prevent those nasty mites from appearing, make sure your plant doesn’t dry out too much over the winter. If you see spidermites on your alocasia, you can use Ortho® Bug B Gon® ECO Insecticidal Soap Ready-To-Use. Spray this insecticidal soap on your plant to eliminate those pesky mites.
troubleshooting
-
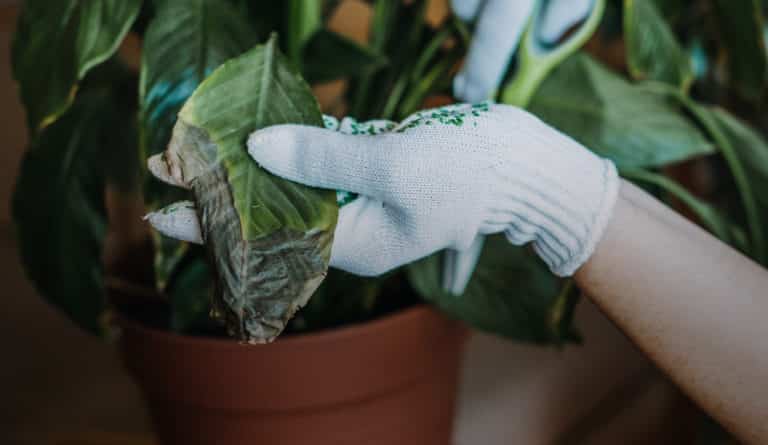
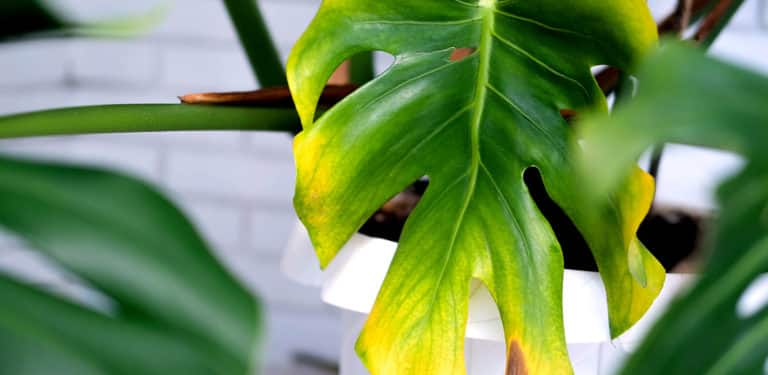
Why are my leaves dying?
Not enough humidity or dry soil. Your alocasia could probably use a good watering. If you’re already on a watering schedule and you’re still noticing dying leaves, consider increasing the humidity in the room.
-
Why are my leaves turning yellow?
Overwatering. Allow the soil to dry out a bit before watering your plant again. For future waterings, make sure the soil is about 25-50% dry before watering.
-
Why are my leaves turning brown?
Probably a sunburn. If your alocasia is too close to bright, direct light then it’s time to move it away. Your alocasia wants to be in bright but indirect light, so find a spot that isn’t right in front of a window. If your lighting is okay, then it could be fertilizer burn. To fix this, drain any accumulated fertilizer from the potting mix, or repot with fresh soil.
-
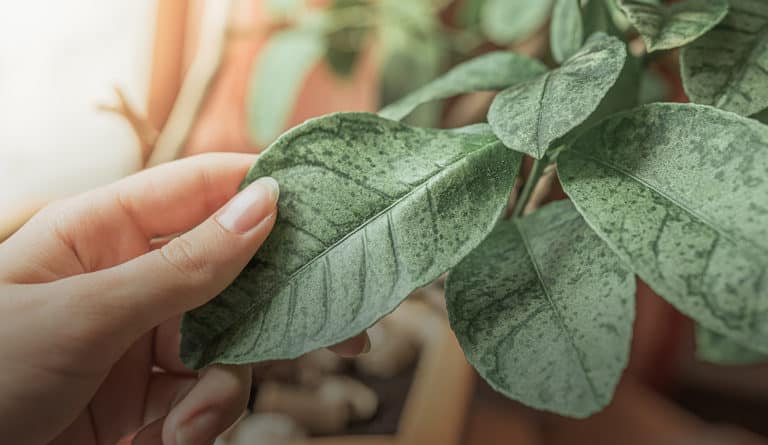
What are these rusty spots on my leaves?
Fungal infection. Poor light and warm, humid conditions can be responsible for fungus. To prevent this make sure the leaves stay as dry as possible. Instead of overhead watering, opt for bottom watering or watering straws instead. Be sure to remove any dead, decaying or diseased plant matter from your alocasia’s pot.
are you ready to level up from your beginner friendly plant collection?
We love our beginner friendly plants, but now that you have nurtured that green thumb, it’s time to test your skills with a few plants that require some know-how to thrive. Enhance your plant collection with these unique and beautiful plant pals.
1
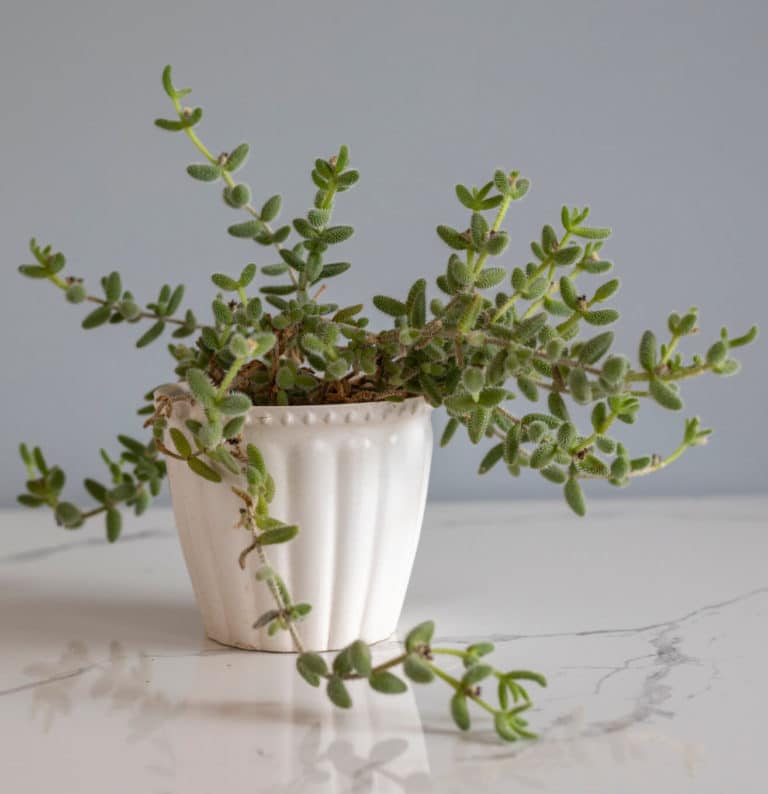
the pickle plant
is a succulent that has unique, spiny-looking leaves that are covered in little white hairs. These plants require a lot of light in order to grow -think bright and indirect light for your pickle plant. Pickle plants are an unusual succulent, so you may not see them in the typical plant collection. They can also flower in the summer, showing a bright red bloom at the top of each stem.
2
string of pearls
is a succulent that produces long trails with delicate green pearls. Sometimes these succulents can also bloom little white flowers. The key to success with a string of pearls plant is the right balance of sun and water. Place your string of pearls where it can receive plenty of sun , like near a east-facing window. For watering, try the weight test. Pick up your plant and if it feels light and airy, it is time for a thorough watering.
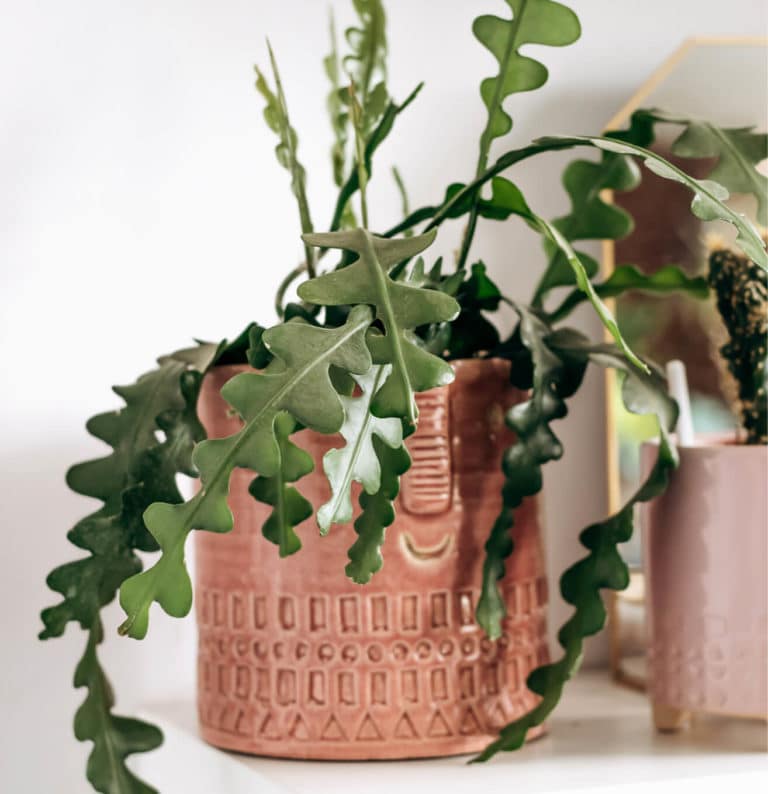
3
fishbone cactus
Also known as the “ric rac cactus.” These plants bloom at night and have a distinct zig-zag pattern that looks like a fish skeleton. If the conditions are just right, you can get this cactus to bloom, but only after about three years. The fishbone cactus needs a couple of hours of direct sunlight, and lots of bright indirect sunlight as well. Be sure to mist your cactus to help it grow, and keep the soil a little moist, especially during the spring and summer months.
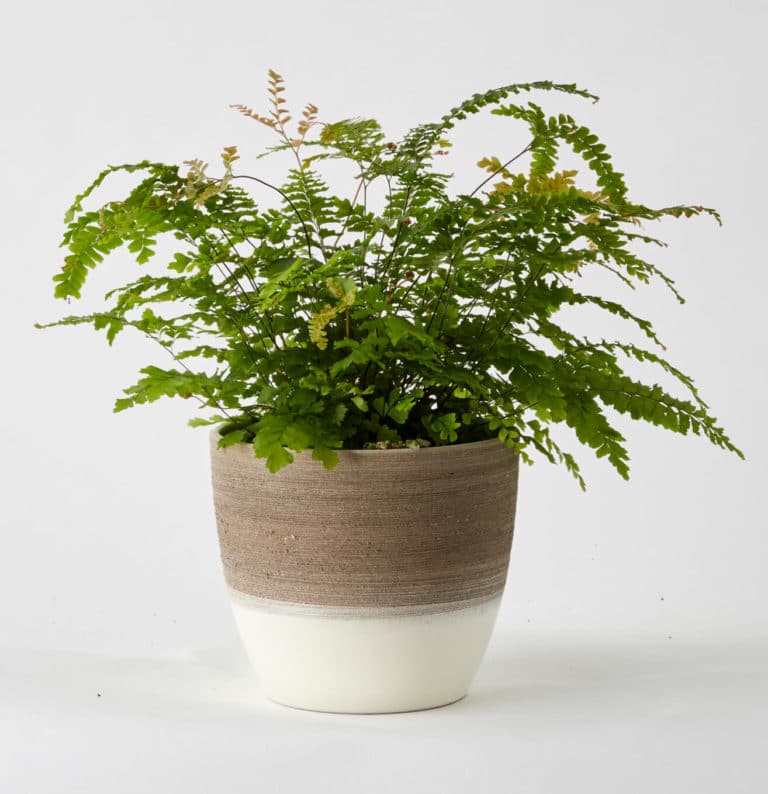
4
maiden hair fern
these plants are known for two things: their delicate foliage and their quick deaths inside. These ferns need a few hours of direct sunlight per day. Think morning or early afternoon light. With most ferns, it is common to keep them wet for a lot of the time but for maiden hair ferns let the soil dry out a little between waterings.
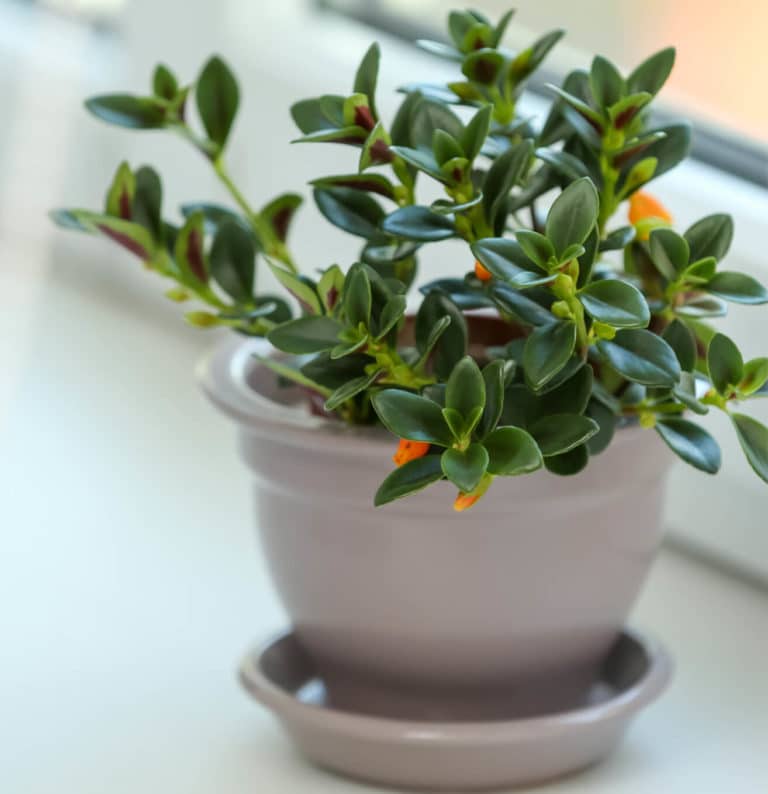
5
goldfish plant
is known for their dark green leaves and bright orange flowers that look like little goldfish. These plants like warm and humid environments. Light is a major contributing factor to their growth. Too much sun and their leaves will get sunburnt and wilt. Too little sun will cause your plant to get leggy and it will not be able to bloom. To get your goldfish blooms to flourish, water slightly less in the winter and fertilize in the growing season
6
Orchid
potted orchids are always a fan favourite with their delicate, vibrant blooms and intoxicating fragrance. While orchids may be a welcomed decoration for your home, they can be challenging to help thrive and re-bloom. Consider keeping your orchids in a terracotta pot with a drainage hole. This will allow for good airflow for your roots. Keep your orchid in bright, indirect light (from an eastern or southern window). This should provide your orchid with enough light to bloom.
Which of these plants are you adding to your collection? We are adding new favourites to our Plant Tags all the time. Want to learn about a specific plant? Let us know in the Plant Chat!

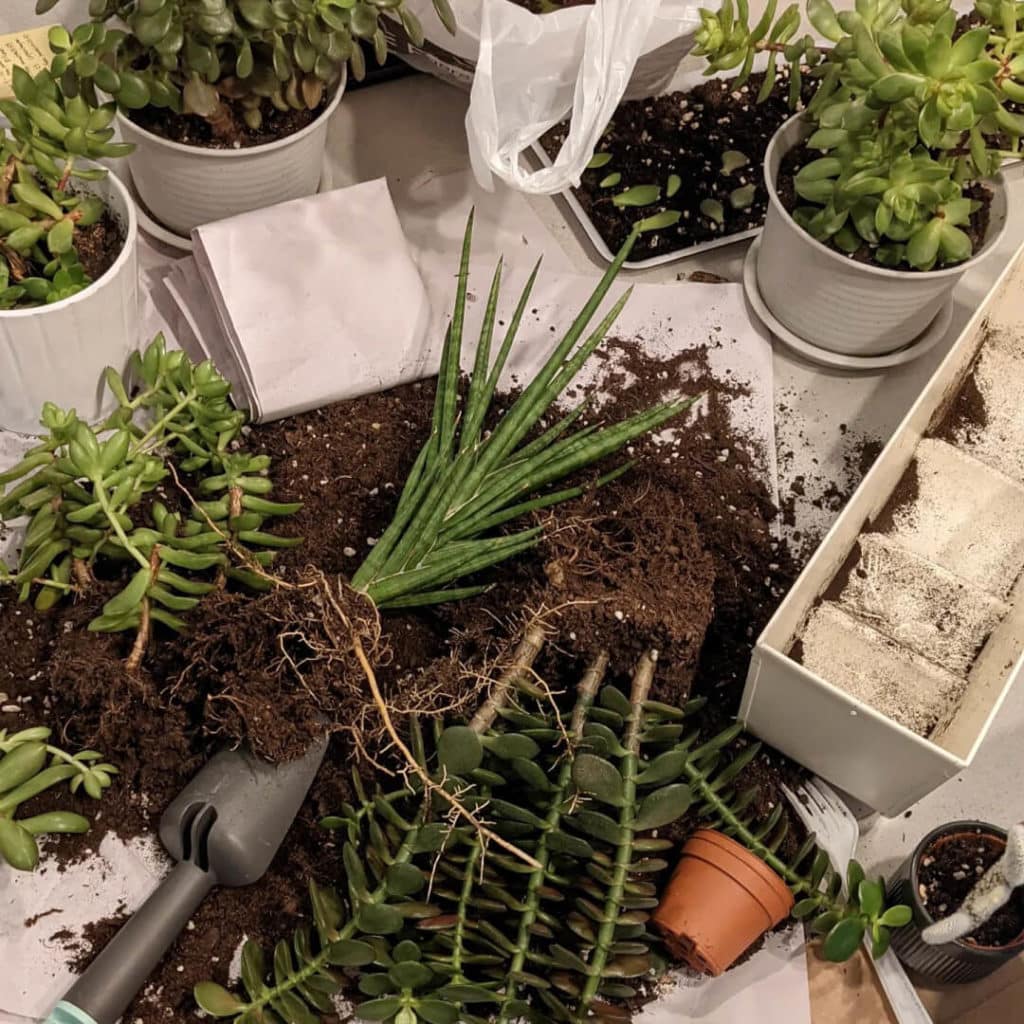
let’s talk root division propagation!
There are a few different ways to clone your favourite plants. Not sure where to start? Do not fret, root division provides a quick and easy way to double up your plant collection.
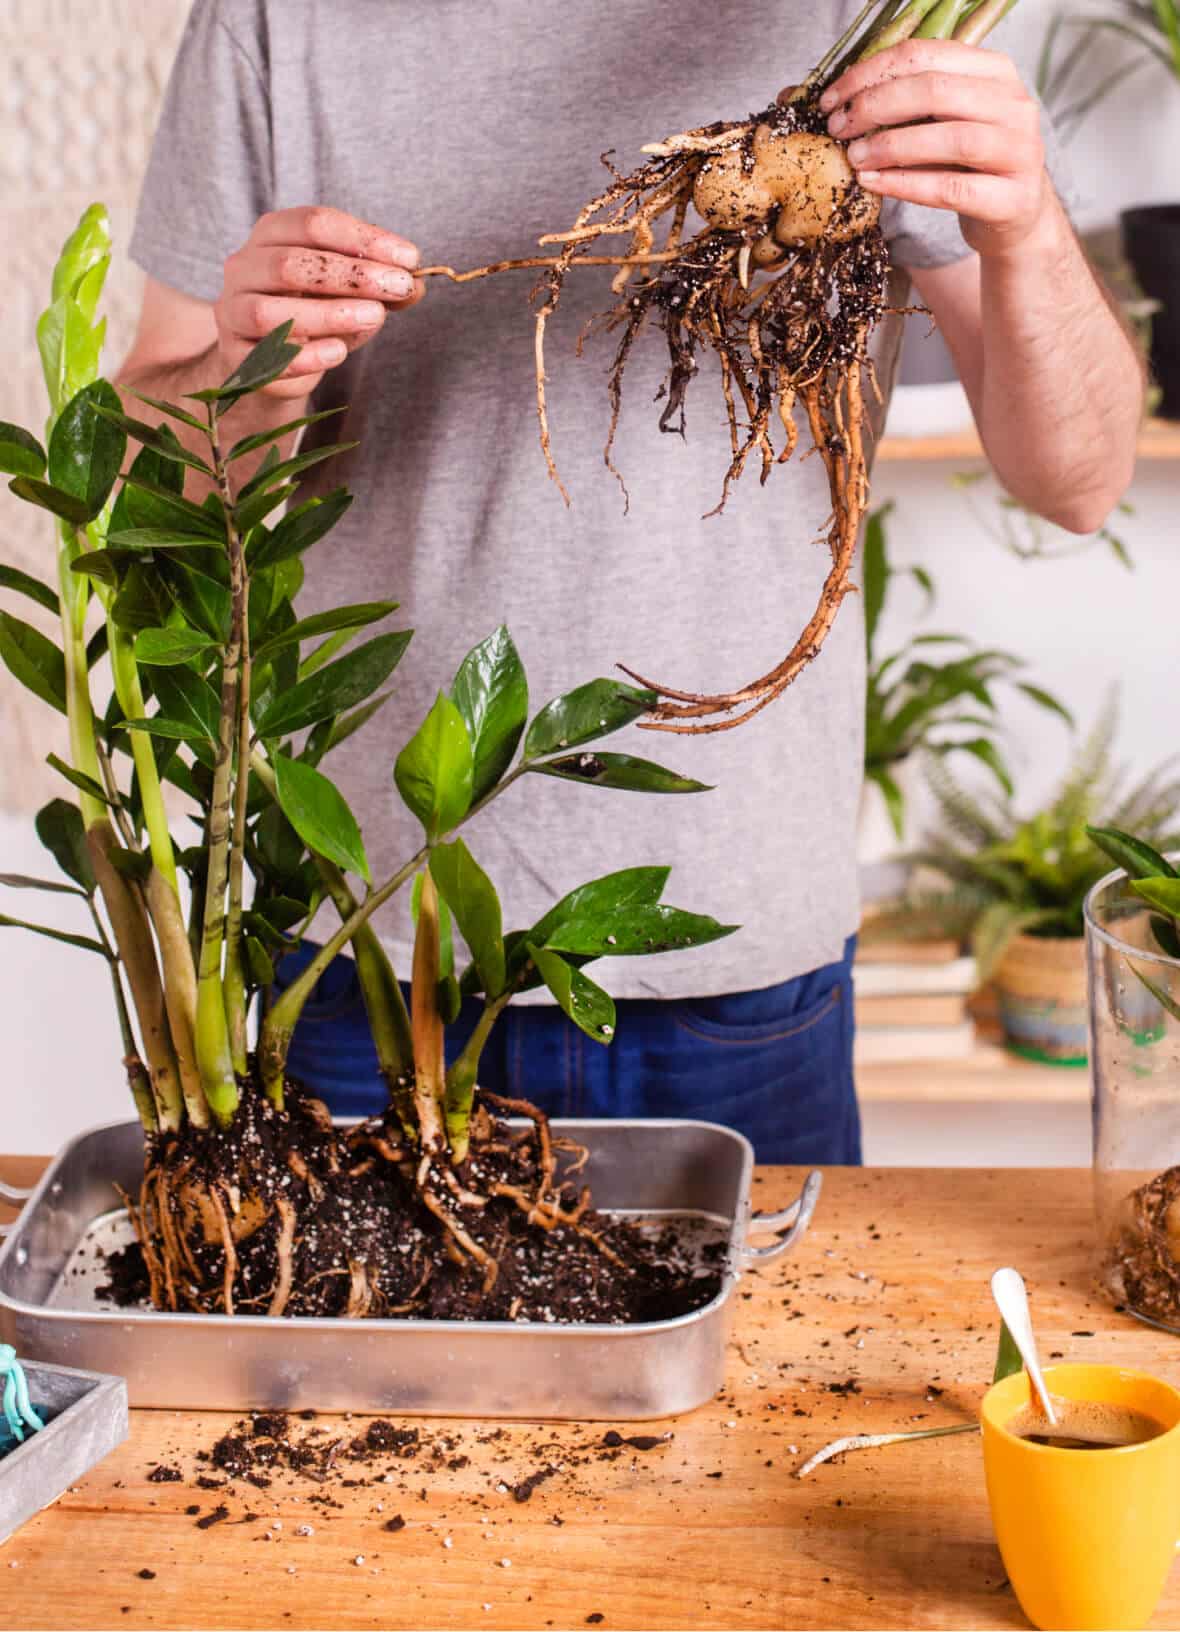
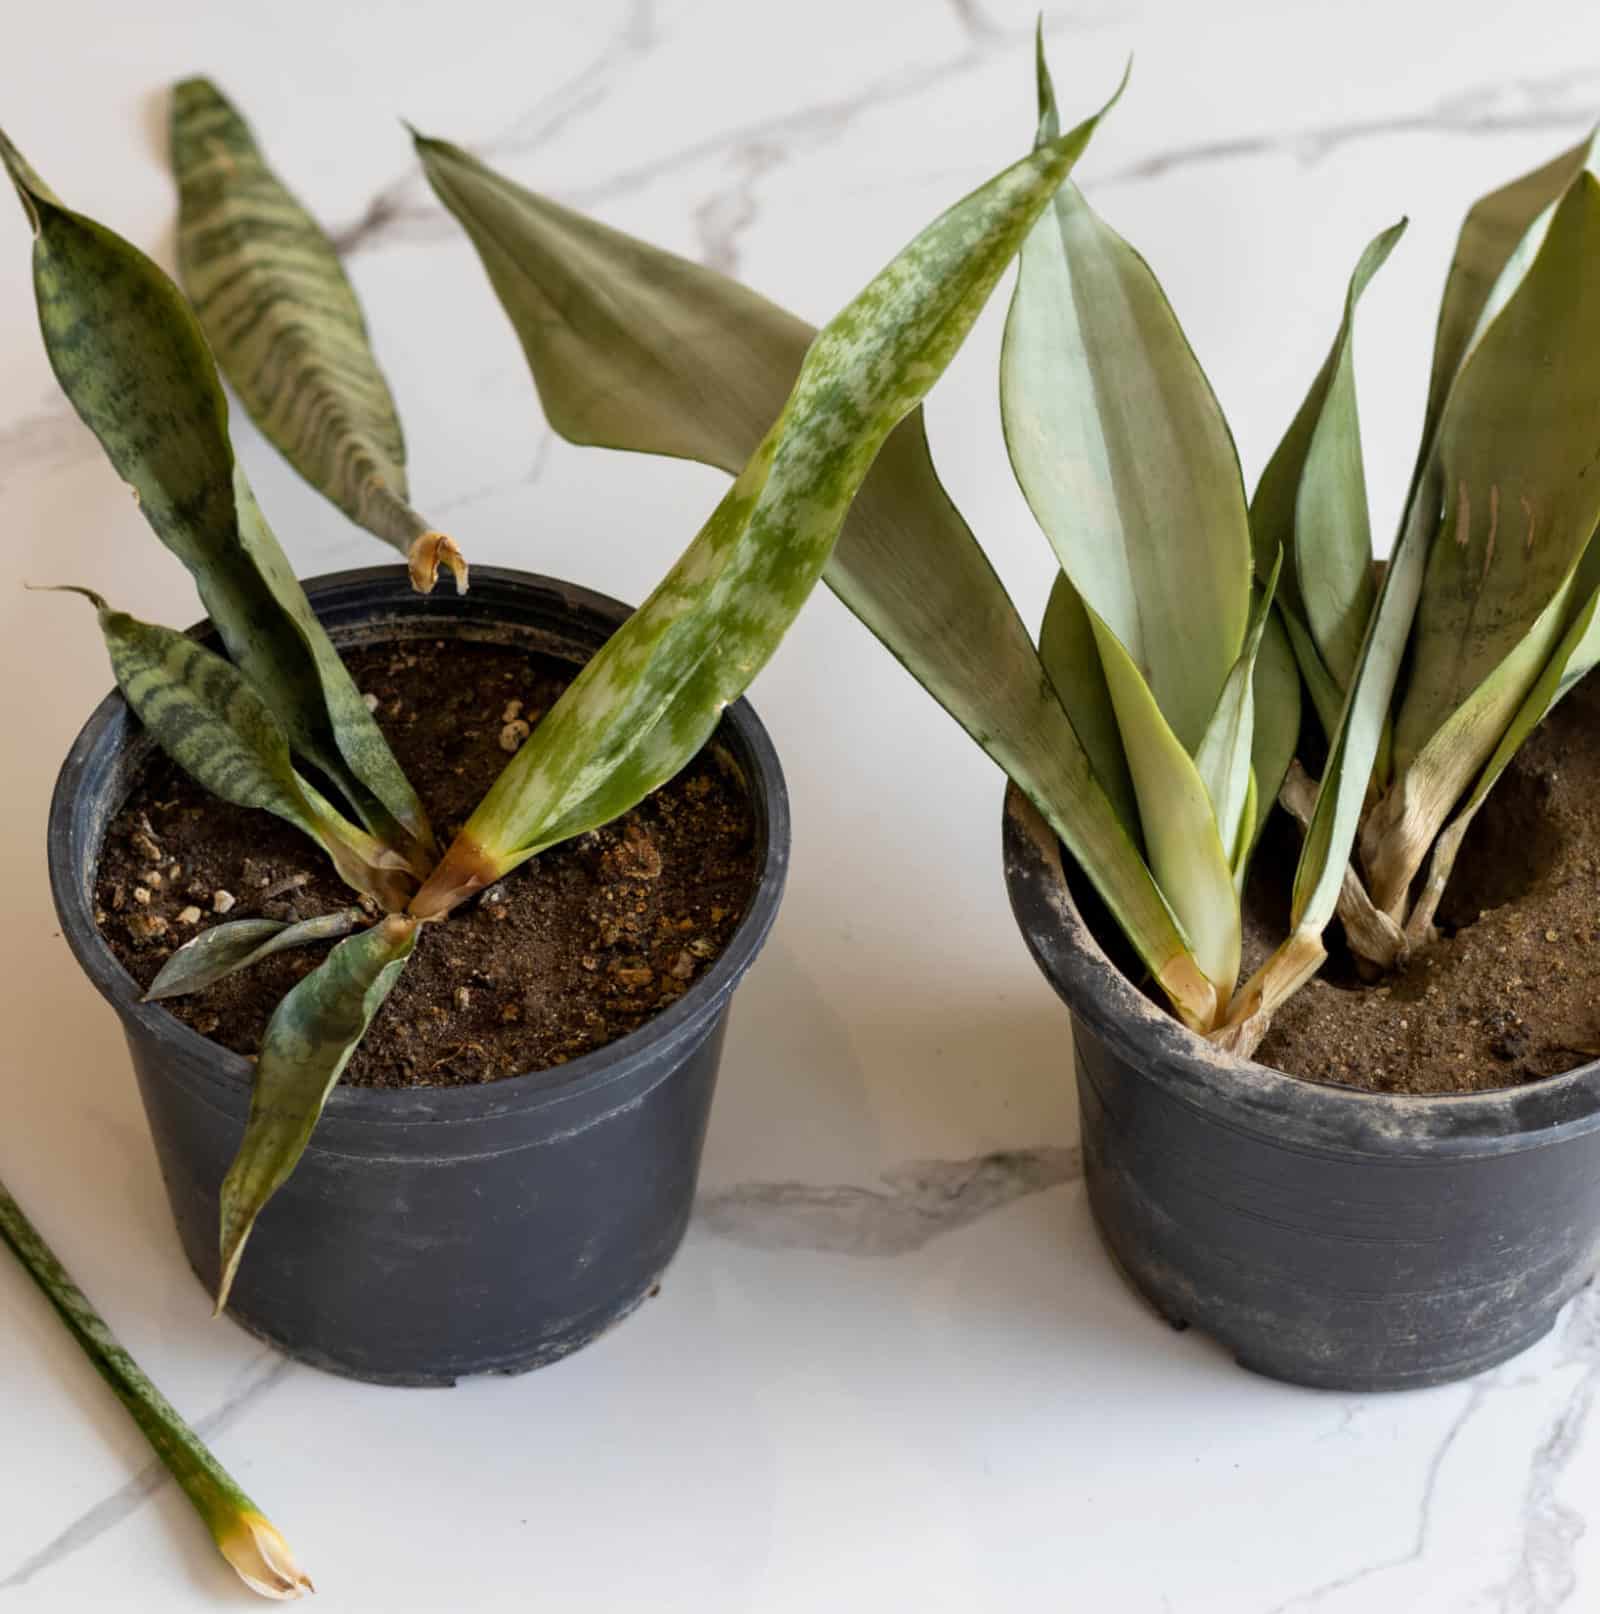
propagation by division
Propagation by division is pretty much exactly how it sounds. It is when you divide a plant into multiple plants. This method is best used for plants like snake plants, ZZ plants, peace lilies, pilea or spider plants.
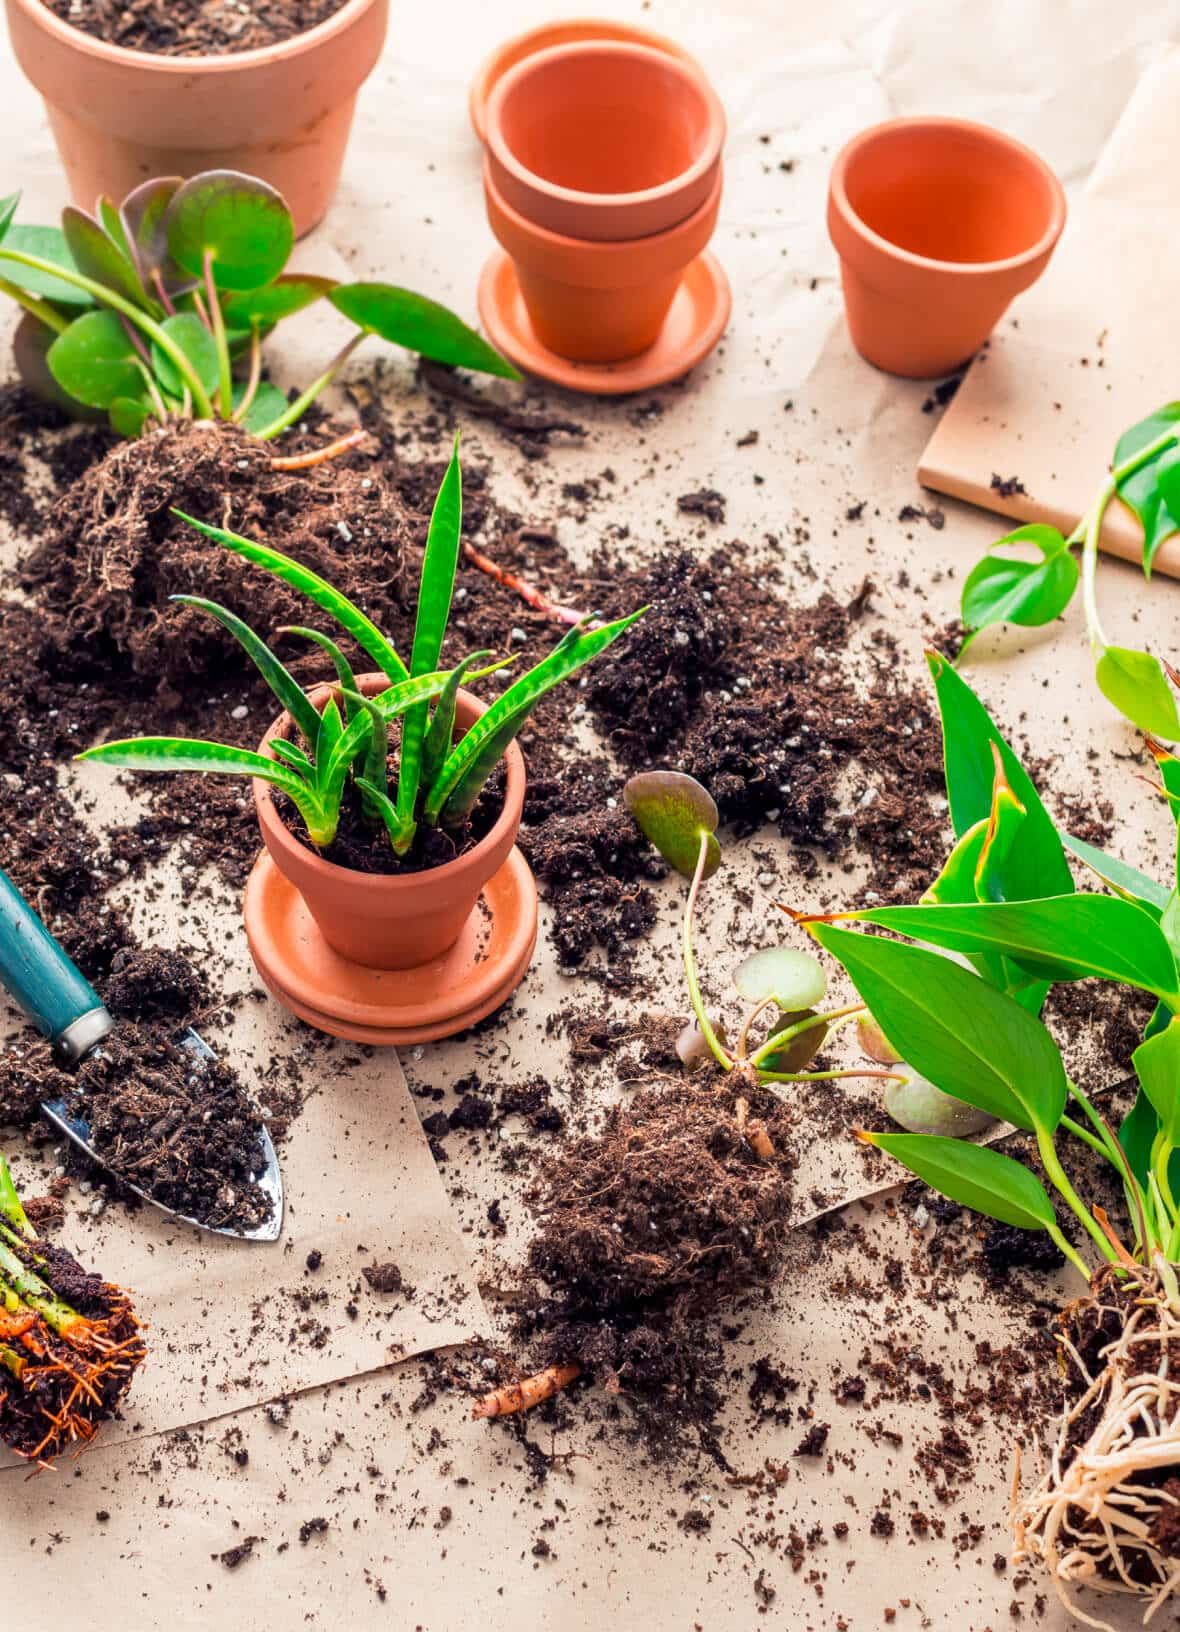
what is root division?
Root division is another form of division propagation. It is super simple. All you have to do is separate sections of a plant, including a section of their roots. These new sections can then be repotted and nurtured to grow into new plants
here is what you will need to get started.
One of your favourite plants
(best results are with plants like pilea, snake plant, spider plant or peace lily)
Clean, sharp scissors or clippers
Miracle-Gro Indoor Potting Mix
A nursery pot or a decorative pot with drainage holes
look for ‘crowns’
Look for ‘crowns’ in the parent plant. These are sections that can be easily separated and will have its own root ball.
loosen up the soil
Take the parent plant out of its pot and loosen up the soil. Once the soil is loose enough, you can separate the crowns. Be sure to keep as many healthy roots as possible on your new section. If they do not come apart easily, you can gently trim the section with your clippers.
repot
Repot your parent plant with new potting soil such as Miracle-Gro Indoor Potting Mix. Make sure the roots are fully covered with soil. Then pot the section you just divided. Again, make sure its roots are fully covered with soil and you have chosen a pot the right size for your new plant.
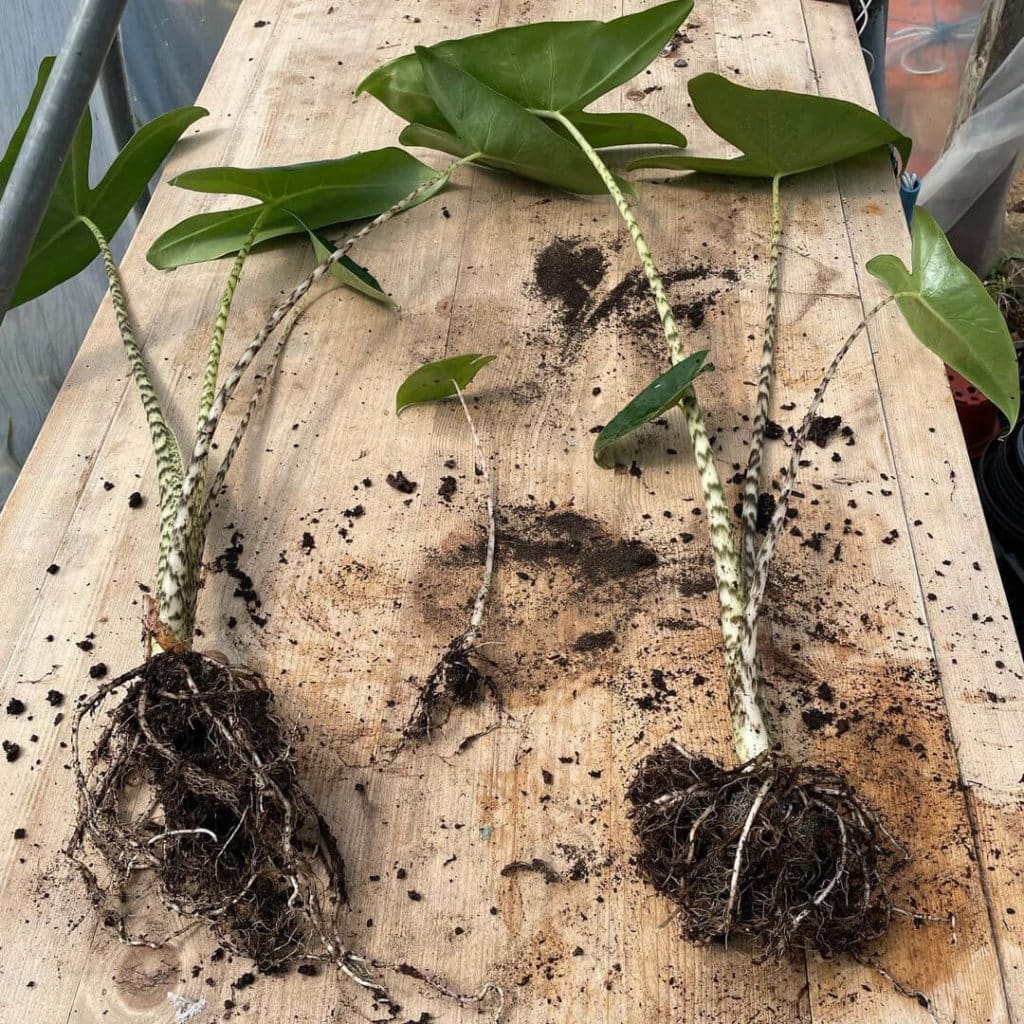
And as easy as 1-2-3 you have a new plant! Still have questions about propagations? We’ve got answers. Check out our post about propagating your plant pals.
#easypeasypropagation
root division
root division

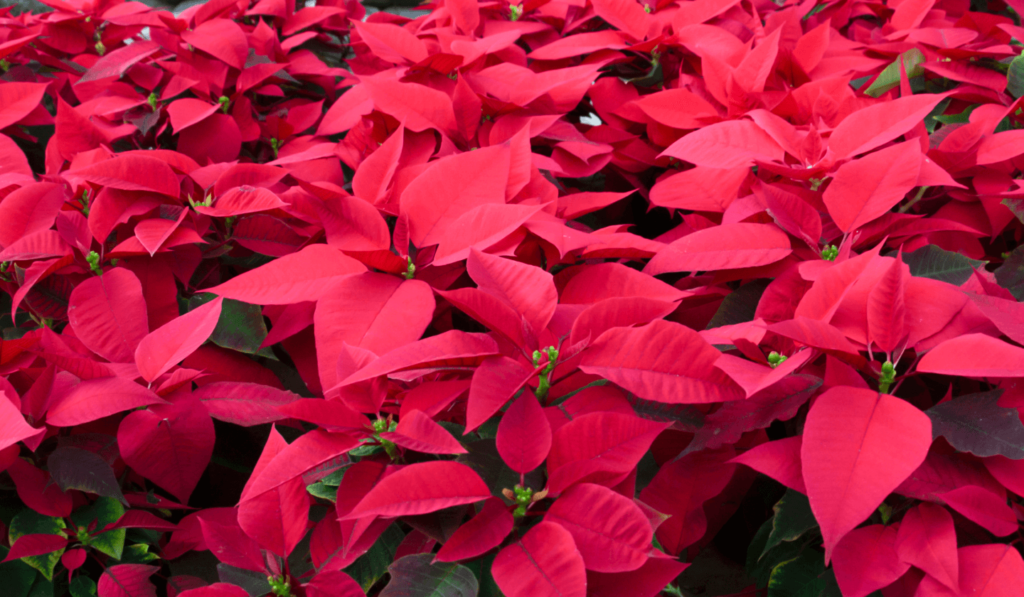
poinsettia
aka euphorbia pulcherrima
Poinsettia are native to Mexico and Central America. They are often used as decoration and gifts during Christmas holidays.
variations
There are over 100 varieties of Poinsettias. Some variations include ‘Premium Picasso’, ‘Monet Twilight’, ‘Shimmer’, and ‘Surprise’ poinsettia.
light
indirect
Need about 6 hours of indirect sunlight daily
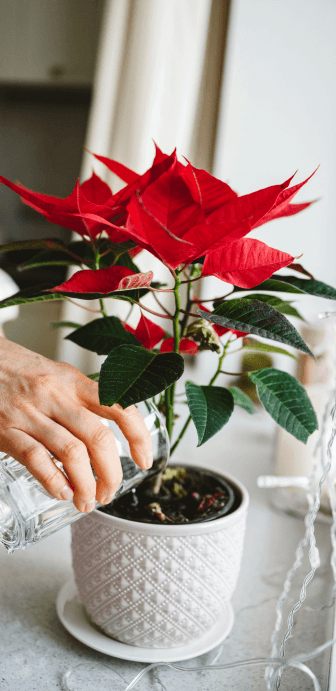
water + feeding
not too thirsty
Water in moderation when soil is dry to the touch
toxic
kind of
They’re not toxic to humans or pets. However, the white, milky sap can irritate some people’s skin and can cause an upset stomach.
location
flexible
They’ll be happy in a semi-shaded or sunny area
humidity
love it
Poinsettia enjoy 50 – 75% humidity, so boost up the moisture
size
small friends
Potted poinsettia will remain small at 8 – 12 inches
pro tip
dry soil is ok
Allow the soil to dry out between watering, especially in the spring.
fun fact
need light and dark
The short days and long nights of fall and winter are perfect for poinsettia. It’s actually what causes them to bloom.
beyond the basics
-
soil + potting
Whether poinsettia is growing indoors or outdoors, they prefer a loose, well-draining potting mix. Consider using Miracle-Gro® Moisture Control® Potting Mix. You can also add Perlite and Peat Moss to your soil for some added nutrients.
-
when to repot
As your poinsettia grows, so does its roots. To avoid your poinsettia getting root-bound, repot it in the spring. It’s generally recommended that by mid-May, your poinsettia will be ready to repot. Choose a pot that is about 2 inches wider and deeper than its current pot. And of course, refresh the soil when you repot.
-
propagation
The most common way to propagate poinsettia is by taking a cutting. Propagating from cuttings ensures a clone of the parent plant. No surprises! To start, wait until the spring to take your cutting. Using sharp scissors or pruners, cut a 3 – 4 inch stem from the parent plant. Then cut off a few of the lower leaves to promote root growth from the cut edge. Be sure to leave at least 3 leaves at the top of the cutting. Transplant your cutting to a small container with well-draining potting mix such as using Miracle-Gro® Seed Starting Potting Mix. Keep your cutting in a bright, humid area, and mist the leaves regularly to stimulate growth.
-
pest control
Whiteflies are the most common pests for poinsettias. Do regular checks under the leaves of your poinsettia and keep an eye out for clumps of greenish eggs. Use a gentle insecticide like Ortho® Bug B Gon® ECO Insecticide Ready-to-Use to easily and quickly get rid of white flies.

troubleshooting
-
Why are my cuttings collapsing?
Bacterial rot. This causes the base or stem of the cuttings to become mushy and eventually collapse. You may also notice a smell surrounding your plant, which is also caused by this bacterial infection. You may be able to mitigate this by proper watering and misting practices. It’s best to cut off misting and watering for a while once you notice the stems are a little soft.
-
Why are my poinsettia’s leaves turning black?
Temperature fluctuations. Sudden temperature fluctuations will shock these tropical plants. To keep your poinsettia happy, make sure it’s in a bright space that can also receive a few hours of shade or darkness. Be sure to keep your plant away from radiators, fireplaces and space heaters too.
-
Why is my poinsettia so pale all of a sudden?
Could be spider mites. These little pests feed off the plant’s sap, causing the leaves to turn pale and sometimes develop little red spots. If you catch spider mites early enough, you may be able to salvage your plant. Use a gentle insecticide like Ortho® Bug B Gon® ECO Insecticide Ready-to-Use to gently take care of this problem. A recovering poinsettia will perk up and brighten up within a week or two.
-
Why are my poinsettia leaves drooping and yellow?
Over- or underwatering. Both over and under-watering your poinsettia will cause its leaves to droop or look wilted. If you’re over-watering your plant, be sure to let its soil dry out a bit. Discard any excess water at the bottom of its pot to prevent it from sitting water and developing root rot. If you’re underwatering, consider boosting your watering routine with Miracle-Gro Indoor Plant Food for the next two watering cycles. You can also start misting the leaves of your poinsettia to increase its water in-take. But don’t overdo it, let the soil dry out a bit between watering.
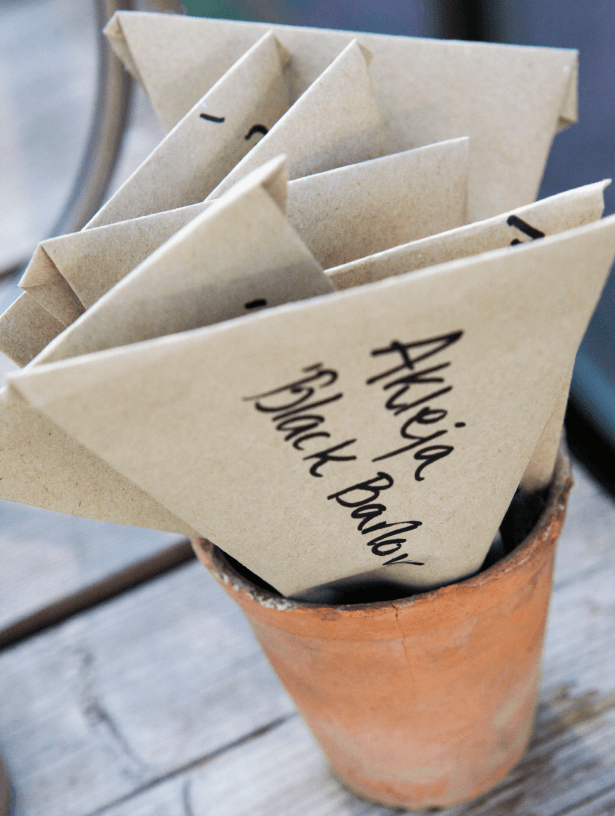
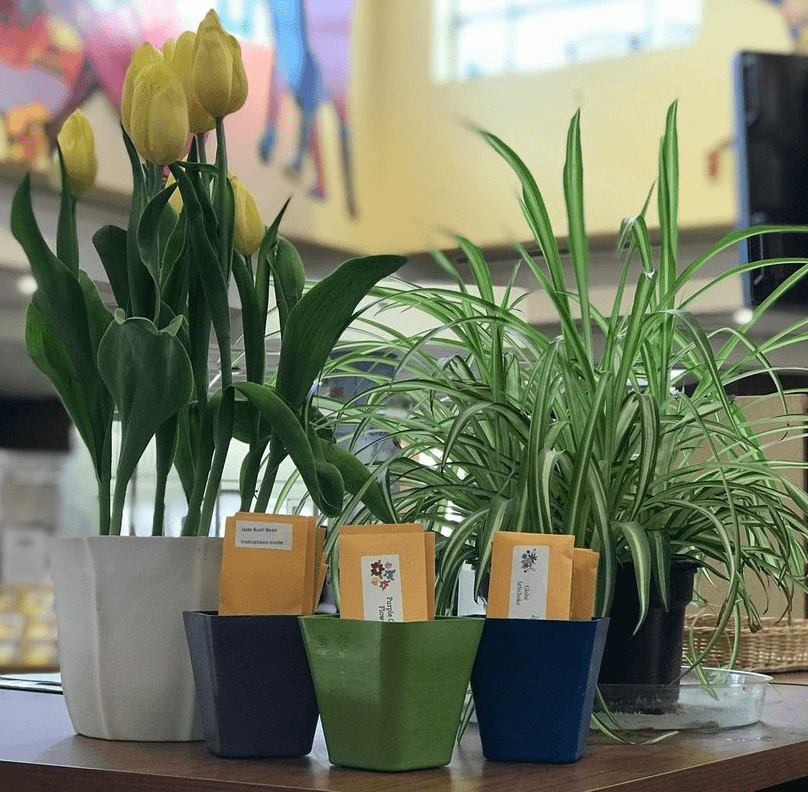
Do you want to build a community with like-minded gardeners, but you’re not sure where to begin? Starting a seed library can be the perfect way to meet some plant-loving friends. It’s also a fun way to grow your own food and encourage others to do the same.
So, what is a seed library? Think of it as a library, but instead of borrowing and returning books, you borrow and return seeds. And as a bonus––no late fines!
Setting up your own seed library takes a bit of thoughtful planning at the start, but once you get going, it’s fun and easy to maintain.
here are some tips to help you get your library off the ground:
step 1. find some seed-savvy friends.
Seed libraries thrive when passionate folks with green thumbs join forces. Connect with gardeners in your community and ask them to share their expertise (and their seeds) as you build your collection. You will also want volunteers to help you manage the library once you’re ready to go. If you have a local gardening club or society, that is a great place to source some support.

step 2. pick a spot.
Find a nearby location that is convenient for borrowers to access. You might want to ask your local community centre or library (the kind with books in it) if they can house it. Seed libraries do not take up much real estate, so it’s a fairly easy sell. You can also set it up outside on your street, like the Little Free Libraries you see around your neighbourhood. It all depends on what vibe you are going for and how accessible you want it to be.
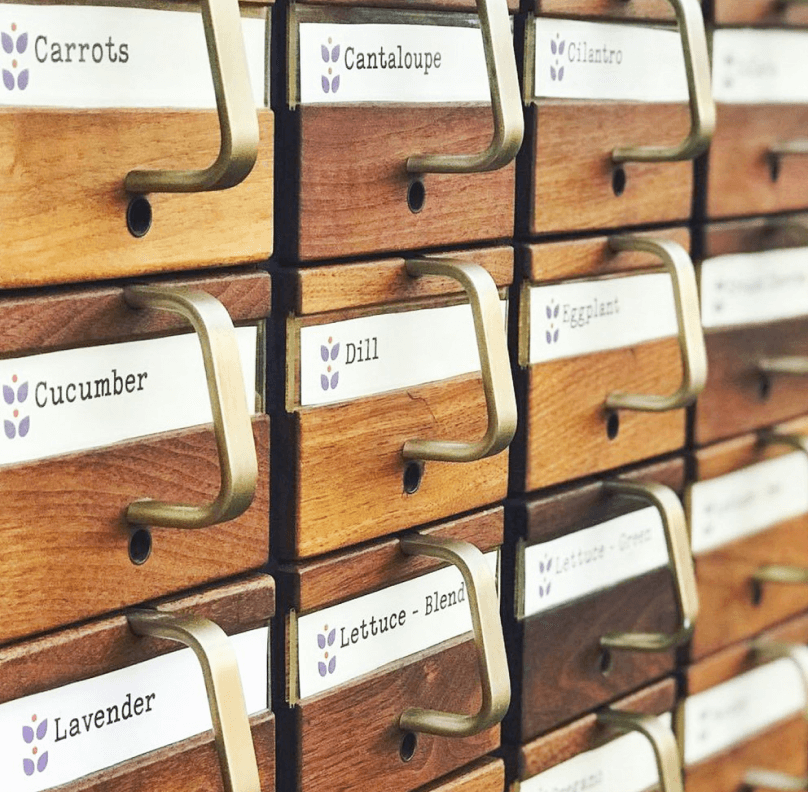
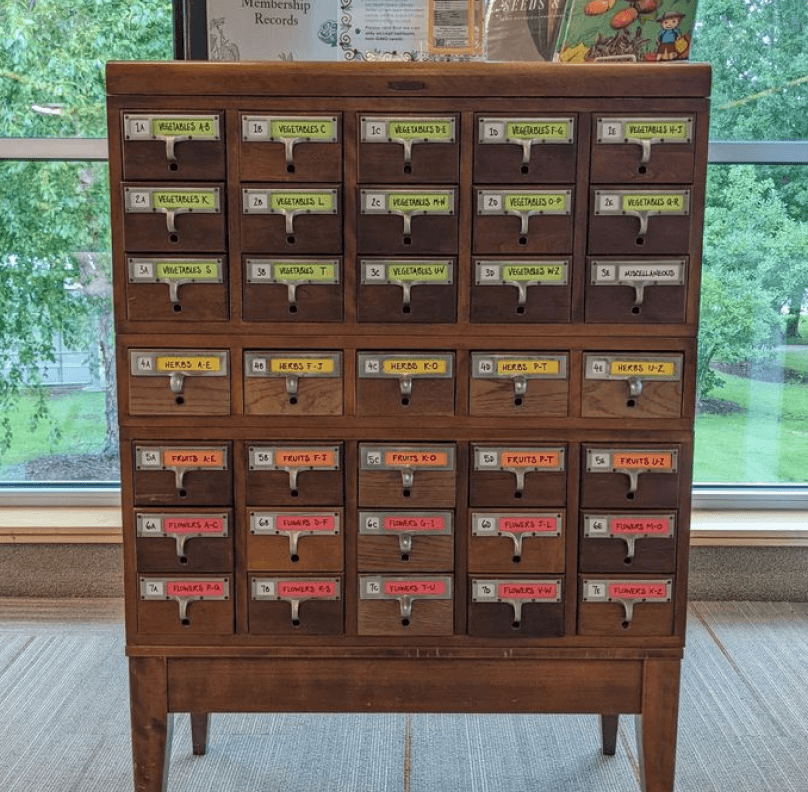
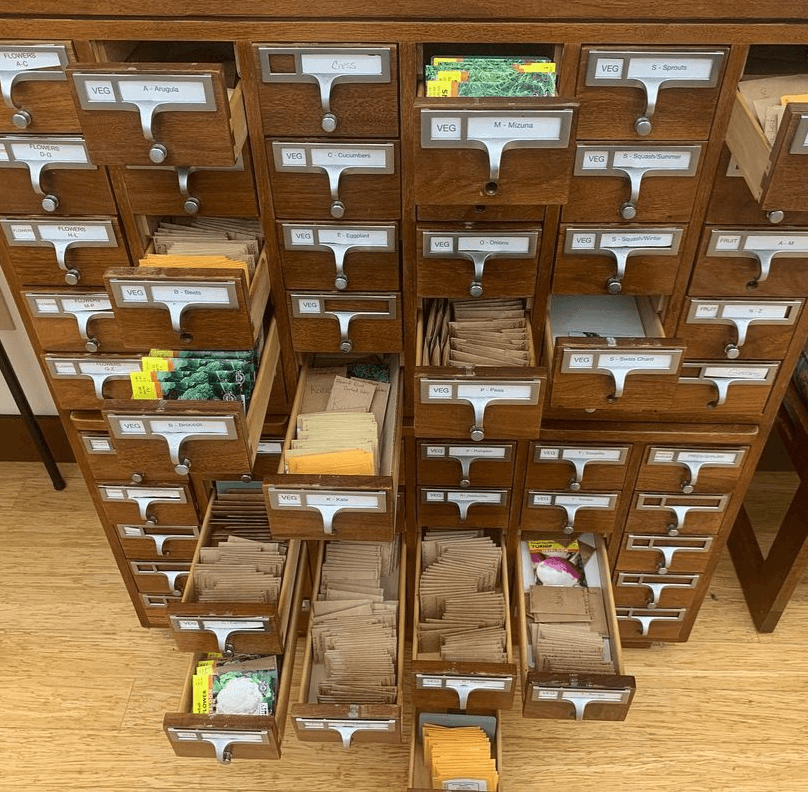
step 3. start building.
Put on your architect’s hat, because you will need to create some sort of structure to hold the seeds. But do not stress––you don’t need to get too fancy. A wooden apothecary cabinet with tiny drawers makes a great home for a seed library. Check out your favourite vintage store or browse your local buy/sell groups online and see what you can find. And if that sounds like too much work, any type of container or small box will do.
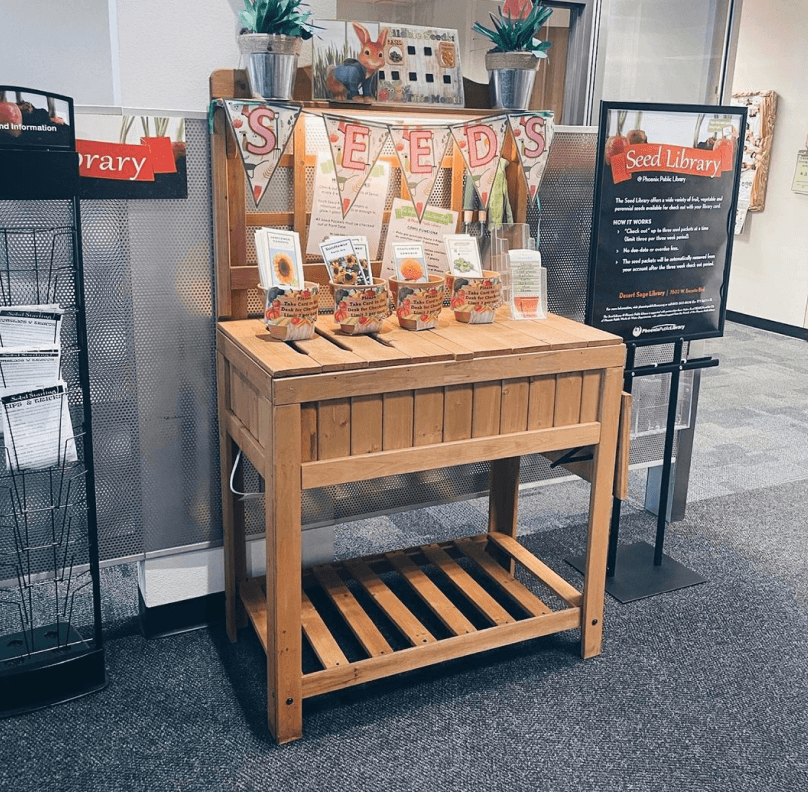
step 4. gather supplies.
Collect the following materials:
- Mini envelopes
- Labels
- Date stamp
- Pencils (for people to write helpful instructions for harvesting)
Again, no need to break the bank here. Hit up the dollar store for lots of low-cost options. You can even see if your local home and garden centre will donate supplies.
step 5. choose your categories.
A truly useful library is an organized one. To simplify the process for your borrowers and lenders, divide your library into different categories. You can choose to do this however you wish. Some options:
- Alphabetical
- Level of difficulty (easy to hard, or beginner to expert)
- Type of plant (veggies, herbs, flowers, etc.)
step 6. tell people how this all works.
For your library to really thrive, you need a steady stream of people contributing to the flow of seeds coming in and going out. If your neighbourhood is part of the Nextdoor app, make sure to post there, or in any other relevant social groups. And don’t forget good old-fashioned word of mouth––tell your neighbours, your friends, your kid’s school council, and anyone you think might be interested in popping by.
And just like that, yYour seed library will be bustling and blooming before you know it! Don’t forget to share your progress with our community in the Plant Chat.
#happygardening
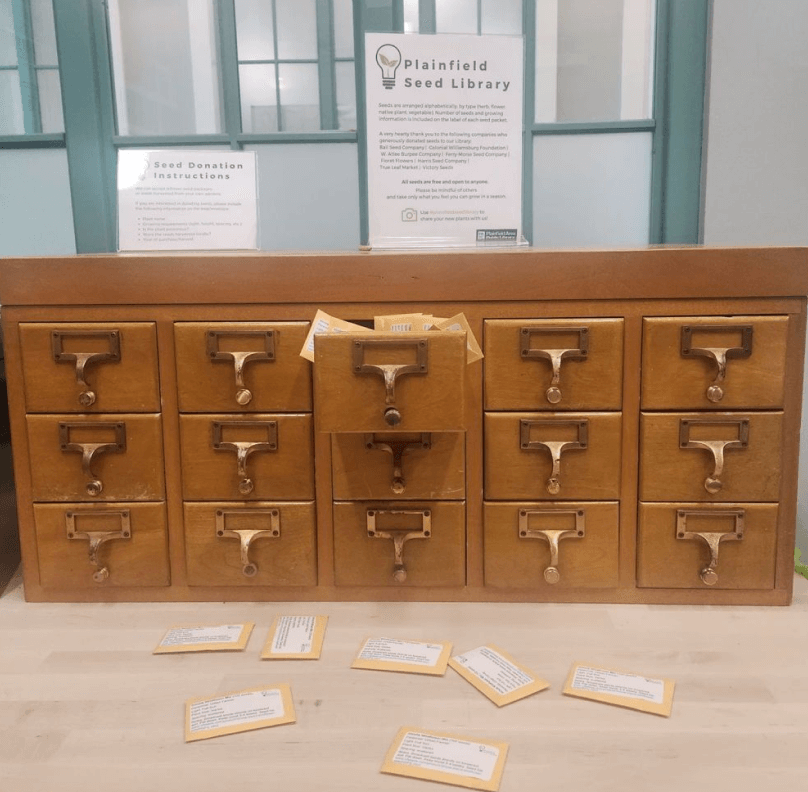
instagram.com/missphoenixaz
#easypeasy
You might think that tropical plants have no business inside your home, but these exotic wonders actually make excellent houseplants. Although sunshine makes them extra happy, many tropical plants can tolerate low light extremely well. And if you’re a low-maintenance plant lover, tropical houseplants are ideal since most only require some basic care.
But these houseplants aren’t completely hands-off—you’ll still have to nourish them to ensure their survival. Follow these tips and your space will feel like an exotic jungle in no time.
trim your tropicals
If you’re bringing your tropical plants in from outside after the warm season, they might be a tad too feral for indoors. This is a great time to grab your pruning shears and remove some of the abundant growth that appeared over the summer.
choose your fertilizer
1
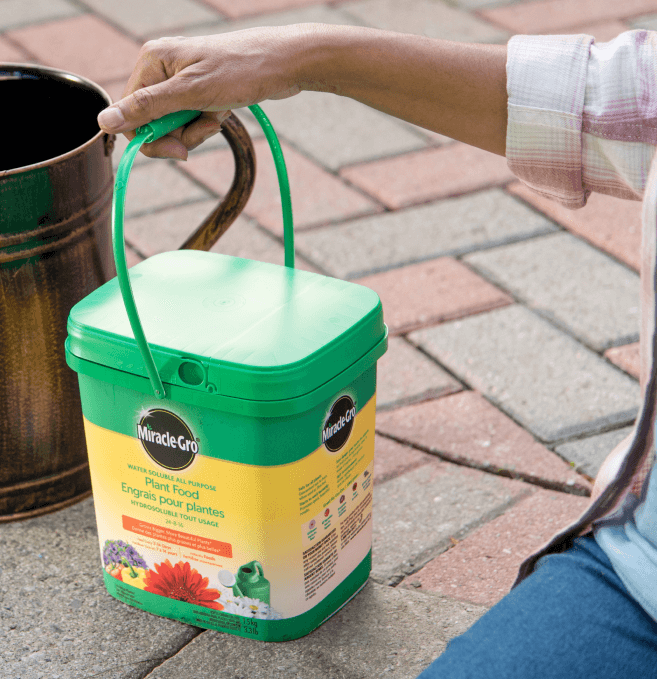
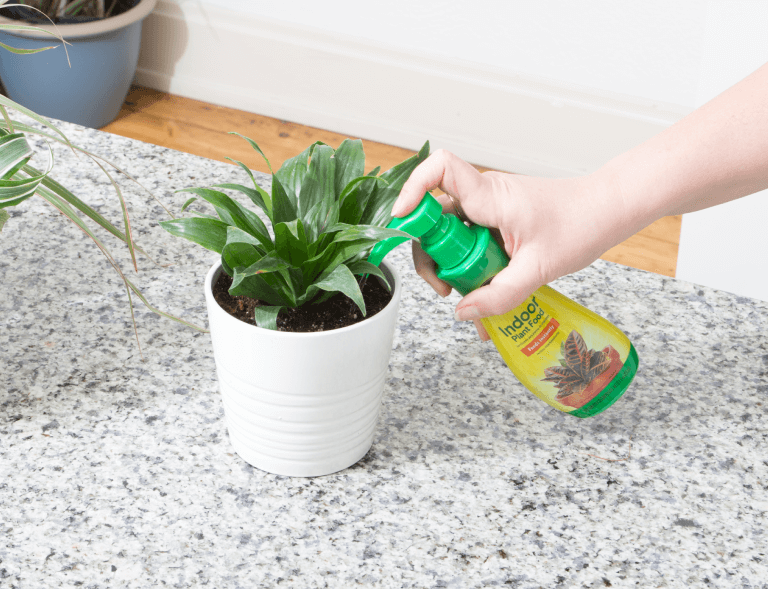
For easy and speedy results, water-soluble fertilizer is a good place to start. This type of fertilizer will fill your space with lush and bright foliage, you’ll need to provide your plants with the nutrients they crave. Try Miracle-Gro® Water Soluble All Purpose Plant Food for an instant boost for your tropicals.

2
For a unique fertilizer that is formulated specifically to target the needs of tropical houseplants, pick up a bottle of Miracle-Gro® Tropical Plant Food. Blended with micronutrients tropical plants love such as magnesium, manganese, copper, iron and zinc , giving your plants exactly what they need to grow lush foliage.
With the many fertilizer formulas to choose from, it’s easy to feel overwhelmed—but some quick research on your specific plant type will help you narrow down your options.
remember: less is more
For many tropical houseplants, fertilizing once a month will get the job done. When winter ends, you can up your feeding frequency to encourage new growth.
For a deeper dive into tropicals and what they need, check out our article here.
*Inhale* Ahhhh. There’s nothing quite like a fresh and fragrant Christmas tree to bring some festive cheer into your home. Sure, they’re more work than the artificial variety, but the effort is well worth the result (and more eco-friendly, to boot).
Here are some helpful tips to keep your tree looking merry and bright all holiday season.

follow these steps to set up your Christmas tree
Start with a healthy tree from your local tree farm—gently shake the tree to make sure it’s flexible and needles aren’t dropping.
Trim 1/2 inch off the base of the trunk to remove dried sap and encourage water absorption.
Measure the diameter of the tree trunk.
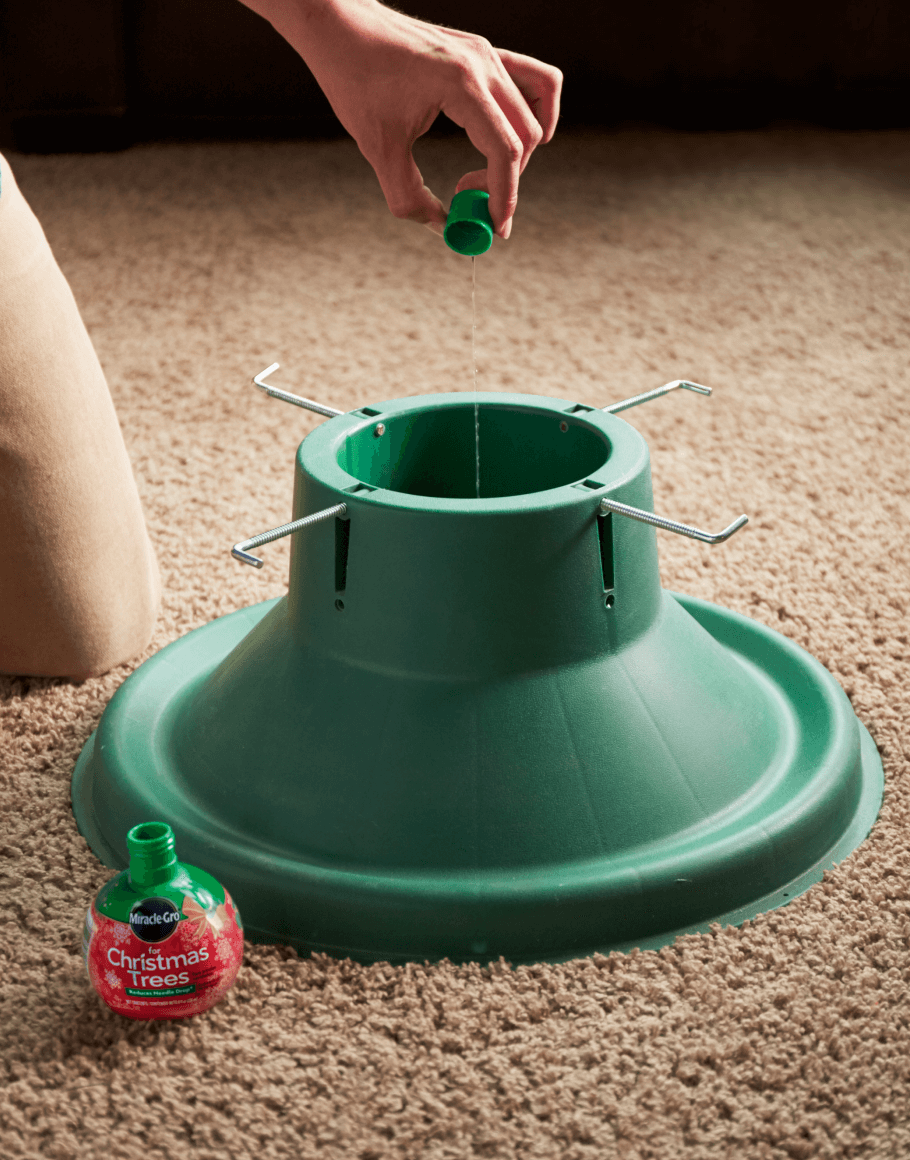
Using a Christmas tree stand that can hold at least 1 gallon of water, add 1 quart of water for every inch of the trunk’s diameter.
Check the water level daily—ensure the water always covers the bottom 2 inches of the trunk (this is the secret to maintaining a super fresh tree!)
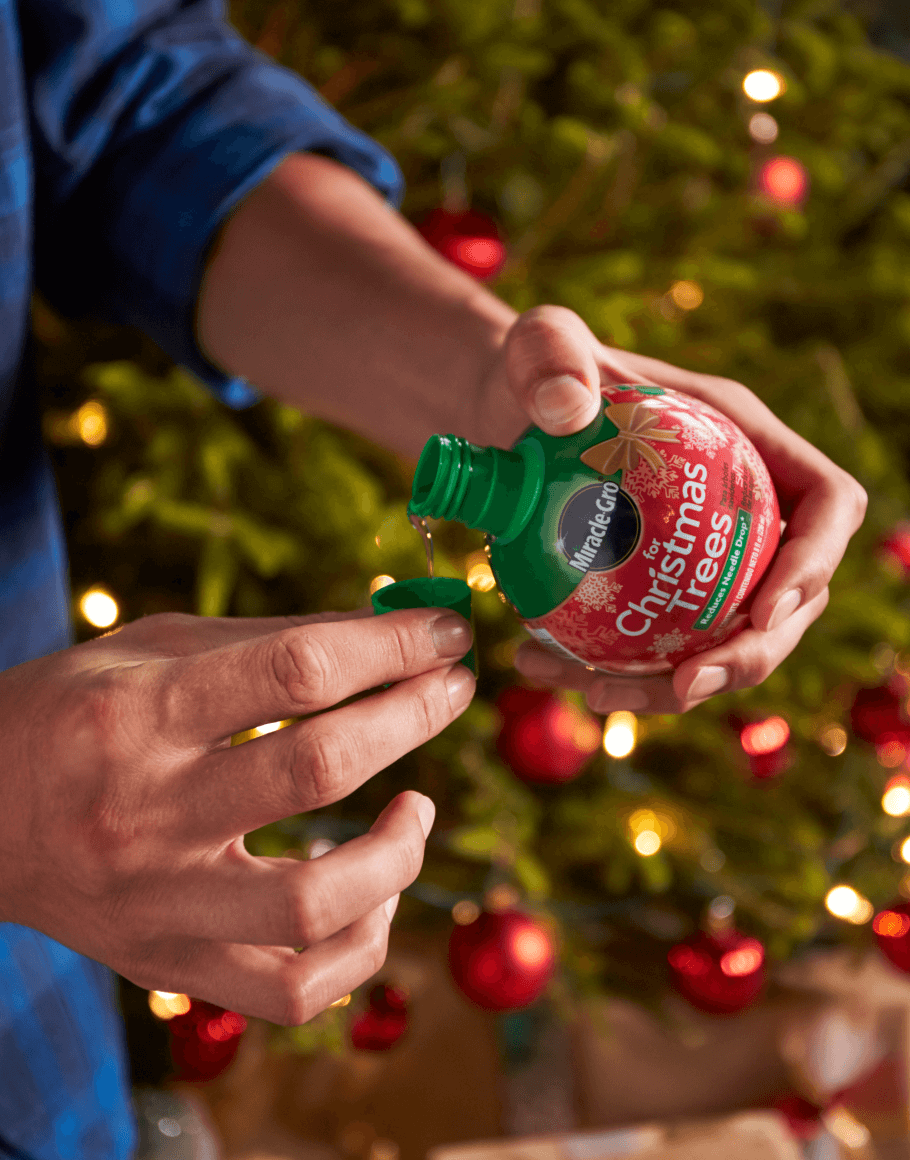
Keep your tree hydrated and reduce needle drop by adding 1 capful of Miracle-Gro® for Christmas Trees for every litre of water.
Christmas trees prefer cooler temps, so put on a cozy sweater, turn down the heat, and keep your tree away from heat sources.

#easypeasy
T’is the season for gift giving and merriment!
If you’ve got some plant lovers on your list, we’ve got you covered. From handmade to store-bought, this list has gifts for plant parents of all skill levels that will knock their ‘stalks’ off.
Let’s get gifting!
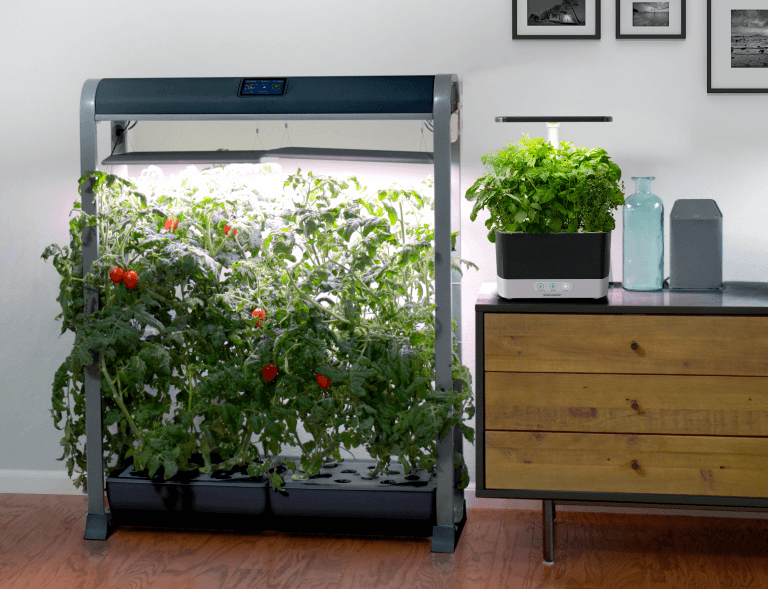
1
Aerogarden. For the table-top gardener. Aerogarden offers a variety of sizes that suit every veggie lover’s needs.

2
Aerogarden Herb Seed Pods. Give the gift that literally keeps giving. Aerogarden herb seed pods make growing herbs a snap.
3
Watering straws. All the rage for the plant parents with needy plants. If you don’t want to shell out for a store-bought model? Try making one of your own.
4
Hand painted planters. Plant lovers always need more pots. Try your hand at decorating customized pots for the plant parent in your life.
5
Props of your fave plants. From one plant lover to another, sharing propagations can be meaningful and a long lasting, thoughtful gift.
6
Plant food. All plant parents know they must feed their plants. Whether it’s a water soluble or liquid variety, plant lovers will be appreciative of being able to prevent hangry housemates. Bonus points because this gift is perfect for plant lovers of all skill levels.
7
Customized birth month flower pot. Whether it’s an arrangement or customized flowerpot, this is a sure-fire win for your astrology obsessed plant parents.

8
Hand made wreath of evergreens from your home. DIY a gorgeous boho-inspired wreath using green materials from your own backyard and garden.
9
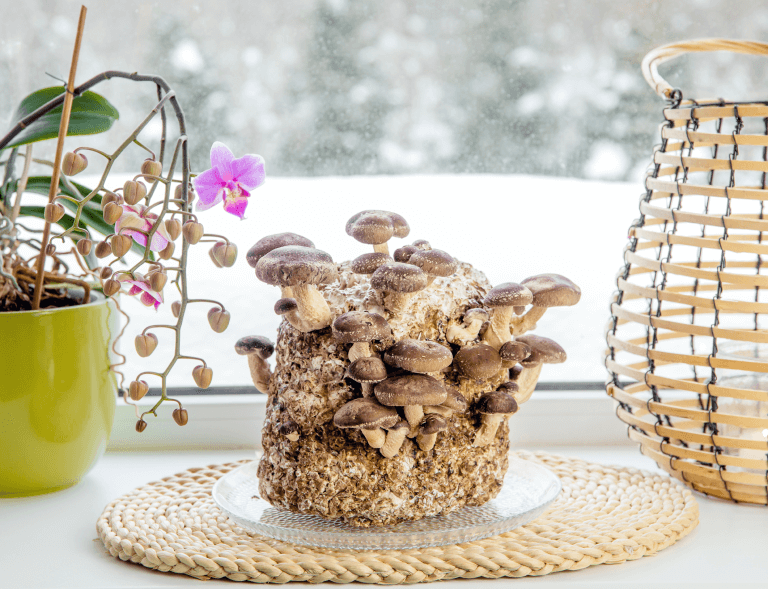
Mushroom growing kit. Mushrooms are on trend right now. Mushroom growing kits are a great gift for the DIY plant obsessed.
We love these holiday gifts that seamlessly compliments the plant lover of your network. We hope these gifts inspire a green thumb and holiday cheer!
#falala

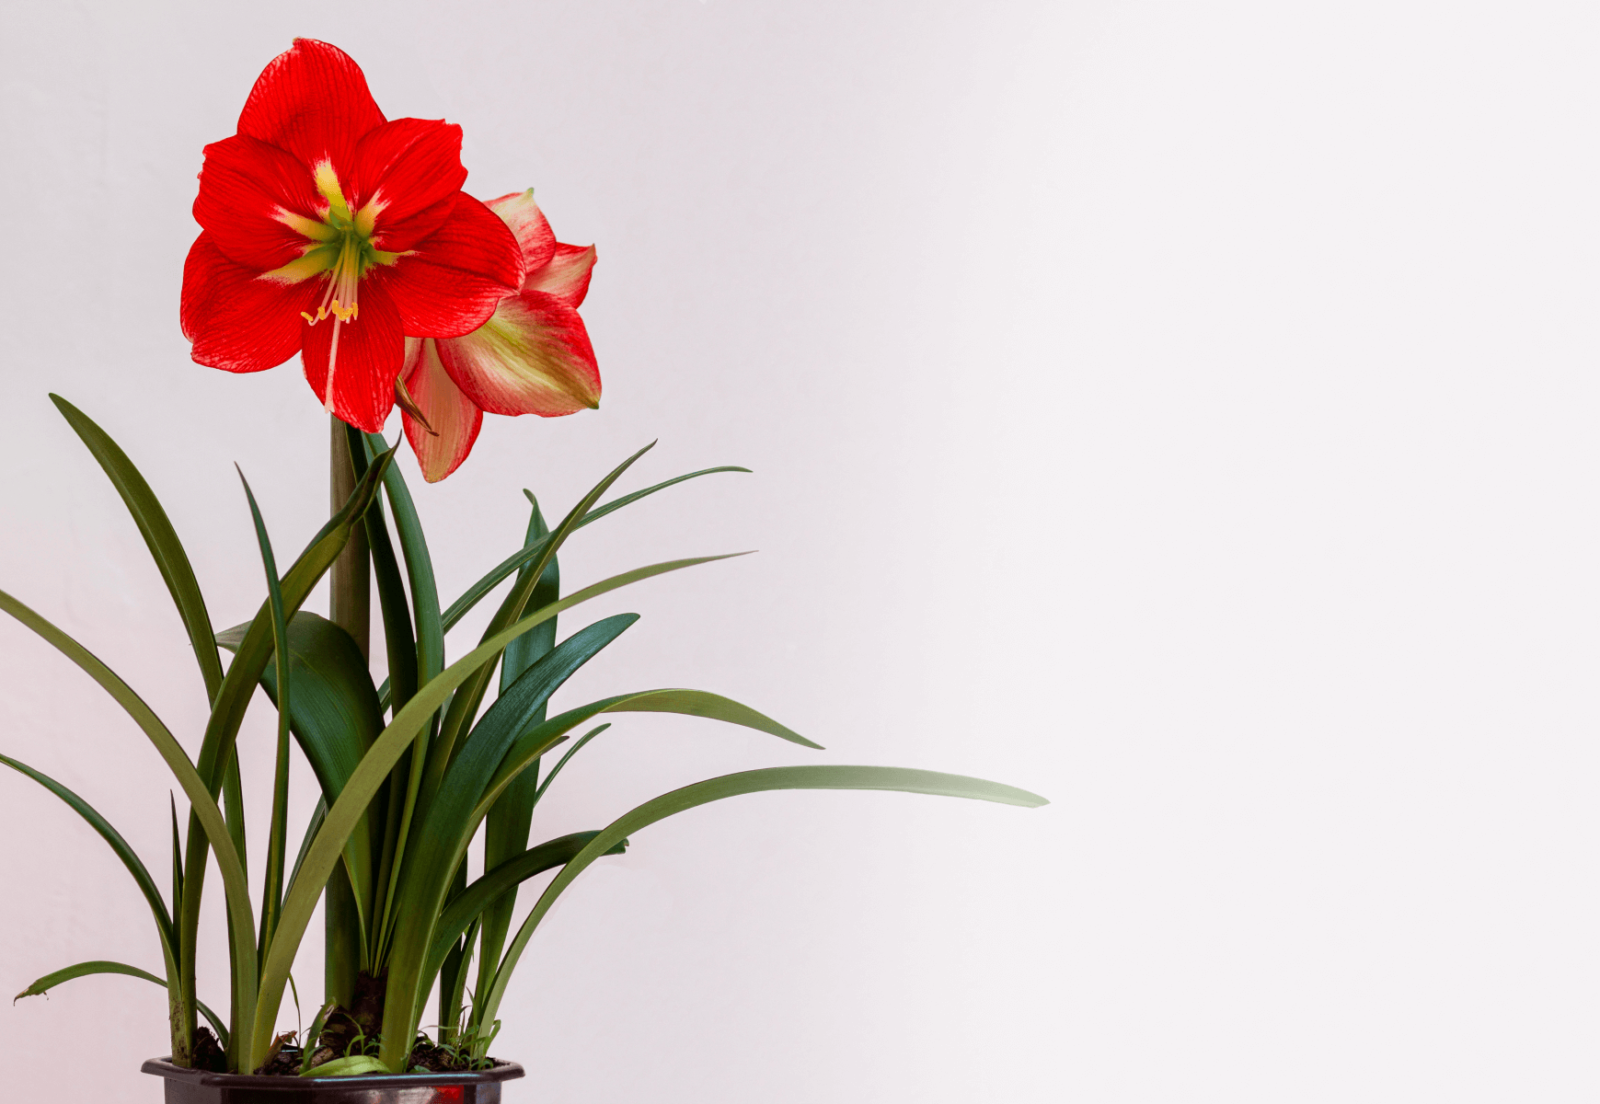
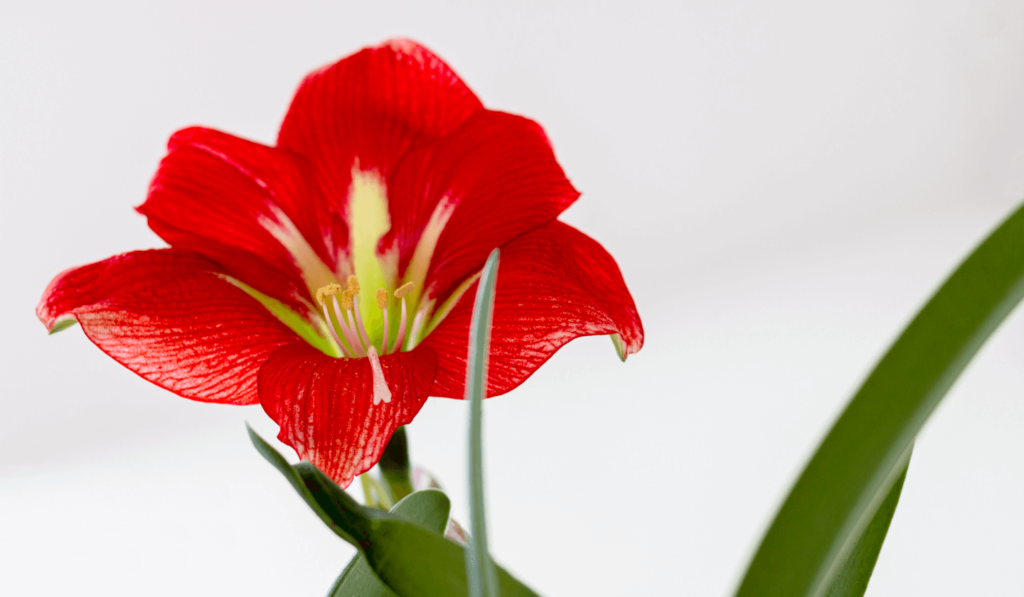
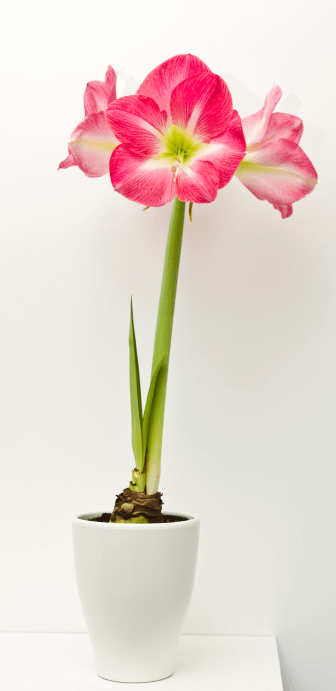
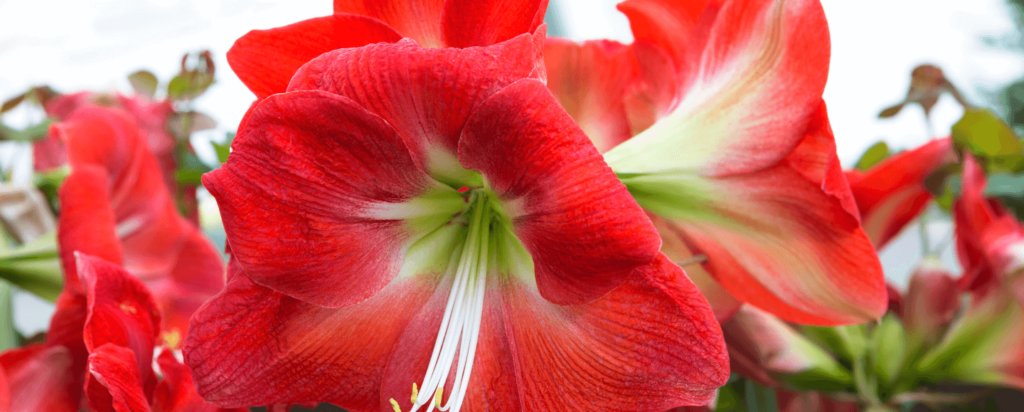
amaryllis
aka hippeastrum genus
a plant native to warm, tropical climates. There are over 1600 species in this plant family.
variations
Ferrari’ Amaryllis, ‘Dancing Queen’ Amaryllis, ‘Mont Blanc’ Amaryllis, ‘Papillio Improved’ Amaryllis, ‘Faro’ Amaryllis, ‘Estella’ Amaryllis, ‘Athene’ White Amaryllis, ‘Double Dragon’ Amaryllis
light
bright, direct
Needs a sunny window to get at least 4 hours of sun daily
water + feeding
not too thirsty
Only water once the top 2 inches of soil have dried.
toxic
yes
The bulbs are the most toxic, but blooms can also be hazardous if eaten
location
picky pals
Need lots of bright, direct sunlight
humidity
not too much
Amaryllis don’t need misting
size
medium
Can grow up to 4 – 6 inches
pro tip
big bulbs mean lots of flowers
That’s right. We like big bulbs, and we can not lie. The bigger the bulb the more blooms you can expect. In fact, a Jumbo bulb (34/36 cm) can produce 3 stems with about 4 to 5 flowers per stem.
fun fact
It’s a look-a-like
The flowers on an amaryllis look very similar to a lily but they are not actually the same flower. They are very distant relatives!
beyond the basics
-
soil + potting
Amaryllis needs to be planted in a light, well draining potting soil. Consider using Miracle-Gro® Indoor Potting Mix. The combination of coconut coir and perlite help control moisture and release water when your plant needs it. If you’re growing a single amaryllis bulb, you can plant it in a 6-inch pot. If you’re growing multiple bulbs (about 2 –3) use a bigger pot, closer to 10 – 12inches. As always, make sure your pot has a drain hole and be sure to leave the top 1/3 of your amaryllis bulb sticking out of the soil.
-
when to repot
Your amaryllis won’t need to be repotted very often. In most cases, you will only need to repot your amaryllis after 3 – 4 years. It’s best to repot once your amaryllis has gone through a dormant stage, typically this means repotting in the spring.
-
propagation
There are 3 ways to propagate amaryllis:
- Through Seeds. Look for seed pods about four weeks after your amaryllis begins to flower. When the seeds are ready, they’ll split open a bit and turn yellow. Then you can gently shake out the little black seeds.
- Separating bulbs/offsets. Look for firm bulblet that are about a third of the size of the “mother” bulb. Trim back any extra foliage to 2 inches above the bulb. Gently remove the bulblets and replant as soon as possible. You can remove the bulblets with either a small knife or just your fingers.
- Choose a bulb at least 6 inches in diameter. Cut into four pieces, vertically, making sure each section has at least two scales. Plant with the basal plate (bottom) of the bulb pointing down, covering only a third of the bulb with soil.
-
pest control
Keep an eye out for common pests like mealybugs and fungus gnats. If you spot these pesky bugs, you can use a gentle insecticide like Ortho® Bug B Gon® ECO Insecticidal Soap to get rid of them without damaging your plant.
troubleshooting
-
Why won’t my amaryllis bloom?
There could be a few reasons. The main reason could be that your amaryllis isn’t getting enough light. Once you’ve moved your plant to a bright window that gets light for about 4 hours a day, you should see blooms. Still nothing? Try adding a little plant food to bump up the nutrients. Consider using a tropical plant food like Miracle-Gro® Tropical Plant Food.
-
Why are my amaryllis leave drooping?
Over or underwatering. The issue could also be that your amaryllis isn’t getting enough light. If you know that your watering schedule is okay, then try moving your plant to a more direct light source.
-
How do I know if my amaryllis bulb is rotten?
Look for colour and texture. If your bulb has a uniform colour and firm texture, it’s a healthy bulb. If you spot signs of a pest infestation, mold or any damage to the actual bulb, these are red flags that indicate your bulb will likely rot. Seeing shriveled or brown skin on the outside? That’s totally normal.