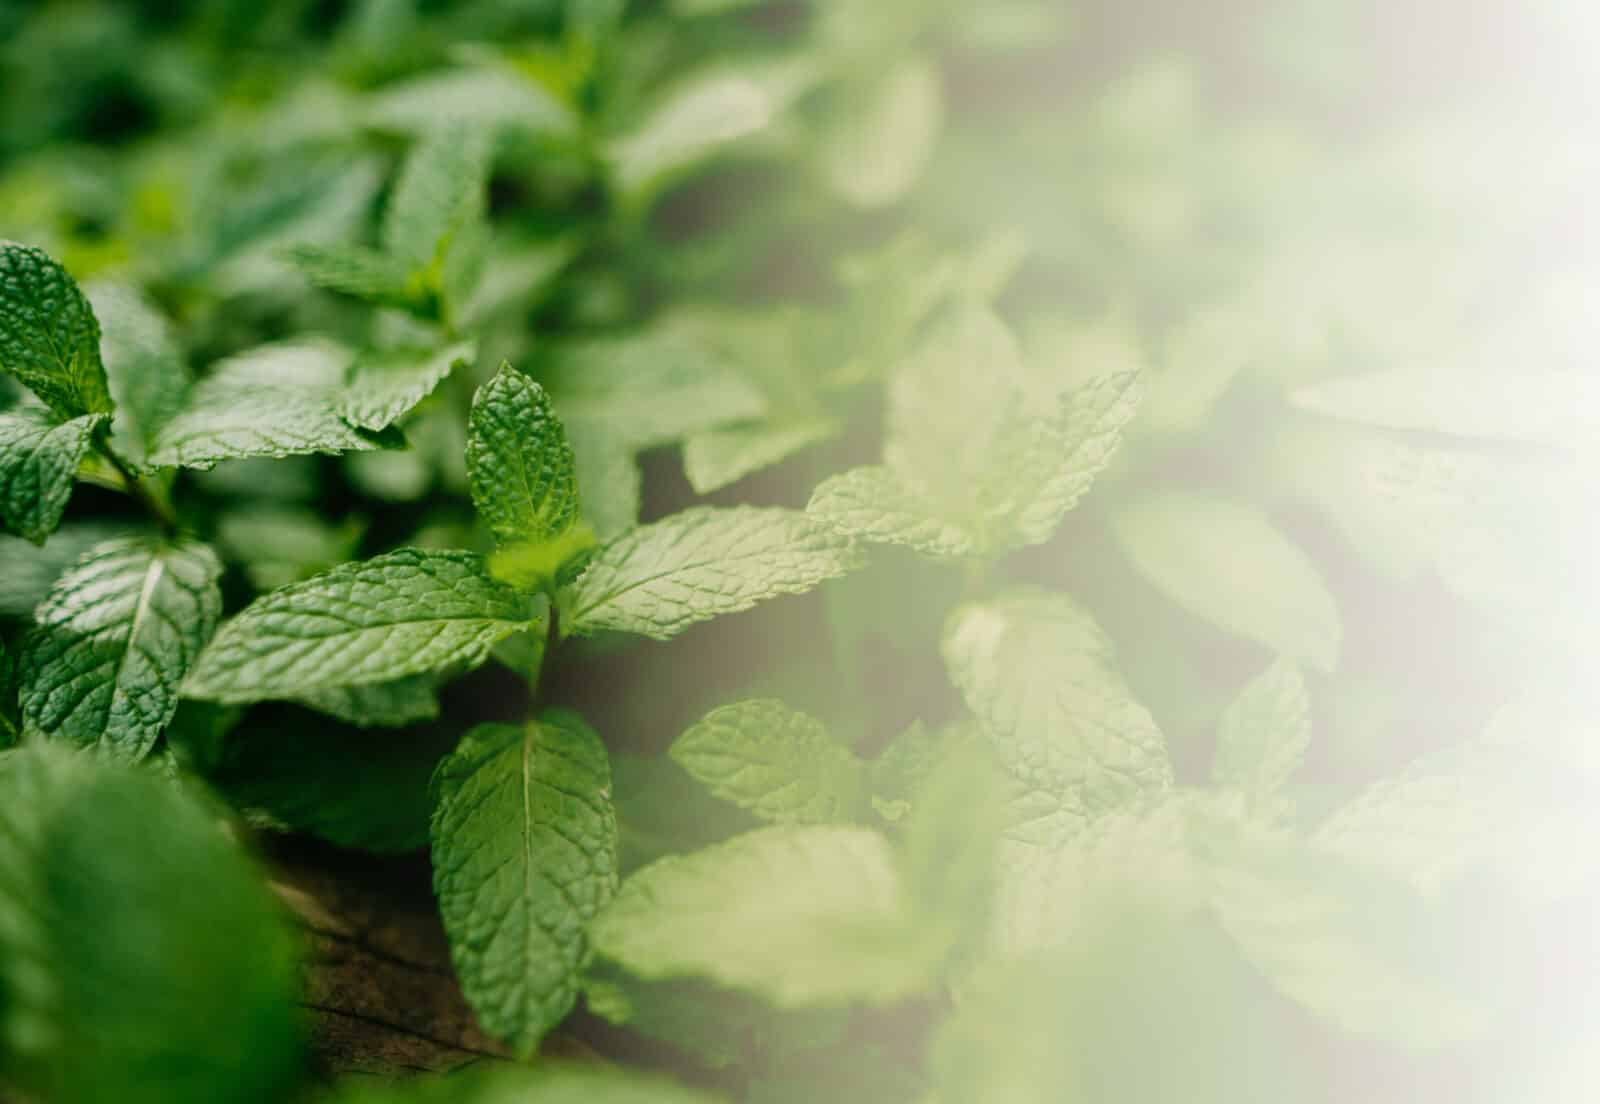
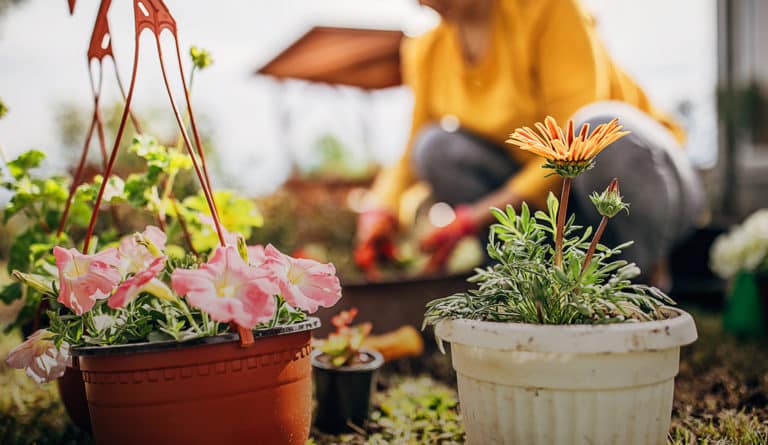
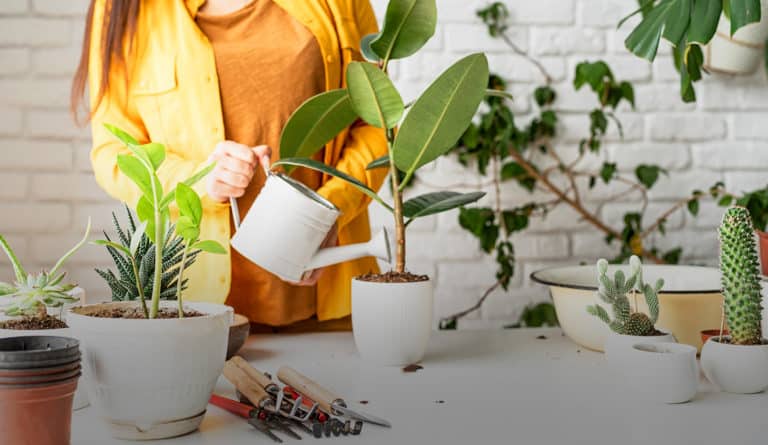
mint
aka mentha
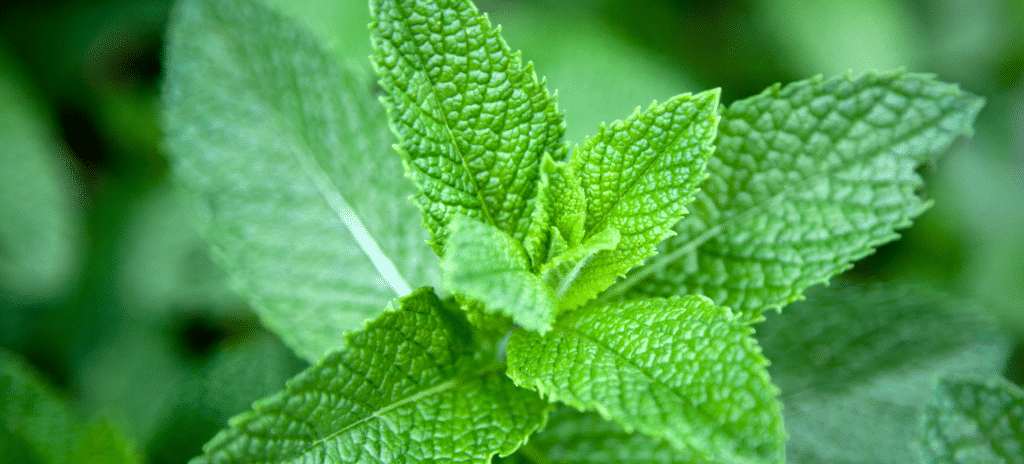
Mint is an easy, fast-growing herb that is used in drink and food recipes. It is a perennial herb that grows little white and purple flowers. There are over 30 different variations of mint, but the most commonly grown is spearmint and peppermint.
variations
Apple/Pineapple Mint, Corsican Mint, Pennyroyal, Peppermint, Citrus Mint, Spearmint

light
full sun
If the soil is nice and moist, full sun is okay. Mint can also thrive in partial shade.

water + feeding
thirsty
Should be watered at least twice a week.

toxic
no
This plant is safe for animals to nibble on.

size
small to medium
Mint can grow to between 1 – 2 feet tall.

pro tip
An effective remedy for headaches
If you are prone to tension headaches, you can make a compress out of mint leaves for your forehead or rub peppermint oil on your temples.

fun fact
Ancient origins
Mint was used in ancient Greece, Rome, and Egypt
beyond the basics
-
soil + potting
Mint does not need to be fussed over which makes it perfect for first-time gardeners. When planting your mint consider using a well-draining soil that can help with moisture control, like Miracle-Gro® All Purpose Garden Soil. This soil helps to prevent from over- and under-watering your mint plant.
-
companion planting:
Luckily, mint is an easy herb to find companion plants for. You can take your pick of popular home garden veggies such as: carrots, cabbage, kale, tomatoes, bell peppers, beans and even zucchini.
-
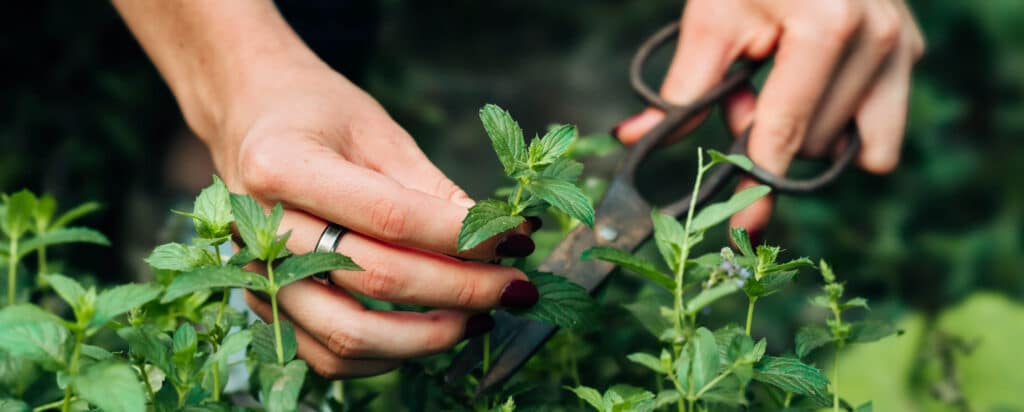
harvesting
Frequent harvesting is important to keeping your mint flourishing. Young leaves have more flavour than older leaves. With this in mind, you can start harvesting your mint as soon as it comes up this spring.
-
pest control
If you see your mint plant drooping, there might be a pest problem. Common pests you might see with mint plants are aphids, mealy bugs, spider mites, or flea beetles. If you are seeing curling leaves or holes in your leaves, these are tell-tale signs of pests. Don’t worry, there is an easy fix. You can use a gentle insecticide like Ortho® Bug B Gon® ECO Insecticidal Soap Ready-To-Use to safely and quickly get rid of those little nuisances.
troubleshooting
-
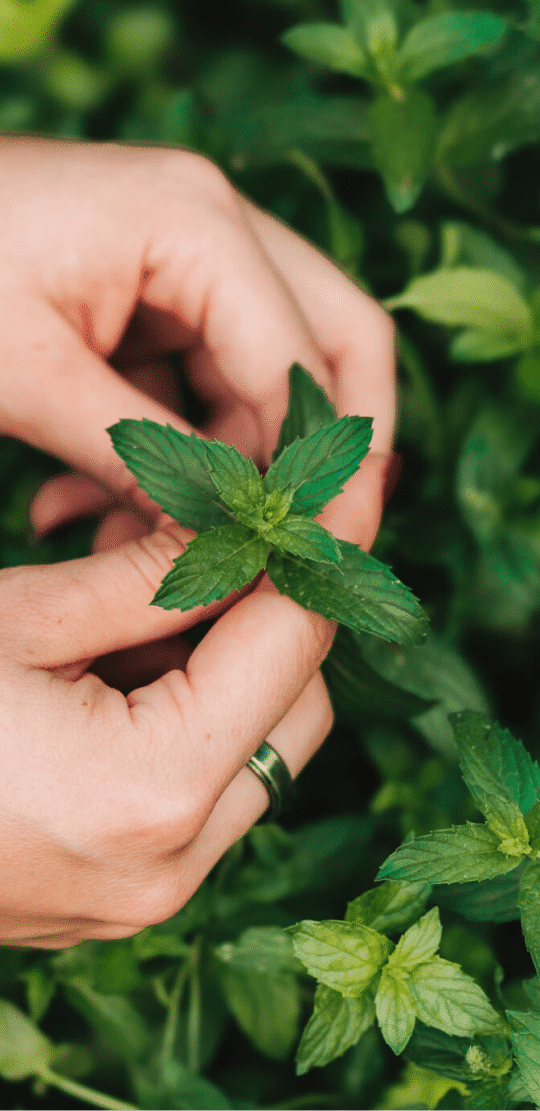
What do I do with my mint once I harvest it?
You’ve got options.
Once you pick a few sprigs from your mint plant, you can keep them in water for a few days. It is best to use your mint while it is fresh, about 3-5 days. If you are looking to dry your mint leaves, cut them right before flowering and let the leave air dry. Once dry, store the dried mint in an air-tight container.
Or you can just pick the leaves from your mint plant as you need them.
-
Why is my mint looking leggy?
More sunlight. Most of the time, if your mint plant is looking thin and leggy it is lacking sunlight or water or nutrients. The best way to prevent mint from getting leggy is to make sure it is growing in a warm spot that gets lots of light. Keep it in a big pot with well-draining and nutrient rich soil.
-
Why is my mint turning crispy and brown?
Under-watering. This is easy to fix. Try watering your mint on a schedule, aiming for once or twice a week. Be sure to water under the leaves and close to the soil so you don’t damage the leaves.
-
How do I know if my mint is healthy?
Healthy, ready to use mint is a deep, rich green. If your mint is yellow and falling, it is likely due to its growing conditions. Keep your mint plant in full or partial sun, with a well-draining potting mix like Miracle-Gro® All Purpose Garden Soil. Make sure you water your mint whenever the top of the soil is dry, usually about twice a week.
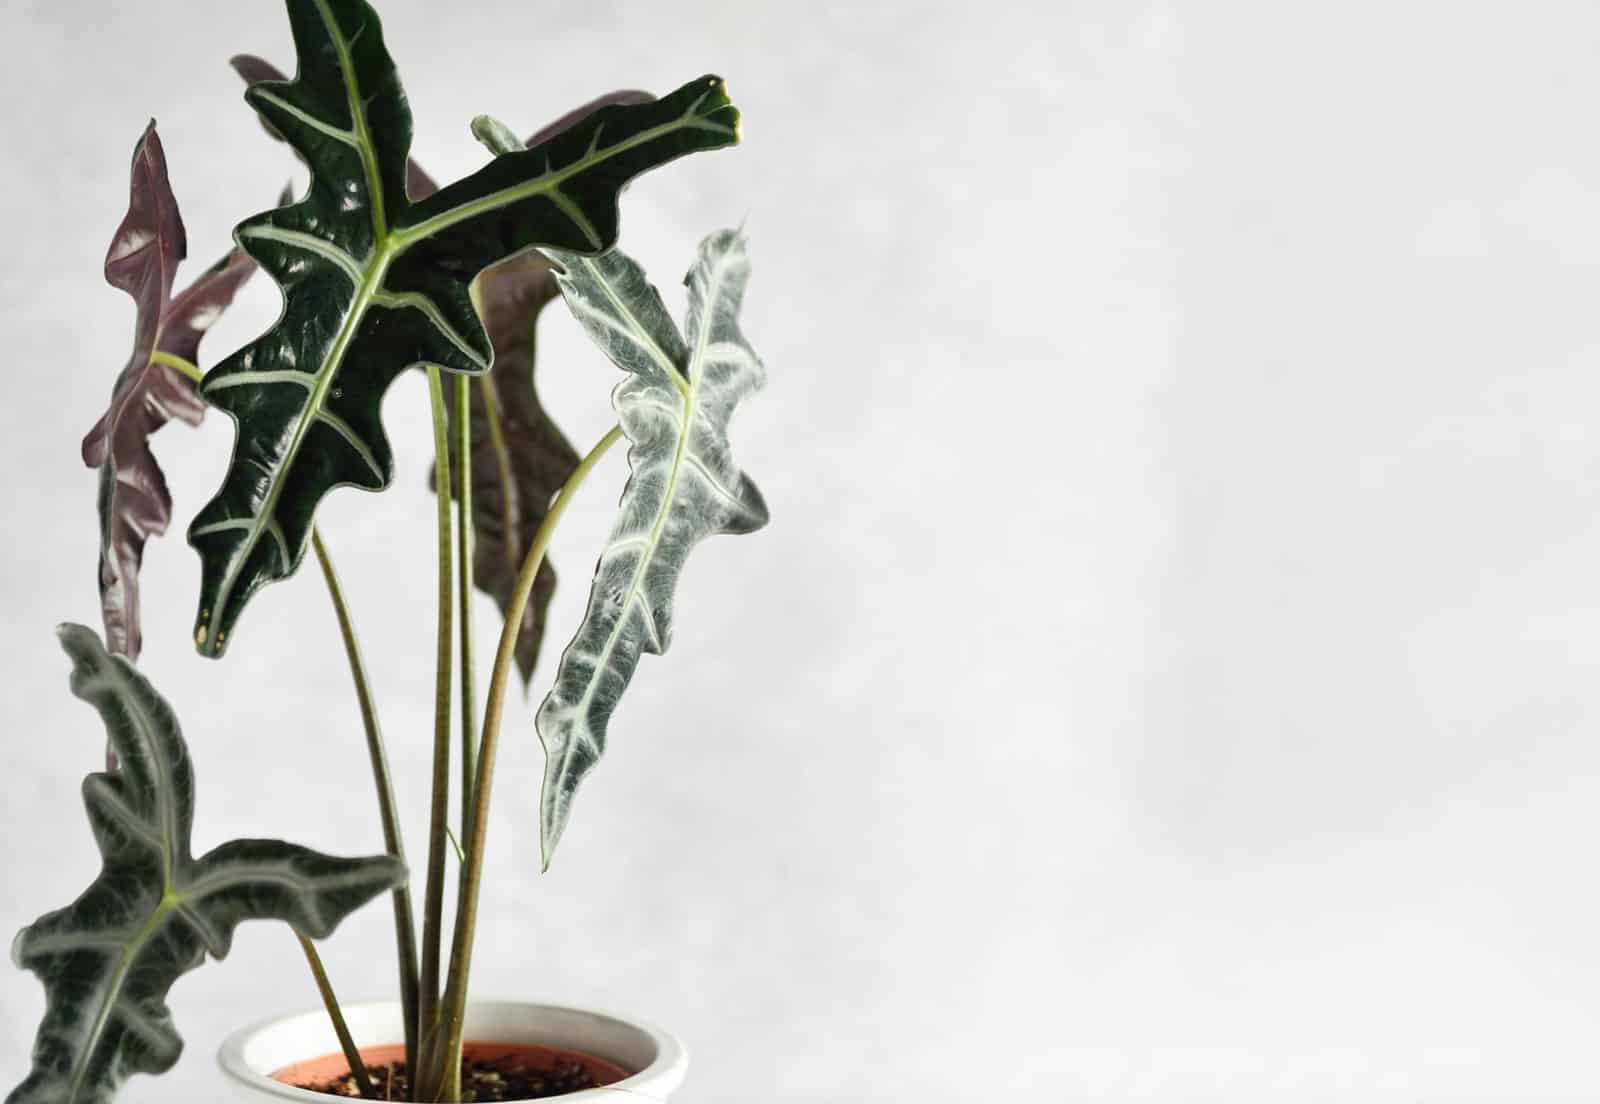
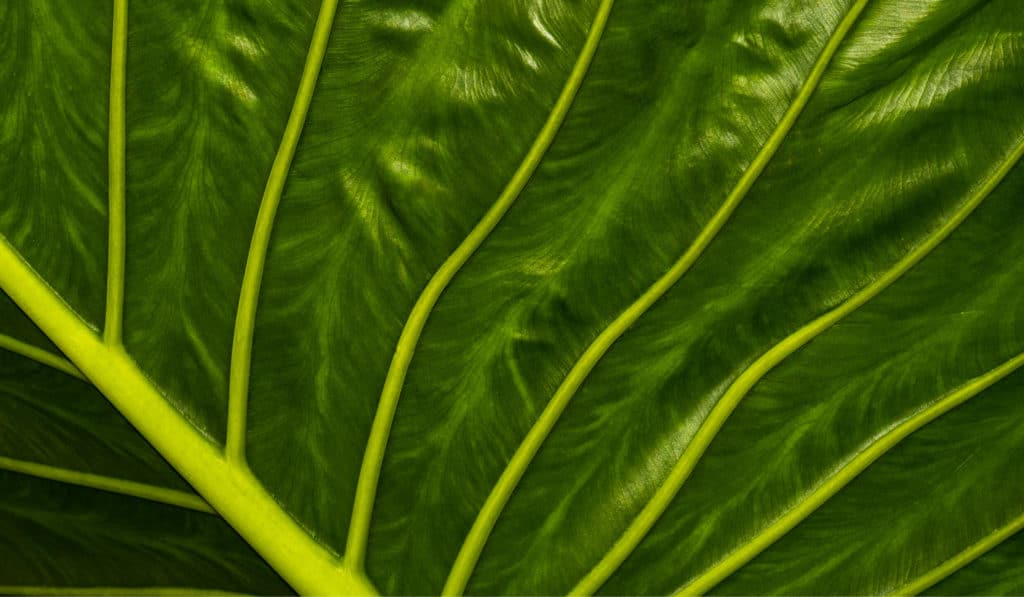
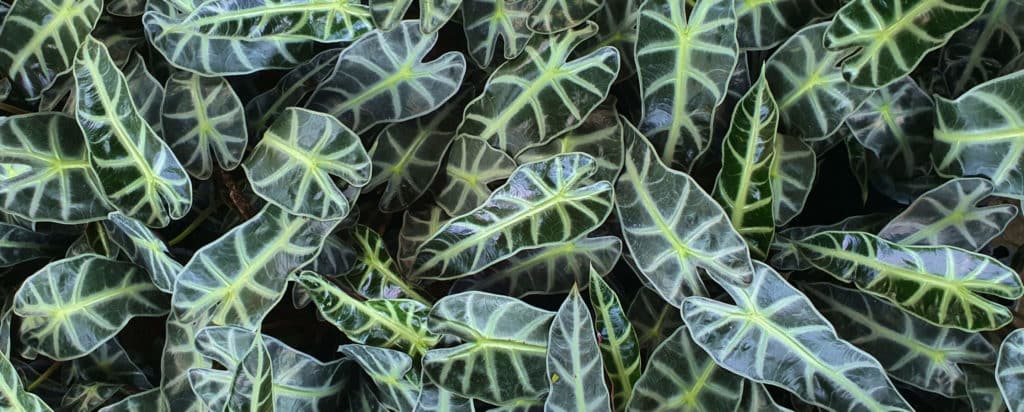
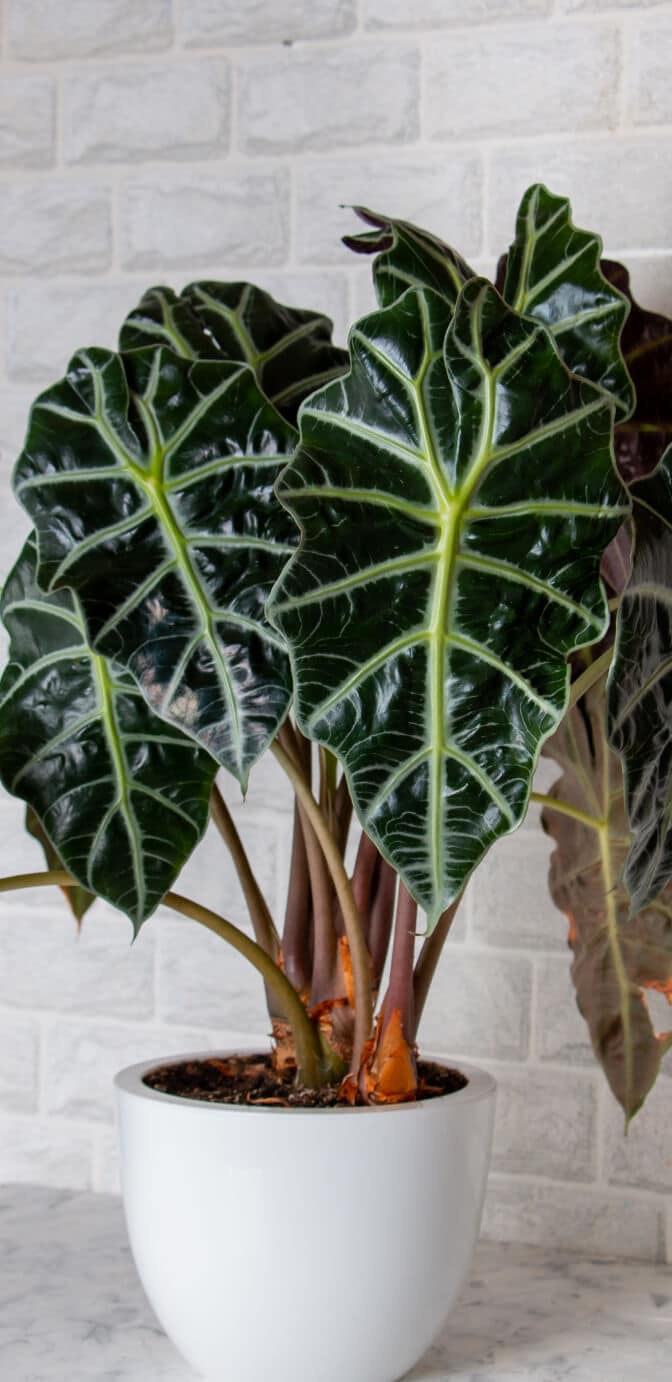
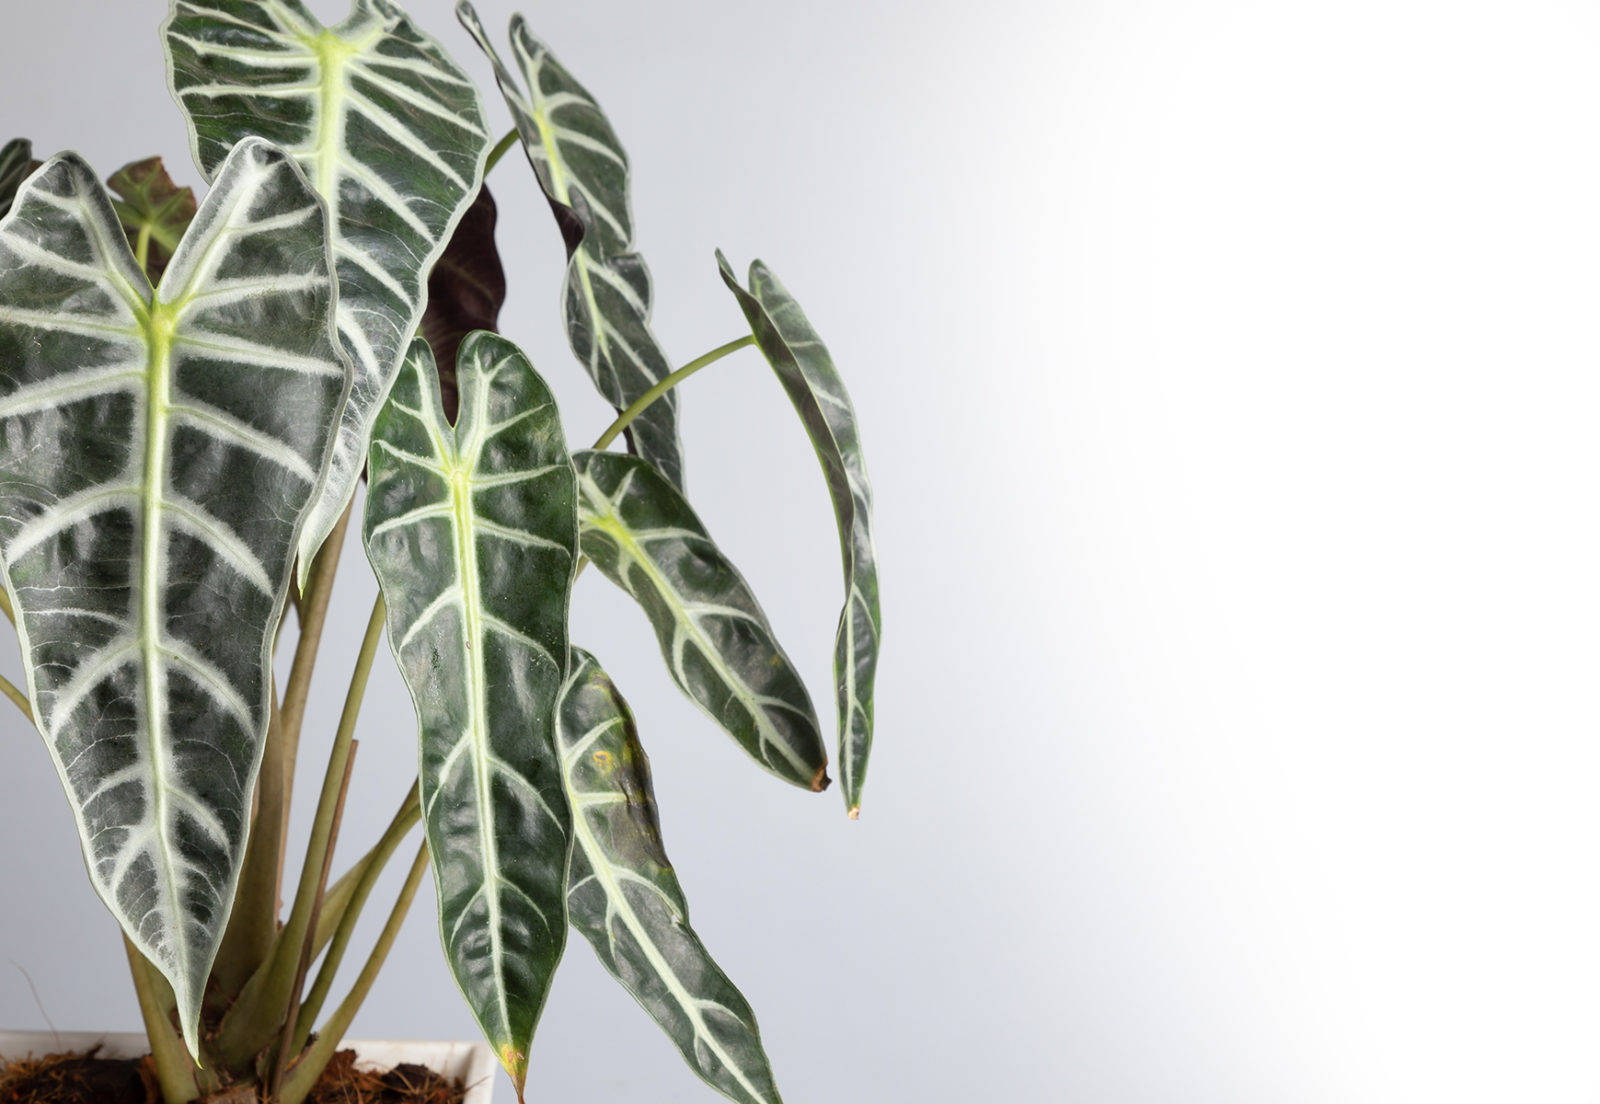
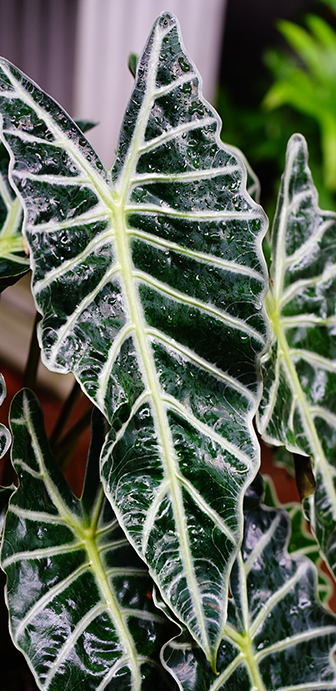
alocasia
aka alocasia
The Alocasia family contains about 70 different variations. They’re tuberous perennials with long stalks. Alocasia leaves vary between being arrow and heart-shaped, and may be interestingly decorated
variations
Alocasia amazonica ‘Polly’, Alocasia amazonica ‘Bambino’, Alocasia amazonica ‘Ivory Coast’, Alocasia micholitziana ‘Frydek’, Alocasia reginula ‘Black Velvet’, Alocasia infernalis ‘Black Magic’, Alocasia rugosa ‘Melo’, Alocasia maharani ‘Grey Dragon’
light
indirect
Place in a spot where it’ll get 6 – 8 hours of indirect light.
water + feeding
not too thirsty
Water until it flows through the drainage hole.
toxic
yes
Should be kept away from your fury friends.

location
a little picky
For spaces that may not get enough light, use a grow light.

humidity
love it
They love high humidity.
size
medium
They can grow between 2 – 6 feet.
pro tip
dry as a bone?
Keep the soil pretty dry throughout the winter, giving it a little water at every 2 weeks.
fun fact
need light and dark
The short days and long nights of fall and winter are perfect for poinsettia. It’s actually what causes them to bloom.

beyond the basics
-
soil + potting
Your Alocasia needs a well-draining potting mix. The Miracle-Gro® Indoor Potting Mix contains coconut coir and perlite to hold onto and release moisture as your plant needs it. If you find that your plant is wanting a little extra, you can add in some Miracle-Gro® Cactus, Palm & Succulent Potting Mix. Adding this succulent mix helps keep your soil light and airy.
-
when to repot
Like most indoor tropical plants, the best time to repot is in the spring or summer, when your plant is strong. Your alocasia will likely want to be repotted every 18 – 24 months. When you’re selecting its new pot, choose one that is about 2 – 4” bigger than its current one.
-
propagation
To propagate your alocasia, use the division method. Remove the plant from its pot and separate a small clump of roots from the main rootball. Replant the small clump into a new pot with fresh soil. Make sure it’s buried at the same depth as the original plant.
-
pest control
Your alocasia may be more prone to spidermites than your other indoor plants. To help prevent those nasty mites from appearing, make sure your plant doesn’t dry out too much over the winter. If you see spidermites on your alocasia, you can use Ortho® Bug B Gon® ECO Insecticidal Soap Ready-To-Use. Spray this insecticidal soap on your plant to eliminate those pesky mites.
troubleshooting
-
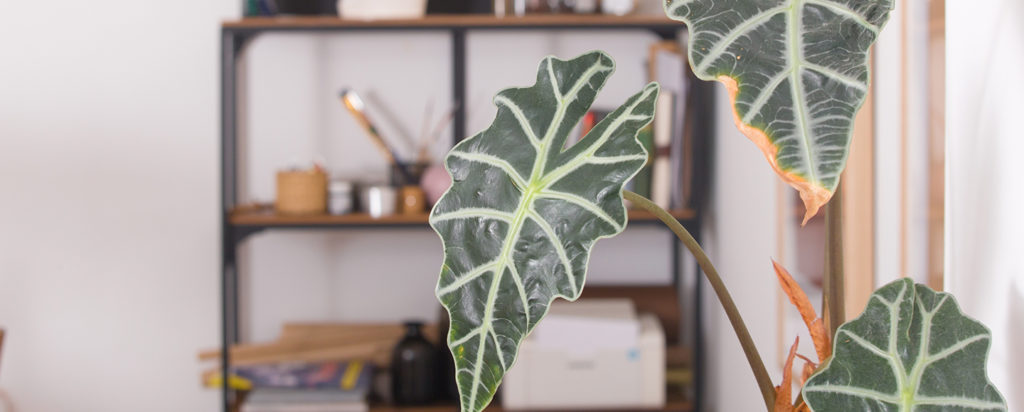
Why are my leaves dying?
Not enough humidity or dry soil. Your alocasia could probably use a good watering. If you’re already on a watering schedule and you’re still noticing dying leaves, consider increasing the humidity in the room.
-
Why are my leaves turning yellow?
Overwatering. Allow the soil to dry out a bit before watering your plant again. For future waterings, make sure the soil is about 25-50% dry before watering.
-
Why are my leaves turning brown?
Probably a sunburn. If your alocasia is too close to bright, direct light then it’s time to move it away. Your alocasia wants to be in bright but indirect light, so find a spot that isn’t right in front of a window. If your lighting is okay, then it could be fertilizer burn. To fix this, drain any accumulated fertilizer from the potting mix, or repot with fresh soil.
-
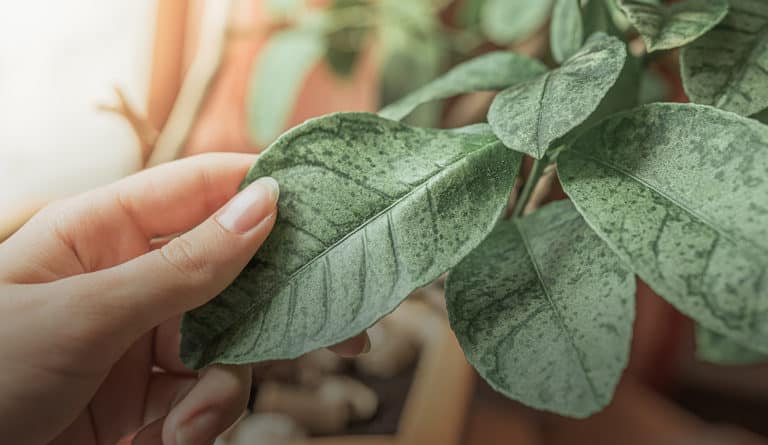
What are these rusty spots on my leaves?
Fungal infection. Poor light and warm, humid conditions can be responsible for fungus. To prevent this make sure the leaves stay as dry as possible. Instead of overhead watering, opt for bottom watering or watering straws instead. Be sure to remove any dead, decaying or diseased plant matter from your alocasia’s pot.
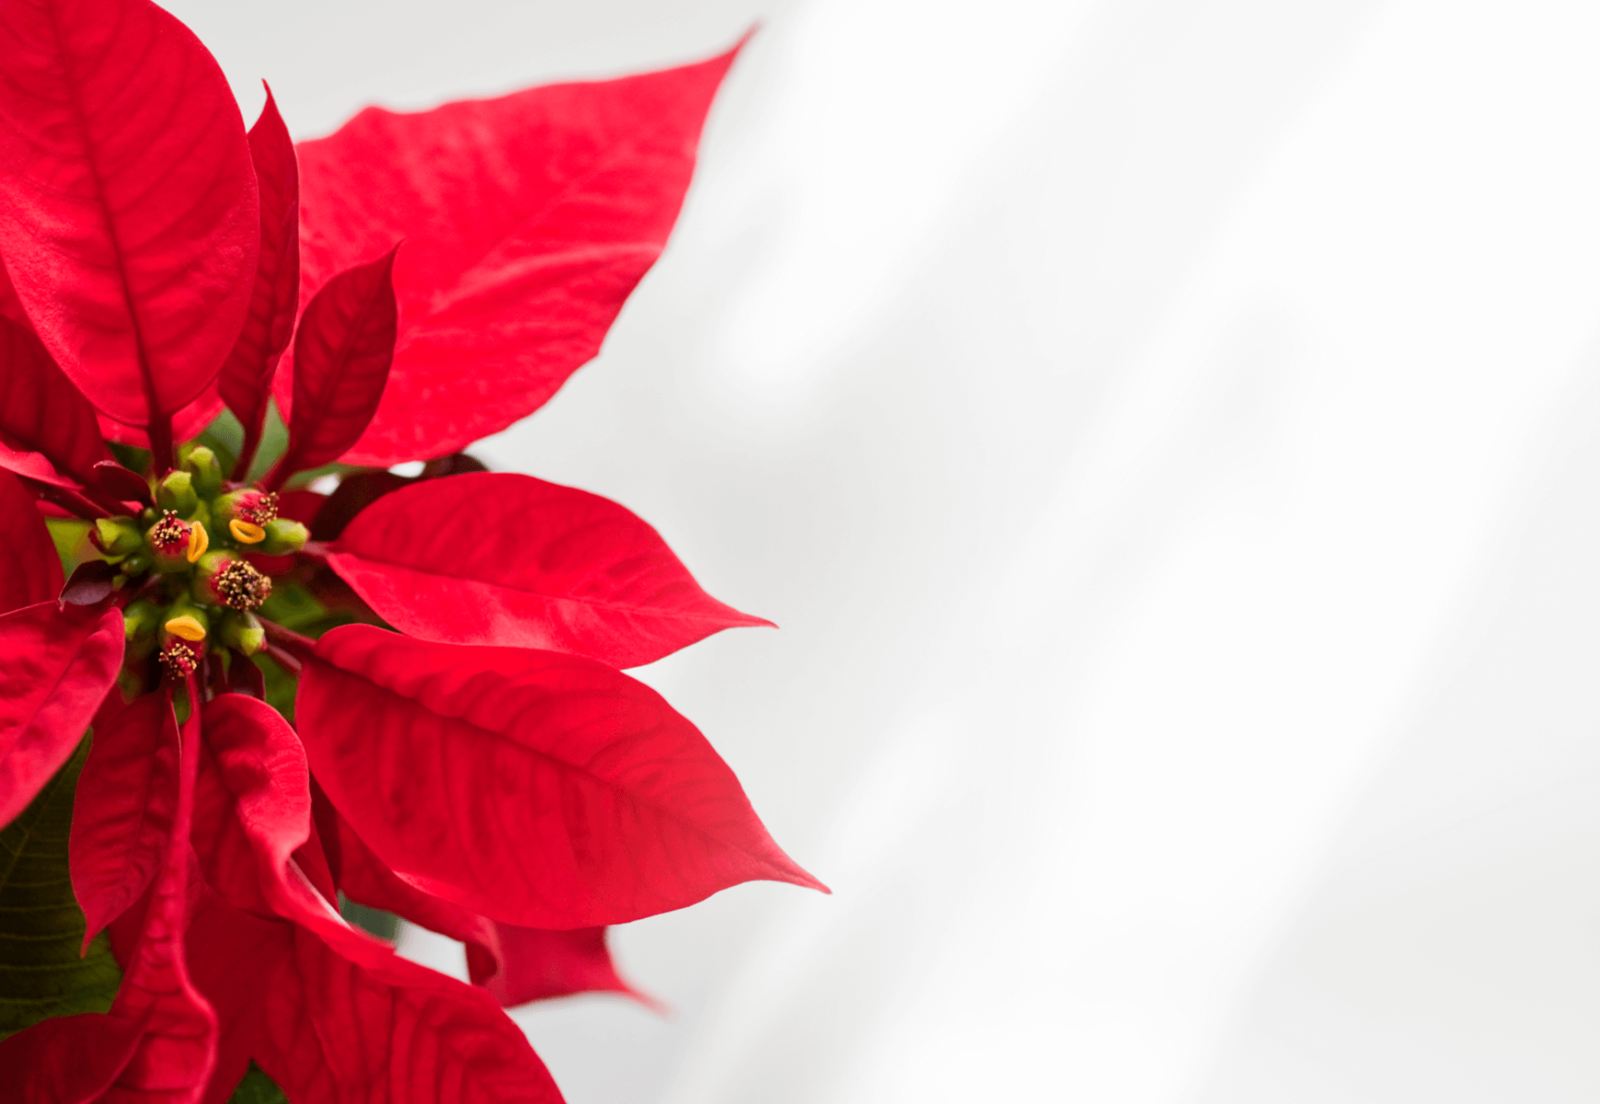
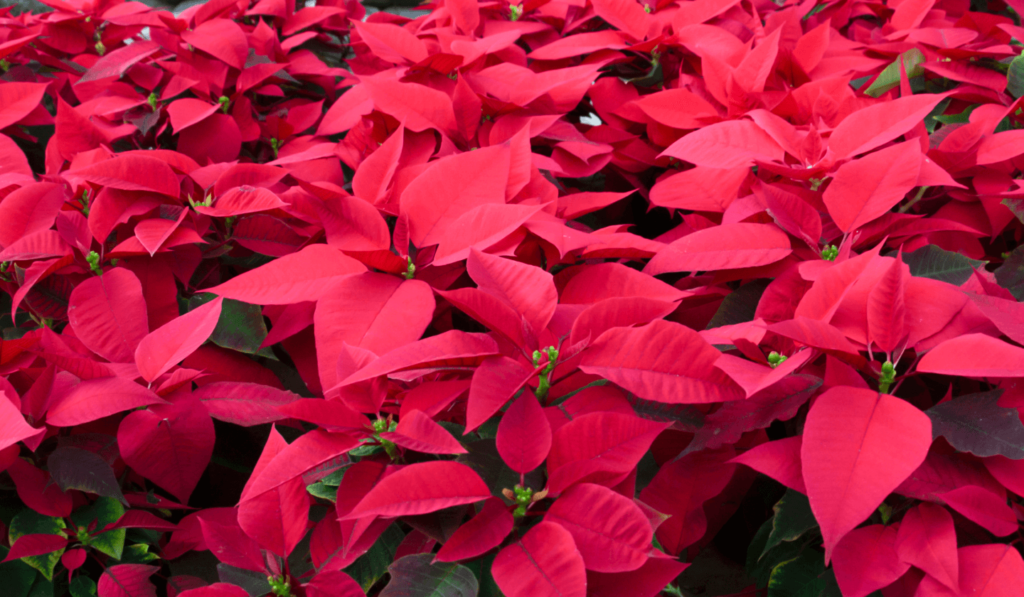
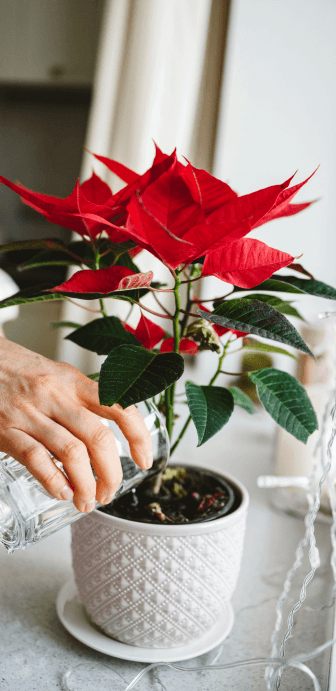
poinsettia
aka euphorbia pulcherrima
Poinsettia are native to Mexico and Central America. They are often used as decoration and gifts during Christmas holidays.
variations
There are over 100 varieties of Poinsettias. Some variations include ‘Premium Picasso’, ‘Monet Twilight’, ‘Shimmer’, and ‘Surprise’ poinsettia.
light
indirect
Need about 6 hours of indirect sunlight daily
water + feeding
not too thirsty
Water in moderation when soil is dry to the touch
toxic
kind of
They’re not toxic to humans or pets. However, the white, milky sap can irritate some people’s skin and can cause an upset stomach.
location
flexible
They’ll be happy in a semi-shaded or sunny area
humidity
love it
Poinsettia enjoy 50 – 75% humidity, so boost up the moisture
size
small friends
Potted poinsettia will remain small at 8 – 12 inches
pro tip
dry soil is ok
Allow the soil to dry out between watering, especially in the spring.
fun fact
need light and dark
The short days and long nights of fall and winter are perfect for poinsettia. It’s actually what causes them to bloom.
beyond the basics
-
soil + potting
Whether poinsettia is growing indoors or outdoors, they prefer a loose, well-draining potting mix. Consider using Miracle-Gro® Moisture Control® Potting Mix. You can also add Perlite and Peat Moss to your soil for some added nutrients.
-
when to repot
As your poinsettia grows, so does its roots. To avoid your poinsettia getting root-bound, repot it in the spring. It’s generally recommended that by mid-May, your poinsettia will be ready to repot. Choose a pot that is about 2 inches wider and deeper than its current pot. And of course, refresh the soil when you repot.
-
propagation
The most common way to propagate poinsettia is by taking a cutting. Propagating from cuttings ensures a clone of the parent plant. No surprises! To start, wait until the spring to take your cutting. Using sharp scissors or pruners, cut a 3 – 4 inch stem from the parent plant. Then cut off a few of the lower leaves to promote root growth from the cut edge. Be sure to leave at least 3 leaves at the top of the cutting. Transplant your cutting to a small container with well-draining potting mix such as using Miracle-Gro® Seed Starting Potting Mix. Keep your cutting in a bright, humid area, and mist the leaves regularly to stimulate growth.
-
pest control
Whiteflies are the most common pests for poinsettias. Do regular checks under the leaves of your poinsettia and keep an eye out for clumps of greenish eggs. Use a gentle insecticide like Ortho® Bug B Gon® ECO Insecticide Ready-to-Use to easily and quickly get rid of white flies.

troubleshooting
-
Why are my cuttings collapsing?
Bacterial rot. This causes the base or stem of the cuttings to become mushy and eventually collapse. You may also notice a smell surrounding your plant, which is also caused by this bacterial infection. You may be able to mitigate this by proper watering and misting practices. It’s best to cut off misting and watering for a while once you notice the stems are a little soft.
-
Why are my poinsettia’s leaves turning black?
Temperature fluctuations. Sudden temperature fluctuations will shock these tropical plants. To keep your poinsettia happy, make sure it’s in a bright space that can also receive a few hours of shade or darkness. Be sure to keep your plant away from radiators, fireplaces and space heaters too.
-
Why is my poinsettia so pale all of a sudden?
Could be spider mites. These little pests feed off the plant’s sap, causing the leaves to turn pale and sometimes develop little red spots. If you catch spider mites early enough, you may be able to salvage your plant. Use a gentle insecticide like Ortho® Bug B Gon® ECO Insecticide Ready-to-Use to gently take care of this problem. A recovering poinsettia will perk up and brighten up within a week or two.
-
Why are my poinsettia leaves drooping and yellow?
Over- or underwatering. Both over and under-watering your poinsettia will cause its leaves to droop or look wilted. If you’re over-watering your plant, be sure to let its soil dry out a bit. Discard any excess water at the bottom of its pot to prevent it from sitting water and developing root rot. If you’re underwatering, consider boosting your watering routine with Miracle-Gro Indoor Plant Food for the next two watering cycles. You can also start misting the leaves of your poinsettia to increase its water in-take. But don’t overdo it, let the soil dry out a bit between watering.
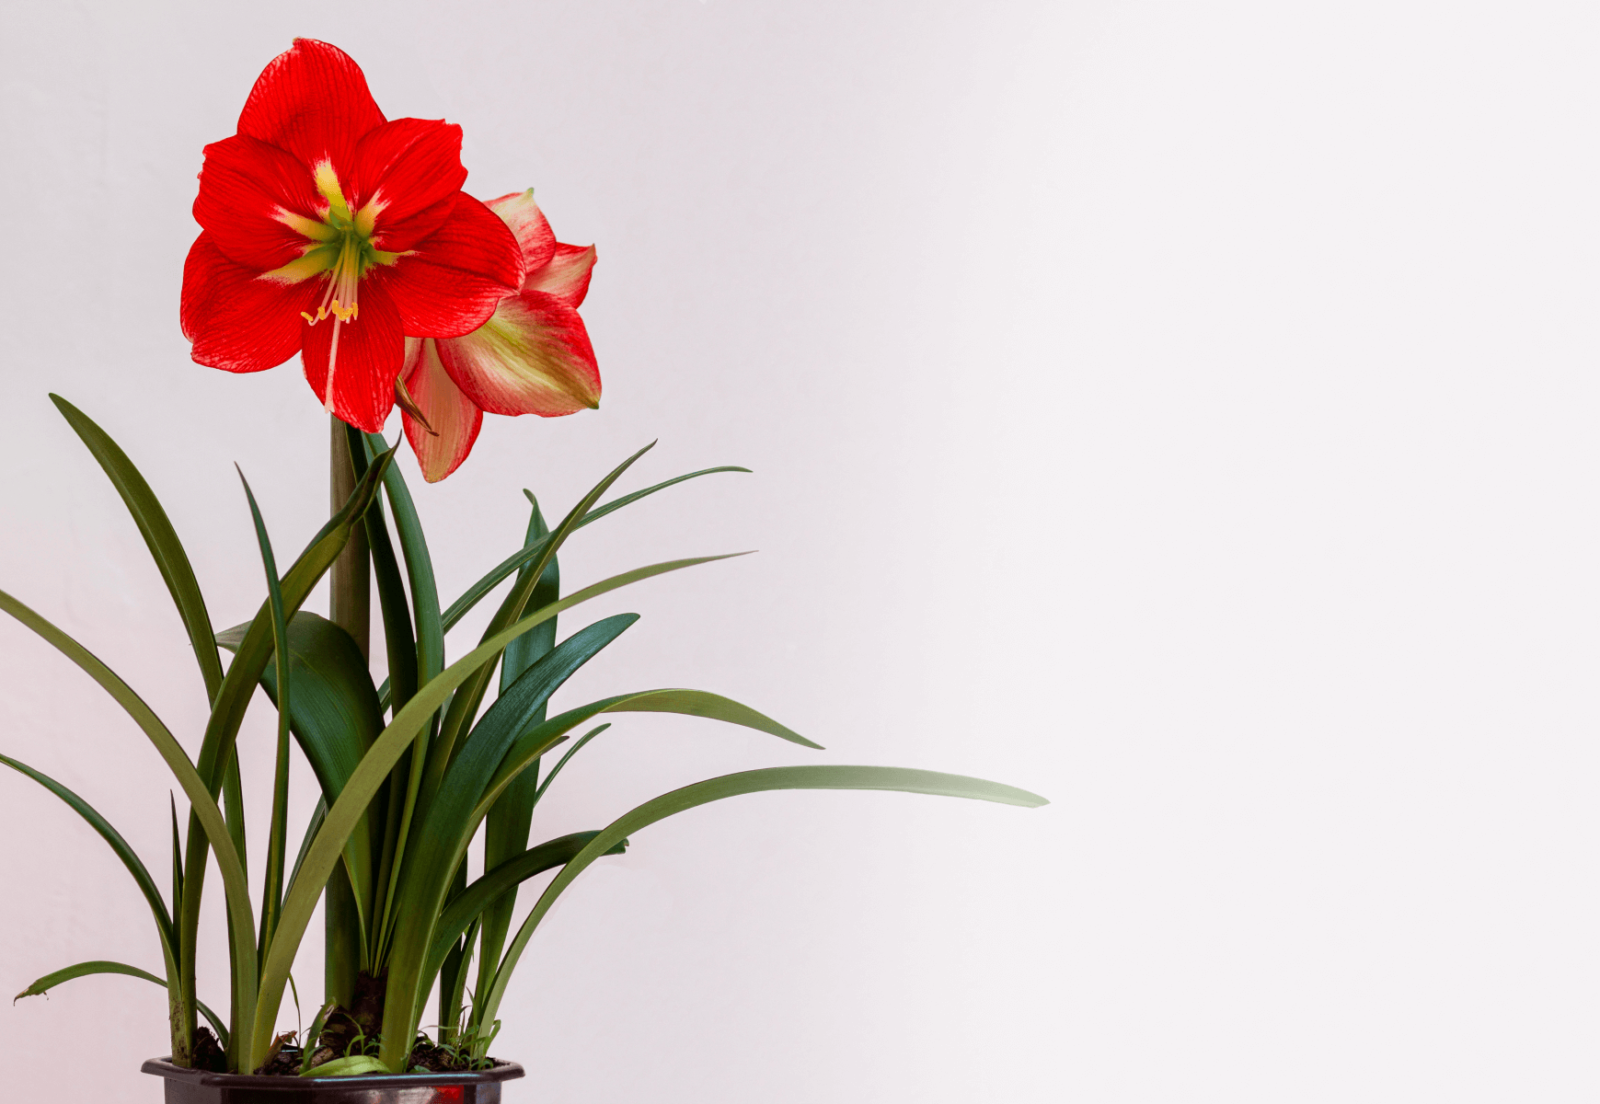
amaryllis
aka hippeastrum genus
a plant native to warm, tropical climates. There are over 1600 species in this plant family.
variations
Ferrari’ Amaryllis, ‘Dancing Queen’ Amaryllis, ‘Mont Blanc’ Amaryllis, ‘Papillio Improved’ Amaryllis, ‘Faro’ Amaryllis, ‘Estella’ Amaryllis, ‘Athene’ White Amaryllis, ‘Double Dragon’ Amaryllis
light
bright, direct
Needs a sunny window to get at least 4 hours of sun daily
water + feeding
not too thirsty
Only water once the top 2 inches of soil have dried.
toxic
yes
The bulbs are the most toxic, but blooms can also be hazardous if eaten
location
picky pals
Need lots of bright, direct sunlight
humidity
not too much
Amaryllis don’t need misting
size
medium
Can grow up to 4 – 6 inches
pro tip
big bulbs mean lots of flowers
That’s right. We like big bulbs, and we can not lie. The bigger the bulb the more blooms you can expect. In fact, a Jumbo bulb (34/36 cm) can produce 3 stems with about 4 to 5 flowers per stem.
fun fact
It’s a look-a-like
The flowers on an amaryllis look very similar to a lily but they are not actually the same flower. They are very distant relatives!
beyond the basics
-
soil + potting
Amaryllis needs to be planted in a light, well draining potting soil. Consider using Miracle-Gro® Indoor Potting Mix. The combination of coconut coir and perlite help control moisture and release water when your plant needs it. If you’re growing a single amaryllis bulb, you can plant it in a 6-inch pot. If you’re growing multiple bulbs (about 2 –3) use a bigger pot, closer to 10 – 12inches. As always, make sure your pot has a drain hole and be sure to leave the top 1/3 of your amaryllis bulb sticking out of the soil.
-
when to repot
Your amaryllis won’t need to be repotted very often. In most cases, you will only need to repot your amaryllis after 3 – 4 years. It’s best to repot once your amaryllis has gone through a dormant stage, typically this means repotting in the spring.
-
propagation
There are 3 ways to propagate amaryllis:
- Through Seeds. Look for seed pods about four weeks after your amaryllis begins to flower. When the seeds are ready, they’ll split open a bit and turn yellow. Then you can gently shake out the little black seeds.
- Separating bulbs/offsets. Look for firm bulblet that are about a third of the size of the “mother” bulb. Trim back any extra foliage to 2 inches above the bulb. Gently remove the bulblets and replant as soon as possible. You can remove the bulblets with either a small knife or just your fingers.
- Choose a bulb at least 6 inches in diameter. Cut into four pieces, vertically, making sure each section has at least two scales. Plant with the basal plate (bottom) of the bulb pointing down, covering only a third of the bulb with soil.
-
pest control
Keep an eye out for common pests like mealybugs and fungus gnats. If you spot these pesky bugs, you can use a gentle insecticide like Ortho® Bug B Gon® ECO Insecticidal Soap to get rid of them without damaging your plant.
troubleshooting
-
Why won’t my amaryllis bloom?
There could be a few reasons. The main reason could be that your amaryllis isn’t getting enough light. Once you’ve moved your plant to a bright window that gets light for about 4 hours a day, you should see blooms. Still nothing? Try adding a little plant food to bump up the nutrients. Consider using a tropical plant food like Miracle-Gro® Tropical Plant Food.
-
Why are my amaryllis leave drooping?
Over or underwatering. The issue could also be that your amaryllis isn’t getting enough light. If you know that your watering schedule is okay, then try moving your plant to a more direct light source.
-
How do I know if my amaryllis bulb is rotten?
Look for colour and texture. If your bulb has a uniform colour and firm texture, it’s a healthy bulb. If you spot signs of a pest infestation, mold or any damage to the actual bulb, these are red flags that indicate your bulb will likely rot. Seeing shriveled or brown skin on the outside? That’s totally normal.
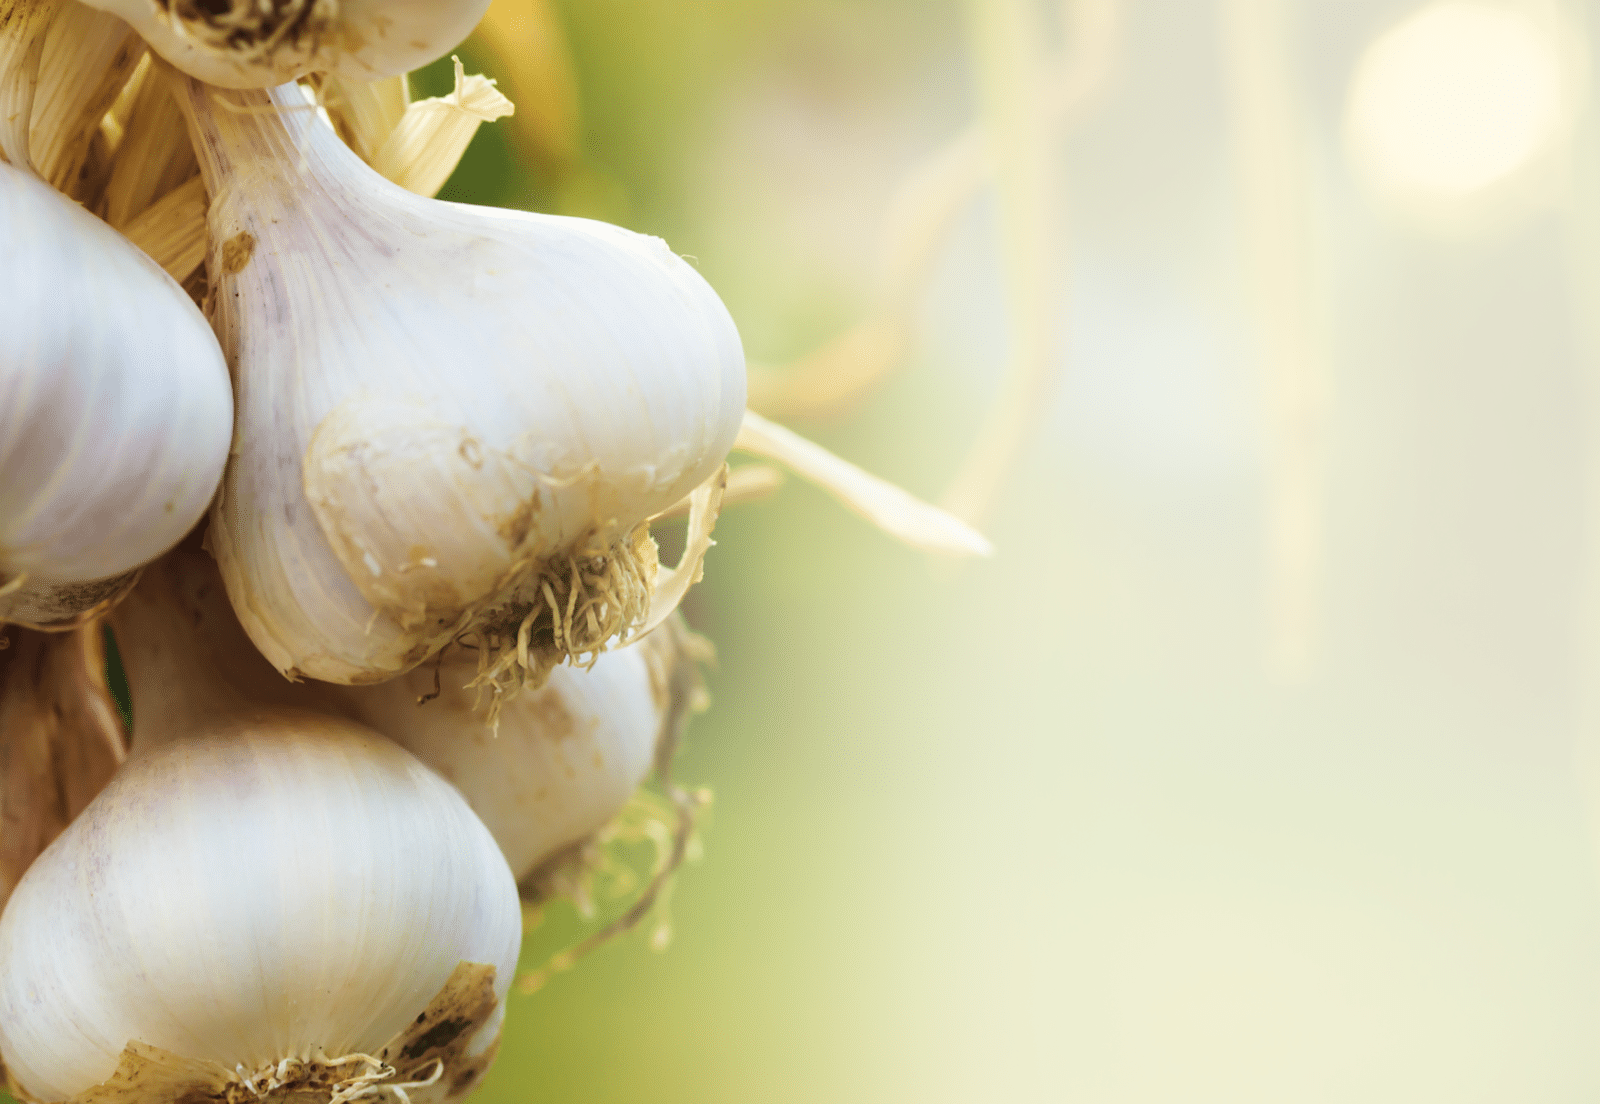
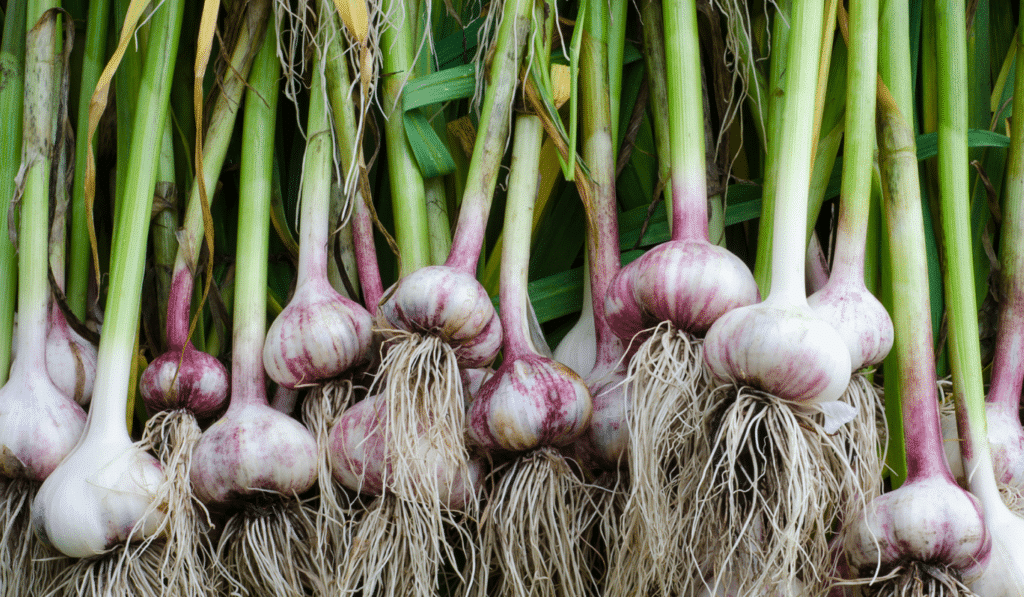
garlic
aka allium sativum
Garlic is one of the most commonly used vegetables in cooking. It offers a variety of health benefits and can be consumed in a myriad of ways including cooked, preserved in oil or even eaten raw.
variations
There are about 11 different types of garlic. They are classified as “hard neck” or “soft neck” variations.
light
full sun
Plant in a place where they can get 6 – 8 hours of sun
water + feeding
not too thirsty
It’s best to water deep, but garlic only requires between a half to a full inch of water per week.
toxic
yes and no
Garlic is toxic for cats and dogs, but delicious for humans
size
small-ish
Average garlic bulbs have about 6-10 cloves, but their foliage can reach up to 2ft in height.
pro tip
plant in the fall
Plant your garlic 4 – 6 weeks prior to first frost
fun fact
keeps more than vampires away
Garlic is known as one of the healthiest foods, containing healing properties such as: anti blood coagulation, antioxidant, antiviral, antimicrobial, lowers cholesterol, reduces blood pressure, anticancer properties and can be used to help fight off colds.
beyond the basics
-
soil + planting
Plant garlic cloves 4 to 8 inches apart, and about 2 inches deep. Be sure you plant the cloves with the root side pointing down. Your garlic needs well-draining soil, such as Miracle-Gro® All Purpose Garden Soil. Add a little compost to bump up the nutrients of soil.
-
companion planting
Garlic can be planted next to other veggies such as beets, celery, lettuce, potatoes, strawberries or even tomatoes. It’s best to avoid planting near peas or beans.
-
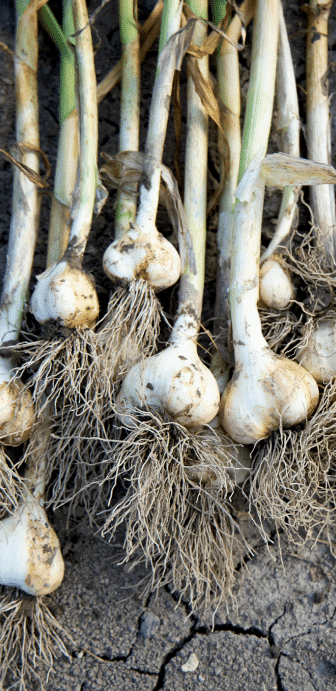
harvesting
Once your garlic has sprouted some leaves, and a few of the lower leaves have turned brown, your garlic is ready to pick. The only way to tell is to pick a few bulbs as a test. If the cloves have filled the skin, they’re ready to harvest. Be sure not to let them wait too long once you notice the lower leaves browning, otherwise the protective layers around the cloves will be too thin. This means the garlic won’t store well.
-
pest control
White rot is a common disease that can wipe out an entire garlic crop. This is identified by little poppy seed sized bumps on the stem, and white fuzzy growth on the bottom of the bulb. If left untreated it can remain in the soil for many years. Keep an eye out for symptoms from mid-summer to autumn. If you’re noticing this has been a problem where you’re planting, apply a fungicide. For best results, apply the fungicide in a 6 inch band over the planting trench. This should happen immediately before planting.

troubleshooting
-
why is my garlic drooping and brown?
Could be time to harvest. When garlic is ready to be harvested, a few of the bottom leaves will turn brown and droop. The easiest way to tell if your garlic is ready to harvest is to count back. Garlic needs about 240 days to mature.
-
no, really why is my garlic drooping?
Nutrient problems. Your soil could be lacking in some key nutrients like nitrogen, potassium, calcium, and magnesium. Consider using a plant food like, Miracle-Gro® Shake ‘N Feed® Tomato, Fruits & Vegetables Plant Food.
-
why is my garlic not sprouting?
Extreme weather conditions. Sometimes after a particularly harsh winter, garlic crops can come out a bit crumpled or very small. One way to prevent this is to water and mulch immediately after planting. Be sure not to add too much mulch though! Too much mulch applied too late in the season will insulate the ground and delay it from going dormant. This can cause root rot once the real cold weather sets in.

kale
aka brassica oleracea var. sabellica
Kale is a cold-hardy and resilient green veggie.
variations
Red Russian, Lacinato, True Siberian, Vates Blue Curled, Winterbor
light
just a little
Kale only needs about 3 hours of sunlight to grow
water + feeding
keep it watered.
Kale needs consistent watering. Your kale needs about 2 inches of water a week.
toxic
okay for humans
But could cause kidney and bladder stones for dogs.
size
small-ish
Can grow between 1 – 2 ft
pro tip
sweetened by frost.
Kale can be harvested until it’s 20°F/-7°C outside. In fact, the first nips of frost can make your kale taste better.
fun fact
technically a biennia
It’s a 2-year plant that produces leaves in the first year and a flower stalk in its second year.


beyond the basics
-
companion planting
Kale works well when planted by artichokes, beets, celery, cucumber, lettuce, onion, peas, potatoes. Avoid other brassicas being planted alongside kale. These include broccoli, kohlrabi, cauliflower, brussels sprouts, and Swiss chard.
-
Harvesting
When your kale’s leaves are about the size of your hand, it’s ready to harvest. Be sure not to pick more than a third of your plant’s leaves at a time.
-
pest control
What are these little white flies? They are literally Whiteflies. They drink sap and excrete a sticky ‘honeydew’ which also encourages mould. Use sticky traps or Ortho® Bug B Gon® ECO Insecticidal Soap to keep your plants healthy.

troubleshooting
-
why are my leaves full of holes?
Cabbageworms. You can use companion plants to help naturally combat these pests. Quickly hand pick your kale, and don’t forget to use row covers to help keep your kale safe.
-
what are these weird yellow V-shape on leaves and rotting stems on my kale?
Probably black rot. This is a fungus that leave yellow v-shapes on your kale’s leaf edges. To prevent this, make sure to rotate your crops and remove debris from your garden. Don’t forget to make sure your garden has good drainage.
-
why are my kale’s leaves misshapen?
Could be aphids. To prevent aphids from infesting your kale plants be sure not to water the foliage. If aphids persist, you can use an insecticide like Ortho® Bug B Gon® ECO Insecticide Ready-to-Use.
.
elephant ear
aka colocasia esculenta
Always the centre of attention, these big beauties make a statement indoors and out. They can grow to an impressive height with leaves that mimic hearts, or the shape of elephant ears.
variations
alocasias and colocasias
light
full sun
Even dappled shade will work
water + feeding
thirsty
Keep the soil moist. In summer months you may have to water your potted plant almost every day.
toxic
toxic to people and animals
Ingesting stems or leaves can cause a burning sensation or cause swelling. In some cases touching the plant can cause a skin irritation.
location
flexible
Elephant ears do well on patios and indoors. Keep your plant in indirect light to avoid it getting sunburnt.
humidity
love it
Elephant ears are tropical plants that thrive in warm, humid environments.
size
large friend
Can grow to 3 – 5 ft
pro tip
Leave lots of room
Elephant ears need a big pot to grow to their fullest potential.
fun fact
A tropical bulb
Elephant ears have tuberous roots that are often referred to as bulbs. Unlike common garden bulbs, these ones are not cold hardy so you’ll need over-winter the bulbs inside.

beyond the basics
-
soil + potting
Consider elevating your elephant ear slightly by adding a layer of rocks and pebbles between the planter and its saucer. This helps increase the humidity and prevents root rot. Use a well-draining soil for your elephant ear. Consider using Miracle-Gro Cactus, Palm & Succulent Potting Mix or Miracle-Gro Moisture Control Potting Mix for a happy plant.
-
when to repot
The best time to repot your elephant ear is during the spring months. When repotting your elephant ear, make sure to use a well-draining soil. Consider using a soil like Miracle-Gro Cactus, Palm & Succulent Potting Mix or Miracle-Gro Moisture Control Potting Mix to help refresh the soil.
-
propagation
While you can’t propagate an elephant ear with a cutting, you can divide tubers of a healthy adult plant. The tubers have a texture similar to that of a potato. You can easily cut through it with a sharp knife. Plant the divided tuber immediately into your potting soil and keep it moderately wet.
-
pest control
Common pests for elephant ears are aphids, spidermites and mealybugs. Use a gentle insecticide like Ortho® Bug B Gon® ECO Insecticide Ready-to-Use and make sure the leaves of your plant are treated as well.
troubleshooting
-
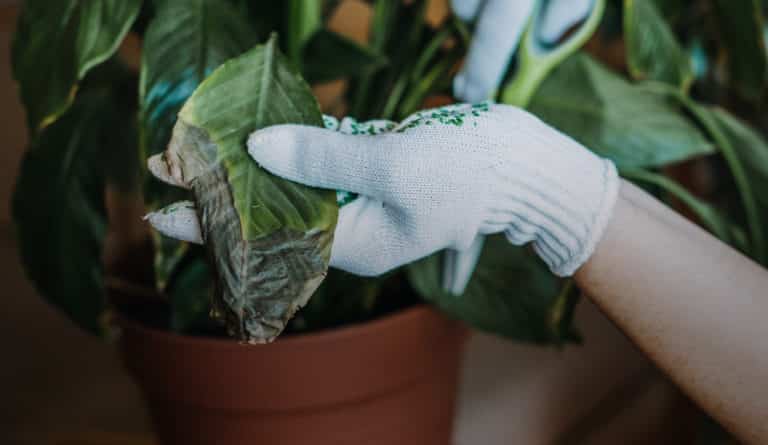
why is my elephant ear turning yellow?
Too much sunlight or overwatering. You can cut the dying leaves close to the base of the stem. This should prevent more leaves from yellowing. Then adjust your watering schedule or move it away from direct sunlight.
-
why are my leaves crying?
Usually due to overwatering. The leaves of an elephant ear are long and heart-shaped, which naturally draws water to the tip of the leaf. If there aren’t other signs of overwatering, like soft stems or yellow leaves, you can likely hold off on watering for a few days.
-
why are my plant’s leaves turning brown?
It’s a sunburn. Your plant is too close to bright, direct light. Elephant ears tend to thrive in bright, indirect light. Scorched leaves won’t kill your plant, it just doesn’t look pretty.
-
Why does my plant’s leaves have spots?
Fungal leaf blight. If this fungus isn’t caught early, it will cause the whole leaf to collapse and travel to the rest of the plant. To prevent this, make sure you’re using high-quality, well-draining soil.

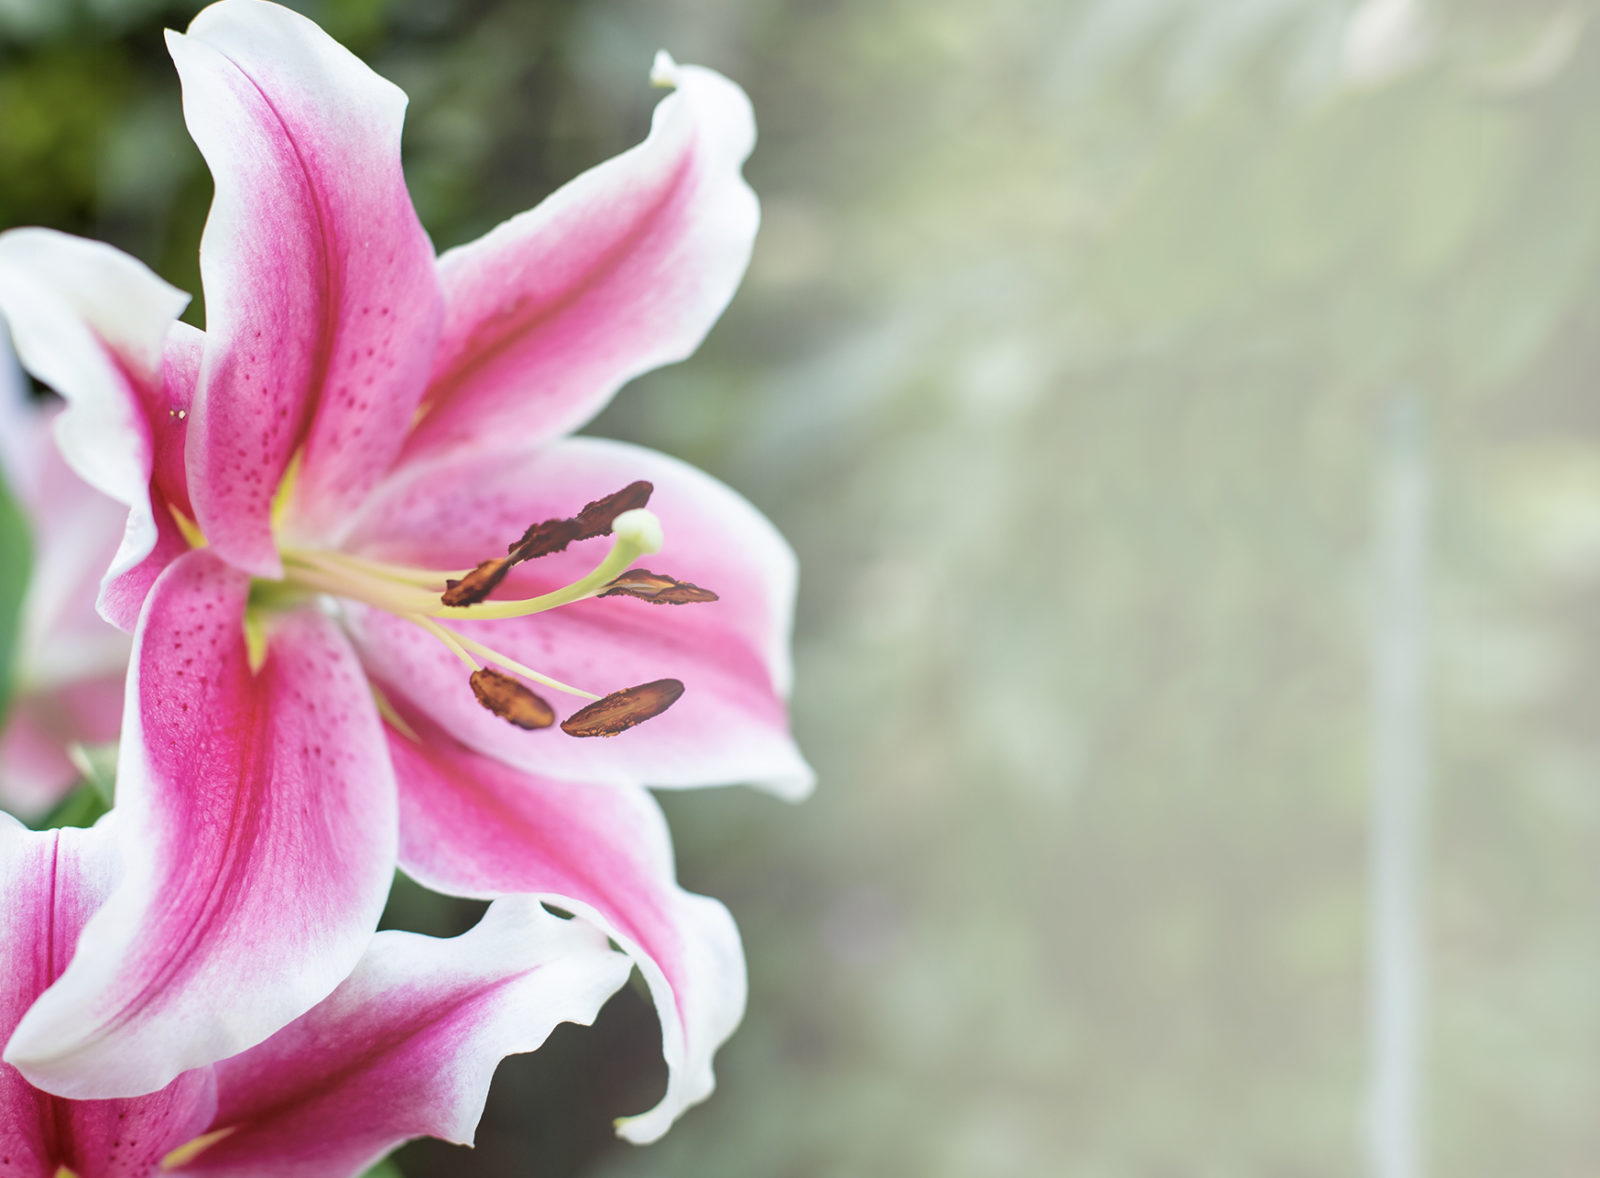
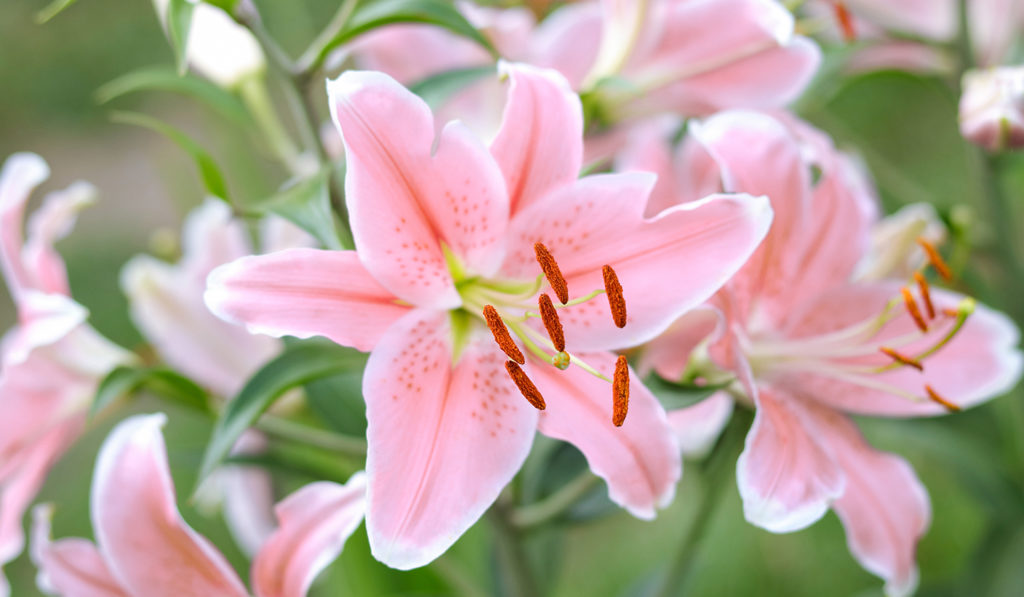
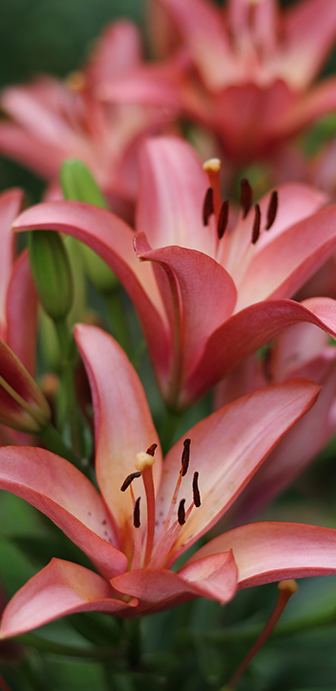
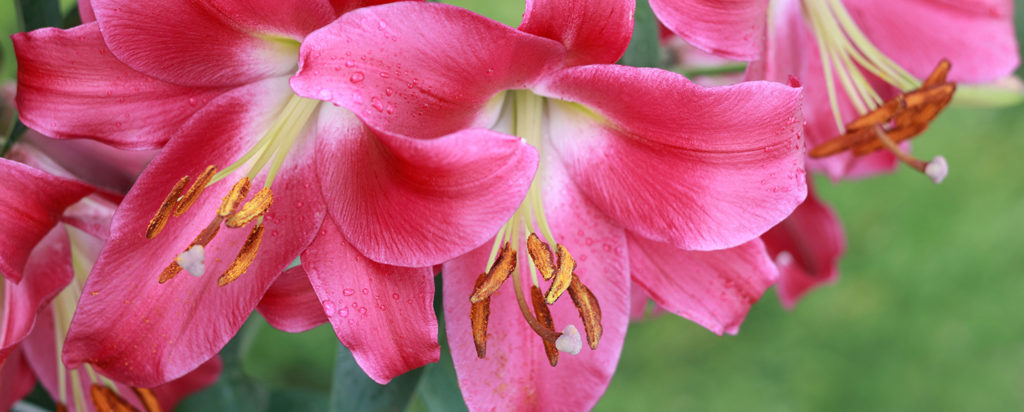
Lily
aka Lilium
lilies are an exotic and elegant perennial flower that are quite easy to grow. Lilies start as onion-like bulbs and require good soil and lots of sun to flourish.
variations
trumpet lilies, Asiatic lilies, Easter lilies, Oriental lilies
light
full sun
Your lilies will enjoy about 6 – 8 hours of sunlight but be sure to keep their roots cool.
water + feeding
thirsty
Water your lilies freely, especially if you’re not in a climate that gets much rainfall in the summer months.
toxic
yes, the whole plant
The entire plant is toxic to humans and pets. Even the water that fresh cut lilies sit in can make you and your fuzzy friends sick.
location
in the sun
A good rule of thumb is that lilies like their head in the sun and their feet in the shade. To help keep your lily’s roots cool, consider planting with low profile annuals or perennials, or ornamental grasses.
size
medium to large
Lilies can grow between 2 – 8 ft tall!
pro tip
lots at stake
Lilies can grow quite tall. Consider staking your lilies to keep them tall and upright.
fun fact
powerful native plants
Lilies are attractive to many insects because of their bright colours and sweet nectar. They can be pollinated by either the wind or bees!
beyond the basics
-
soil + potting
Lilies love to have their roots in cool soil, and their heads in the sun. The best soil option to keep your lilies happy is a rich, moist soil. that is also well-draining. Consider adding in just a little bit of organic compost.
-
companion planting
You can find a wide variety of companion plants from annuals, bulbs to
other perennials. Consider using annuals such as dill, geraniums, pansies, or new guinea impatiens. Dahlias, daffodils, or irises make great companions when planting other bulbs. Perennials such as peonies, daisies and lavender are excellent companions for lilies. -
Blooms
Lilies only bloom once per season. You can remove, or deadhead, faded flowers to keep your plant from wasting energy making new seeds.
-
pest control
The most common pest issues for lilies are infestations of scarlet lily beetles. These little guys like to hang out on the underside of leaves. The easiest way to get rid of these little pests is to catch them manually by holding a bottle of warm water under the leaves you’re inspecting. The bugs will be startled and drop off into the water waiting below.
troubleshooting
-
what are those oval-shaped spots on my leaves?
Lily disease. This is a fungal infection that creates oval-shaped dark spots on your lily’s leaves. Make sure you use clean tools before you get started. Then clear out the infected soil and debris and get rid of the infected plant. Be sure to not plant lilies in an infected spot again.
-
why are the tips of my leaves turning brown?
Could be overwatering, sunburn, or underwatering. If the tip of the leaf is brown and crunchy, this means the soil is likely too dry.
-
why are my buds rotting?
Likely a fungus. Many fungi (Rhizoctonia, Phytophthora, Pythium, Fusarium, and Cylindrocarpon) attack the bulb and cause the roots to rot. This will also cause the plant to wilt, and eventually die. Be sure to remove the infected plants and check all bulbs carefully before planting.
-
why aren’t my lilies blooming?
Could be the result of small bulbs or over-crowding in the soil. Planting your lily bulbs too shallow could also lead to your lily not producing big blooms. If you cut away the leaves after a lily has flowered, it may also decrease the likelihood of flowering the following year. Keep in mind, some lilies won’t flower in their first year of planting due to transplant shock.
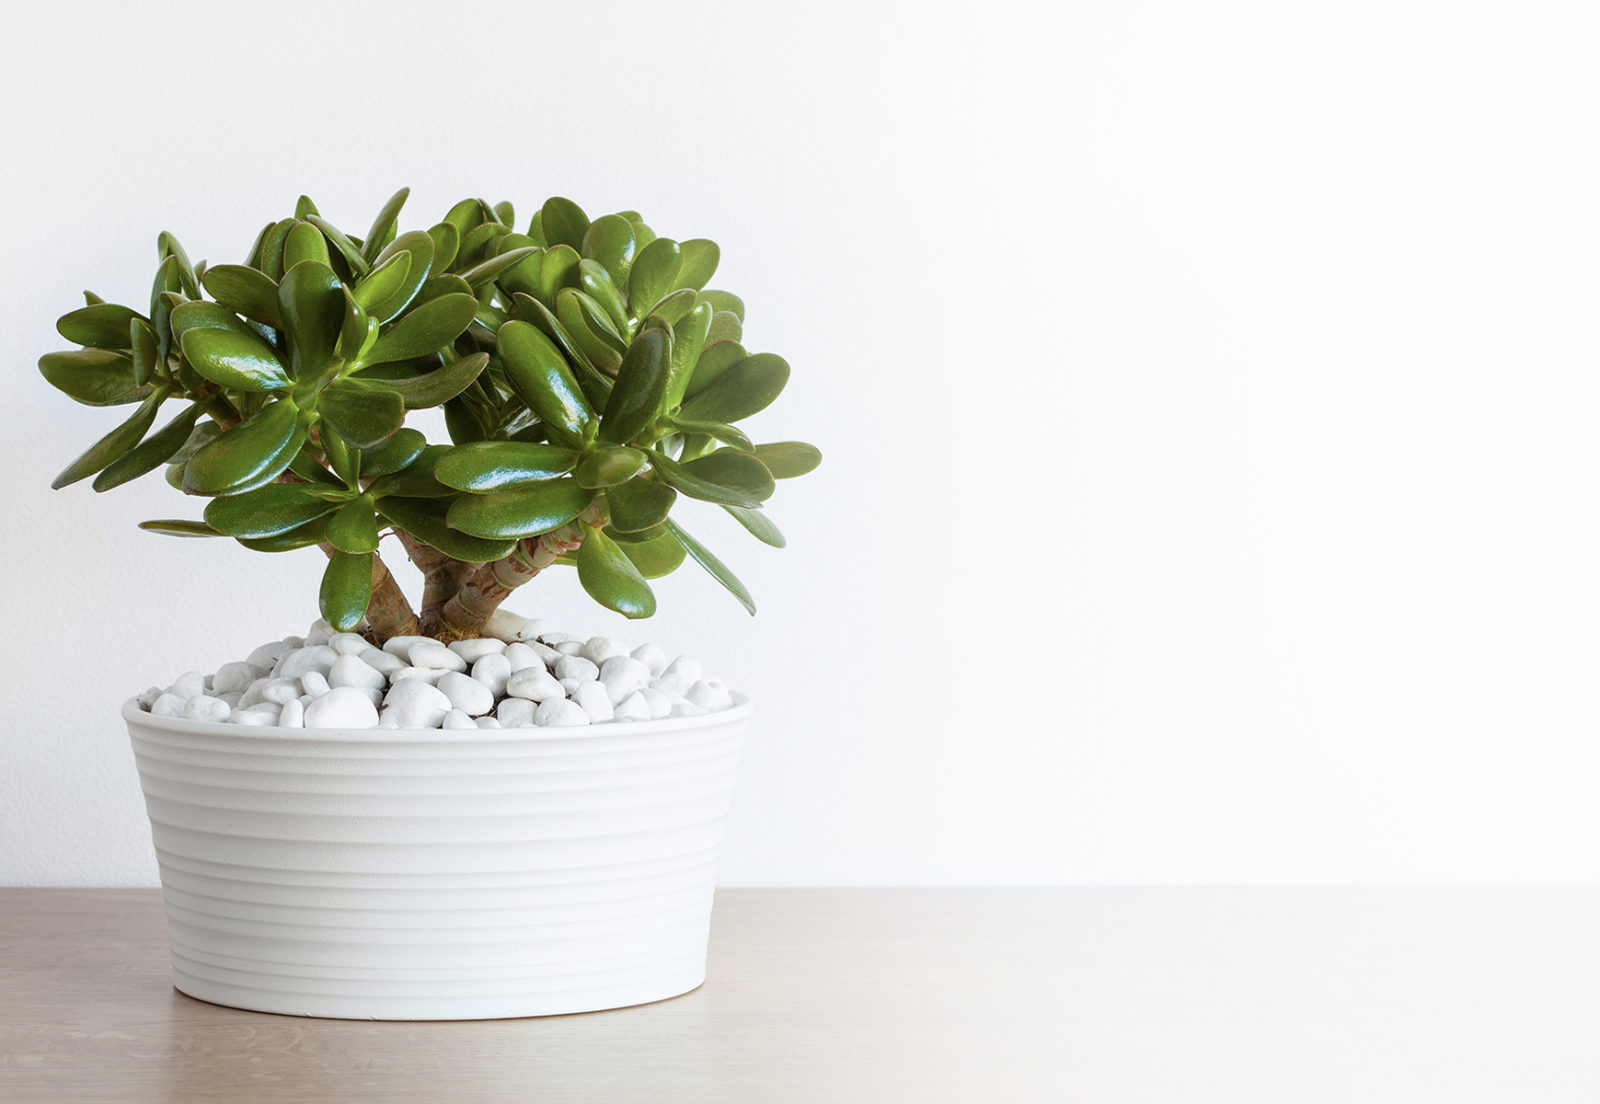
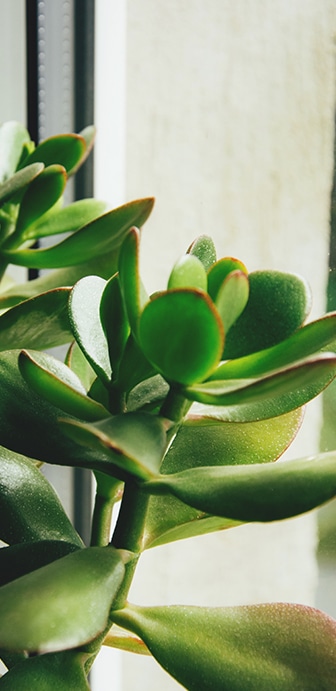
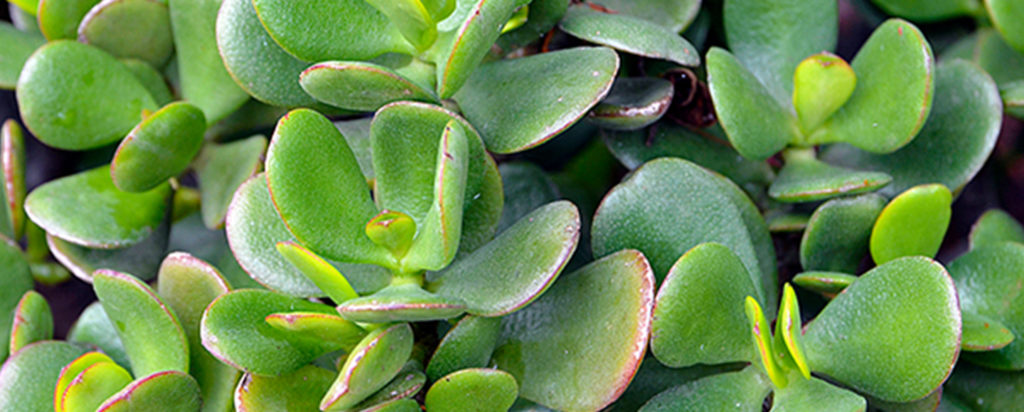
jade
aka crassula ovata
Jade plants are native to South Africa and are classified as a succulent. Jade plants have oval shaped, fleshy leaves and stems that look like tiny tree trunks.
variations
there are a variation of jade plants available that range from the common green-leaf to more rare variegated varieties. Variegated jade plants can include the tricolour, ET’s Finger or the Hummel’s Sunset variety.
light
bright, indirect.
Jade plants, especially young plants, should get about 6 – 8 hours of light a day.
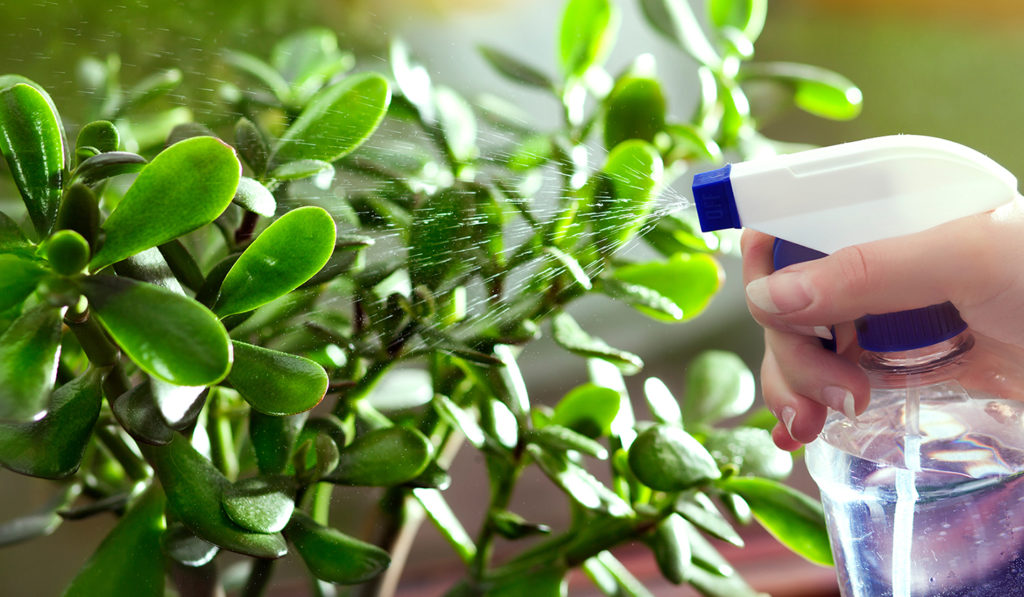
water + feeding
somewhat thirsty
In spring and summer your jade plant should be watered consistently so that its soil is moist, but not super wet.
toxic
Yes
Jade is toxic to pets.
location
Adaptable
These beautiful plants do well in most indoor settings, but prefer to be close to bright, indirect light. Jade does their best growing in room temperature 18° to 24°C (65° to 75°F).
humidity
a little finnicky
Overwatering and standing water are the most common mistakes made with jade plants. Be sure to monitor your jade for signs of too much moisture.
size
it depends
Jade plants can grow up to 5 ft tall but can stay small if they are rootbound in a small pot.
pro tip
rare flowers
Jade plants don’t regularly flower when grown indoors. To get your jade plant to flower keep it rootbound and in a small pot. Cut back slightly on watering, and you may see a bloom come through.
fun fact
bringers of good luck
Jade is often given as a housewarming gift because it’s thought to bring good luck.
beyond the basics
-
soil + potting
Succulents thrive in porous, well draining potting mix. These usually have less organic matter than regular indoor potting mix. A mix like Miracle-Gro® Cactus, Palm & Succulent Potting Mix is well-draining and won’t compact. Don’t forget to feed your plants consistently during the feeding season.
-
when to repot
Repotting a young jade plant every 2 – 3 years will encourage growth. If you want to keep your jade plant small, they enjoy being slightly rootbound and can stay in a small pot to maintain a manageable size. Always repot in the spring.
-
propagation
Propagating a jade plant is super easy! You can start a whole new jade from just a single leaf or cutting. Remove a leaf or stem cutting from a healthy, mature plant, making sure it’s about 2-3 inches long and has at least 2 leaf pairs. Let the cutting sit in a warm, bright place for several days to develop a little callous. Place the cutting in moist, well-draining soil, keeping it propped upright with rocks. Be sure not to water your jade cutting at this point. After a week or two roots should start to form. Gently water the soil once roots have formed, and allow soil to dry between watering.
-
pest control
Jade is prone to mealybugs and scale. Mealybugs may hide under the leaves of your plant. During your routine leaf cleaning, inspect the underside. Most pests can be managed by using an insecticidal soap such as Ortho® Bug B Gon® ECO Insecticidal Soap. For more tips, check out our Pest control section in Plant 101 for how to identify and deal with pests on your plant!
troubleshooting
-
why are my leaves dropping?
Overwatering. While young jade plants need thorough watering, if your jade’s leaves are squishy and dropping it’s definitely getting overwatered.
-
why are my leaves shrivelling?
Underwatering. These are clear signs that your jade is asking for more frequent or deeper watering.
-
why are the stems getting squishy?
Root rot. Do a quick inspection of your plant’s root ball. A healthy root will be firm a white. If your plant’s roots are looking brown or slimy, it’s definitely root rot. To avoid this, be sure the soil is drying out completely between watering.
-
why are my leaves spotty?
You’ve got scale. These insects feed on the sap in your jade’s leaves. You can quickly remedy this problem by applying Ortho® Bug B Gon® ECO Insecticidal Soap.
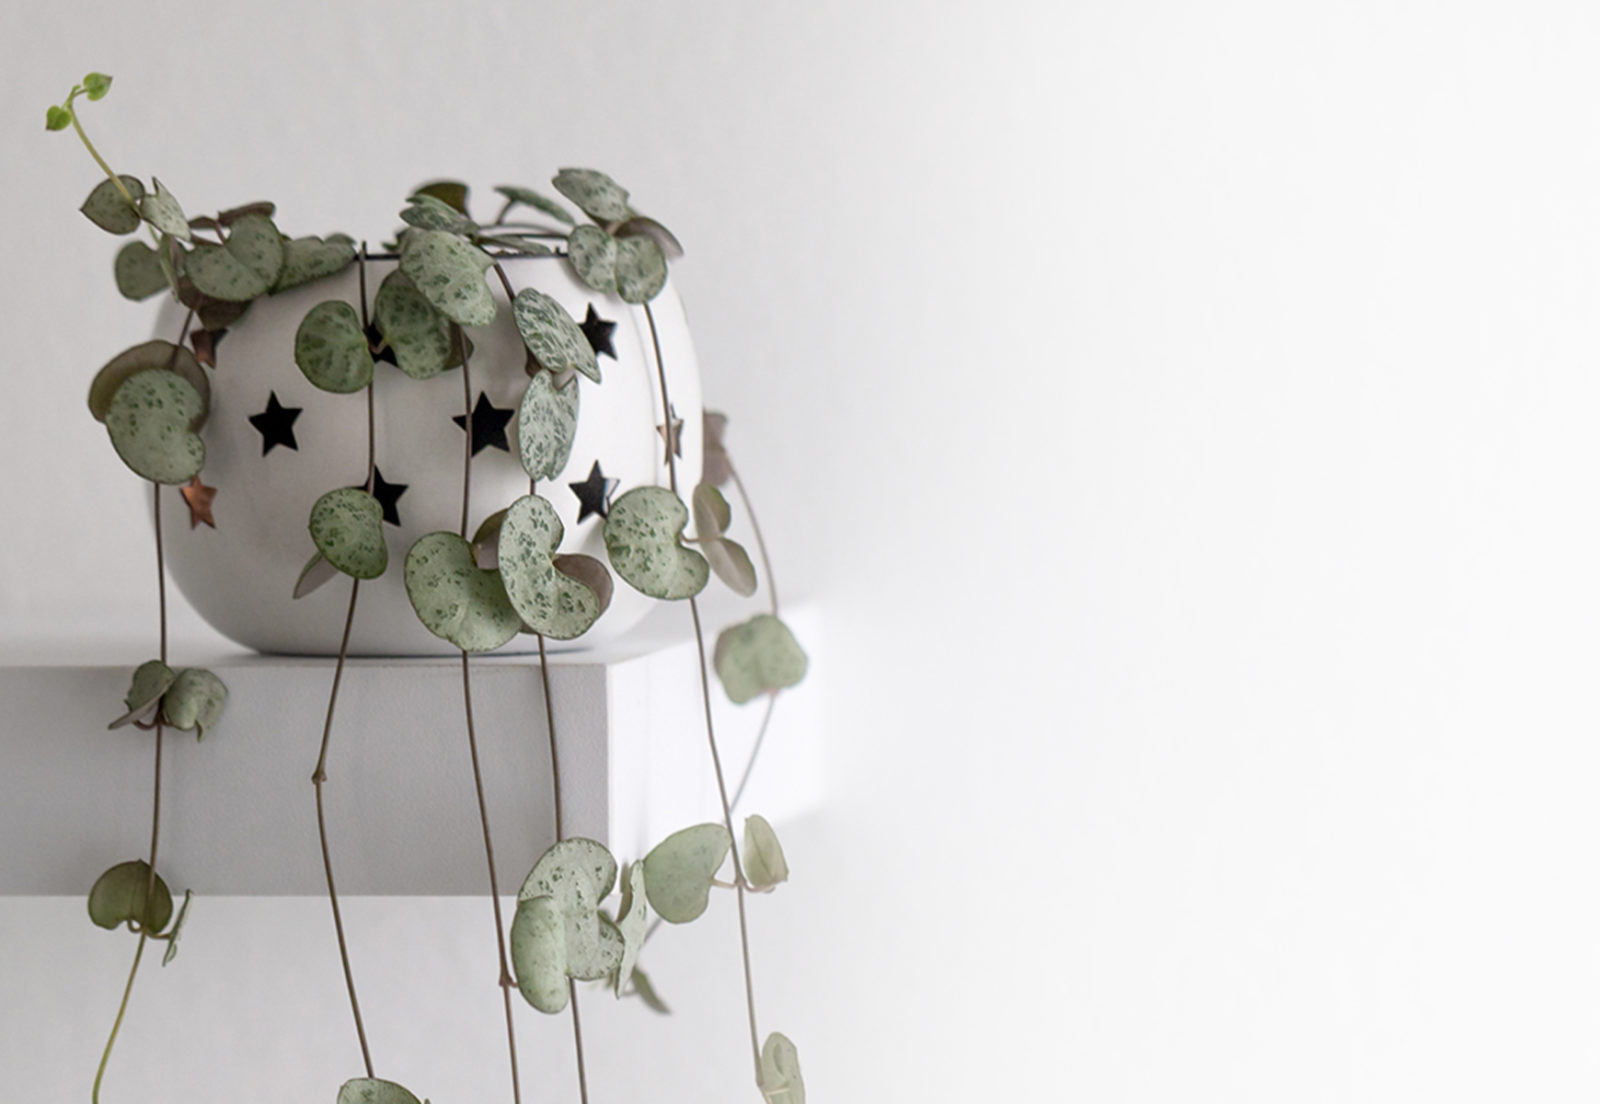
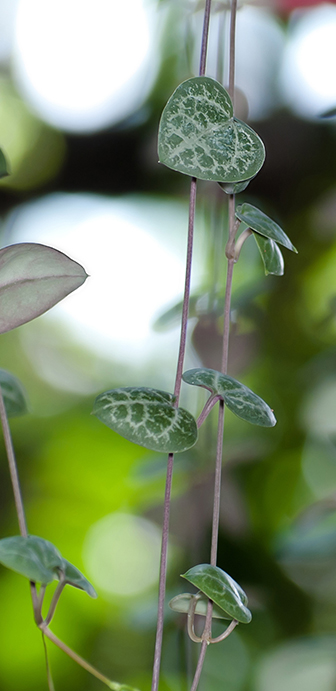
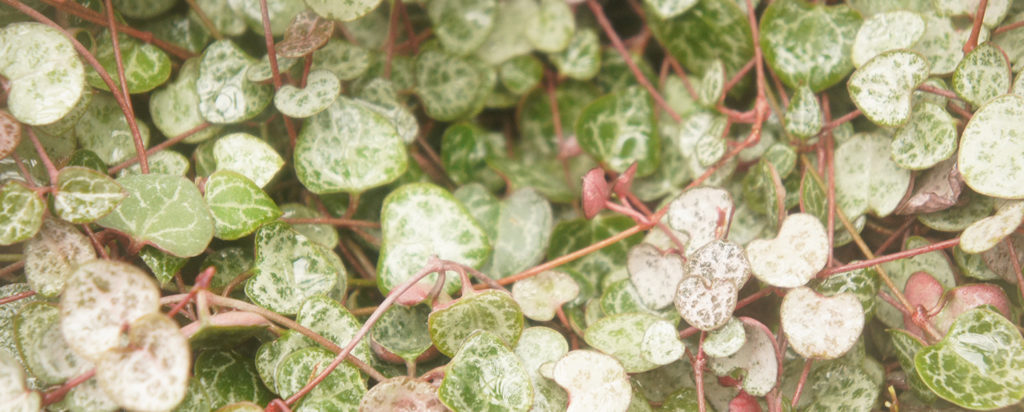
string of hearts
aka ceropegia woodii
this beautiful trailing succulent is native to South Africa, Swaziland and Zimbabwe. This plant is named for the sweet, heart-shaped leaves.
variations
the more sun it gets, the more variegated the leaves will get. Leaves can get silver, cream or even pink markings.
light
bright, indirect.
Ample bright, indirect light will lead to greater variegation in the leaves.
water + feeding
somewhat thirsty
Can be watered 1-2 times a week in the spring and summer, once every week or two during the fall and winter.
toxic
no
This plant is safe for pets.
location
somewhere bright
Place near your brightest window. South or West facing windows is recommended
humidity
not too fussy
Can tolerate drier climate but thrive in about 40-50% humidity.
size
small-ish
Can grow up to 3 inches tall and have trailing stems that can grow to 3 – 9 ft long.
pro tip
sun baths
Colour can be revived by placing your plant by a bright window. Leaves can return to their vibrant colours and even turn pink.
fun fact
fast Growers
They’re fast growers and very easy to care for, making them popular houseplants for beginners.

beyond the basics
-
soil + potting
String of heart plants are a member of the succulent family, so they need a porous, well-draining potting mix that doesn’t retain a lot of moisture because these beauties are prone to root rot. It’s recommended to use a succulent specific potting mix, like Miracle-Gro® Cactus, Palm & Succulent Potting Mix.
-
when to repot
String of hearts tend to be okay with staying slightly rootbound, so you don’t need to keep a strict schedule when repotting. A good rule of thumb is to repot about every 1 – 2 years. Use a pot that is a few inches bigger than its current pot and has a drainage hole.
-
propagation
Start by trimming your string of hearts just under a nodule. Place your cutting in moist soil and watch your new plant take root. This process will likely take about a month. Make sure the soil is kept moist during this growing period.
-
pest control
String of hearts are prone to root rot, so make sure your plant’s soil is drying out between watering. Other pests like aphids or mealybugs can be managed by using an insecticidal soap such as Ortho® Bug B Gon® ECO Insecticidal Soap.
troubleshooting
-
why are there big gaps between my leaves?
Not enough light. Move your string of hearts to a place where it can sit in ample indirect, bright light.
-
why are my leaves turning mushy and droopy?
Overwatering or root rot. Root rot is caused by overwatering. The easiest way to tell if it’s root rot or just overwatering is to give it a sniff. If your plant smells bad, it’s root rot. If it smells okay, just hold off on watering it for a little the soil dries out a bit.
-
why are my leaves turning brown?
Sunburn. It looks like your string of hearts is getting too much sun. These plants enjoy bright, but indirect light. Move your plant away from direct sunlight, but keep in a nice, bright room.
-
why are my plant’s leaves curling?
Underwatering. Thinning or curling leaves is a clear indicator of underwatering. Give your string of hearts a good soak and your plant should be happily re-hydrated.
