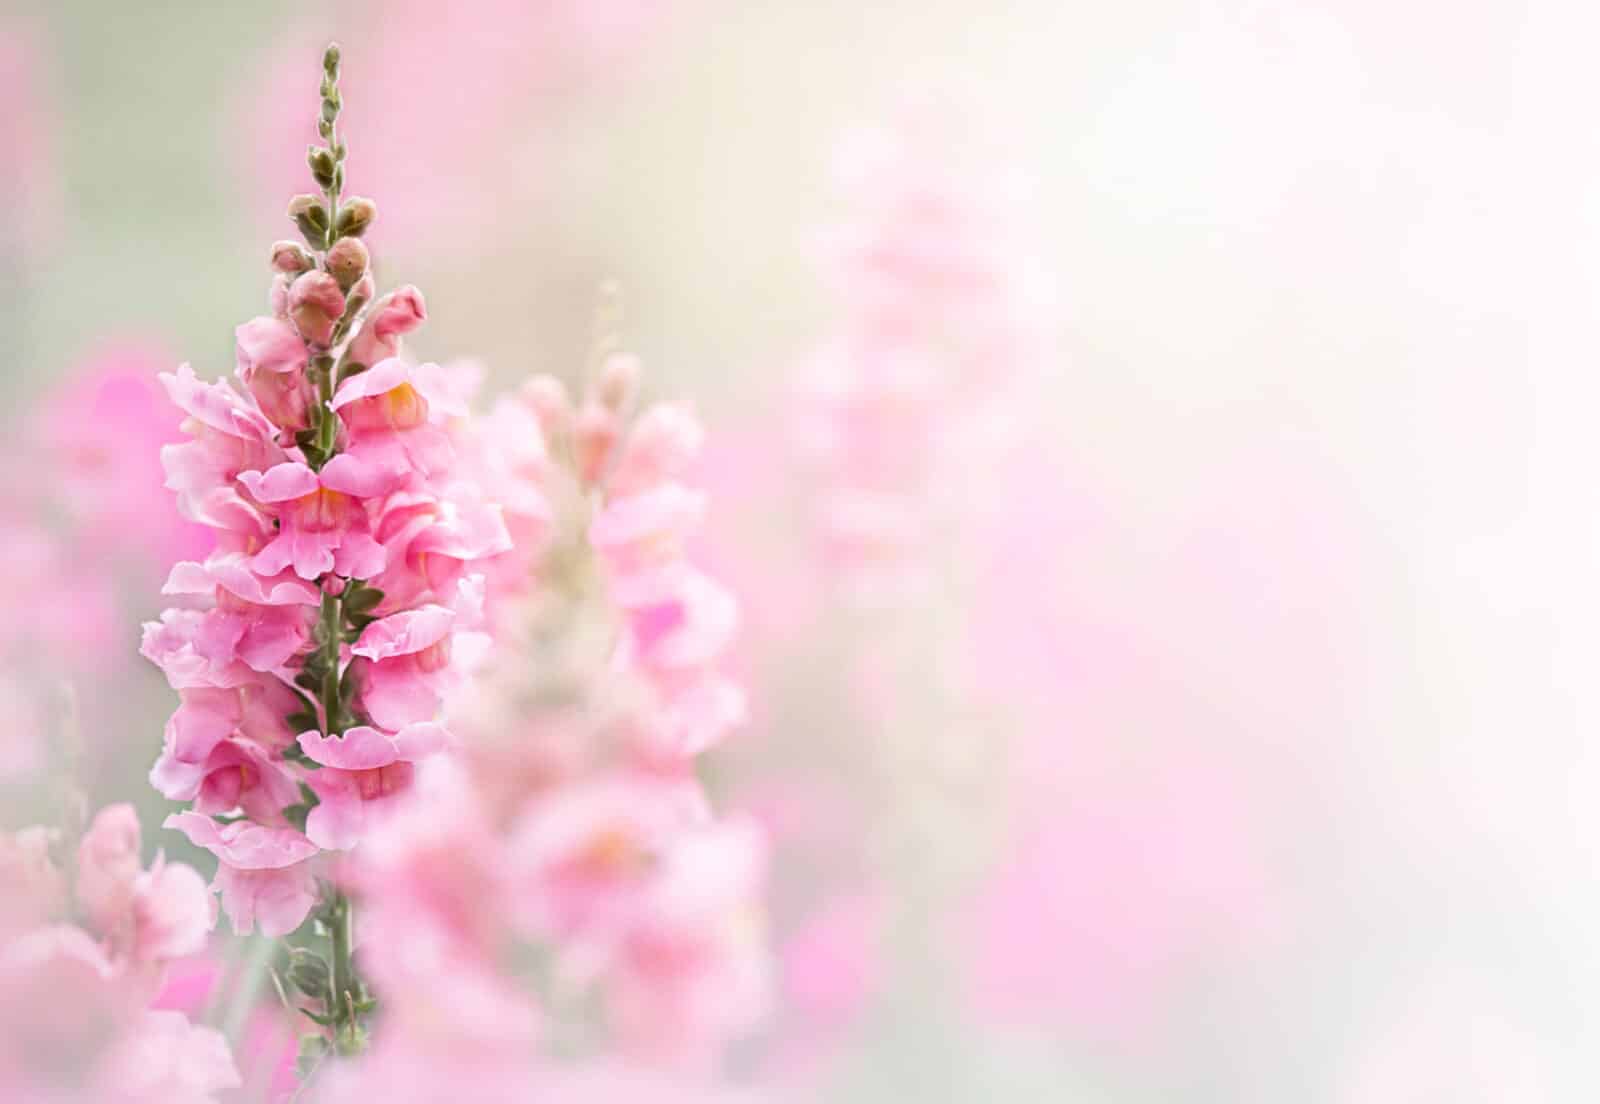
snapdragons
aka antirrhinums, dragon flowers, and dog flowers
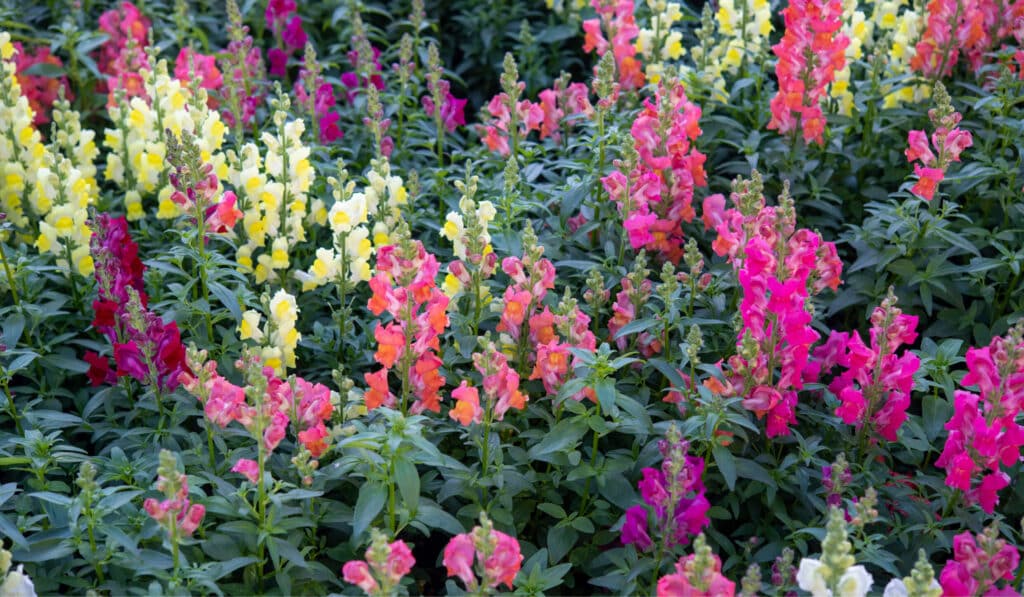
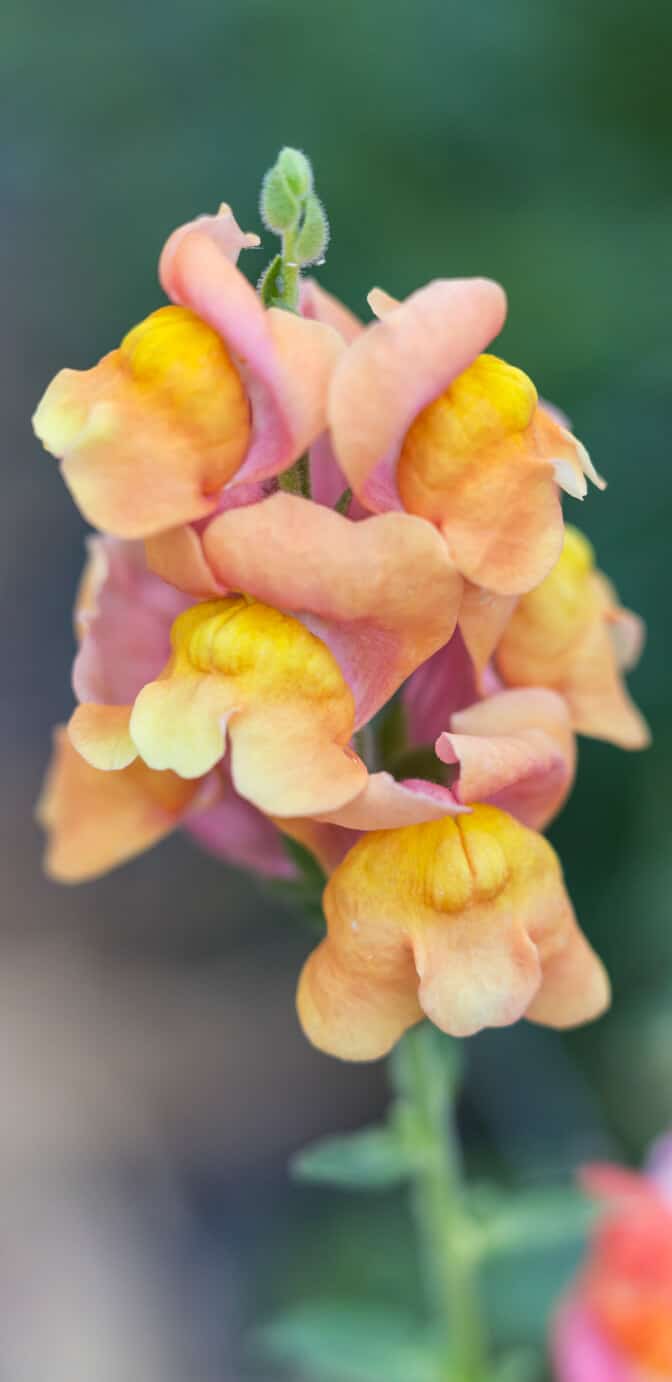
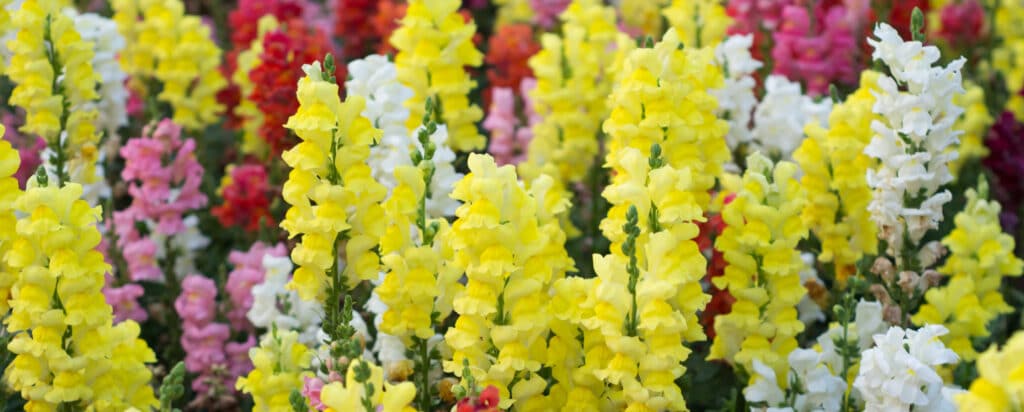
Snapdragons are a beloved choice for cottage gardens and perennial flower beds, adding charm and beauty to any landscape. These flowers possess a unique charm with their dragon-like flower heads and a stunning range of colours including white, yellow, pink, orange, and purple.
variations
Tall snapdragons, Dwarf snapdragons, Twining snapdragons (climbing snapdragons), and Angelonia snapdragons.

light
full sun
For best blooming results, make sure they receive at least 6 hours of direct sunlight daily.

water + feeding
thirsty
Snapdragons are somewhat drought-tolerant and prefer a good drink followed by a period of dryness.

toxic
yes
While Snapdragons are safe for humans they can lead to an upset stomach for furry friends.

size
it depends
Snapdragons come in different sizes depending on the variation. On average, they grow between 1 and 3 feet tall. Dwarf varieties only reach up to 10 inches, while larger species can reach 4 feet.

pro tip
give them room to bloom
Snapdragons like to have a bit of personal space. Make sure to leave about 6 to 12 inches between each plant to provide ample space for them to expand and thrive. Plus, it can actually help prevent the spread of diseases. These aren’t wallflowers—they like a little room to show off their vibrant blooms!

fun fact
snap it open!
The name ‘Snapdragon’ comes from an old superstition that says if you hold the flower by the stem and squeeze it, its mouth will “snap” open and close. They may not actually snap at you, but it’s still a fun way to engage with these beautiful plants! So don’t be afraid to give them a gentle squeeze and watch their petals snap.
beyond the basics
-
soil and potting
Snapdragons thrive in nutrient-rich, well-draining soil like Miracle-Gro® Moisture Control® Garden Soil. For outdoor planting, choose a sunny spot with ample spacing of 6 to 12 inches. In containers, use a pot that is at least 12 inches deep and wide, providing the roots with enough space to expand and thrive. Also, make sure the pot has good drainage to keep those roots from getting waterlogged.
-
companion planting
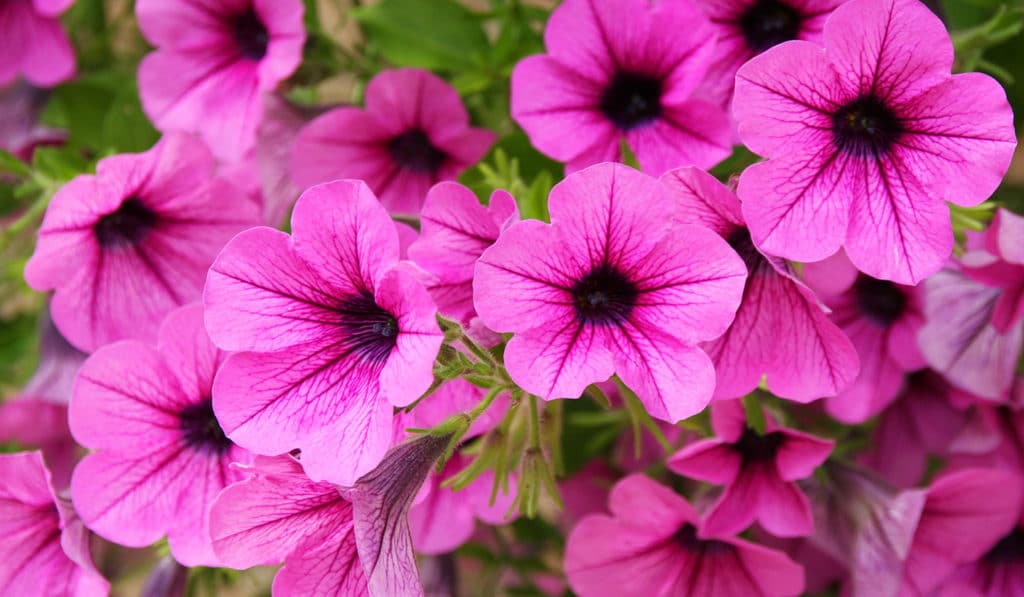
Snapdragons are versatile plants that effortlessly blend into any garden. They complement summer blooms like petunias, lavender, and sunflowers, as well as aromatic herbs like rosemary and sage.
-
blooms
Different varieties of snapdragons have single, double, or frilly petals and come in many vibrant colours. The most common variations are tall snapdragons that feature flowers with broad petals on strong stems, dwarf snapdragons that boast delicate blooms in an array of colours on short stems, and double snapdragons which feature multiple rows of ruffled petals.
-
pest control
Snapdragons generally are resistant to pests, but it’s important to keep an eye out for aphids and thrips. If you happen to spot any of these pests, it’s recommended to employ natural methods such as using an insecticidal soap like Ortho® Bug B Gon® ECO Insecticidal Soap or rinsing the foliage thoroughly with a forceful stream of water to dislodge any potential invaders.
troubleshooting
-
why aren’t my snapdragons blooming enough?
Insufficient sunlight exposure or subpar fertility conditions. To ensure your Snapdragons thrive, ensure your plants receive a minimum of 6 hours of direct sunlight each day. To improve soil fertility, you can enhance it by incorporating a nutrient boost like Miracle-Gro® Water Soluble All Purpose Plant Food. This will enrich the environment for your plants and promote their growth. Also, to encourage the formation of new buds, try deadheading to clear up any withered blossoms.
-
why are my snapdragon’s leaves powdery?
Fungal disease. This tends to appear in warm and humid climates. To prevent and treat this condition, ensure adequate air circulation between plants by leaving sufficient space when planting, avoid wetting the foliage during watering sessions, and use fungicides if necessary.
-
why does it look like my snapdragons are wilting?
Over watering or under watering. Excess moisture can result in root rot, hindering your flowers’ ability to absorb essential nutrients. Conversely, a lack of moisture can cause your flowers to dry out or wither. To ensure optimal growth, carefully assess soil moisture levels and adjust watering practices accordingly.
-
why are my snapdragons falling over?
Insufficient sunlight. To address this, try moving the plant to a spot that ensures 6 hours of sunlight. Additionally, consider pruning the leggy stems and using supports such as stakes or trellises to help the stalks stand tall.
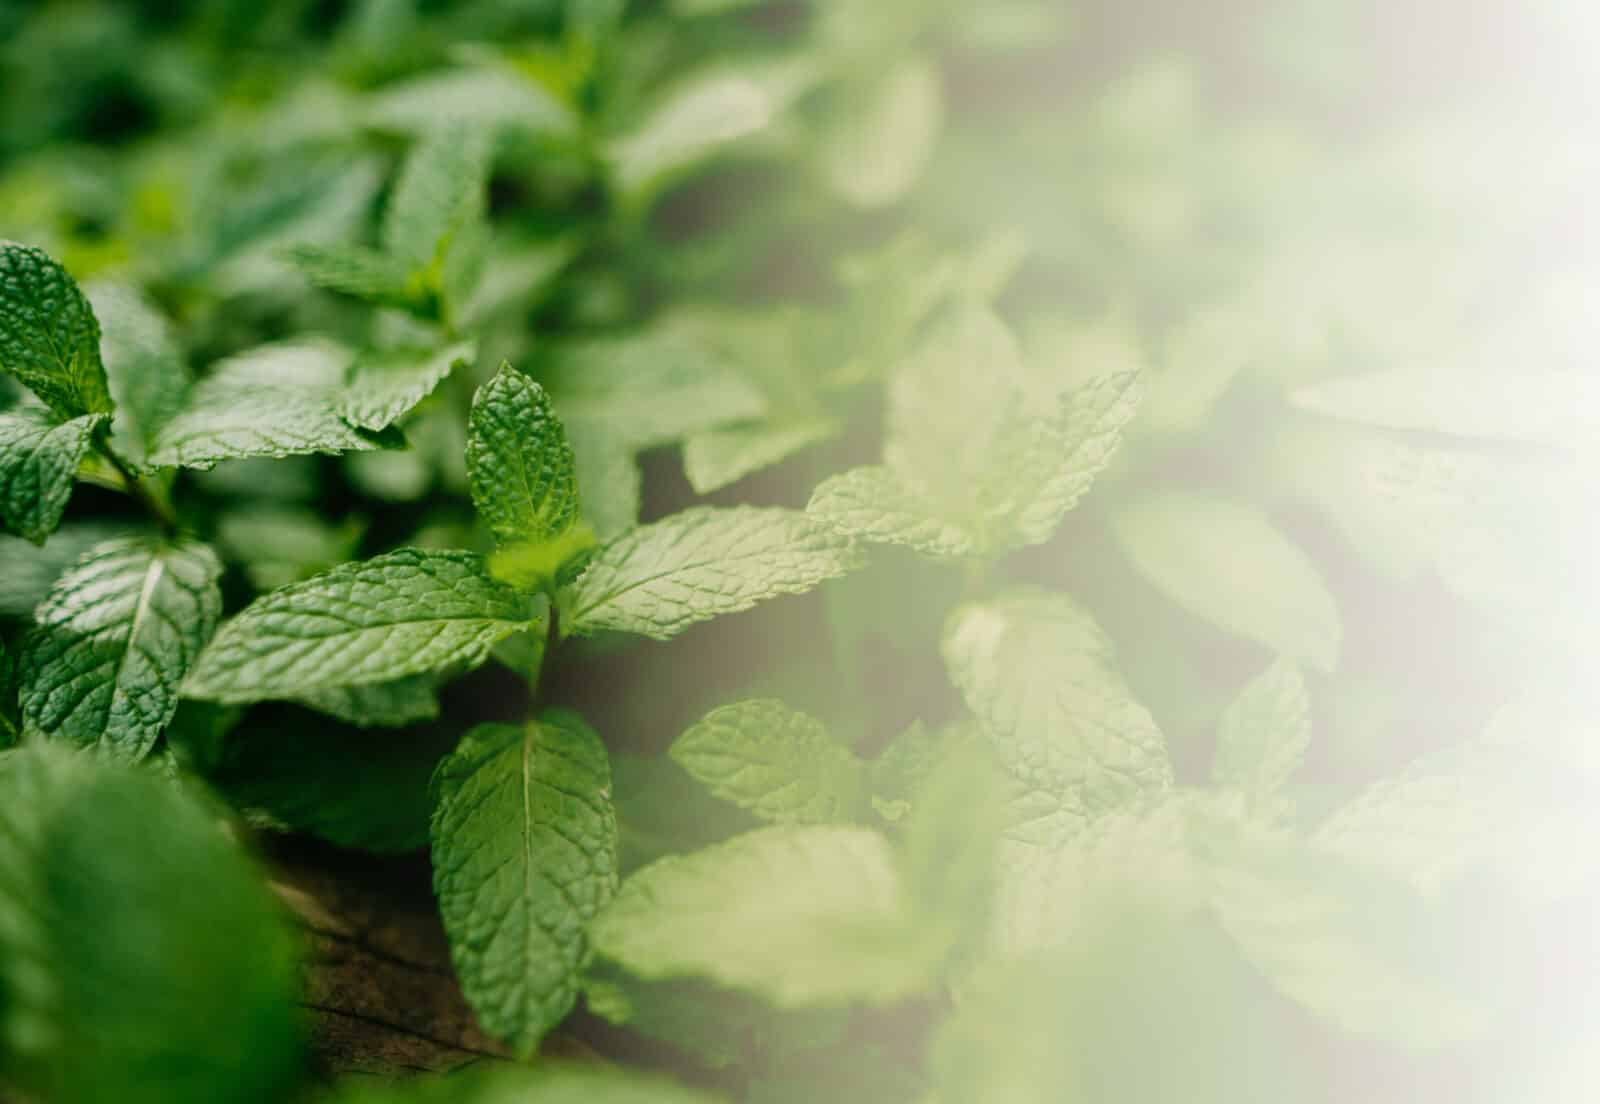
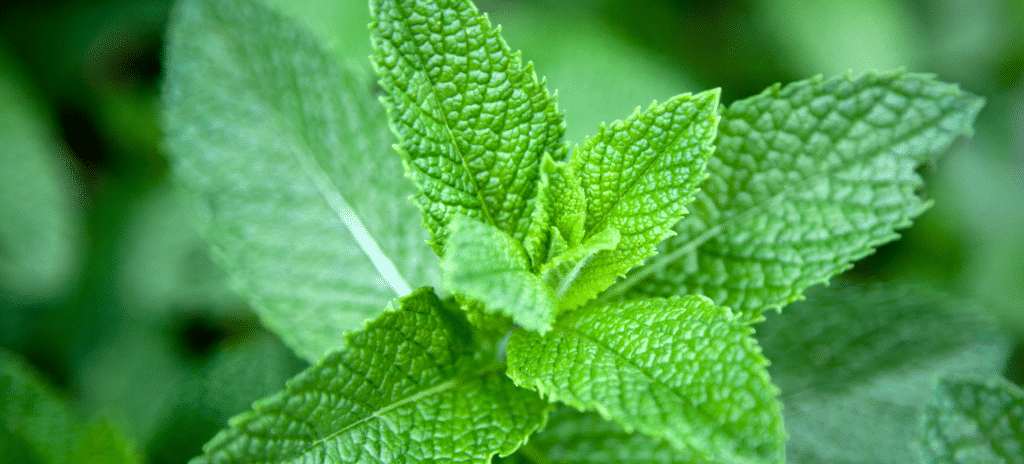
mint
aka mentha
Mint is an easy, fast-growing herb that is used in drink and food recipes. It is a perennial herb that grows little white and purple flowers. There are over 30 different variations of mint, but the most commonly grown is spearmint and peppermint.
variations
Apple/Pineapple Mint, Corsican Mint, Pennyroyal, Peppermint, Citrus Mint, Spearmint
light
full sun
If the soil is nice and moist, full sun is okay. Mint can also thrive in partial shade.
water + feeding
thirsty
Should be watered at least twice a week.
toxic
no
This plant is safe for animals to nibble on.
size
small to medium
Mint can grow to between 1 – 2 feet tall.
pro tip
An effective remedy for headaches
If you are prone to tension headaches, you can make a compress out of mint leaves for your forehead or rub peppermint oil on your temples.
fun fact
Ancient origins
Mint was used in ancient Greece, Rome, and Egypt
beyond the basics
-
soil + potting
Mint does not need to be fussed over which makes it perfect for first-time gardeners. When planting your mint consider using a well-draining soil that can help with moisture control, like Miracle-Gro® All Purpose Garden Soil. This soil helps to prevent from over- and under-watering your mint plant.
-
companion planting:
Luckily, mint is an easy herb to find companion plants for. You can take your pick of popular home garden veggies such as: carrots, cabbage, kale, tomatoes, bell peppers, beans and even zucchini.
-
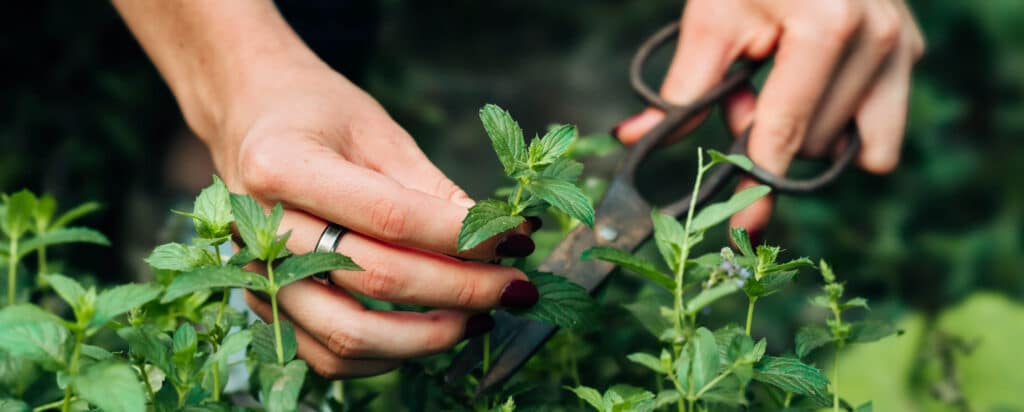
harvesting
Frequent harvesting is important to keeping your mint flourishing. Young leaves have more flavour than older leaves. With this in mind, you can start harvesting your mint as soon as it comes up this spring.
-
pest control
If you see your mint plant drooping, there might be a pest problem. Common pests you might see with mint plants are aphids, mealy bugs, spider mites, or flea beetles. If you are seeing curling leaves or holes in your leaves, these are tell-tale signs of pests. Don’t worry, there is an easy fix. You can use a gentle insecticide like Ortho® Bug B Gon® ECO Insecticidal Soap Ready-To-Use to safely and quickly get rid of those little nuisances.
troubleshooting
-
What do I do with my mint once I harvest it?
You’ve got options.
Once you pick a few sprigs from your mint plant, you can keep them in water for a few days. It is best to use your mint while it is fresh, about 3-5 days. If you are looking to dry your mint leaves, cut them right before flowering and let the leave air dry. Once dry, store the dried mint in an air-tight container.
Or you can just pick the leaves from your mint plant as you need them.
-
Why is my mint looking leggy?
More sunlight. Most of the time, if your mint plant is looking thin and leggy it is lacking sunlight or water or nutrients. The best way to prevent mint from getting leggy is to make sure it is growing in a warm spot that gets lots of light. Keep it in a big pot with well-draining and nutrient rich soil.
-
Why is my mint turning crispy and brown?
Under-watering. This is easy to fix. Try watering your mint on a schedule, aiming for once or twice a week. Be sure to water under the leaves and close to the soil so you don’t damage the leaves.
-
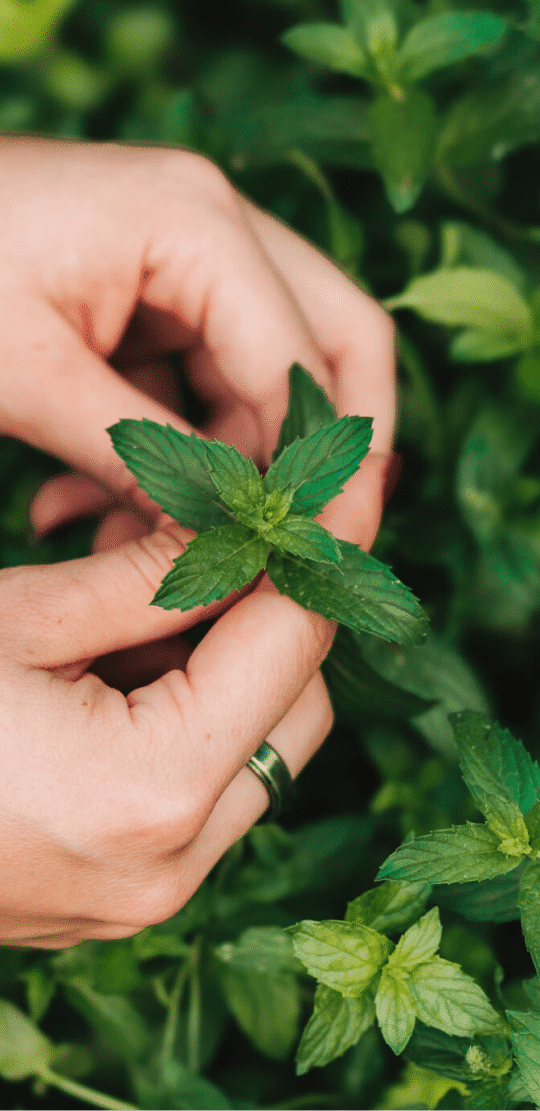
How do I know if my mint is healthy?
Healthy, ready to use mint is a deep, rich green. If your mint is yellow and falling, it is likely due to its growing conditions. Keep your mint plant in full or partial sun, with a well-draining potting mix like Miracle-Gro® All Purpose Garden Soil. Make sure you water your mint whenever the top of the soil is dry, usually about twice a week.
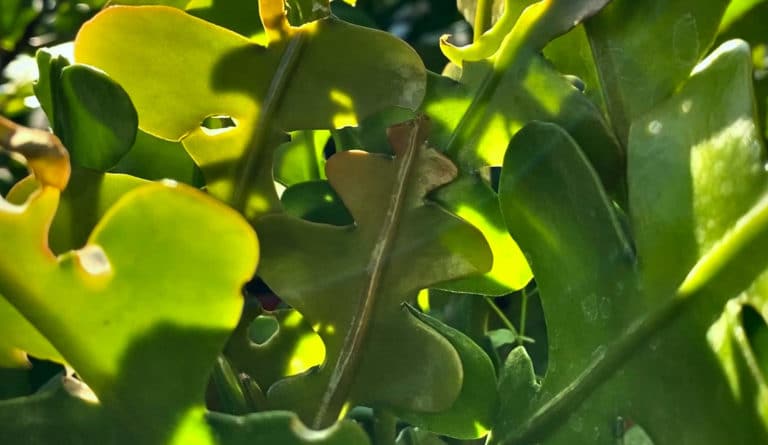
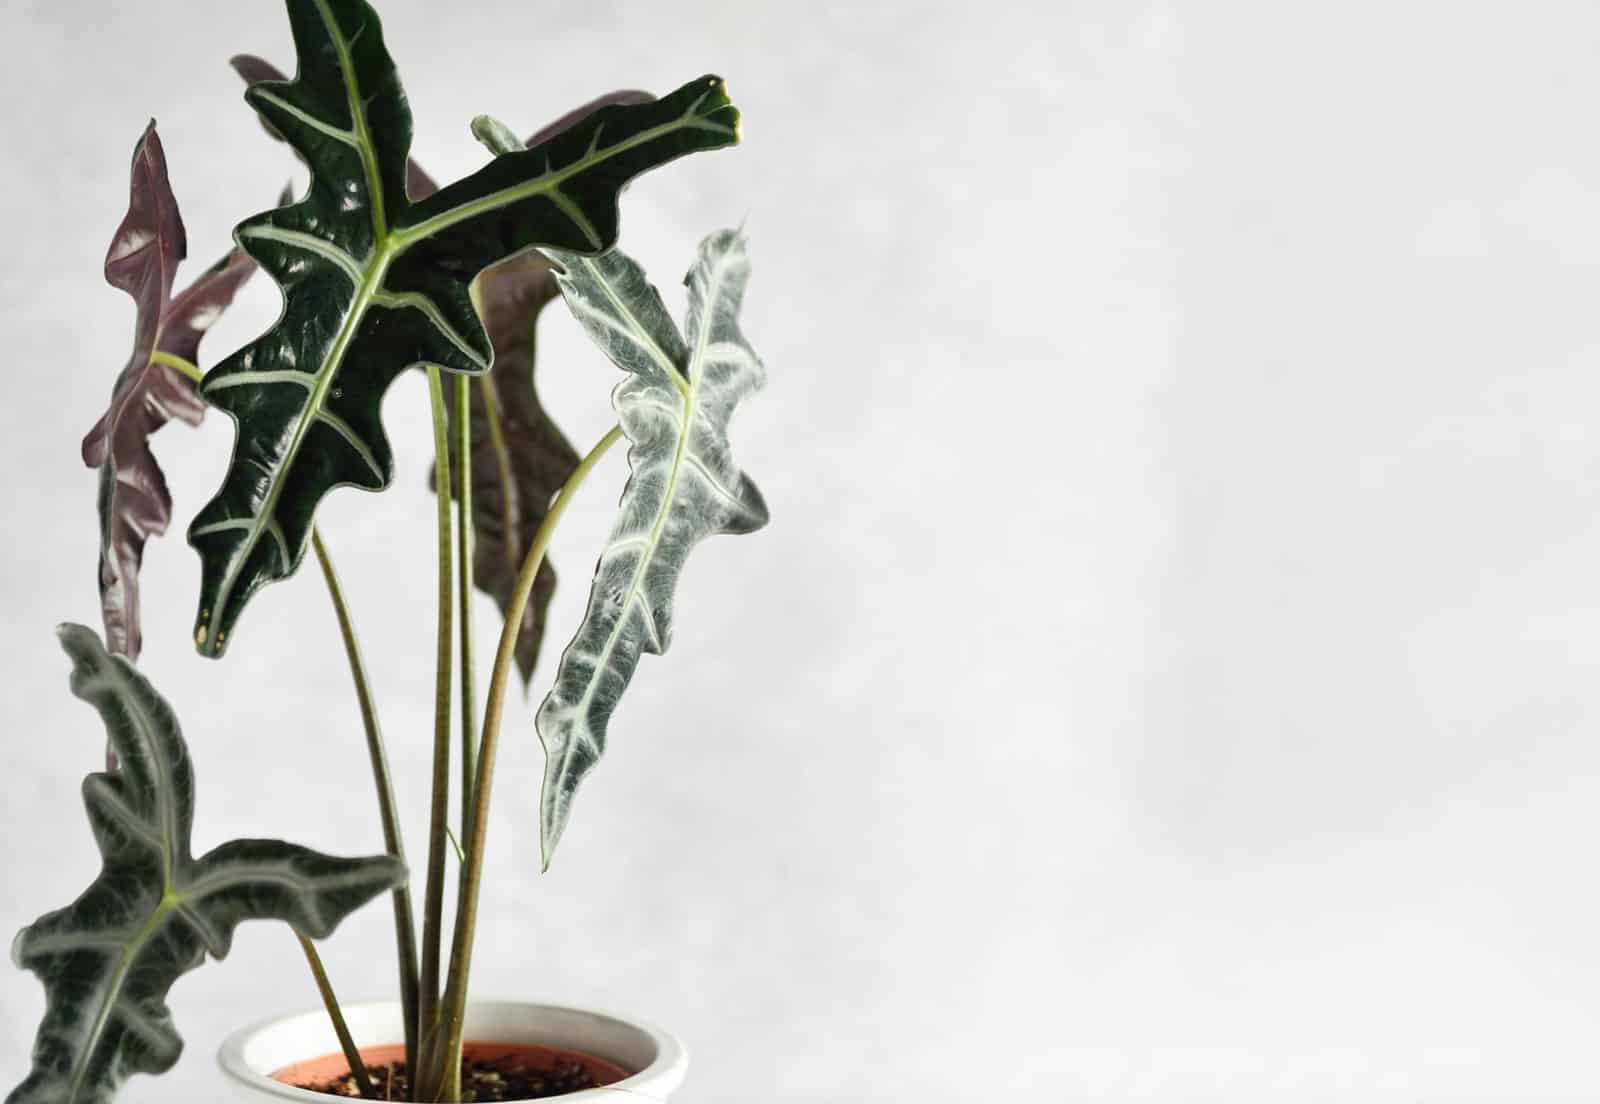
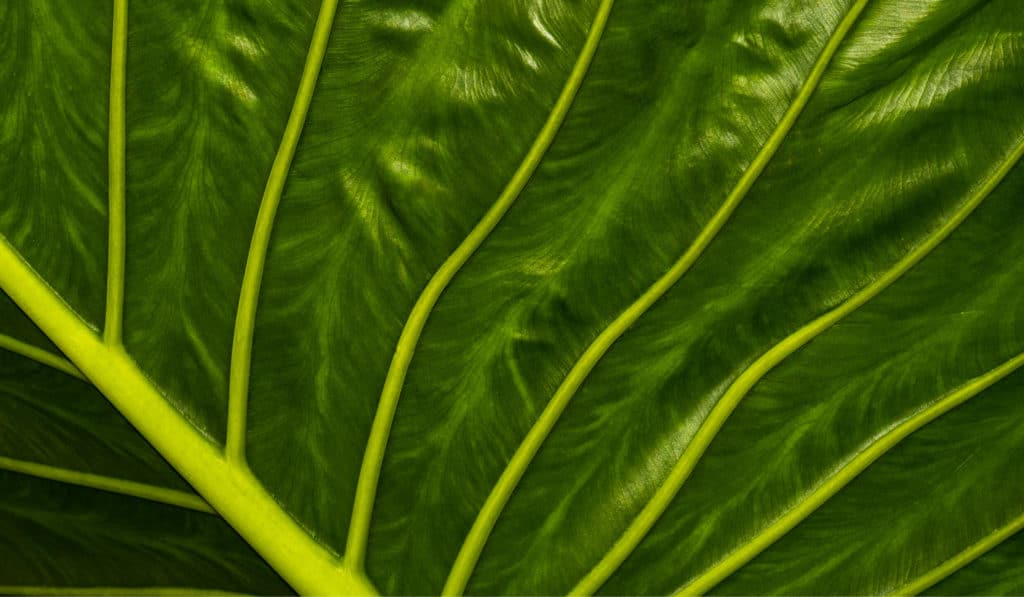
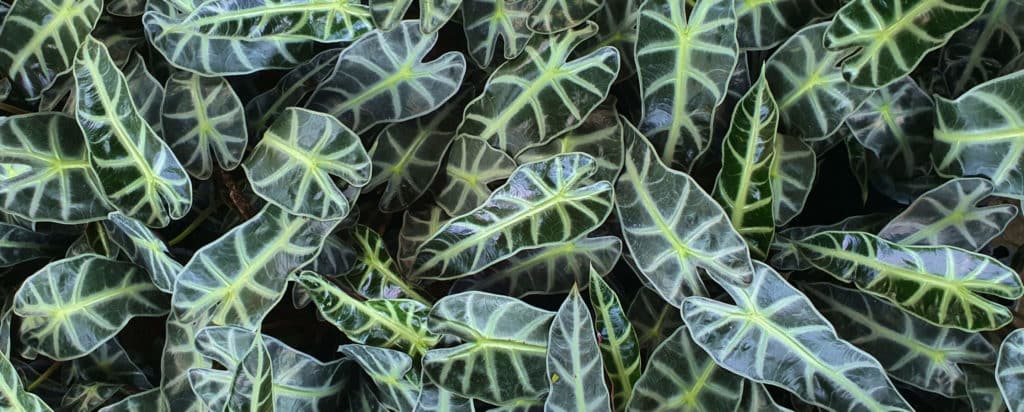
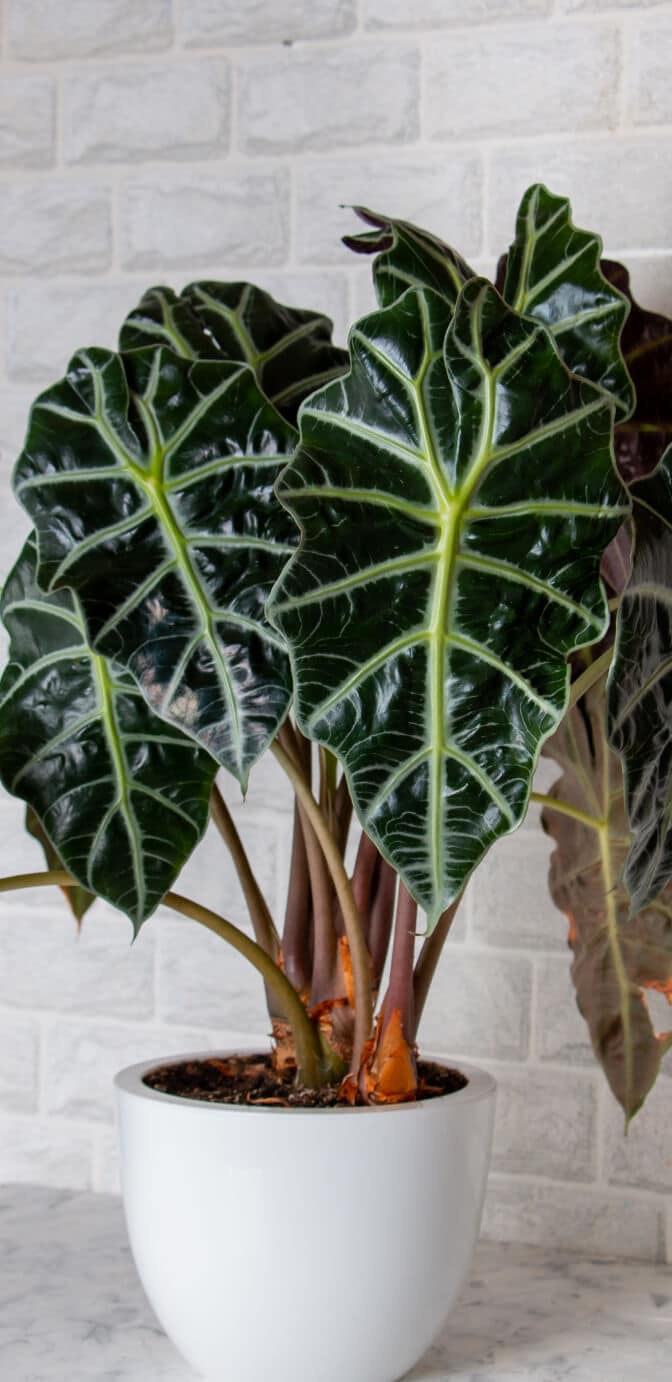
alocasia
aka alocasia
The Alocasia family contains about 70 different variations. They’re tuberous perennials with long stalks. Alocasia leaves vary between being arrow and heart-shaped, and may be interestingly decorated
variations
Alocasia amazonica ‘Polly’, Alocasia amazonica ‘Bambino’, Alocasia amazonica ‘Ivory Coast’, Alocasia micholitziana ‘Frydek’, Alocasia reginula ‘Black Velvet’, Alocasia infernalis ‘Black Magic’, Alocasia rugosa ‘Melo’, Alocasia maharani ‘Grey Dragon’
light
indirect
Place in a spot where it’ll get 6 – 8 hours of indirect light.
water + feeding
not too thirsty
Water until it flows through the drainage hole.
toxic
yes
Should be kept away from your fury friends.

location
a little picky
For spaces that may not get enough light, use a grow light.

humidity
love it
They love high humidity.
size
medium
They can grow between 2 – 6 feet.
pro tip
dry as a bone?
Keep the soil pretty dry throughout the winter, giving it a little water at every 2 weeks.
fun fact
need light and dark
The short days and long nights of fall and winter are perfect for poinsettia. It’s actually what causes them to bloom.

beyond the basics
-
soil + potting
Your Alocasia needs a well-draining potting mix. The Miracle-Gro® Indoor Potting Mix contains coconut coir and perlite to hold onto and release moisture as your plant needs it. If you find that your plant is wanting a little extra, you can add in some Miracle-Gro® Cactus, Palm & Succulent Potting Mix. Adding this succulent mix helps keep your soil light and airy.
-
when to repot
Like most indoor tropical plants, the best time to repot is in the spring or summer, when your plant is strong. Your alocasia will likely want to be repotted every 18 – 24 months. When you’re selecting its new pot, choose one that is about 2 – 4” bigger than its current one.
-
propagation
To propagate your alocasia, use the division method. Remove the plant from its pot and separate a small clump of roots from the main rootball. Replant the small clump into a new pot with fresh soil. Make sure it’s buried at the same depth as the original plant.
-
pest control
Your alocasia may be more prone to spidermites than your other indoor plants. To help prevent those nasty mites from appearing, make sure your plant doesn’t dry out too much over the winter. If you see spidermites on your alocasia, you can use Ortho® Bug B Gon® ECO Insecticidal Soap Ready-To-Use. Spray this insecticidal soap on your plant to eliminate those pesky mites.
troubleshooting
-
Why are my leaves dying?
Not enough humidity or dry soil. Your alocasia could probably use a good watering. If you’re already on a watering schedule and you’re still noticing dying leaves, consider increasing the humidity in the room.
-
Why are my leaves turning yellow?
Overwatering. Allow the soil to dry out a bit before watering your plant again. For future waterings, make sure the soil is about 25-50% dry before watering.
-
Why are my leaves turning brown?
Probably a sunburn. If your alocasia is too close to bright, direct light then it’s time to move it away. Your alocasia wants to be in bright but indirect light, so find a spot that isn’t right in front of a window. If your lighting is okay, then it could be fertilizer burn. To fix this, drain any accumulated fertilizer from the potting mix, or repot with fresh soil.
-
What are these rusty spots on my leaves?
Fungal infection. Poor light and warm, humid conditions can be responsible for fungus. To prevent this make sure the leaves stay as dry as possible. Instead of overhead watering, opt for bottom watering or watering straws instead. Be sure to remove any dead, decaying or diseased plant matter from your alocasia’s pot.
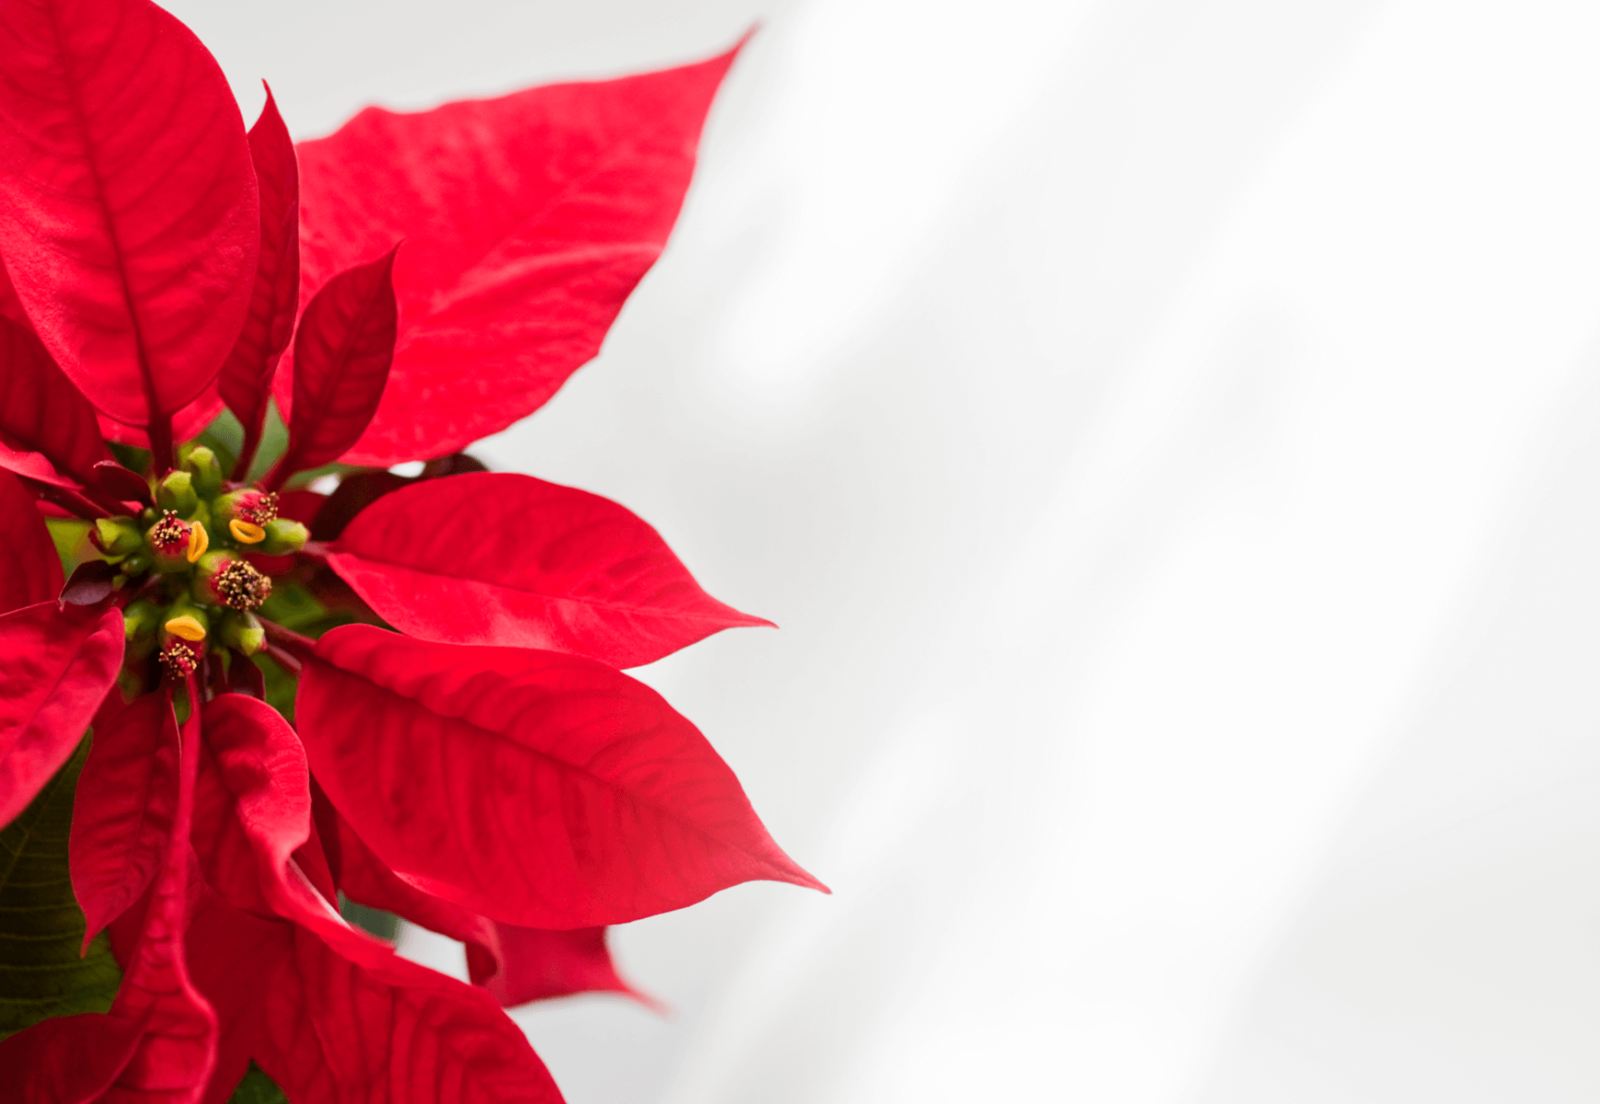
poinsettia
aka euphorbia pulcherrima
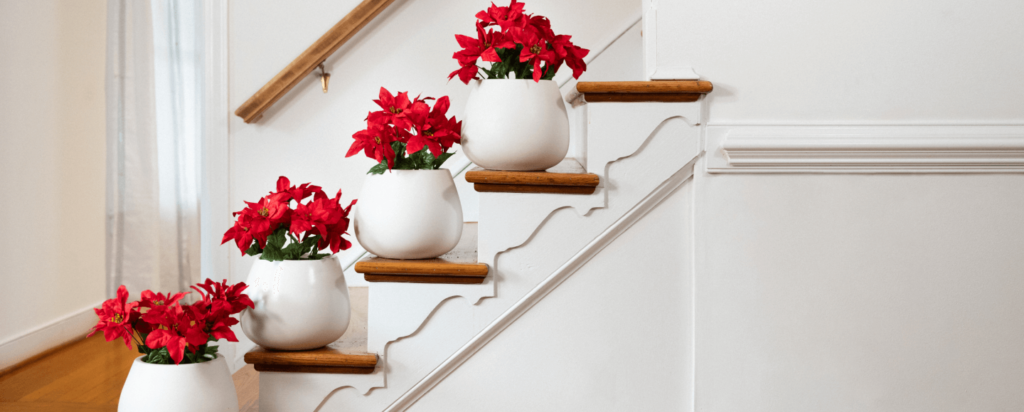
Poinsettia are native to Mexico and Central America. They are often used as decoration and gifts during Christmas holidays.
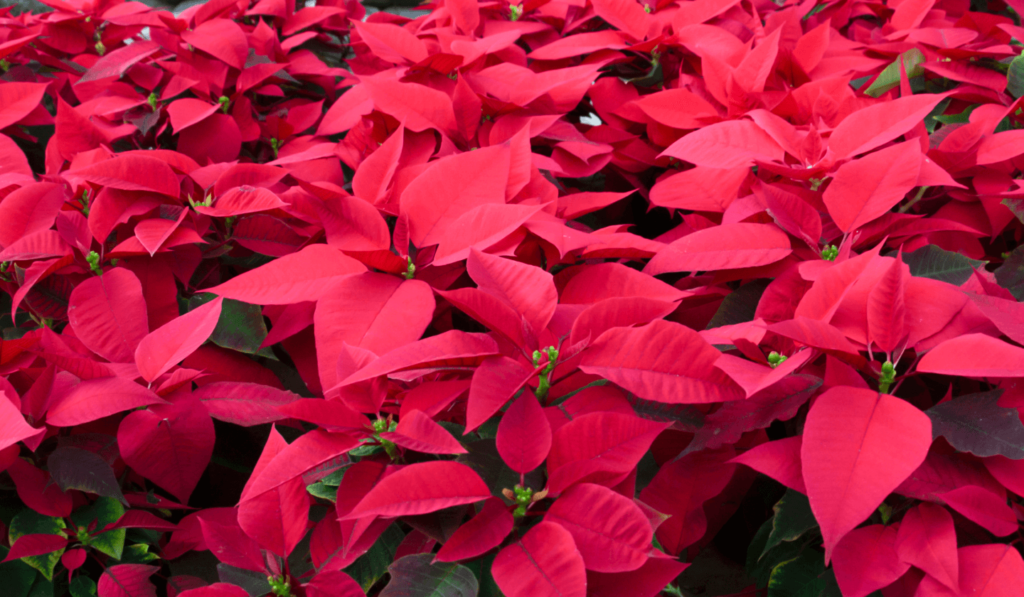
variations
There are over 100 varieties of Poinsettias. Some variations include ‘Premium Picasso’, ‘Monet Twilight’, ‘Shimmer’, and ‘Surprise’ poinsettia.
light
indirect
Need about 6 hours of indirect sunlight daily
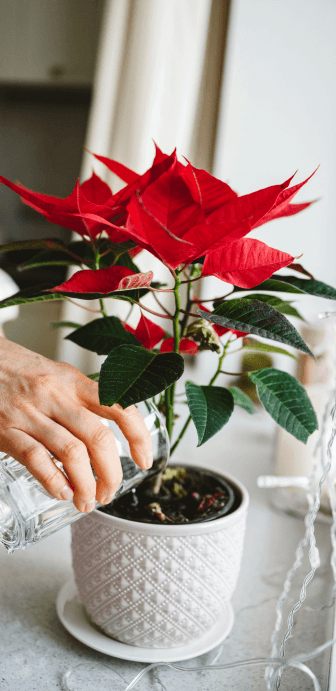
water + feeding
not too thirsty
Water in moderation when soil is dry to the touch
toxic
kind of
They’re not toxic to humans or pets. However, the white, milky sap can irritate some people’s skin and can cause an upset stomach.
location
flexible
They’ll be happy in a semi-shaded or sunny area
humidity
love it
Poinsettia enjoy 50 – 75% humidity, so boost up the moisture
size
small friends
Potted poinsettia will remain small at 8 – 12 inches
pro tip
dry soil is ok
Allow the soil to dry out between watering, especially in the spring.
fun fact
need light and dark
The short days and long nights of fall and winter are perfect for poinsettia. It’s actually what causes them to bloom.
beyond the basics
-
soil + potting
Whether poinsettia is growing indoors or outdoors, they prefer a loose, well-draining potting mix. Consider using Miracle-Gro® Moisture Control® Potting Mix. You can also add Perlite and Peat Moss to your soil for some added nutrients.
-
when to repot
As your poinsettia grows, so does its roots. To avoid your poinsettia getting root-bound, repot it in the spring. It’s generally recommended that by mid-May, your poinsettia will be ready to repot. Choose a pot that is about 2 inches wider and deeper than its current pot. And of course, refresh the soil when you repot.
-
propagation
The most common way to propagate poinsettia is by taking a cutting. Propagating from cuttings ensures a clone of the parent plant. No surprises! To start, wait until the spring to take your cutting. Using sharp scissors or pruners, cut a 3 – 4 inch stem from the parent plant. Then cut off a few of the lower leaves to promote root growth from the cut edge. Be sure to leave at least 3 leaves at the top of the cutting. Transplant your cutting to a small container with well-draining potting mix such as using Miracle-Gro® Seed Starting Potting Mix. Keep your cutting in a bright, humid area, and mist the leaves regularly to stimulate growth.
-
pest control
Whiteflies are the most common pests for poinsettias. Do regular checks under the leaves of your poinsettia and keep an eye out for clumps of greenish eggs. Use a gentle insecticide like Ortho® Bug B Gon® ECO Insecticide Ready-to-Use to easily and quickly get rid of white flies.
troubleshooting
-
Why are my cuttings collapsing?
Bacterial rot. This causes the base or stem of the cuttings to become mushy and eventually collapse. You may also notice a smell surrounding your plant, which is also caused by this bacterial infection. You may be able to mitigate this by proper watering and misting practices. It’s best to cut off misting and watering for a while once you notice the stems are a little soft.
-
Why are my poinsettia’s leaves turning black?
Temperature fluctuations. Sudden temperature fluctuations will shock these tropical plants. To keep your poinsettia happy, make sure it’s in a bright space that can also receive a few hours of shade or darkness. Be sure to keep your plant away from radiators, fireplaces and space heaters too.
-
Why is my poinsettia so pale all of a sudden?
Could be spider mites. These little pests feed off the plant’s sap, causing the leaves to turn pale and sometimes develop little red spots. If you catch spider mites early enough, you may be able to salvage your plant. Use a gentle insecticide like Ortho® Bug B Gon® ECO Insecticide Ready-to-Use to gently take care of this problem. A recovering poinsettia will perk up and brighten up within a week or two.
-
Why are my poinsettia leaves drooping and yellow?
Over- or underwatering. Both over and under-watering your poinsettia will cause its leaves to droop or look wilted. If you’re over-watering your plant, be sure to let its soil dry out a bit. Discard any excess water at the bottom of its pot to prevent it from sitting water and developing root rot. If you’re underwatering, consider boosting your watering routine with Miracle-Gro Indoor Plant Food for the next two watering cycles. You can also start misting the leaves of your poinsettia to increase its water in-take. But don’t overdo it, let the soil dry out a bit between watering.
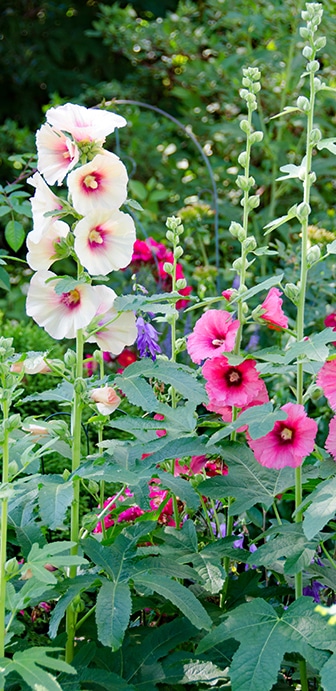
hollyhocks
aka Alcea rosea
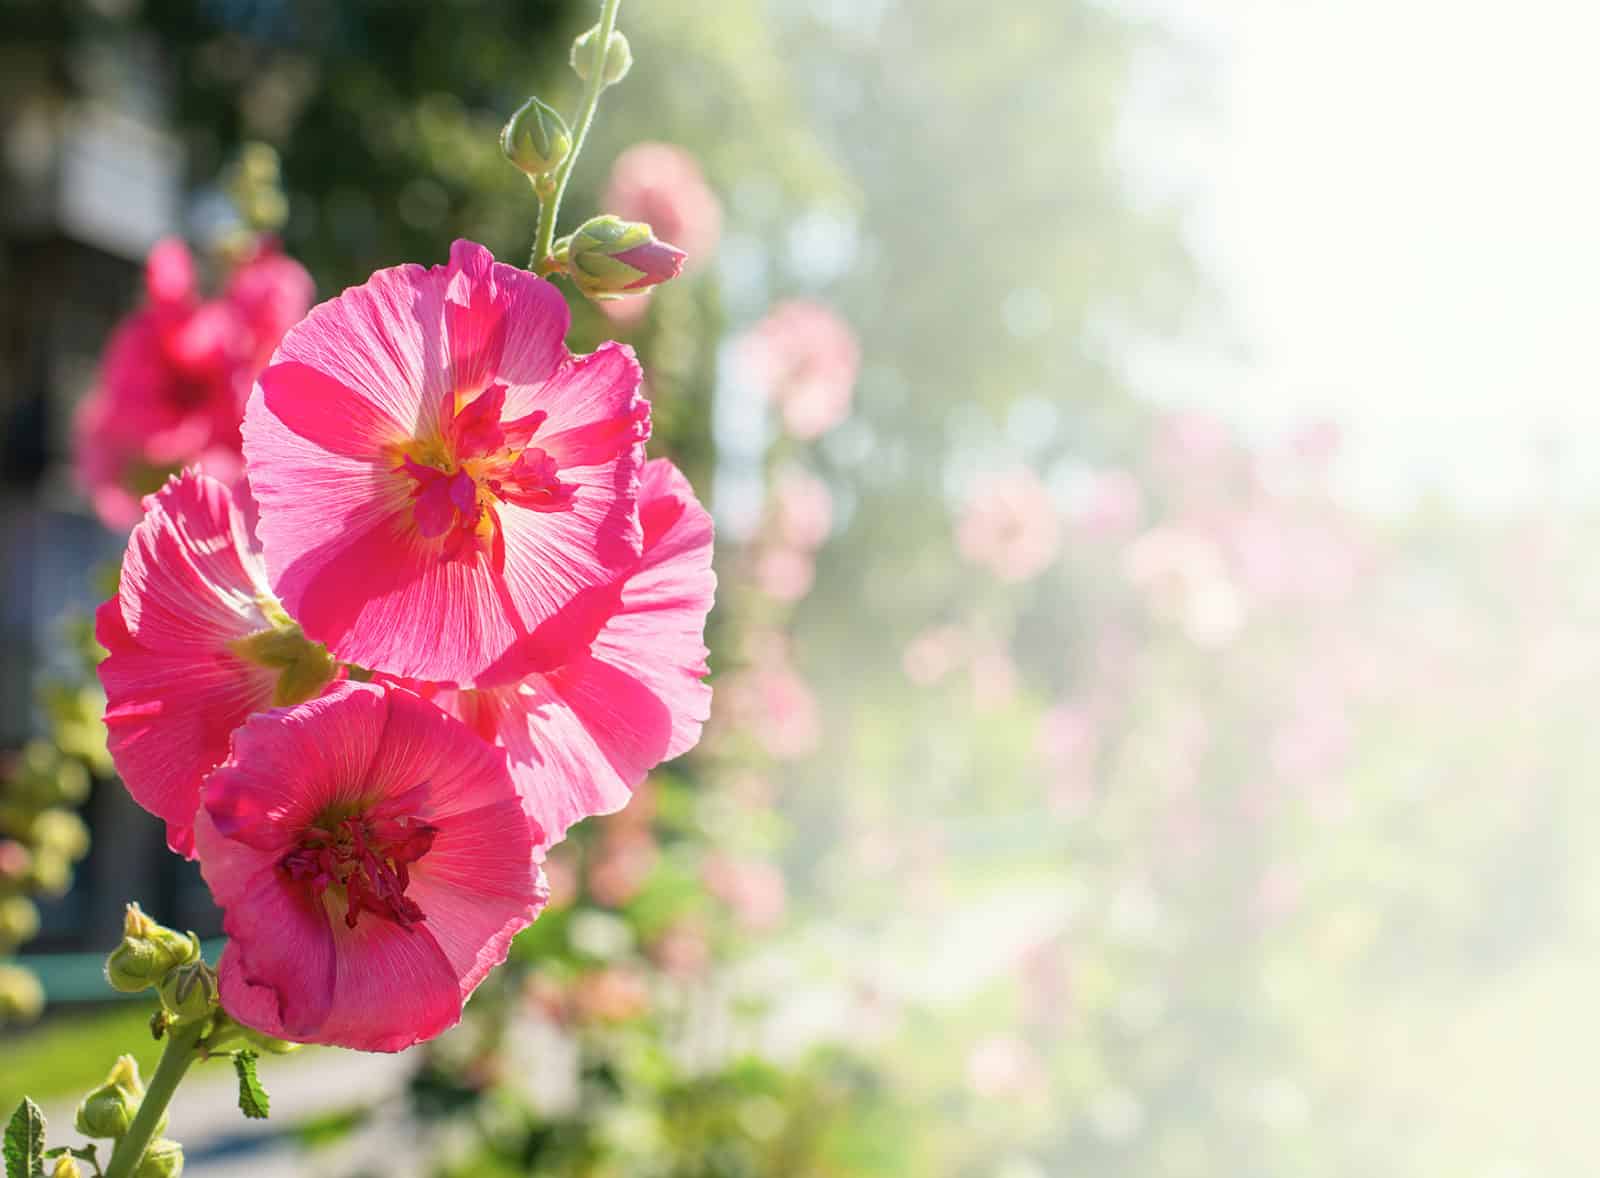
Hollyhocks can easily be started from seeds indoors, and transplanted outdoors. They add drama, colour and height to your garden. These plants are likely to attract some wildlife to your garden such as hummingbirds and butterflies! Hollyhocks can get a little “leggy” and it’s often suggested to plant dense plants in front of them to hide this. Once planted, Hollyhocks can be difficult to move. It’s suggested to plant them in a spot where you won’t have to move them.
variations
Hollyhock ‘Sunshine’, Hollyhock ‘Peaches ‘n’ Dreams, Hollyhock ‘Creme de Cassis’, Hollyhock ‘Blacknight’, Hollyhock ‘Halo Red’, Hollyhock ‘Halo Apricot’, Hollyhock ‘Halo Lavender’, Hollyhock ‘The Bride’, Hollyhock ‘O Hara’, Hollyhock ‘Banana’
light
varying needs
Full sun to partial shade
water + feeding
not too thirsty
Will tolerate moist conditions if soil is well drained. Water thoroughly during hot, dry weather. Keep water off leaves when watering, to prevent disease problems. The mistake many novice hollyhock growers make is to plant this flower in soil that’s too dry. If you are planting seeds, sow them outside about a week before last frost. If you are planting seedlings out, wait about two to three weeks after last frost. Hollyhock seeds only need to be planted right below the soil, no more than 1/4-inch (.6 cm.) deep
toxic
not really
These flowers are also non-poisonous to dogs or cats, but you need to be careful about the stems and leaves as they may have resin or fiber which may cause some skin allergies.
size
medium-ish
Hollyhock blooms are about four inch double flowers borne on wand-like stems. They have fuzzy leaves, that grow to be about 6-8″ across. A hollyhock plant can grow to be almost 6ft tall!
pro tip
blooms for years
Remove any seed-heads that may form, so hollyhock will continue to bloom for several years. Most plants will live and bloom for several years if stalks are cut off at the base after flowers have faded. They will not be as vigorous as new seedlings. Once established in the garden, hollyhock often grow voluntary from seeds dropped during the summer. These chance seedlings may and should be transplanted elsewhere in the garden.
fun fact
welcome flowers
Hollyhocks symbolize the circle of life, ambition, fertility, and abundance. They have traditionally been planted near the front door of homes to welcome prosperity. Egyptians frequently placed wreaths of hollyhocks with the mummified to help them in their journey to the afterlife.
beyond the basics
-
soil & potting
Hollyhock will do well in almost any soil but prefers a well-drained soil. The most important factor is good air circulation, so do not crowd plants or plant too close to structures, hedges or other plants.
-
companion planting
Hollyhocks make excellent companions for Dahlias, Clematis, Shasta Daisies, Shrub Roses, Baby’s Breath, Black-eyed Susan, or Climbing Roses.
-
blooms
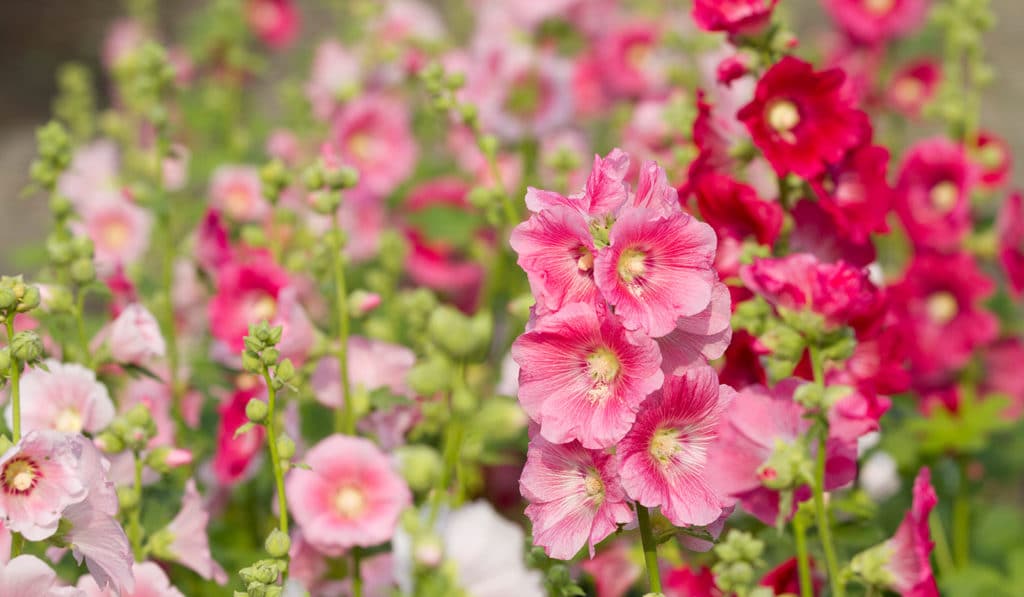
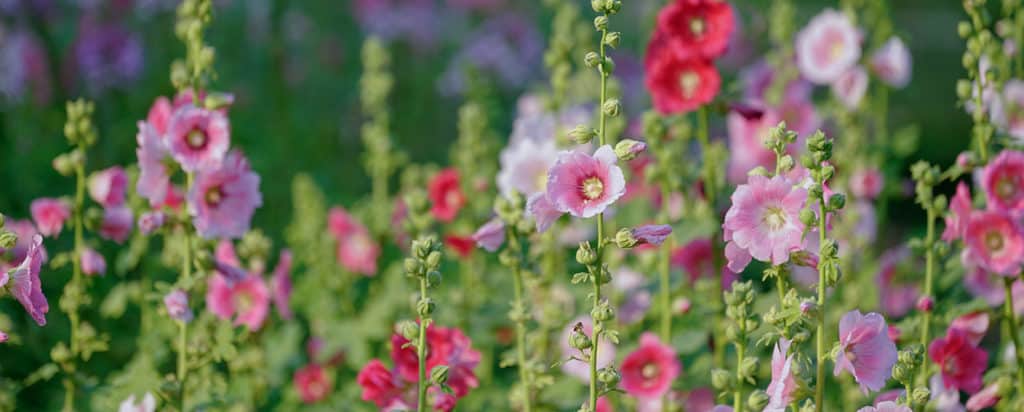
Hollyhocks have single or double, cup-shaped flowers with little or no stalk and bloom on tall spikes. Hollyhocks come in a wide variety of colours: blue, pink, purple, red, white, yellow and even black.
-
pest control
Rust is a leaf disease to which hollyhocks are especially prone. It is worse on older plants and can be kept in check by replacing plants every couple of years.
troubleshooting
-
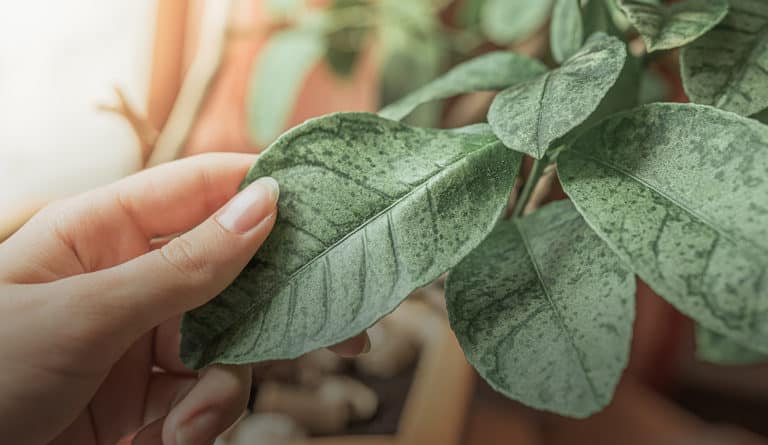
rusty looking leaves?
Rust is a common problem with hollyhocks and can cause the plants to look ragged. Brown, yellow or orange spots appear as the fungus forms and grows. The damaged leaves will fall off as the disease progresses. Control fungi through proper removal and disposal of infected plants and with a general fungicide.
-
breaking Stems?
High winds or torrential rains can damage hollyhocks because of the sheer height of the flowers. The stalks are strong, but can be knocked around by a summer storm. A trellis positioned behind the hollyhocks gives you a place to anchor the plants. Garden twine, looped around the stalk and fastened to the trellis, keeps the hollyhocks in place when strong winds hit the garden.
-
holes in leaves?
Japanese beetles love the large leaves of the hollyhock plant and create unsightly holes in the foliage. The hibiscus sawfly looks like an elongated housefly with an orange spot just below the head. The larvae of these pests eat the foliage and can completely destroy the leaves on several plants in a short time. Insecticidal soaps and beetle traps generally aid in ridding the hollyhocks of the pests.
-
broken stalks?
Some caterpillars cause hollyhock stems to break and leaves to wilt. Close examination shows small round holes in the stems. Control stalk borers by slitting each affected stem lengthwise, removing the borers, and binding the stems together. Practice clean cultivation and burn all weeds, stems and plant remains likely to harbor over-wintering eggs.
-
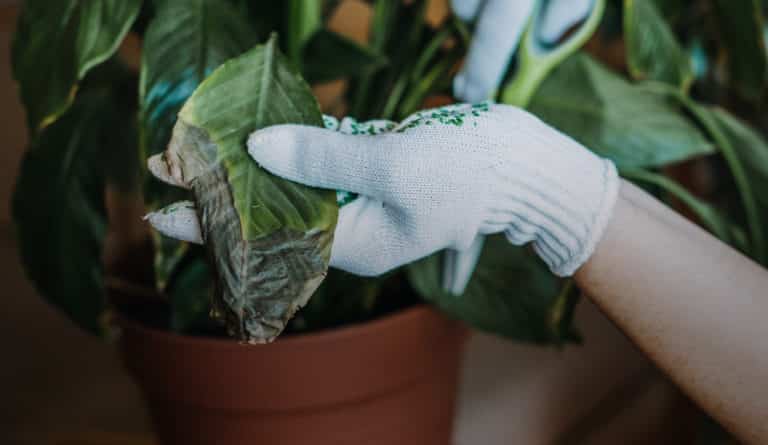
wilting leaves?
A fungal stem canker attacks hollyhocks at bloom time on rare occasions. Stem lesions are first dark brown and later ash-gray. As these spots girdle the stem the part above wilts, collapses, breaks off and dies. Remove and destroy infected plants or plant parts as soon as you notice them. Disinfect clippers and other tools after using them on cankered plants. Space plants farther apart to minimize splash-borne infection.
hollyhocks
aka Alcea rosea
Hollyhocks can easily be started from seeds indoors, and transplanted outdoors. They add drama, colour and height to your garden. These plants are likely to attract some wildlife to your garden such as hummingbirds and butterflies! Hollyhocks can get a little “leggy” and it’s often suggested to plant dense plants in front of them to hide this. Once planted, Hollyhocks can be difficult to move. It’s suggested to plant them in a spot where you won’t have to move them.
variations
Hollyhock ‘Sunshine’, Hollyhock ‘Peaches ‘n’ Dreams, Hollyhock ‘Creme de Cassis’, Hollyhock ‘Blacknight’, Hollyhock ‘Halo Red’, Hollyhock ‘Halo Apricot’, Hollyhock ‘Halo Lavender’, Hollyhock ‘The Bride’, Hollyhock ‘O Hara’, Hollyhock ‘Banana’
light
varying needs
Full sun to partial shade
water + feeding
not too thirsty
Will tolerate moist conditions if soil is well drained. Water thoroughly during hot, dry weather. Keep water off leaves when watering, to prevent disease problems. The mistake many novice hollyhock growers make is to plant this flower in soil that’s too dry. If you are planting seeds, sow them outside about a week before last frost. If you are planting seedlings out, wait about two to three weeks after last frost. Hollyhock seeds only need to be planted right below the soil, no more than 1/4-inch (.6 cm.) deep
toxic
not really
These flowers are also non-poisonous to dogs or cats, but you need to be careful about the stems and leaves as they may have resin or fiber which may cause some skin allergies.
size
medium-ish
Hollyhock blooms are about four inch double flowers borne on wand-like stems. They have fuzzy leaves, that grow to be about 6-8″ across. A hollyhock plant can grow to be almost 6ft tall!
pro tip
blooms for years
Remove any seed-heads that may form, so hollyhock will continue to bloom for several years. Most plants will live and bloom for several years if stalks are cut off at the base after flowers have faded. They will not be as vigorous as new seedlings. Once established in the garden, hollyhock often grow voluntary from seeds dropped during the summer. These chance seedlings may and should be transplanted elsewhere in the garden.
fun fact
welcome flowers
Hollyhocks symbolize the circle of life, ambition, fertility, and abundance. They have traditionally been planted near the front door of homes to welcome prosperity. Egyptians frequently placed wreaths of hollyhocks with the mummified to help them in their journey to the afterlife.
beyond the basics
-
soil & potting
Hollyhock will do well in almost any soil but prefers a well-drained soil. The most important factor is good air circulation, so do not crowd plants or plant too close to structures, hedges or other plants.
-
companion planting
Hollyhocks make excellent companions for Dahlias, Clematis, Shasta Daisies, Shrub Roses, Baby’s Breath, Black-eyed Susan, or Climbing Roses.
-
blooms
Hollyhocks have single or double, cup-shaped flowers with little or no stalk and bloom on tall spikes. Hollyhocks come in a wide variety of colours: blue, pink, purple, red, white, yellow and even black.
-
pest control
Rust is a leaf disease to which hollyhocks are especially prone. It is worse on older plants and can be kept in check by replacing plants every couple of years.
troubleshooting
-
rusty looking leaves?
Rust is a common problem with hollyhocks and can cause the plants to look ragged. Brown, yellow or orange spots appear as the fungus forms and grows. The damaged leaves will fall off as the disease progresses. Control fungi through proper removal and disposal of infected plants and with a general fungicide.
-
breaking Stems?
High winds or torrential rains can damage hollyhocks because of the sheer height of the flowers. The stalks are strong, but can be knocked around by a summer storm. A trellis positioned behind the hollyhocks gives you a place to anchor the plants. Garden twine, looped around the stalk and fastened to the trellis, keeps the hollyhocks in place when strong winds hit the garden.
-
holes in leaves?
Japanese beetles love the large leaves of the hollyhock plant and create unsightly holes in the foliage. The hibiscus sawfly looks like an elongated housefly with an orange spot just below the head. The larvae of these pests eat the foliage and can completely destroy the leaves on several plants in a short time. Insecticidal soaps and beetle traps generally aid in ridding the hollyhocks of the pests.
-
broken stalks?
Some caterpillars cause hollyhock stems to break and leaves to wilt. Close examination shows small round holes in the stems. Control stalk borers by slitting each affected stem lengthwise, removing the borers, and binding the stems together. Practice clean cultivation and burn all weeds, stems and plant remains likely to harbor over-wintering eggs.
-
wilting leaves?
A fungal stem canker attacks hollyhocks at bloom time on rare occasions. Stem lesions are first dark brown and later ash-gray. As these spots girdle the stem the part above wilts, collapses, breaks off and dies. Remove and destroy infected plants or plant parts as soon as you notice them. Disinfect clippers and other tools after using them on cankered plants. Space plants farther apart to minimize splash-borne infection.
