Hello Everyone! My name is Shavonne, and my social media channels are called Once Upon a Bungalow. You can find me on Instagram, TikTok, Facebook, or YouTube. I am excited to be here on Plant Project Canada’s page to give you a step-by-step tutorial on how I created a Chess Set made to make any plant person happy. Even if you don’t want to play chess, this still makes for the perfect backyard garden display, where the plants become the pieces. It will be sure to strike up conversation and add whimsy to your yard this summer.
Here we go!…
Materials You’ll Need
Main Structure:
Cast iron bistro table and chairs. (Check your local marketplace for a set that you can repurpose)
Metal spray paint/sandpaper, if you desire to paint the bistro set
1 square paving stone that covers the service of the table you are using (The size that fit my bistro set was 2 ft × 2 ft)
Exterior paint in the desired colour of the chessboard
Painter’s tape
Exterior clear sealer
Pencil
Carpenter’s square or ruler
Measuring tape
Construction adhesive
Optional – Exterior adhesive felt pads for pot bottoms
Cups, mini planters, or thrifted containers also work
3D printed plant pots printed to size
Plants
Choose plants with different heights, textures, and personalities so each piece is easy to identify. Have fun selecting the perfect plants for the pieces, and make sure they mimic the vibe of their traditional chess counterpart. Introduce colour to add more whimsy and magic to your chess set!
The plants that were utilized in my chess set were:
Pawns: Small Echeveria Succulents These succulents form tight rosette-shaped leaves. They thrive in bright light and well-draining soil. Allow the soil to completely dry between waterings to keep these looking beautiful.
Rooks: Bunny Ear Cactus (Opuntia microdasys) These feature flat oval-shaped green pads that grow in pairs, resembling rabbit ears. These cacti require bright, direct sunlight to maintain their compact shape. Allow the soil to completely dry out before watering thoroughly.
Knights: Echeveria ‘Purple Pearl’ These plants have a stunning purple hue. They can become more intensely coloured when exposed to full sun, transitioning from grey-green. They need well-drained soil and require bright indirect light.
Bishops: Gasteraloe These are a hybrid plant between Aloe and Gasteria. These feature thick, dark, green leaves with raised white spots or bumps. They thrive in bright light, and just like most succulents, need the soil to completely dry before watering thoroughly.
Queen: Moon Cactus (Pink) These are a novelty plant that is actually two different cacti grafted together. The top colourful part is a Gymnocalycium mihanovichii, with the green stem being a different species used as rootstock. The pink that I used in the chess set creates a dramatic centrepiece for the chessboard.
King: Moon Cactus (Red) These require bright, indirect sunlight. Water only once soil has completely dried out, and thrives in well-draining soil. Protect these plants from the temperature dropping below 10 degrees Celsius.
Step 1: Prepare the Bistro Table and choose an Area
Choose a flat outdoor space that gets plenty of sunlight. Place the cast-iron bistro set where it will stay most of the season. Since succulents and cacti generally prefer sun and good airflow, a patio or garden corner works well. I chose to use a cast-iron set to ensure the paving stone had a nice, sturdy surface to support the weight. You can use a different base for your chess set, or even have the paving stone sitting directly on the ground.
The bistro set was found on Facebook Marketplace and was in rough repair. I took sandpaper to remove any loose paint or metal. I then used matte black metal spray paint to give the set a refreshed look and a cohesive colour that popped against my wooden deck backdrop.
Step 2: Create the Chess Board
Your paving stone is 24 inches × 24 inches.
Because a chessboard has 8 rows and 8 columns: 24 ÷ 8 = 3-inch squares
This gives:
Chess squares: 3″ × 3″
No border
If you’d like a 1-inch border around the edge:
24 – 2 inches = 22 inches usable space
22 ÷ 8 = 2.75-inch squares
Using a tape measure to mark the measurements of where you wish the grid to be. Using a ruler or carpenter’s square, mark your grid in straight lines using a pencil. After you have your markings and are satisfied with the look of your chessboard, use painter’s tape to tape out the first direction of squares.
Allow the paint to dry completely, then follow the lines of the first rows of squares you have created and add fresh painter’s tape to make the other squares on the board.
Paint alternating squares:
□ ■ □ ■ ■ □ ■ □
Once completely dry, remove all painter’s tape. Patio stones are usually not completely flat and tend to have a textured surface; as a result, you may need to touch up the paint. Using permanent acrylic paints, I mixed up a grey colour to match the original patio stone colour and touched up the white squares, creating a more refined straight line.
Step 3: Glue to the base & seal
Once this has dried completely, seal the surface with an outdoor sealer paint to protect it from the weather and outdoor elements. I used a clear spray paint sealer in a matte finish.
After this, use construction adhesive to glue the patio stone to the top of the cast-iron table. Apply the adhesive liberally to the top of the table and adjust the positioning until the patio stone is centred on top of the table.
Step 4: Differentiate the Two Teams
You want players to recognize pieces quickly. I chose to 3D print the pots to create the perfect size that would fit the 2 ¾” size squares. I did have to make a few prototypes until I was happy with the overall shape, size, and colour of the pot. I went with the traditional black and white colours for my plant pot chess pieces. Small terracotta plant pots would also work great if you do not have access to a 3D printer. *Tip: Your local library might have a 3D printer that you can use. Check your local library to see what’s available.
Optional – Add decorative gravel on top. (The gravel gives a finished appearance and keeps soil from splashing during rain.)
Miracle-Gro® Cactus, Palm & Citrus Potting Mix features a fast-draining formula and is enriched with Miracle-Gro® Plant Food. This fast-draining formula is blended to help promote the successful growing of cacti, potted palms, citrus, and other succulents. This cactus potting mix is designed for indoor and outdoor container plants, including cacti, palm plants, citrus trees, and succulents.
Step 6: Arrange the Pieces
Set up the board as a standard chess layout.
Front row:
8 pawns
Back row:
Rook
Knight
Bishop
Queen
King
Bishop
Knight
Rook
Step 7: Care for Your Living Chess Set
Water only when the soil is dry.
Make sure the chess set is in a well-lit area so the plants can thrive.
Rotate pots occasionally so plants grow evenly.
Bring delicate plants indoors if the weather dips below freezing.
Reapply outdoor sealer to the patio stone every season or two.
Finished Result
You’ll end up with:
✓ A functional outdoor chess board ✓ A living succulent and cactus display ✓ A decorative patio centrepiece ✓ A unique conversation starter that changes as the plants grow
The result feels part garden, part art piece, and part game table—something that looks just as good during a chess match as it does sitting quietly on the patio with coffee.
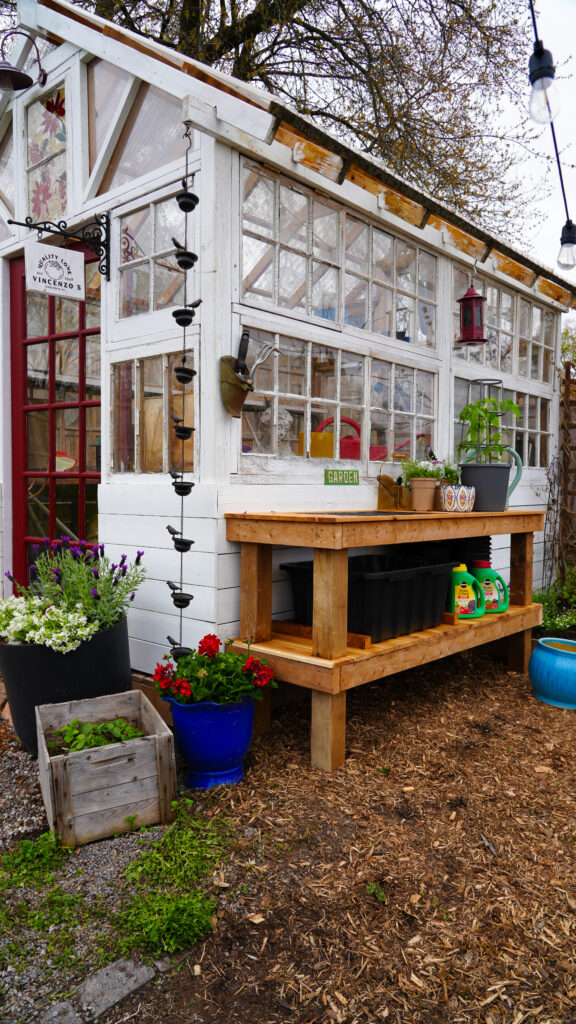
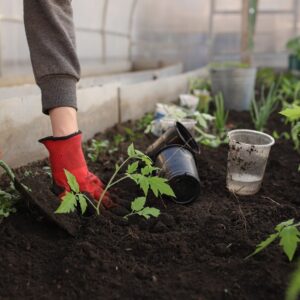
There’s something incredibly satisfying about repotting plants and giving them fresh space to grow. As the garden season ramps up, our greenhouse quickly runs out of room, which usually leaves us potting plants on the greenhouse floor or right on the ground outside, and with that comes SO much wasted soil.
I decided it was finally time to create a better solution beside the greenhouse: a DIY Potting Bench designed to catch and reuse excess soil instead of letting it disappear into the dirt below.
Using a beautiful upcycled antique iron grate as the inspiration for the build, this project feels equal parts functional and whimsical. The vintage grate adds so much character and charm while secretly solving one of my biggest gardening frustrations.
If you’ve been looking for a practical weekend DIY that makes gardening easier, more organized, and just a little more magical, this DIY Potting Station is such a worthwhile addition to any greenhouse, shed, or garden space
Miter saw (alternative tools: hand saw, circular saw or jigsaw)
Drill
Jigsaw
Clamps
Brad Nailer (optional)
Rubber Mallet
Wire Brush
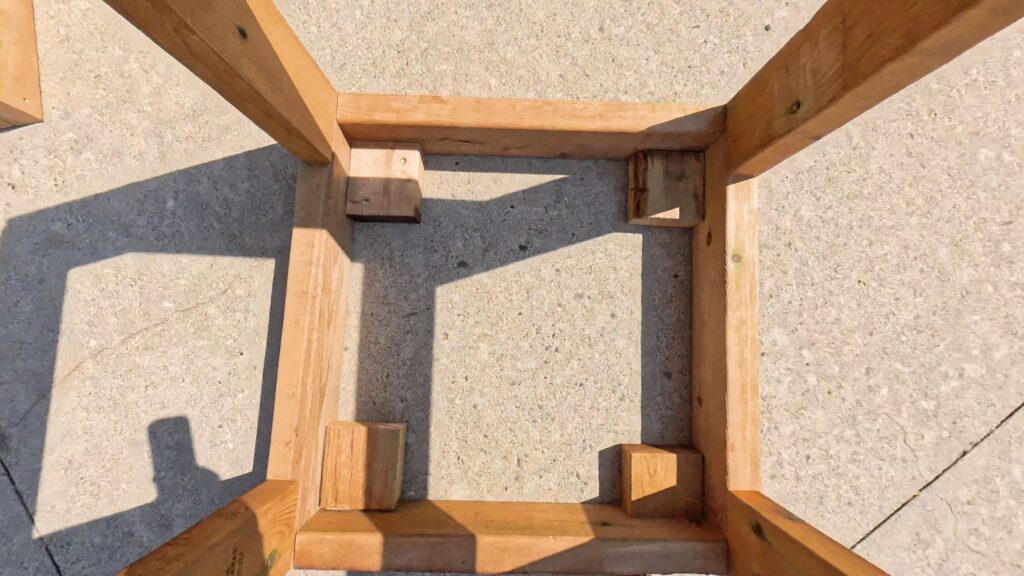
Step 1: Frame Lumber Cuts
*These measurements are based upon my grate size. Feel free to adjust accordingly.
(Alternative tool options: hand saw, circular saw or jigsaw.)
Using a miter saw, I cut my 4×4 and 2×4 pressure-treated lumber into the following sizes:
4×4 PT Legs
(4) 35 3/8″
2×4 PT Support Apron
(4) 67″
(4) 21″
2×4 PT Cross Supports
(7) 18″
2×4 PT Grate Support
(2) 25 1/4″
(2) 18”
Soil Bucket Supports
Customize cuts to the size of the bin base on three sides (Back, Left, Right)
PRESSURE TREAT NOTE:
Once all pressure treated lumber is cut, seal all cut ends with an PT wood preservative to help prevent moisture damage and rot.
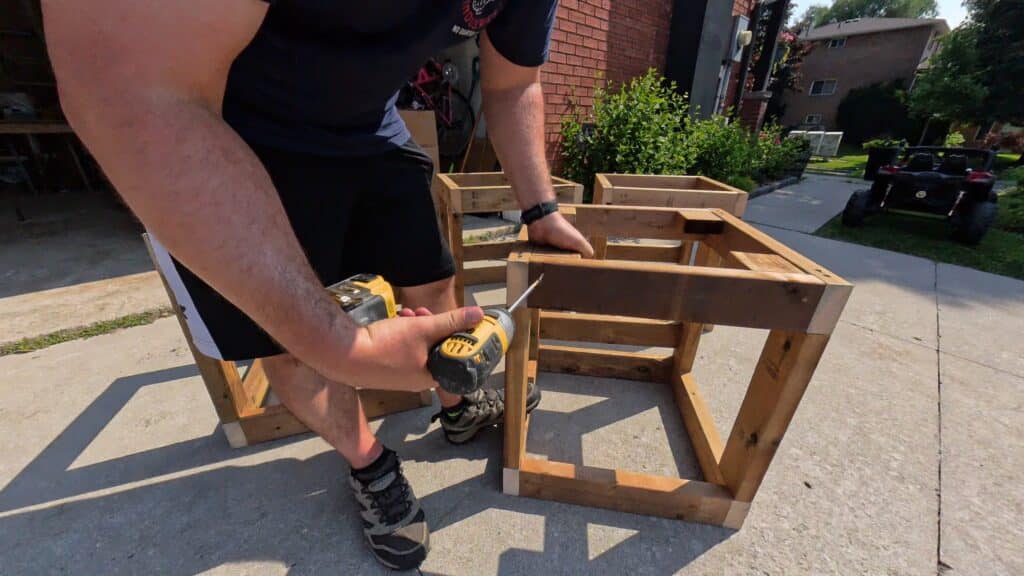
Step 2: Build Workbench Frame
Fill your container about halfway with a high-quality indoor potting mix. Secure the top support apron. Note: I built this upside down on my work table to simplify the build.
Flush at both ends of one 67″ 2×4, secure two 4×4 legs, clamping in place first.
Pre-drill to prevent wood splitting, then secure with 3″ screws.
Add the 21″ supports flush with the 67” 2×4 at the corner, and secure with screws. Repeat on both sides until you have a sturdy rectangular frame with four legs attached at each corner.
Step 3: Add the Middle Shelf
From the base of the top support apron, I measured and marked 19” on the 4×4 to guide my middle shelf height.
Repeat the same framing process at this new height to create the middle shelf support.
Step 4: Install Support Braces
Secure five 18″ braces evenly (approx. 10” on center) across the inside of the bottom apron. Flip the table on its side if needed for easier access.
Tap each brace into place with a rubber mallet for a snug fit, pre-drill and screw through the outer apron into the support ends.
Step 5: Add Supports for the Grate Insert
Where you place your grate along your table top is completely personal. I favoured the left side to have a larger potting work surface on the right.
Mark and measure 10” from the left outside edge and secure the first 18” cross support brace using 3” screws. Bud up both 25 1/4″ supports to the inside edge of your 18” cross brace, parallel to your apron, and secure from the inside using your 2.5” screws. Bud up the last 18” cross support and secure using a 3” screw.
These measurements provide the grate a half inch ledge to rest upon and keeps that bulky 1.5” 2×4 edge from being visible underneath.
Step 6: Prepare the Cedar Top
I opted for red cedar on my visible surfaces because I love the way the grain looks, it’s naturally rot and insect resistant and continues to look beautiful over time.
Cedar Board Cuts:
(2) 71″
(2) 34 1/4″
(2) 10 1/2″
Note: These measurements were customized to fit length wise around the grate opening. Depending on where you place your grate, these measurements could change. Adjust accordingly.
Cedar Top
The top surface was measured to include a ½” overhang on the front/sides and sit flush with the frame on the back.
Step 7: Cut the Grate Opening
Mark any cedar boards that overlap with your grate and remove this material using a jigsaw.
Since grate sizes vary, it’s best to dry-fit often and trim gradually until the insert sits neatly in place.
Step 8: Secure the Cedar Top
Using your Brad nailer, secure the cedar boards into the cross supports underneath.
(Alternative options: 2” nails with hammer or wood screws)
Step 9: Build the Middle Shelf
Cedar Board Cuts:
(13) 21”
Cut and place lower shelf tops widthwise across the middle apron.
For both end boards, measure and use a jigsaw (or hand saw) to notch around the 4×4 legs for a neat finish.
Use a brad nailer to secure the boards into the support beams underneath. (Alternative options: 2” nails with hammer or wood screws)
Step 10: Add Soil Bucket Supports *OPTIONAL*
I found a heavy duty plastic bucket at my local hardware store in their storage section.
To keep the bucket from sliding around on the shelf, I used scrap pressure-treated lumber to create small support brackets along the sides and back, securing them in place with brad nails.
This creates a snug fit that holds the bin in place while still allowing it to slide out easily from the front. Be sure to measure your own bucket and cut the supports to fit for a custom, secure hold.
Step 11: Restore the Grate
My grate was old and weathered after being left outside for years, so it needed a little TLC to clean away the rust, grime, and years of buildup.
To refresh it:
Dry brush away any flakey loose rust using a wire brush.
There are many ways to remove rust depending on its level of rustiness. For light rust, submerge it in vinegar and water or lightly scrub a baking soda paste (baking soda and water) then let sit for 24 hours.
For more heavy duty applications like mine, use a rust remover gel or rust remover liquid, scrub with a wire brush and let sit for 30 minutes.
Make sure to rinse with water and soap and let fully dry before applying anything on top.
Spray your grate with rust-inhibiting spray paint. This seals the metal, blocks moisture from getting in, and helps stop any rust from spreading. I chose a semi-gloss finish to create a tough surface that can handle all the dirt, water, and pot scraping this station is about to see. Just a heads up, oil-based paints take a bit longer to cure, so give it a few days before putting it to work!
Step 12: Finish it
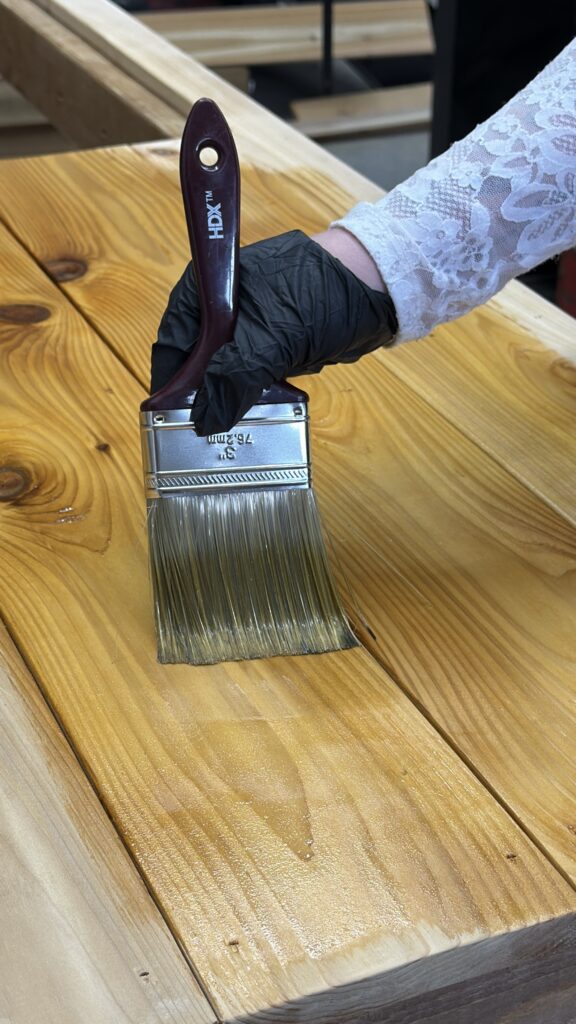
Cedar is naturally rot-resistant, but it will fade in the sun and rain. Use a transparent penetrating oil to soak into the wood to protect it from moisture, add UV resistance, and keep that beautiful natural look intact.
Step 13: Secure Beside the Greenhouse
The final step was securing the potting bench to the side of the greenhouse for extra stability.
Using long 6″ rugged structural screws, I fastened the bench from the back side directly into the greenhouse’s structural 4×4 posts to create a strong, sturdy connection.
Final Thoughts
This DIY Garden Potting Station has completely transformed the way I garden. Soil now drops straight through the grate and into my bucket for easy reuse, the cedar shelves keep all my pots and tools within reach, and every little gardening task suddenly feels so much more organized and inspiring!
Honestly, these are my favourite kinds of DIYs – projects that are not only beautiful, but make your everyday life easier every single time you use them. Want to see more of these kinds of projects? Follow me on Instagram, Facebook, Pinterest.
Now bring on the garden magic and thriving plants this season!
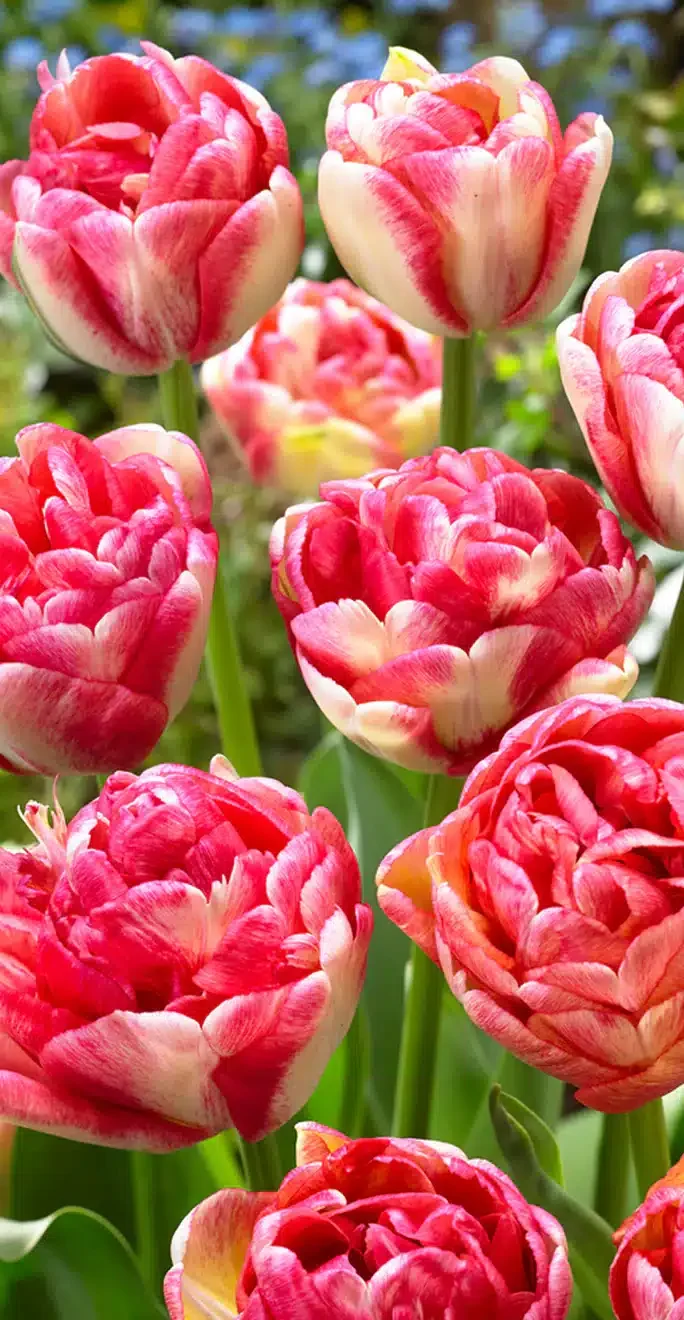
Tulips are one of the most beloved spring flowers, known for their vibrant colours and elegant cup-shaped blooms. Originating from Central Asia and popularized in the Netherlands, they symbolize renewal and beauty. Tulips are versatile in gardens, containers, and cut-flower arrangements.
Tulip AKA
Tulipa gesneriana
Colour: red, yellow, pink, orange, purple, white, and even near-black shades of maroon
Sun Exposure: Full sun
Family: Liliaceae
Native Areas: Central Asia, the Middle East, parts of southern Europe, and North Africa
Common Name: Tulip
Scientific Name : Tulipa gesneriana
Plant Type: perennial
Mature Size: 10 to 30 inches
Soil Type: rich, well-draining soil with a slightly acidic to neutral pH
Soil PH: 6.0 – 7.0
Bloom Time: March to May
Hardiness Zones: 3–8 (Canada)
Toxicity: contain the compound tulipalin, which can cause skin irritation (“tulip itch”), stomach issues, and other symptoms in both humans and animals
Are Tulips Right for Your Garden?
Tulips are ideal for gardeners who want a burst of early spring colour with minimal care. They thrive in cooler climates and are perfect for flower beds, borders, or indoor forcing. If you enjoy low-maintenance yet striking flowers, tulips are a great choice.
Space Craving: tulips generally need a good amount of room to thrive, both individually and when planted together, to allow for proper root development and to prevent bulbs from dividing and crowding each other out over time.
Soil Preparation: choose a location with full sun and loosen the soil to a depth of 12-15 inches. Add 2 – 4 inches of compost to improve drainage and fertility.
Patience required: plant tulips between September – November, before temperatures drop below 15C. Autumn planting lets the bulbs establish roots through the winter, to bloom in the spring.
Watering challenges: Water new bulbs thoroughly after planting to help stimulate root development. Tulips prefer dry conditions, only water when the top inch of soil is dry.
Types & Variations
of Tulips
Darwin Hybrid Tulips
Double Tulips
Fringed Tulips
Lily Tulips
Parrot Tulips
Single Early Tulips
Triumph Tulips
Pest/Disease
Symptoms | Control & Prevention
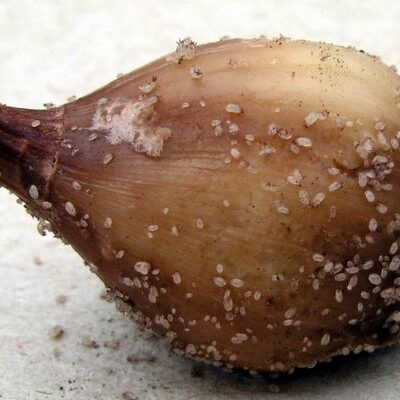
Bulb Mites
Symptoms: Weak, off-colour leaves and deformed flowers.
Control & Prevention: Inspect bulbs before you plant them, and keep an eye out for clear, slow moving bugs that look like little spiders. The bulbs will also have soft spots. Avoid knicking or injuring bulbs when planting.
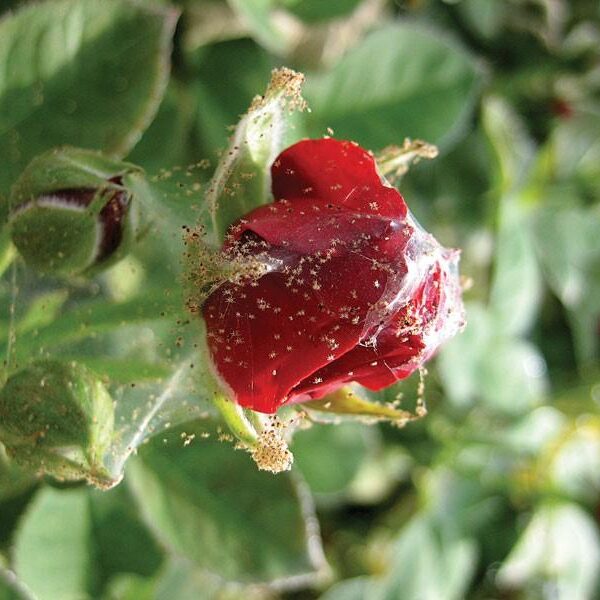
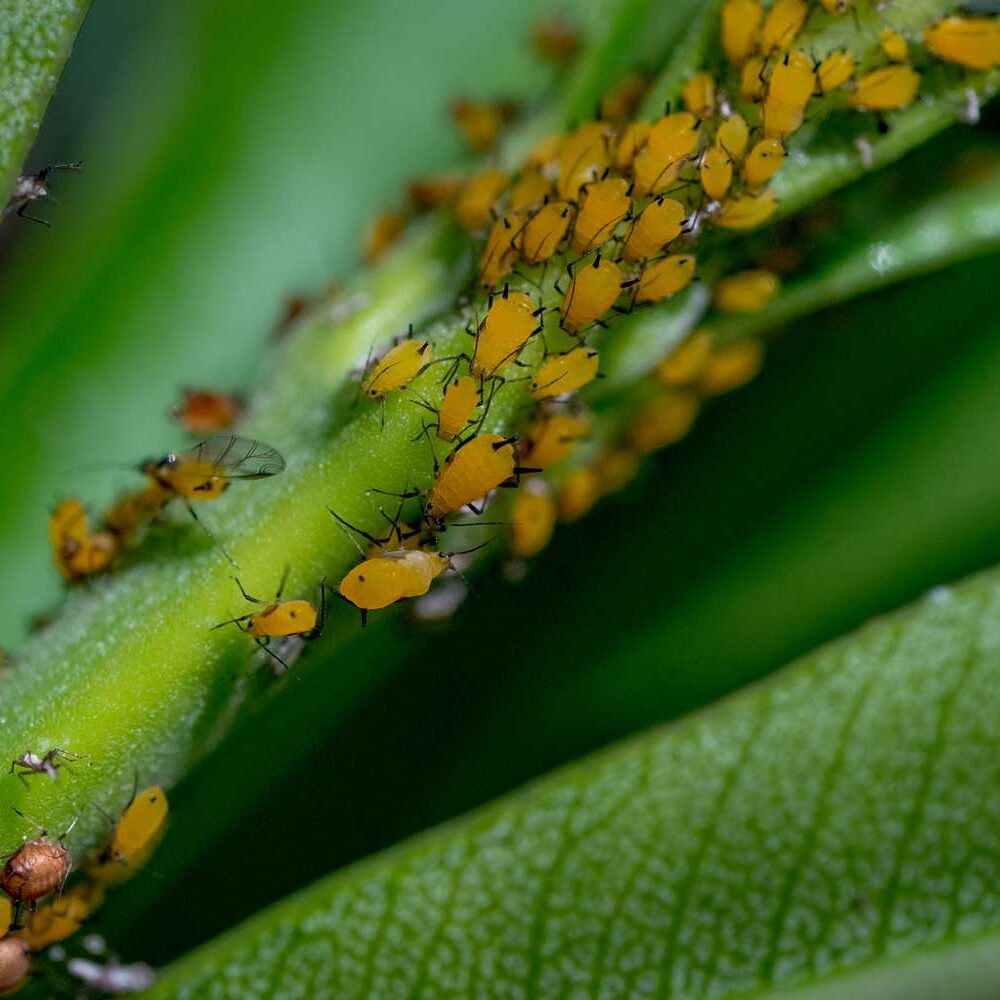
Aphids
Symptoms: Yellow and distorted leaves, and a black sticky substance on leaves or buds.
Control & Prevention: Spray with insecticidal soap. If you don’t want to use an insecticide, you can spray with a hard stream of water on the underside of leaves and along stems.
Spider Mites
Symptoms: Tiny, fast-moving bugs, yellowing leaves with a sticky web.
Control & Prevention: Removing the lowest leaves can discourage their spread. Monitor nearby plants for signs of spider mite infestations to prevent spreading.
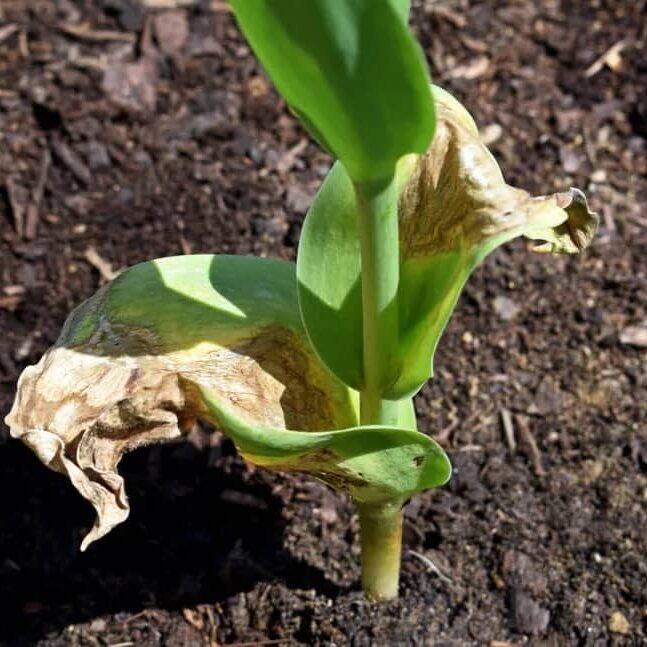
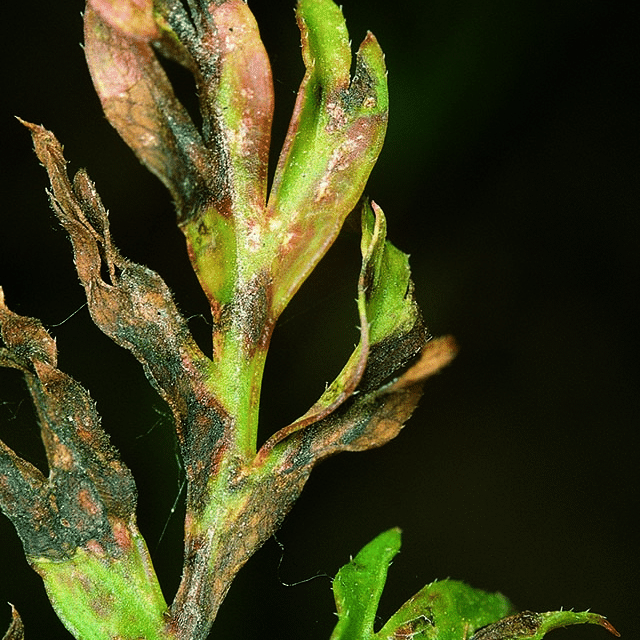
Tulip Fire
Symptoms: Distorted and twisting leaves that whither quickly. Surviving leaves will have brown lesions that turn into scorched areas.
Control & Prevention: Be sure the tulip bulbs are healthy before planting, and make sure they are planted in well-draining soil with good air circulation. Avoid overhead watering. If Tulip Fire is found, it’s best to remove the bulbs and plants.
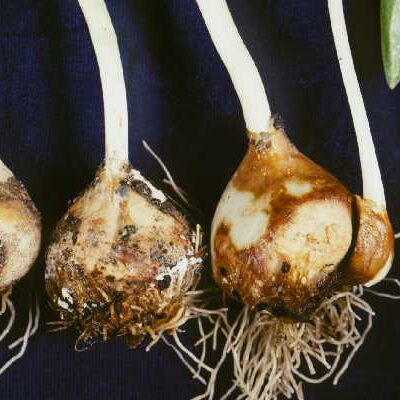
Tulip Basal Rot
Symptoms: Sour odour on bulbs when the fungus breaks down the plant matter. Pink, white or brown spots on bulbs.
Control & Prevention: Inspect bulbs very carefully and discard all bulbs with signs of rot.
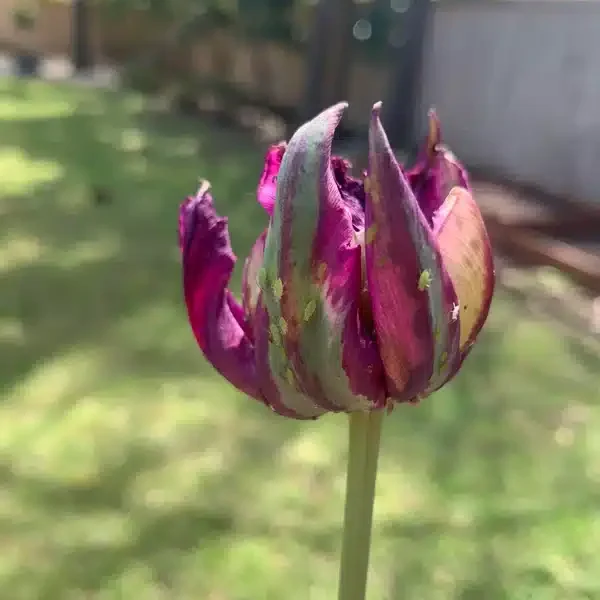
Tulip Breaking Virus
Symptoms: Stripes, flecks or feathering on tulip petals.
Control & Prevention: Be sure to use clean tools to avoid transmission of the virus. Dig up and destroy any affected bulbs as soon as possible.
Thrips
Symptoms: Little black punctures on leaves and pale, drooping petals.
Control & Prevention: A strong, forceful stream of water multiple times a day. The use of reflective mulch can be used to deter thrips.
Control & Prevention: Keep flower beds tidy and free of debris. The use of a soaker hose may help to water the soil, allowing the leaves to remain dry.
After planting, water thoroughly once to settle the bulbs. Through fall and winter, let rainfall do the work. In spring, water once a week if the weather is dry to support blooming.
Tulips thrive in cool climates. Ideal growing temperatures range between 10°C and 18°C during spring. They prefer low to moderate humidity, which keeps bulbs healthy and prevents rot.
For strong blooms, apply a balanced bulb fertilizer (like 10-10-10) at planting time and again as shoots appear in spring. Avoid over-fertilizing—it can cause weak stems or fewer flowers.
In-ground: Tulips thrive in loose, well-draining soil. Before planting, loosen the soil about 10–12 inches deep and mix in compost or well-rotted manure to enrich it. Avoid areas where water pools, as bulbs can rot in overly wet conditions.
Raised beds: These are ideal for tulips if your soil tends to stay heavy or clay-like. Raised beds help improve drainage and keep bulbs dry through winter. They also warm up faster in spring, encouraging earlier blooms and healthier root growth.
Pro Tip: If you’re planting in a wetter area, add a small layer of sand or gravel at the base of each planting hole to enhance drainage and protect bulbs from rot.
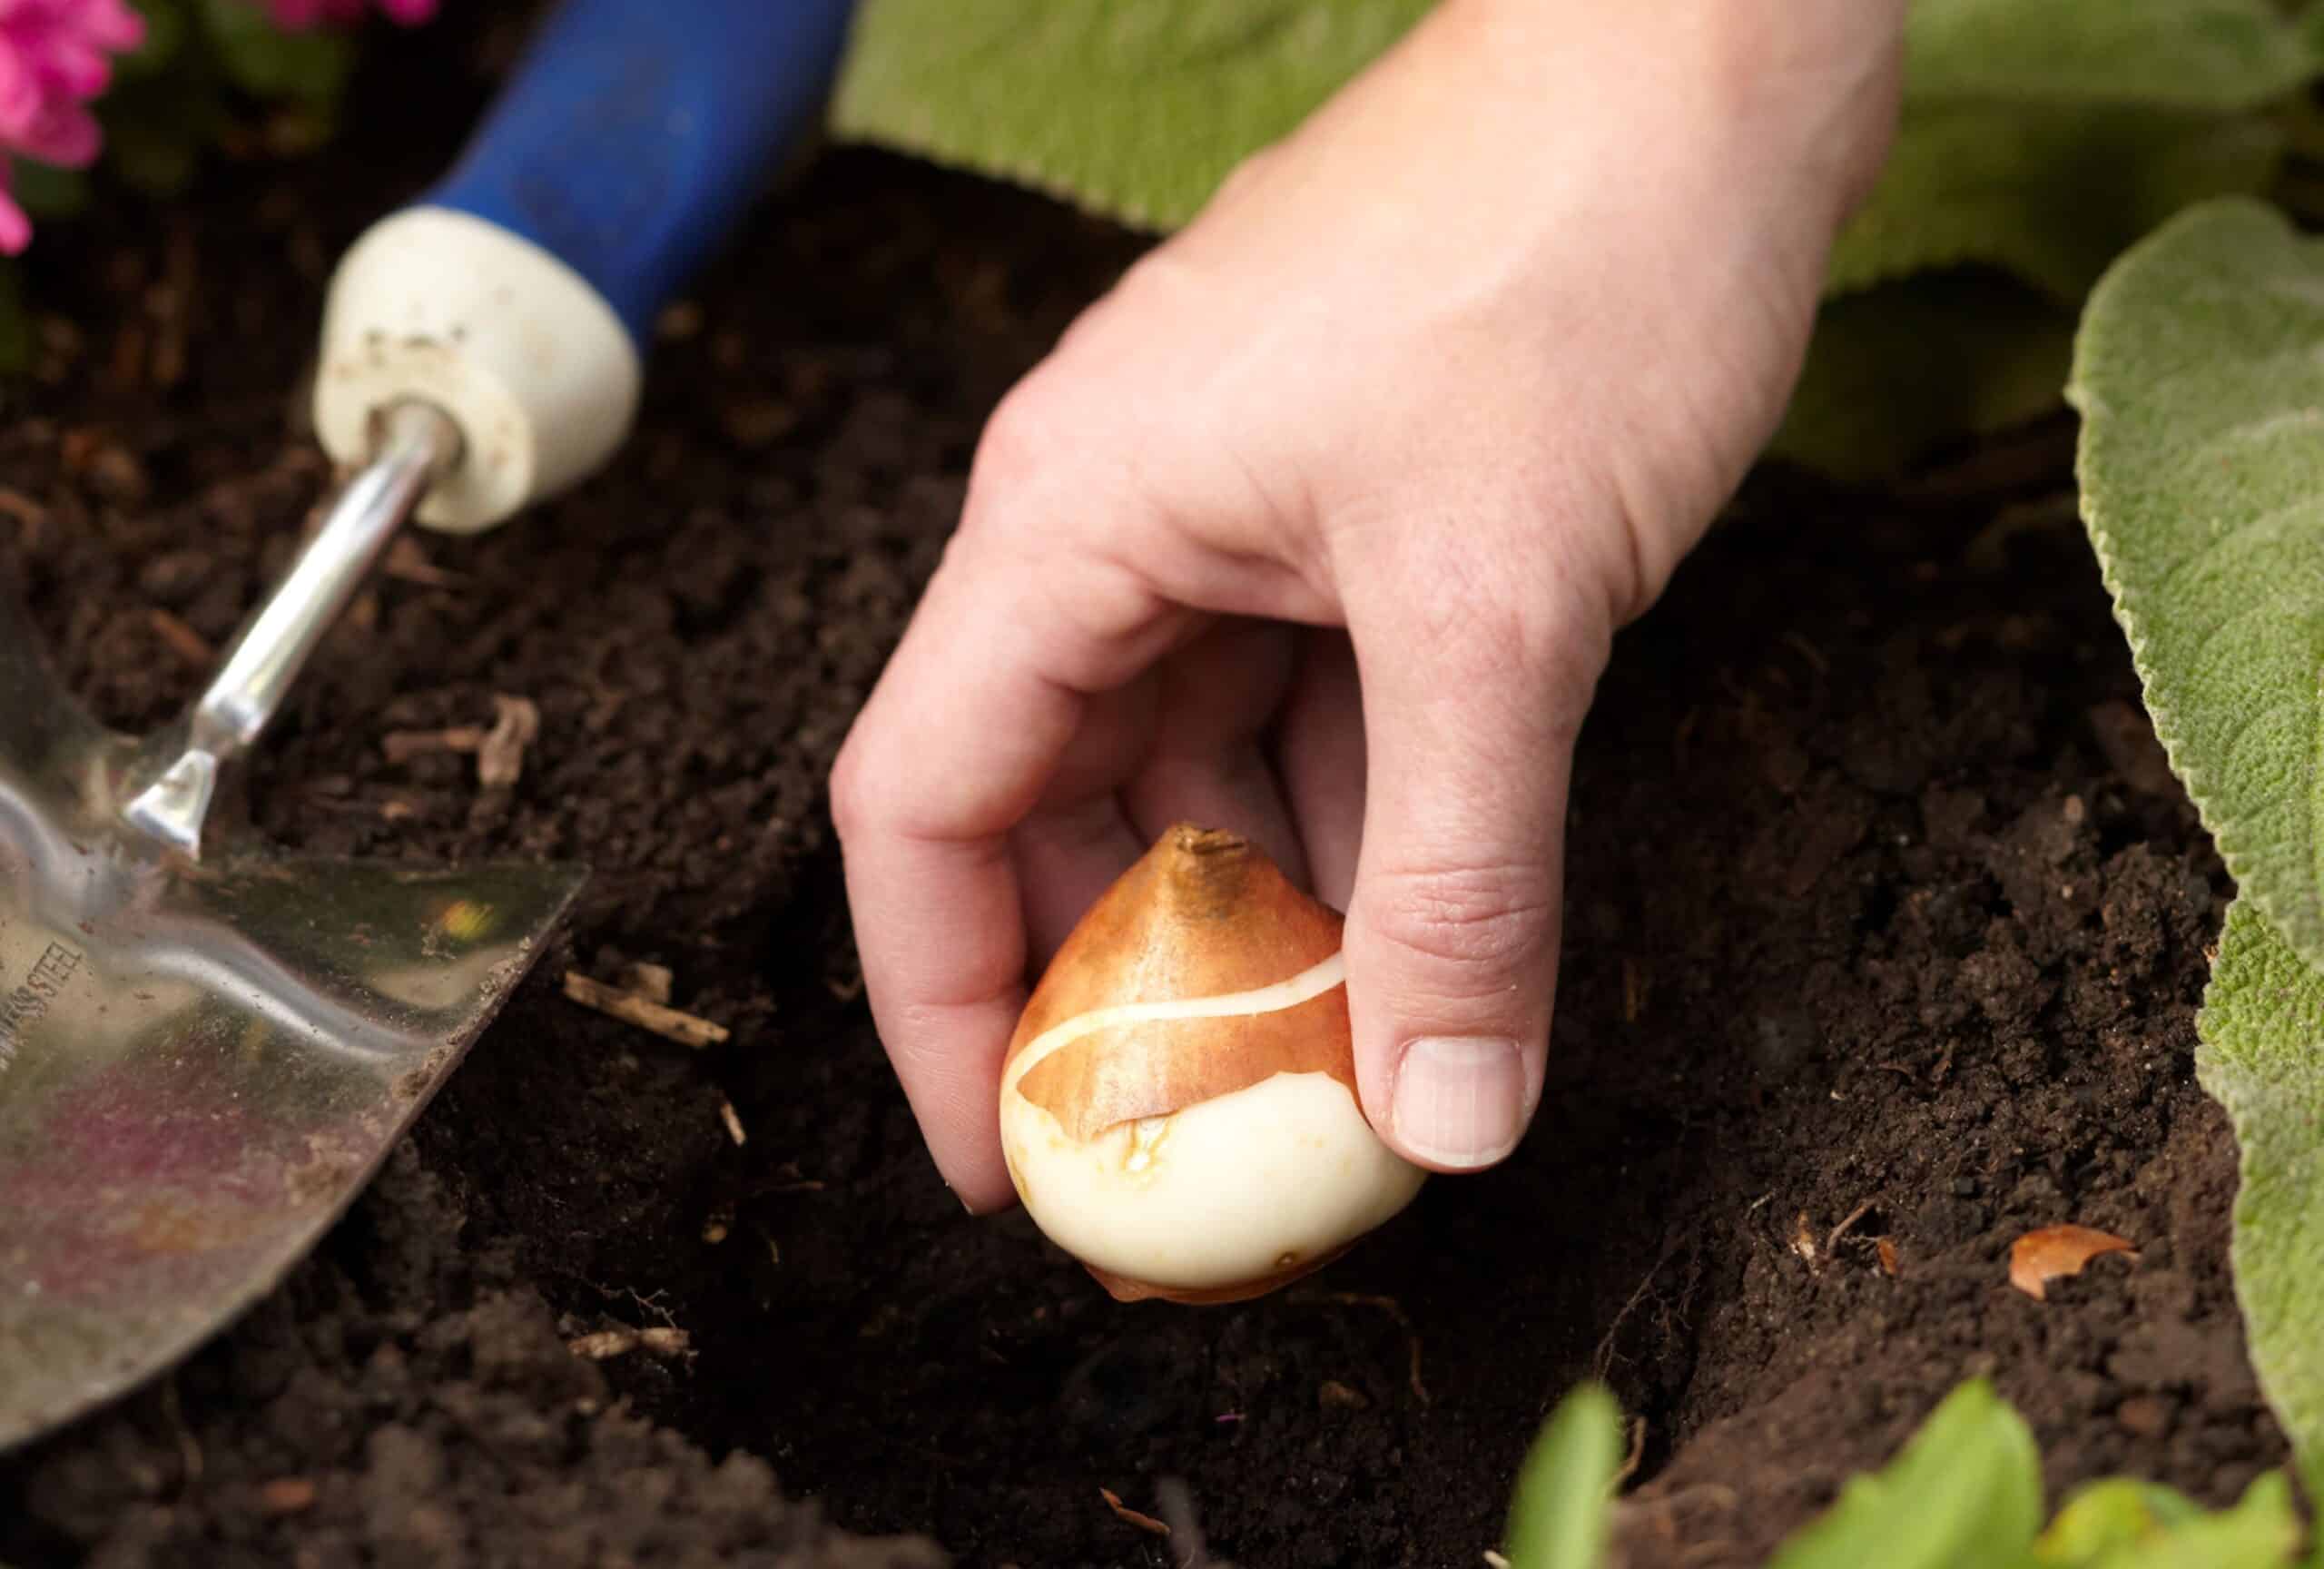
Plant at the Right Depth: Plant the bulbs in holes about three times the depth of the bulb. Cover lightly with soil gently pat down. Water immediately after planting.
Placement Is Key: Make sure to place the bulbs with the pointed end up.
Spacing Needs: leave about 4 – 8 inches between bulbs
Timing matters when planting tulip bulbs. They need a period of cold dormancy to bloom beautifully in spring. Here’s the best timing by region across Canada:
• Southern Canada (e.g., Ontario, BC, parts of Quebec): Late September to mid-October.
• Northern Canada & Frost-Prone Regions (e.g., Manitoba, Alberta): Early to mid-September.
Pro Tip: Plant tulip bulbs about six weeks before the ground freezes. This allows roots to establish before winter sets in, ensuring vibrant blooms come spring.
Plan to plant your tulip bulbs in the fall, before the ground freezes. Then, find a sunny spot and prepare the area with well-draining soil. Space your bulbs several inches apart. Dig a small hole, about three times as deep as the size of the bulb. When you place the bulbs, make sure the pointy end face up. Then cover the bulb with soil and water thoroughly.
A small hand tool that can dig small holes for the tulip bulbs.
Garden Gloves:
Protects your hands from dirt and potential cuts while working with soil.
Bulb Planter:
A small tool with a serrated edge and a depth marker. It will cut a small plug of soil then remove it and can release the soil back in the hold. It can help to speed up the process and can be helpful for larger projects.
Knee Pads
To protect your knees and provide cushioning while kneeling in the garden.
Carrots are root veggies packed with vitamins and fibre. They come in more than just orange! Try yellow, purple, or even white varieties for some extra colour in your garden.
Carrots grow deep into the soil to develop their iconic long roots, so they need loose, well-drained earth for proper growth. Their sweet, crunchy goodness makes them a family favourite, and their hardiness makes them perfect for Canada’s sometimes unpredictable weather.
Carrot AKA
Daucus carota subsp. sativus
Colour: Orange, purple, yellow, white
Mature Size: 6–12 inches (root length)
Family: Apiaceae (Umbelliferae)
Plant Type: Biennial (grown as an annual)
Toxicity: Non-toxic to humans and pets
Soil PH: 6.0–6.8
Soil Type: Loose, sandy, well-drained
Native Areas: Europe, Southwestern Asia
Sun Exposure: Full sun
Hardiness Zones: 3–7 (Canada)
Bloom Time: Does not bloom in the first year
Are Carrots Right for Your Garden?
Easy to grow: Low-maintenance and thrive in colder climates.
Nutritious: Packed with vitamins, fibre, and antioxidants.
Unique varieties: Different colours and flavours not commonly found in stores.
Space-saving: Ideal for containers or small garden beds.
Soil needs: Require loose, sandy soil — avoid heavy or rocky soils.
Patience needed: Carrots take 2–3 months to mature.
Watering challenges: Require consistent moisture, especially during germination.
Pest/Disease
Symptoms | Control & Prevention
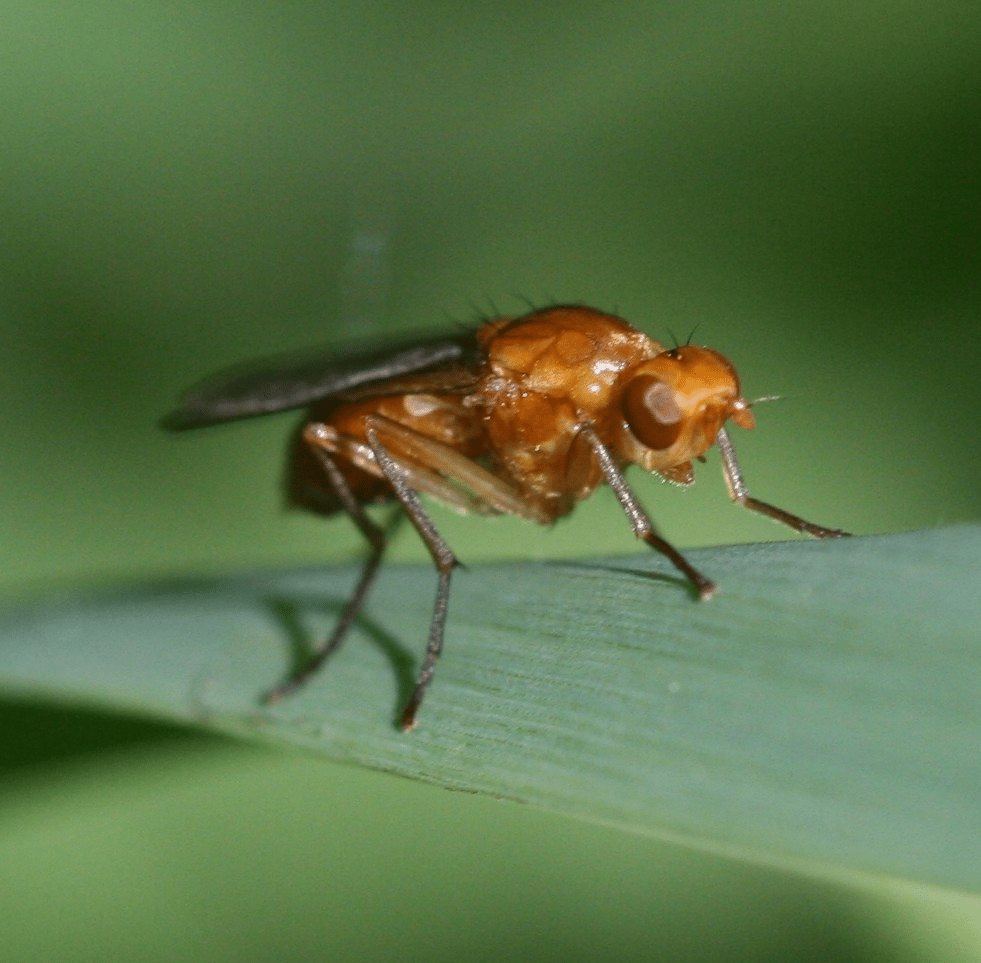
Rust Fly
Symptoms: Wilting leaves, yellowing, and rust-coloured tunnels in roots. Control & Prevention:
Use row covers
Practice crop rotation
Plant alongside onions or leeks to deter flies
Aphids
Symptoms: Sticky residue (honeydew), curled or deformed leaves, and stunted growth. Control & Prevention:
Spray with insecticidal soap
Introduce ladybugs
Remove weeds to reduce habitat
Wireworms
Symptoms: Small holes in roots and poor plant growth. Control & Prevention:
Rotate crops
Reduce grassy weeds
Remove plant debris to limit lifecycle
Leaf Spot
Symptoms: Brown or black spots on leaves and yellowing foliage. Control & Prevention:
Avoid overhead watering
Ensure proper spacing for airflow
Remove infected leaves promptly
Black Rot
Symptoms: Black, soft spots on roots, leading to decay. Control & Prevention:
Use resistant seeds
Practice crop rotation
Avoid planting in poorly drained soil
Carrot Weevil
Symptoms: Brown scars on roots and holes caused by larvae. Control & Prevention:
Remove plant debris
Rotate crops
Use sticky traps to capture adults
Alternaria Blight
Symptoms: Dark, irregular spots on leaves and stems, with a yellow halo. Control & Prevention:
Remove infected plants
Use disease-free seeds
Avoid planting in areas with past infestations
Powdery Mildew
Symptoms: White, powdery coating on leaves and stems, leading to weakened plants. Control & Prevention:
Use fungicide sprays
Ensure good air circulation
Avoid overhead watering
Keep the soil evenly moist but not soggy. Water your carrots about 1–2 times a week. Remember, shallow watering won’t cut it because their roots grow deep!
Carrots grow best in temperatures between 13(0)C and 24(0)C. Temperatures above 29(0)C can cause less growth and a bitter taste. Carrots prefer moderate humidity levels, around 50-70% so the soil stays moist but isn’t waterlogged.
Pro Tip: Add a thin layer of mulch (like straw or dried grass clippings) around your carrot tops. It keeps the soil cool and moist while protecting those tops from sunburn.
Carrots are low-maintenance when it comes to fertilizer. Avoid overly nitrogen-rich fertilizers (you’ll grow bushy leaves instead of juicy carrots). Stick to a balanced organic fertilizer with potassium and phosphorus for healthy roots.
In-ground: Carrots need depth to grow those long, beautiful roots. In a garden bed, it’s essential to loosen the soil at least 12 inches deep and remove any rocks or debris that could block root growth.
Raised beds: These allow you to control the soil quality, ensuring it’s loose, well-draining, and rich in organic matter. Raised beds are especially helpful for preventing waterlogging, which carrots dislike. They also warm up faster in the spring, giving you a head start on planting!
Sow Seeds Thinly: Space the seeds out evenly. Aim for around 1-2 inches between seeds to reduce thinning later
Plant at the Right Depth: Sow seeds about ¼ inch deep. Cover lightly with fine soil or compost and gently pat down.
Thinning Is Key: If you planted seeds densely, thin the seedlings once they’re about 5cm (2 inches) tall, leaving 5cm of space between each plant. Crowded carrots = smaller yields.
Timing is everything when it comes to carrots. They thrive in cool weather, so spring is perfect for planting! Here’s a breakdown based on Canada’s zones:
Southern Canada (e.g., Ontario, BC, parts of Quebec): Late April to early May.
Northern Canada & Frost-Prone Regions (e.g., Manitoba, Alberta): Mid-May to early June.
Pro Tip: Carrots can tolerate light frost, but planting after the last hard frost ensures success.
Most carrot varieties are ready about 60–80 days after planting. Look at the shoulders of the carrot peeking out of the soil. They’re ready when they’re about 1.5-3cm in diameter (depending on the variety).
Check Maturity: Carrots are usually ready to harvest 60–80 days after planting, depending on the variety. You’ll know they’re ready when the tops peek out of the soil and are about 1.5 to 2.5cm wide.
Time It Right: Harvest carrots in the morning when it’s cooler for the best flavour and less stress on the plant.
Moisten the Soil: Water the carrot bed a day before harvesting to soften the soil. This reduces the risk of breaking the roots while pulling them up.
Gather Your Tools
Collect essential tools such as a garden fork, trowel, garden gloves, and a bucket or basket for collecting your carrots.
3. Loosen the soil
Use a Garden Fork: Insert the fork into the soil a few inches away from the plant to avoid damaging the roots. Gently lift and loosen the soil around the carrots.
For Tight Spaces: If you don’t have room for a fork, use a trowel to loosen the soil around individual carrots.
4. Pull up the Carrots
Grip the Tops: Grasp the carrot tops firmly where they meet the root. Pull straight up with steady pressure to avoid breaking or damaging the carrots.
Check for Resistance: If the carrot doesn’t release easily, loosen the soil further with your garden fork or trowel before trying again.
5. Trim the Tops
Immediately after harvesting, use pruning shears or scissors to cut the leafy tops about 1 inch above the root. Leaving the tops can draw moisture away from the carrots, reducing their shelf life.
Clean your carrots
Shake Off Excess Soil: Gently shake off the loose dirt while in the garden.
Rinse (Optional): If you prefer, lightly rinse the carrots with a garden hose or in a bucket of water. Be gentle to avoid bruising or scraping the roots.
7. Inspect your harvest
Separate any damaged or imperfect carrots from the healthy ones. Damaged carrots should be used first, as they won’t store as well.
8. Store your carrots
Dry Them: Allow carrots to air-dry completely before storing.
Refrigerate or Store in Sand: For short-term storage, place carrots in plastic bags with ventilation holes. For long-term storage, layer them in sand or sawdust inside a cool, dark, and humid area like a root cellar.
9. Clean up the Garden bed
Remove any leftover plant debris to prevent pests and diseases from overwintering in the soil.
Consider planting a cover crop or mulching the area to prepare for future planting.
Pro Tip: Carrots left in the soil longer will keep growing sweeter, but don’t leave them too long, or they might split.
Essential Supplies for Growing Carrots
100% pure bone meal, free of synthetic additives, and feeds your carrots for up to 2 months.
Packed with phosphorus and calcium, it supports strong root development and improves resistance to disease.
Specially formulated to send nutrients directly to the roots
when your carrots need them most. This soil helps improve water absorption and moisture retention—essential for the consistently damp environment carrots thrive in.
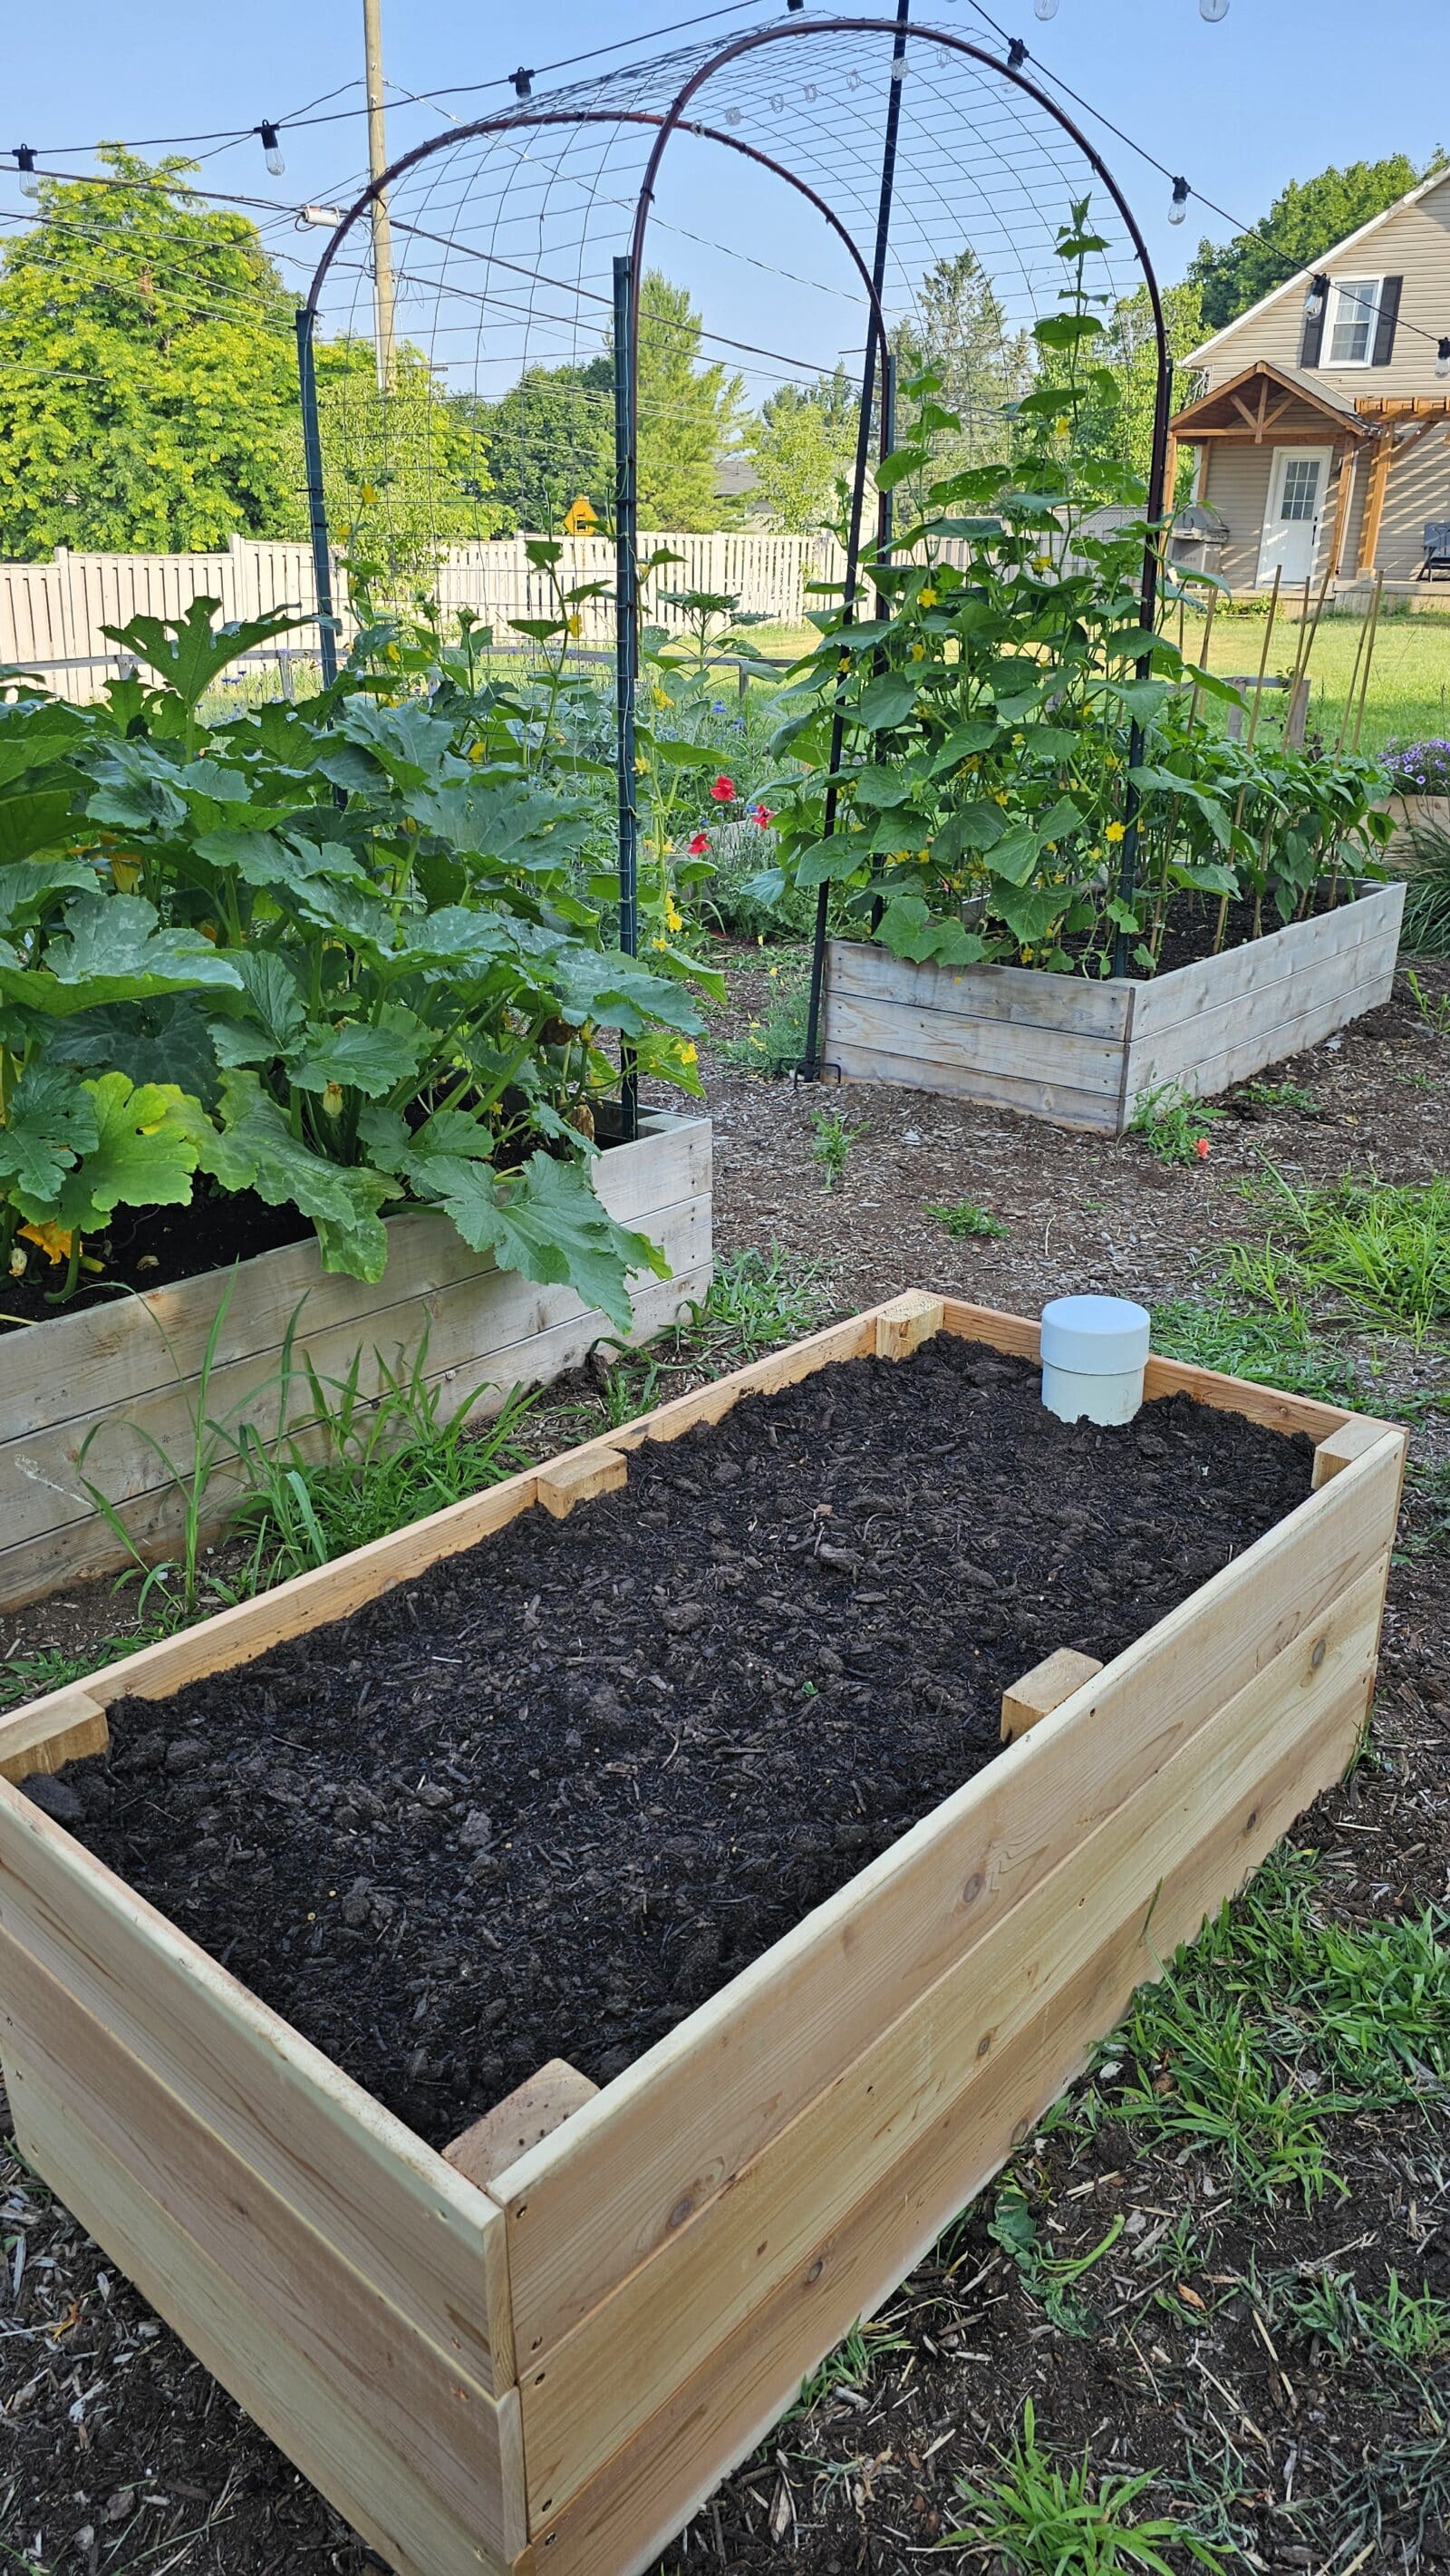
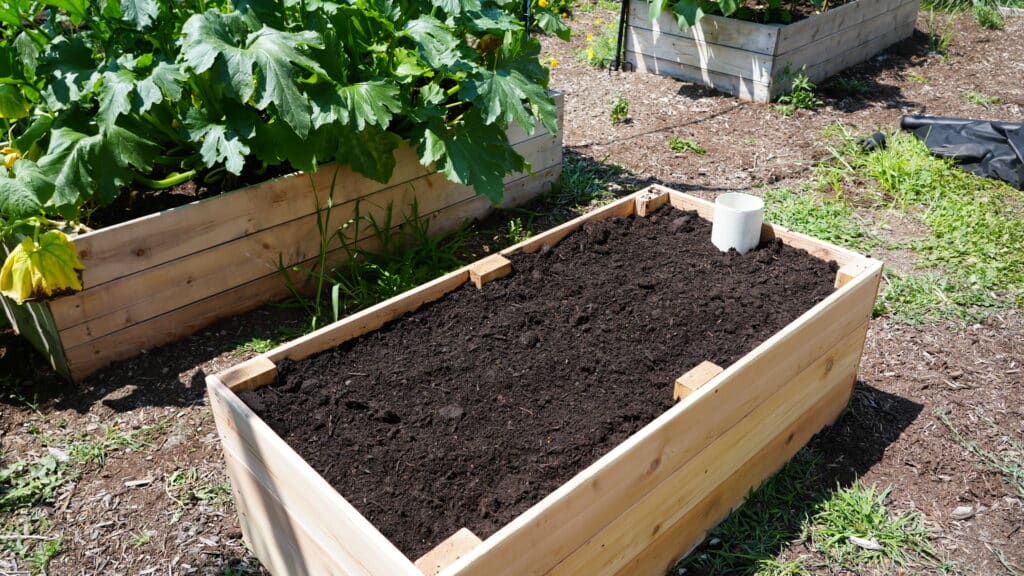
Keeping up with watering your garden can feel like a full-time job. And when your house runs on a well like mine does, every drop of water counts. That’s why I’ve been eyeing self-watering garden beds for a while (also called self-wicking beds or sub-irrigated planters). And this year, I finally decided to try building one myself!
These beds are designed to water your plants from the bottom up, using a built-in water reservoir. It’s a super efficient way to keep your garden hydrated, without constantly dragging out the hose or worrying about overwatering.
After learning more about how they work, I realized this could be the perfect mix of sustainability and practicality for my garden oasis! If this one thrives, I’m definitely upgrading all my beds next season.
Here’s exactly how I built it, so you can try one too!
MATERIAL LIST
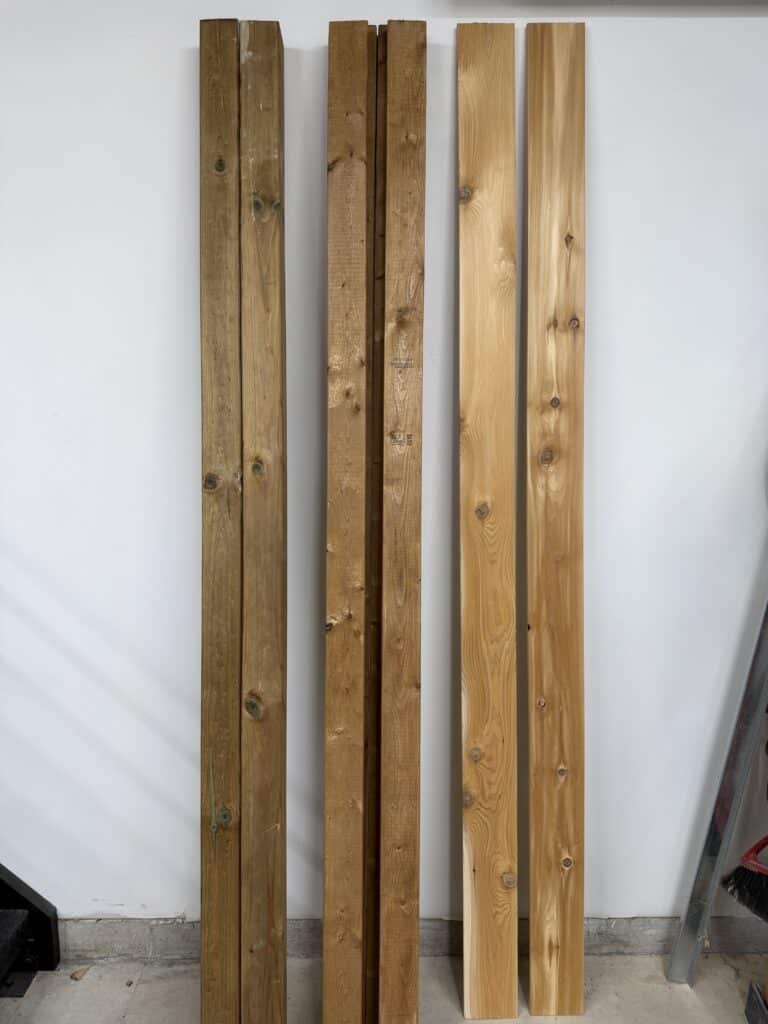
Lumber & Structure
(6) Cedar 1×6″ fence boards, 6 ft long (garden box)
(1) 2x4x8 cedar board (cut into 6 vertical supports)
2″ deck screws
Water Reservoir & Lining
(1) 10 ft – 4” perforated PVC pipe
(1) 4” 90° elbow joint
(2) End caps (to seal pipe end and keep critters out)
PVC Primer & PVC Pipe Glue (optional but recommended)
(6–8) bricks or blocks
(4–5 cu. ft) washed gravel
5 ft x 5 ft heavy-duty pond liner
Heavy-duty landscape fabric (for soil separation)
Soil & Plants
4 bags of Miracle-Gro Raised Bed Soil
Seeds or starter plants of your choice
Tools
Chop saw or circular saw
Drill
Reciprocating saw
Staple gun
Utility knife or scissors
Measuring tape
Step 1: Build Your Box
I built my garden box to be 2 ft x 4 ft and about 16.5” tall – plenty of space for root growth without eating up your whole yard.
Start by cutting your 1×6 cedar boards down to (6) 24” pieces and (6) 46¾” pieces. Then cut your 2×4 into (6) shorter posts to use as your vertical corner supports.
Build the long sides of the box first. Stack three 46 ¾” boards and add three vertical supports across to keep them secured. Place one vertical piece at each end and one in the middle. Then attach the 24” pieces to create a full planter box. Boom! You’ve got yourself a garden bed.
Step 2: Line It with a Pond Liner
In order for the soil to wick, the garden box needs to hold water. To do this, I’m securing a heavy-duty pond liner with a staple gun. Staple it along the inside walls of the bed, about halfway up the sides. You don’t need to line the whole height – it just needs to sit above your pvc pipe to create a reservoir in the bottom section of the bed.
Pro tip: Don’t skimp on this step. A cheap liner will tear, and then your plants are basically living in a leaky canoe!
Step 3: Set Up the Water Reservoir
Now comes the fun part – let’s create our reservoir! This is what makes your planter “self-watering.”
First, cut the 10-foot PVC pipe down to size. The inside of the planter box measured 40.5 inches. Cut the pvc pipe to this size but consider the end cap and 90 degree elbow in this measurement. In order for the plants to pull water from the reservoir, the pipe needs holes! If your pipe isn’t already perforated, you’ll need to drill ½-inch holes along its length. I made 4 holes approx. 3 inches apart, spaced out at every 6 inches. Cap one end and add a 90° elbow to the other.
Using the leftover PVC pipe, I cut a 13 inch vertical fill pipe that connects to the elbow, in order to easily pour water in from the top.
Optional: use PVC primer and PVC Pipe glue to secure the joints if you want a watertight seal.
Next, fit the pipe inside the garden bed! Add 6–8 bricks along the bottom of your bed to hold your pipe in place. This setup creates a reservoir where water can hang out, ready for your plants to sip on when they’re thirsty.
Step 4: Add Gravel & Fabric
Once your pipe system is in place, it’s time to fill in around it with washed gravel. Pour gravel until it fully covers the pipe and fills the bottom 4–5 inches of the bed. This holds the water and prevents soil from clogging the system.
Lay a layer of landscape fabric over the gravel and secure it in place with the staple gun. This is key! It keeps the soil from seeping into your water reservoir but still lets moisture pass through. Think of it like the bed’s breathable base layer.
Step 5: Fill with Soil
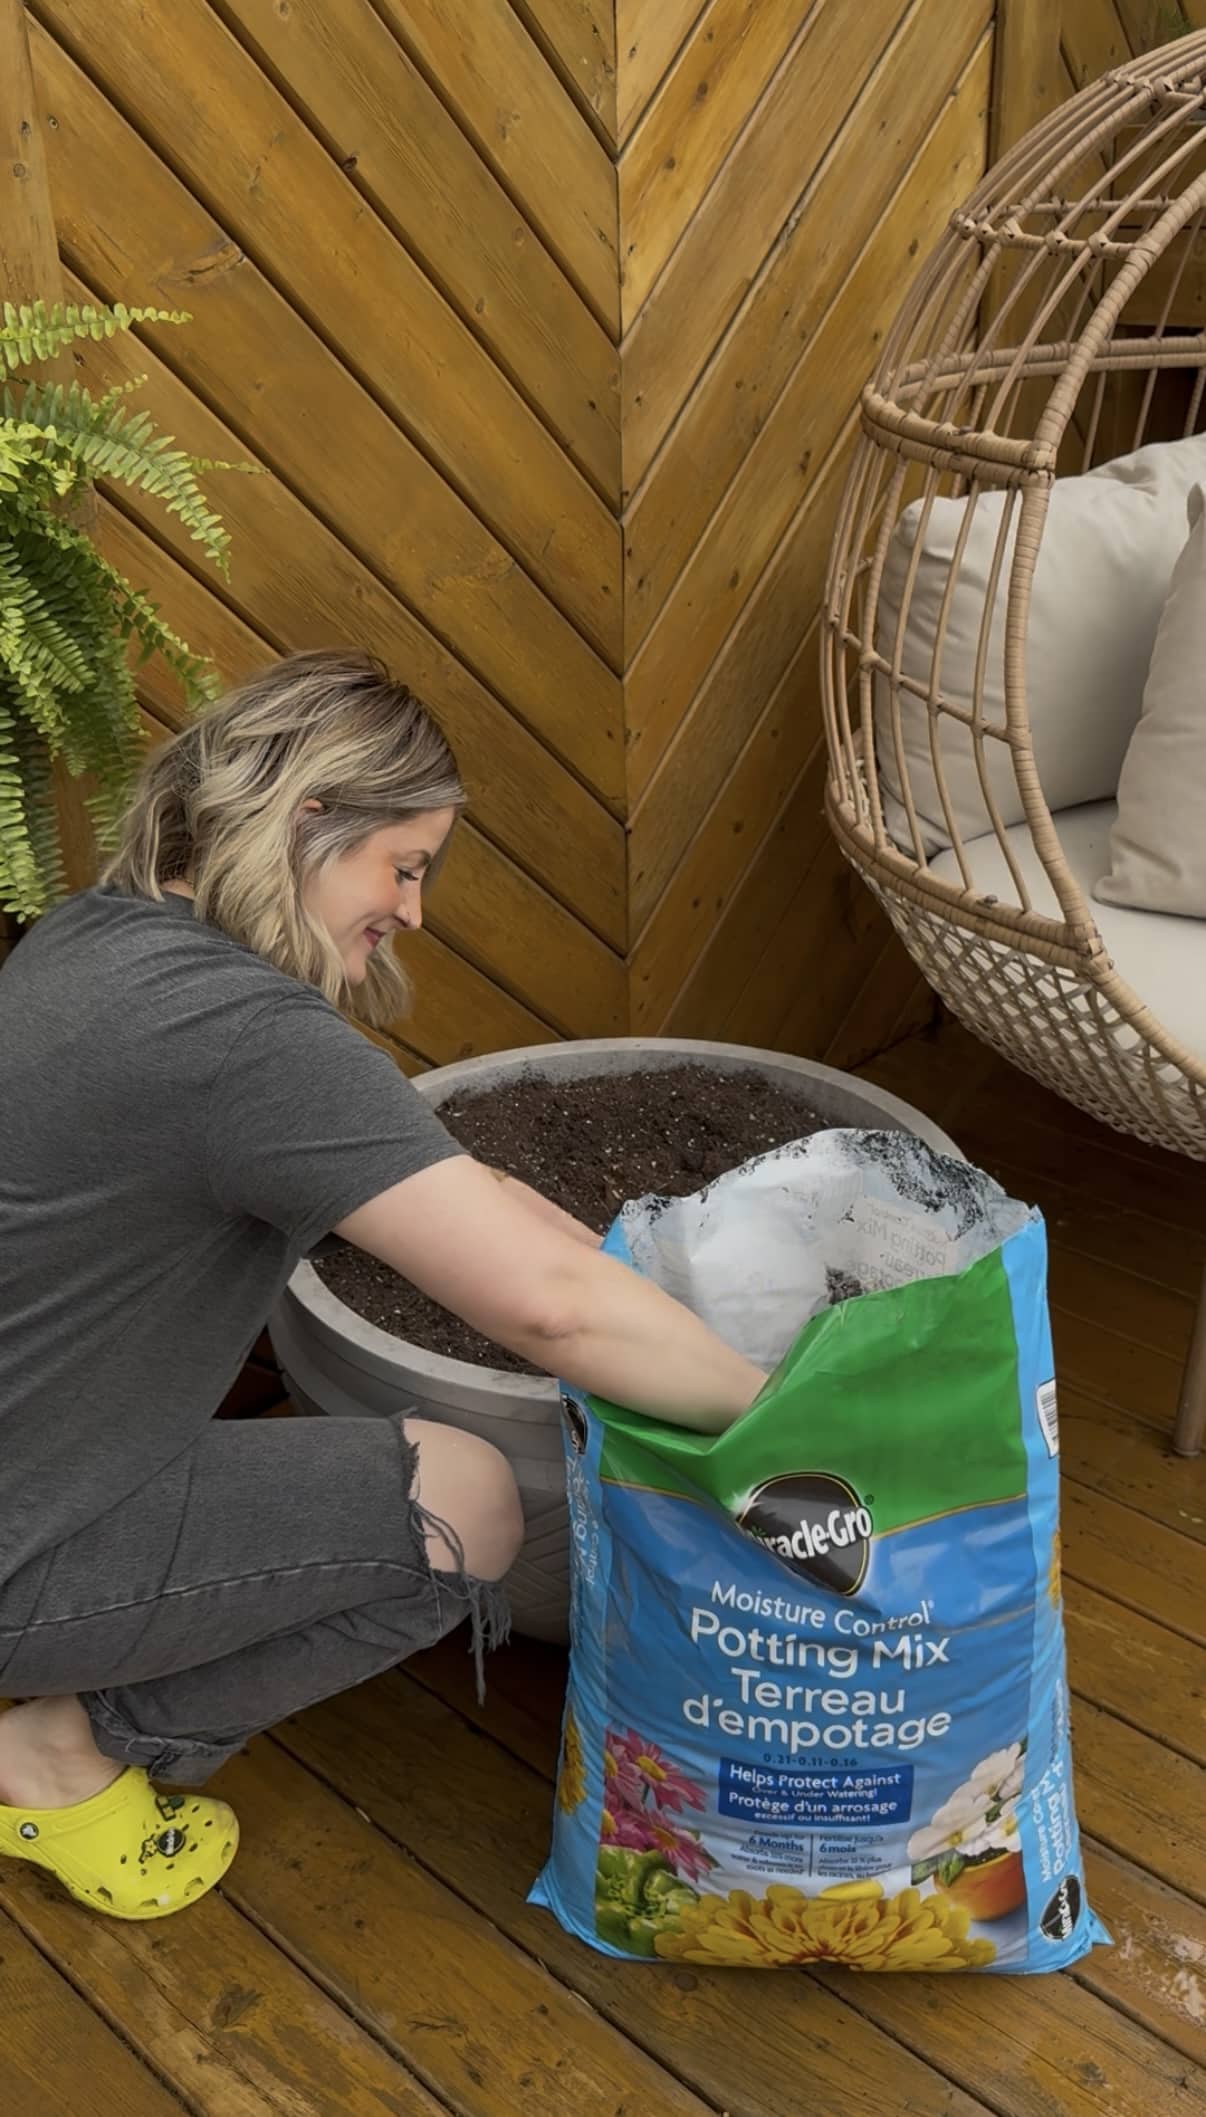
Now the fun part. Pour in your soil – I used Miracle-Gro Raised Bed Soil because it’s pre-mixed with compost and nutrients, and perfect for veggies! Add soil all the way to the top, gently pressing it down but not compacting it too much. Roots still need room to stretch.
Step : Fill Your Reservoir + Plant Away
Pop the cap off your vertical fill pipe and slowly add water until the reservoir is full. Then, get planting! The water will wick up through the soil as needed.
This means you’ll water way less often, and your plants will be less prone to stress from over – or under -watering. This was one of those projects that made me feel like a garden genius! It’s practical, sustainable, and just really satisfying to build. With one watering, your plants are set for days, even during the hottest stretches of summer.
If you’re looking to reduce water waste, take the guesswork out of watering, or just want an excuse to play with PVC pipe, a self-wicking bed is 100% worth trying.
Hello Everyone! My name is Shavonne, and my social media channels are called Once Upon a Bungalow! I’m here on Plant Project Canada’s webpage with instructions on how to build this stunning planter and privacy wall. I hope you enjoy creating this project as much as we did!
This was built for my cousin’s house. We thought her pool’s seating area could use some flair, so this is what my husband, Stuart and I came up with. We couldn’t be happier with how this turned out, and they love it so much! Check out the reel for this project on Instagram here. Here we go!…
These planter boxes are ideal for many different foliage and flowers as they have an 8” depth of soil, which is ample soil space for your plants to thrive.
The instructions below will build two planter boxes and the privacy wall portion. To form the 90-degree look hugging my cousin’s sectional, one finished planter box will be 18” W x 38” H x99” L and the other planter box will be 18” W x 38” H x 80” L. Her sectional measured 76” L x 76” W and 32” H. If the furniture you are building this for has different dimensions, you may want to alter the cuts and measurements to customize it to your needs, but you still can follow the steps below for the assembly process. I used pressure-treated pine to create my planters. This can be substituted for any ideal preferred type of wood. However, I recommend pressure-treated wood as it is worth the investment because the wood won’t need a stain for the first few years.
Building the frame of the first (larger) planter box.
Note: Follow these exact instructions to make the second (smaller) planter box. Instead of cutting 96” pieces, replace this measurement with 80.” The instructions below will take you through the process of building the larger box.
Step One: Cutting the pieces
Using a table saw, cut six 2”x 4” pressure-treated pine in half so that you have 1” x 2” strips. Next, cut the strips made into eight 33” pieces, twelve 12” pieces, and six 96” pieces using a mitre saw.
The cut list for the first frame is as follows:
Six at 96”
Eight at 33”
Twelve at 12”
Step Two: Building the frame of the two long sides of the planter box
Lay the materials on a flat surface. Two 96” pieces on the bottom and top, and four 33” inch pieces on either side and two in the middle. Using a power drill, pre-drill holes at the bottom of the 96” piece upwards into the 33” pieces. Use 3” screws to secure the to end pieces in place. Space the two middle 33” pieces evenly. I chose to space mine 27 3⁄4” in from each side. Pre-drill holes at the bottom of the 8’-0” piece upwards into the 33” pieces and secure with 3” screws. Next, using 2” screws, toenail those screws from the 33” pieces into the 96” pieces making the frame extra secure. Repeat this process to end up with 2 frames. Refer to the images below.
Step Three: Adding the deck boards to the frame
Starting at the top, attach the 8’-0” deck boards to the frame by pre-drilling holes with a power drill and then using 2” screws to fasten the boards to the frame. Use 2 screws at each frame location (where the “studs” are located). Six full-width decking boards will fit on this frame. The seventh decking board will have to be cut to size using a table saw. To measure what is needed to cut off, place the board on the frame and trace using a pencil where it hits the top of the frame. Cut that portion off with a table saw and use the same steps as above to secure it to the planter’s frame. Repeat this process on both frames created in step two. Refer to the images below.
Step Four: Attaching the 12” pieces
On a flat surface lay one of the planter sides created in the previous step, flat, with the inside of the frame facing upwards. Begin to attach the 12” pieces created in step one perpendicular to the frame. Attach one 12” piece to each of the four corners, four 12” pieces on the top and bottom in line with your frame, and four 12” pieces going across the center.
For the center 12” pieces, measure down 8” from the top of the planter and place those pieces there. These middle pieces will provide your planter with more support, but will also be the future frame for the bottom of the soil area. Using 3” screws toenail each 12” piece on two different sides into the frame making sure they are square and at a 90-degree angle. Refer to the images below.
Step Five: Attach the other side of the planter
Take the side of the planter that was just completed in step four and flip it over on to the other side of the planter that does not have 12” pieces with the inside of this side facing up. Make sure it is aligned as square as possible. Once the side with the 12” pieces already attached has been placed face down on top of the side without 12” pieces, begin using 3” screws to toenail the 12” pieces to the other side of your planter. Two screws per 12” piece. Refer to the images below.
Step Six: Creating the bottom of the soil area
Because this planter is so large, there isn’t a need for soil to go all the way to the bottom of the planter. Before closing up the sides of the planter with more decking boards, install the bottom of the soil area. Place two 96” decking boards in the planter and mark the sides of the wood where these boards hit the inside frame. Measure how deep the notches will need to be cut. Remember, this doesn’t need to be perfectly tight to the frame, as drainage is important for healthy plants, so a little bit of imperfection is a good thing for this step.
Using either a jigsaw, multi-tool, or reciprocating saw, cut the marked notches out of the 8’-0” decking boards. Slide these into the planter from the sides and make sure they fit correctly around the frame of the interior. The two full-size decking board pieces will go on either side, and for the middle of this soil area, use the scrap wood that was cut off in step three. It should be a good fit here, allowing for movement between the boards and water drainage. Refer to the images below.
Note: Follow these exact instructions to make the second (smaller) planter box. Instead of 96” pieces, replace this measurement with 80.”
Building the privacy wall/backdrop & assembling the structure together
If the design is the same “L” shape design we created, make two of these. The instructions are to create one. If you are creating the same design as we did, proceed to make two of the following.
Step One: Making the cuts
Cut two 2×4’s at 67 5⁄8”. Cut two 1 1⁄2” x 1” pieces at 31 1⁄2”. These 31 1⁄2” pieces are cut from a 2×4 cut in half lengthwise on a table saw. The cut list for the privacy wall is as follows:
Two 2×4’s at 67 5⁄8”
Two 1 1⁄2” x 1” pieces cut at 31 1⁄2”
Two 4×4’s left as is at 8’- 0” long. Ensure they are the same height.
Step Two: Assembly of the black panel frame
Lay two 4x4s flat on the ground. Place the 67 5⁄8” piece flat and at a 90-degree angle between the two 4×4’s. The bottom of this piece of wood should be 42” above the bottom of the 4×4. Toenail 3” screws from the 67 5⁄8” pieces into the 4x4s from the top and bottom.
Next, place the 31 1⁄2” boards perpendicular up from the 2×4 that was just attached. Secure the 31 1⁄2” piece to the 4×4 by pre-drilling and then securing with 2” screws to the top and bottom. Next, add the other 67 5⁄8” piece to the top of these two boards, toenailing this piece to the 4×4 on the top and bottom of the piece. This is the frame created for the black acrylic panels.
Next attach the black privacy screen to the frame that was created using 1” screws. This will be the back of your privacy wall. Refer to the images below.
Step Three: Cutting and assembling the top piece of the “pergola” privacy wall
This is the step that will add the top part of the “pergola” style of this privacy wall. First, take two 8’-0” long 2×6’s and add a 45-degree angle to their ends. Measure 1 1⁄2” down from the top of the board and use a speed square to mark a perfect 45-degree angle with a pencil.
Using a mitre saw, cut the 45-degree angle to match the pencil marking. Repeat this process on both 2×6’s. Next, attach one of these to the 4×4. Attach this 2×6 3 1⁄2” down from the top of the 4×4. There should be 10 3⁄4” measurement on either side of the 2×6 from the edge to the start of the 4×4, making this piece centred on top.
Pre-drill holes first, and then attach with three 3” screws. Flip over the privacy wall, and repeat these steps on the opposite side of the privacy wall. Refer to the images below.
Step Four: Attaching the two planters together
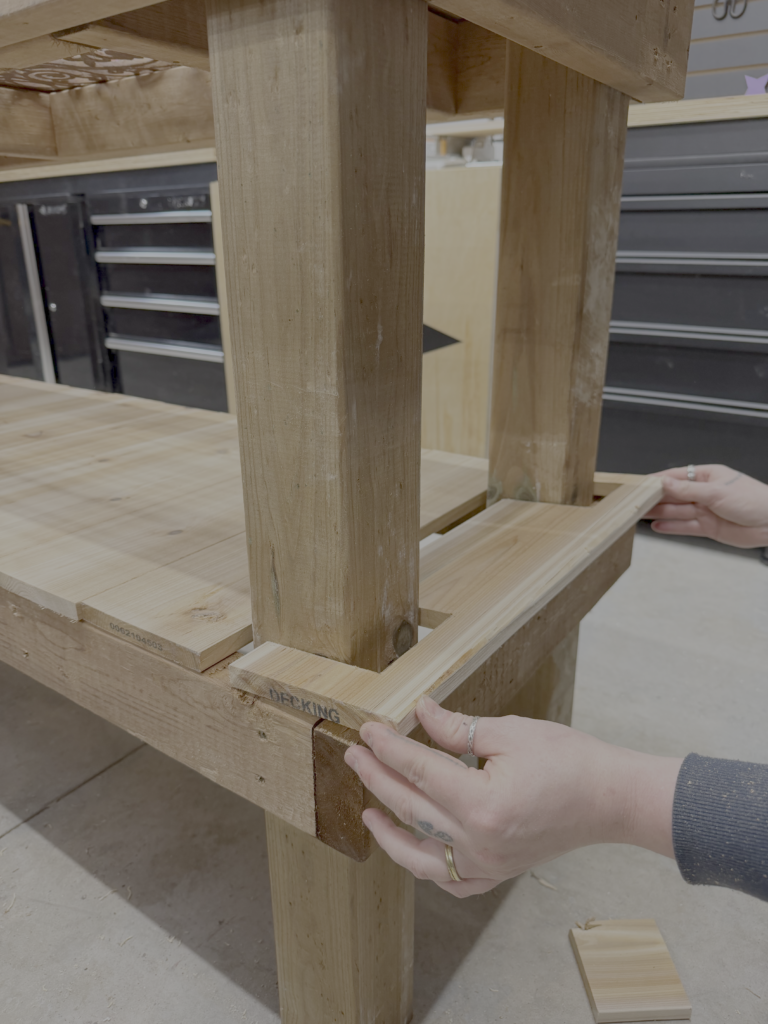
At this point in the project, we transported the planters and privacy walls to my cousin’s backyard to assemble the rest of it there. ….. Place the larger garden box at the back of the project, and the smaller garden box perpendicular to the face of the larger one. Attach by pre-drilling, then using 3” screws through the interior of the smaller planter into the larger planter to secure these together. Insert the privacy wall structure into the planter boxes and push it to the far side of each planter to ensure that they do not overlap or intersect at the top. Anchor the 4×4’s in to the planter by pre-drilling, then using 5” screws.
Using a jigsaw, cut out a 4” x 4” spot for the 4×4 to go through the base of the soil area. After everything is attached and anchored properly, add one layer of landscaping fabric to the base of the planter, securing the fabric with staples. Refer to the images below.
Step Five: Add the top pergola pieces
Cut fourteen 2×4’s at 18” long. Then, measure 1” down from the top of the 18” 2×4” piece on either side and mark this with a pencil. Using a speed square, mark a 45-degree angle on both sides. Using a mitre saw, cut this 45-degree angle. Place the seven pieces on each privacy wall, space them out evenly on top. They will be placed about 14 1⁄2” apart. Secure these to the top by toenailing these top pieces onto the structure up through the 2×6 into the 2×4 pieces. Refer to the images below.
Step Six: Add the Trim
To make the top trim: Using a table saw, cut the 5/4” deck boards at 3 1⁄2” width. To form the trim around the top, measure the length and width of the planter, and then cut these at a 45-degree angle. Pre-dill, then attach with 2” deck screws.
To make the side trim: Using a table saw, cut the 1”x6” deck boards in half using a 45-degree angle lengthwise. Cut the boards into 36” pieces and attach these to the sides of the planters, creating a mitered joint on the outer, and inner corners, concealing the raw edges of the planter boxes. Attach by pre-drilling, then using 2” deck screws. Refer to the images below.
Step Seven: Add the soil and plants
Using Miracle-Gro Garden soil, fill the planters that have been lined with landscaping fabric. This all-purpose planting mix helps grow plants twice as big and helps plants develop strong, healthy roots. I purchased purple, red, and yellow petunias for the planters and make sure to give them a good trim after planting them in the planters. This will help encourage new blooms to grow. I wanted something that would continuously bloom in her yard all summer. It’s recommended to fertilize with Miracle-Gro Water Soluble, All-Purpose plant food as well. Refer to the images below.
Step Seven: Add the soil and plants
This project was so much fun to complete with my husband, Stuart. My cousin and her family are so happy with the result, and we think it looks amazing in their yard. Check out the before and after shots below. What a difference!
Be sure to check out the reel of this project here. If you make a project inspired by ours, be sure to tag @PlantProjectCanada and @OnceUponaBungalow so that we can see your project!
Hello everyone! My name is Shavonne, and my social channels can be found by searching Once Upon a Bungalow on most social media platforms. I’m on Plant Project Canada’s blog to teach you about the DIY Patio Pond. I’ll cover all the different aspects of the project in this article, from the supply list, to what soil to use, to what plants to buy and the overall maintenance that comes with having one of these ponds on your patio!
Similar to creating a traditional planter pot feature with soil, layers of different shapes and sizes of plants are important considerations to make. Create a stunning pond by including a variety of plants. Consider using tall plants for the back or middle of the pond, filler plants around your taller plants, and floating plants for the front of the patio pond.
Pre-made and ready-to-go options will be located in the pond plant section at your local greenhouse. Pre-potted options are super easy and my personal favourite. These are already potted in the proper soil and rocks, and allow you to simply drop the plants into the pond as they are and enjoy.
The tags on the plants will specify how deep to place the plants in your pond. Just like a traditional planter, each plant will have different requirements to ensure it grows and thrives to the best of its ability. For example, water lilies are beautiful but require being in a deeper pond, so keep that in mind when purchasing your pond plants. Just like flowers in your garden, the tag on the plant will list the optimal locations, sunlight needs, and depths of planting. Below are some of the many options for your patio pond.
Aquatic Water Bowl (A premade pre-potted mix you can find at your local greenhouse)
Floating plant: Water lettuce
Floating plant: Water hyacinth
Water lily
Blue Hawaii Colocasia
Barred Horse Tail (Equisetum Japonica)
Upright Water Clover (Marsilea Mutica)
Large-leaved Weed Mace (Typha latifolia)
Water Calla (Zantedeschia Aethiopica)
Yellow Creeping Jenny (Lysmachia numm Aurea)
Variegated Ginger (Hedychium coronarium)
Aquaris Hibiscus (Hibiscus Acetosella)
Water Pennywort (Hydrocotyle)
Hardy Water Canna (Thalia Dealbata)
Bronze Canna (Canna ‘Australis’)
Pitcher Plant (Sarracenia ‘Velvet’)
Primula (Primula Vialli)
Siberian Iris (Iris Siberica)
Variegated Sweet Flag (Acorus)
Chameleon Plant (Houttuynia)
Red Stemmed Parrot’s Feather (Myriophyllum Brasiliensis)
maintenance
The biggest thing to remember when caring for your patio pond is that it is not a pool, so the water is not going to stay perfectly clear and immaculately clean. This style of a patio pond is similar to a bird bath, which means you may have to dump it out, give it a quick rinse and refill it every so often. If you are having trouble with an excess of algae, try moving the location of the pond to a less sunny spot. If you are finding that the solar fountain isn’t circulating the water enough, add a plug-in pump to give more water movement.
most commonly asked questions
how do I avoid too much moisture in the soil below?
One of my biggest recommendations when making a pond with a planter pot around the bottom is to use Miracle-Gro® Moisture Control soil. This type of soil will ensure that the plants in the surrounding base pot won’t get over-saturated with water when the pond pot inevitably spills over into the plants in the surrounding base pot. Ensure there are drainage holes in the base pot as well to help with the excess water these plants will experience.
When choosing plants for the base pot, pick plants that don’t mind being exposed to more water. I’ve had success with creeping jenny, potato vines, and ivy. Try and stay away from plants that don’t like a lot of water, such as succulents, cacti, and other drought-resistant plants. Despite your best efforts, the water will spill over into this area, so take the time to protect the plants you have invested in.
how do you keep mosquitoes away?
This is an easy one! Mosquitos do not like moving water, they only like still water. As long as your pond has water circulating, mosquitoes shouldn’t be an issue.
how big of a pot do you use?
You can use as big or as small of a pot as you like. The larger the pot, however, the more plants you can enjoy in the pond. The larger pot in my video content is 30 inches wide by 17” high.
can you winterize the pond?
Just like other plants, you can winterize your pond plants. You’ll need adequate lighting, such as a very sunny window or a grow light to do so. You’ll also have to change out the water frequently to keep them healthy throughout the winter. Personally, I just purchase new pond plants every year as I don’t have the space to winter too many plants indoors; however, if you are able to winterize, this could be a big money saver in the long run. Keep in mind, I do live in Canada, so I am not able to keep my patio pond out all year.
can you add fish?
Fish require a lot more research to keep in a pond, it’s doable, but this is out of my scope of knowledge on the topic of patio ponds. They would likely need more circulation in the water than just a solar fountain. I recommend researching this topic in depth before adding pet fish to the mix!
is it safe for animals?
Wild animals such as birds and squirrels love ponds and bird baths! After speaking to a bee expert, I have learned that bees specifically like this type of water source as they prefer a more “natural taste” that a patio pond can offer. I can only speak from my experience when it comes to domesticated animals drinking from a patio pond. Our small pup, Mojito, has been fine after having the odd drink from the pond. We don’t encourage it, but he finds a way to sneak a drink here and there. If you are worried about your pet drinking from the pond, just take extra precautions to keep your pet away from your patio pond.
how many plants should I buy?
You don’t need as many plants as you think. Just like other plants, they grow and expand! Especially in terms of the floating pond plants. You likely will only need one plant of the floating variety in a small pond, and you’ll be surprised just how quickly these spread and grow. You can separate or propagate pond plants, just as you would any other plant.
I hope this helps get you started on your patio pond adventure. Please feel free to contact me with any other questions you may have. If you create a patio pond, please tag @PlantProjectCanada and/or @OnceUponaBungalow! We would love to see what you design!
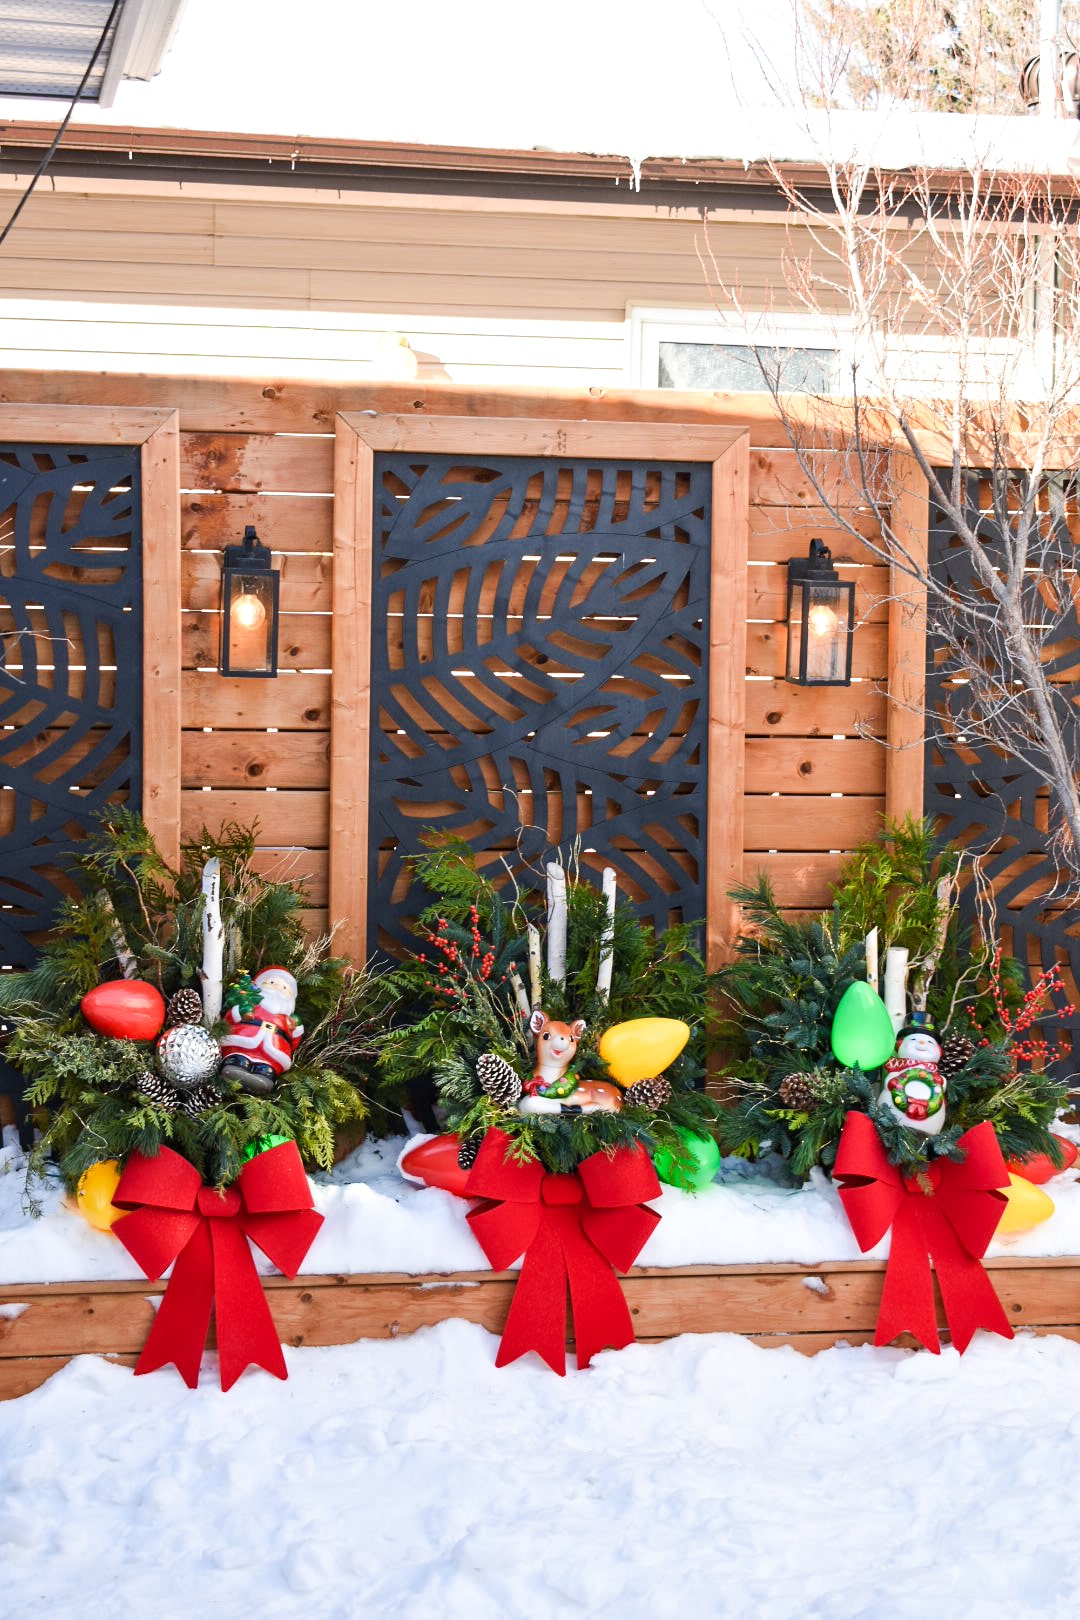
Hello Everyone! My name is Shavonne, and you can find me anywhere on social media under the name Once Upon a Bungalow. Plant Project Canada has graciously asked me back to give you some tips on creating outdoor holiday arrangements. Now, I’ll be honest with you, this was my first time making an outdoor arrangement. I’m not claiming to be an expert. I am, however, going to show you everything I learned, along with the materials I used to make these as quirky and unique as possible – a common theme in our bungalow. Be sure to check out this holiday outdoor arrangement reel on Instagram, Facebook, or Tiktok!
Alright, let’s go!
First things first: If you don’t know how to do something, ask someone who does! That’s precisely how I started this project, asking our local expert so that I could give you the best “how-to” article possible. I’d love to give a HUGE shout-out to Jacqueline Williams of Just a Girl in her Garden, a local greenhouse and flower shop. She took the time out of her busy holiday schedule to give me a course on how to create a long-lasting and gorgeous arrangement for our cold Saskatchewan winters. Check out Just a Girl in Her Garden’s webpage here.
Here’s what you’ll need:
Pine
Cedar
Fir
Oregonia
Birch Poles
Ilex Berries
Curly Willow
Miracle-Gro Potting Soil
Pot liners/ Container
Fairy Lights
Accents & Decor
Jumbo Christmas Lights
Pine cones
Wooden dowl
Floral Tape
Floral Wire
Diagonal cutters/ tin snips/ needle nose clippers/ or flower sheers
step 1.
Select you greens: I used three main foliage types for the arrangements (photographed above in order): Pine, Cedar, and Fir. Using different kinds of foliage gives the arrangement different colours, textures, and dimensions. I purchased an equal amount of each of these varieties, and I recommend you source your foliage from your local greenhouse to ensure the quality of the product. If you already have a garden full of these greens, you can also just cut off your own!
For accents, I used Oregonia, birch poles, and Ilex berries. These are more of an investment; however, you only need a few of them, and they add so much flair and personality to your arrangement. Later in this article, I’ll also show you the curly willow that is incorporated into the final design.
step 2.
Select you soil, pot, and decide on a layout: There are many options that can be used as a basis for the arrangement. Some prefer sand, and some prefer floral foam; however, in the harsh Saskatchewan climate that fluctuates regularly and sees extremely cold temperatures, our local garden expert, Jacqueline, recommended starting with the soil. I chose to use Miracle-Gro Potting Mix, which is ideal for outdoor and indoor containers. This will also help us prevent the branches from rotting and ensure we have a long-lasting holiday arrangement. This potting mix facilitates soil aeration that ensures oxygen reaches the plant branches, which is an essential factor in promoting overall arrangement health.
Your pot selection depends on the size of your arrangement and whether or not you would like to use a liner in your main pot. These three arrangements were going to be featured in our outdoor privacy wall planter, so I knew just the pot liner would work well for this project. You can also choose to build your arrangement directly into your main pot; a liner is unnecessary.
Deciding on your arrangement layout depends on how you want people to view it. Where is your arrangement going? Will it be seen by all the sides? Or will it only be seen from the front? Asking yourself these questions will determine how you build your design. For my vintage holiday arrangements, I knew there would be a backside that would rest against the privacy wall in our backyard. Instead of a “mound” style that is beautiful from all angles, I went for a forward-facing arrangement that will be primarily viewed from the front. Knowing my design direction, the back of my arrangement didn’t have to look good, and I could create height at the back of the pot instead of the middle. Tip: Explore Pinterest for inspiration before beginning.
step 3.
Start with the poles: Start with your birch poles. I used three as I like an odd number, but you can use as many as you like! This creates a central focus for your arrangement, and you can start building the rest from there. Stagger the poles to create different heights and vary the angles at which they are added to the pot. Remember, if you are building a mound arrangement (an arrangement that will be viewed from all angles), you will want to place these in the center. However, these were placed more toward the back because I am building a forward-facing arrangement.
step 4.
Add the greens: One of the biggest things I learned from my class at Just a Girl in Her Garden was to make sure that you take off the lower branches, needles, and leaves from the base of your foliage to ensure that the plant does not rot within the soil. Before placing it in the pot, ensure the bottom 3-4 inches are clear of all needles, leaves, and branches. Some you can remove with your hands, and others can use either tin snips, floral sheers, diagonal cutters, or needle nose clippers.
step 5.
Add the accents: Take into consideration what you want in the center of your arrangement. I knew that I wanted the vintage Santa, reindeer, and snowman as my focal point, so I included parts of the shorter greenery facing downwards in the front to create a resting spot for these elements. After putting all the fir, pine, and cedar in place, I added some curly willow, glitter branches and pine cones. To attach your accent items and focal point items, use floral wire and wrap the wire around the item you would like to secure, and then anchor the wire to a birch pole, or another strong point of your foliage. This keeps everything secure and in place.
step 6.
Add the lighting: Next, I added the Ilex berries, jumbo-size Christmas lights and fairy lights. The lights do make all the difference! These fairy lights were battery operated, but I recommend getting plug-in lighting or solar lighting that you can set to come on when it gets dark out at night – it’s just less hassle.
step 7.
Water your arrangement: After completing all these steps, ensure you water your arrangement well; however, do not overwater. If you accidentally put too much water in the soil (like I did), drain it out before putting it outside to freeze. If you fail to do this and have too much water in the pot, the plastic can burst open with the expansion of the frozen water! Remember, if temperatures go above zero, you must water these arrangements often! They do drink quite a bit. If temperatures stay below zero, they should remain lovely, lush, and green, and you won’t have to worry about watering.
ta-da! you’re done!
Honestly, I was pretty worried about messing up before I started making these! As it would turn out, you really can’t mess up! Have fun with it, get creative and add finishing touches that make your arrangement represent what makes you happy and brings you joy. I went for an over-the-top, vintage, quirky Christmas, and I’m so glad I did. I hope you guys enjoyed this tutorial! Happy Holidays from my family to yours! – Shavonne
Hello Everyone! My name is Shavonne and my social channels are called Once Upon a Bungalow. I’m so happy to have been invited to Plant Project Canada’s webpage to share a how-to on this very exciting project. This time I have instructions on how to build our Light-Up Living Plant Wall. Check out our video for this project here! This project is for beginner to intermediate woodworkers and is a great way to display your plants outdoors in the day or in the evening. In case you missed it, click here for my instructions on making Planter Boxes with a Blooming Trellis Archway, my first article with Plant Project Canada.
These instructions are based on our backyard living wall, feel free to adjust the measurements to fit your space appropriately. Alright, Let’s get started on this unique and whimsical plant wall…Here we go!
Here’s what you’ll need:
Material list:
– 1 ¾” Deck Screws
– 3 ½ ” Deck Screws
– 2 – Pressure-treated 4×4’s (8’-0” Long)
– 4 – Pressure-treated 2×4’s (10’-0” Long)
– 12 Pressure-treated fence boards (10’-0” Long)
– 2 Black Acrylic Privacy Panels (2’-0” x 4’-0”)
– 6 Hanging Plant Pots (I used metal plant pots)
– 3 Rectangle Plant Pots (For the top, these can be any pots you like!)
– Stain and or Paint
– LED Strip Lights (65.6ft, self-adhesive)
– 12 Metal Flower Pot Clips (Typically used for hanging clay pots on a fence)
– Optional: Vinyl cut out with a quote of your choice (This adds some magic to the project!)
– Plants! (I used all tropical plants that can be brought indoors in the winter)
Creating the sides of the base to the Plant Wall: Cut two 4x4s at 65 ¾” on the metre saw and toenail these with four 3 ½” screws into your deck. Use a level to ensure your 4x4s are straight. Note: If creating a living wall on the ground, dig your 4x4s 3’-0” into the soil and anchor it with gravel or concrete. Add 3’-0” to the 65 ¾” measurement above. See the images below.
step 2.
Add 1 ½” x 1 ½” to the 4x4s to create an inset space to attach the fence boards: Next, take a 2×4 and cut it in half on the table saw lengthways, creating two 1 ½ x 1 ½ pieces. Cut these 1 ½ x 1 ½ pieces at 51” on the metre saw. Attach these vertically flush with the back and top of your 4×4 pieces. Anchor these with 3 ½” deck screws, every 12” forming a base for the fence boards to be screwed to. Once these pieces are in place on both sides, find the measurement inside of the 4x4s. See the images below.
step 3.
Add your fence boards: Measure from inside the 4×4 space and cut your fence boards to fit. Use a level to ensure the top board is straight. Attach fence boards on the outer edges with two 1 ¾” screws with no spaces between each board. Our fence boards were cut at 57 ¼”. We used 9 fence boards going horizontally down, as we had a window we didn’t want to cover. If desired, boards can extend to the ground. See the images below.
step 4.
Make a frame for the black acrylic privacy panels to be attached to: Use your 2x4s to create a frame for the black acrylic privacy panels to be attached to. Cut the top and bottom pieces first at 57 ¼”. Place these two pieces at the top and bottom (flush with the top fence board and flush with the last fence board attached on the bottom.) Attach with two 1 ¾” deck screws on the ends of the board, toenail the sides to secure the boards. Cut three 2×4 pieces at 44”. Place 2 of the 44” 2×4 pieces on each side, snug beside the 4x4s and attach with two 1 ¾ deck screws on each side, along with a toenail screw on the sides. Next, find the center, use a level to ensure the board is straight, and then attach the third 44” board by using two 1 ¾” deck screws on both ends and then toenail the sides again until secure. See the images below.
step 5.
Add the LED Strip lighting: Drill one small hole in the bottom inner corner of each frame for the cord of the strip lights to go through. Attach self-adhesive LED strip lights around the inner edges of the frame you just made. With a 65.5ft pack of LED lights, which is sold in two separate sections, I wrapped the LED lighting around the inner edge of the frame three times. Run an extension cord behind the plant wall to plug in the strip lights, and tuck any cords up behind the project to hide them from sight. See the images below.
step 6.
Add blocking to the plant wall to support the hanging plant pots: The plant pots need something strong to hold on to, as they cannot hang off the black panels alone. We used six hanging wall pots and needed two rectangular pieces behind each pot to act as studs behind each pot. Cut the remaining 1 ½” 2×4 pieces into twelve 3” rectangles. Attach “stud pieces” with two 1 ¾” deck screws in places that align with the plant pots required in the placement desired. Get creative and design your own unique placement, or feel free to copy ours! See the images below.
step 7.
Attach the black acrylic privacy screens: Next up, the black panels! Using four 1 ¾” deck screws for each panel, attach the black panels to the frame at the top and bottom. See the images below.
step 8.
Attach the hooks to hold the plant pots: Take 12 metal flower pot clips and attach each clip with one 1 ¾” deck screw to the blocking behind the black panel. If the design pattern of the black acrylic panel doesn’t work out to lay directly in front of your hook, use a washer to shim out the space and attach your plant clip. If two hooks are required for each pot, use a level to ensure you are creating a straight line that your pot will hang upon. See the images below.
step 9.
Add the outer frame and top piece to finish off the look: Using a table saw cut 2 fence boards to 4” in width. Cut two pieces with a 45-degree angle using a metre saw at 58” and two pieces at 50 ½” to form a border around the black panels securing them in place and creating your trim work. Secure these to the plant wall with 1 ¾” deck screws. Cut one fence board at its original width at 64” in length to create the top and final piece of wood to the plant wall. Place on top and secure downwards with 1 ¾” deck screws. See the images below.
step 10.
Add the plants: For our plant wall, I went with all tropical plants that I could bring inside during the winter months. The plants I chose include different variations of pathos, prayer plants, snake plants, and other various tropical plants. To ensure these plants stay happy in the summer heat, and with my tendency to over-water, I chose to use Miracle-Gro® Moisture Control Potting Mix. This soil helps you protect your plants from over and under-watering! It absorbs 33% more water than your basic soil and releases it as the roots need it. It’s also nutrient-rich and contains a slow-release fertilizer within the soil to provide those essential nutrients to your plants over time. Moisture control Potting Mix also helps with airflow within the dirt, giving the roots the oxygen they need, which is essential for the plant’s development and vitality. See the images below.
step 11.
Add personal touches and details: I added a vinyl sticker featuring a quote about light from our favourite book series. I thought this quote suited the project as it lights up beautifully at night. 10 points to Gryffindor if you can recognize where this quote is from! I also added a metal flying key to add more whimsy and personalization to the project. For extra glowing magic, add fairy lights to each plant! See the images below.
There you have it! That’s how you can build your very own plant wall. I hope you enjoyed our tutorial. Please tag @PlantProjectCanada and @OnceUponaBungalow if you do create one too. Find my family and me on all socials under the name “Once Upon a Bungalow.” Thank you to Plant Project Canada for having us on the blog again, we loved creating this how-to! Check out more images from this project below.
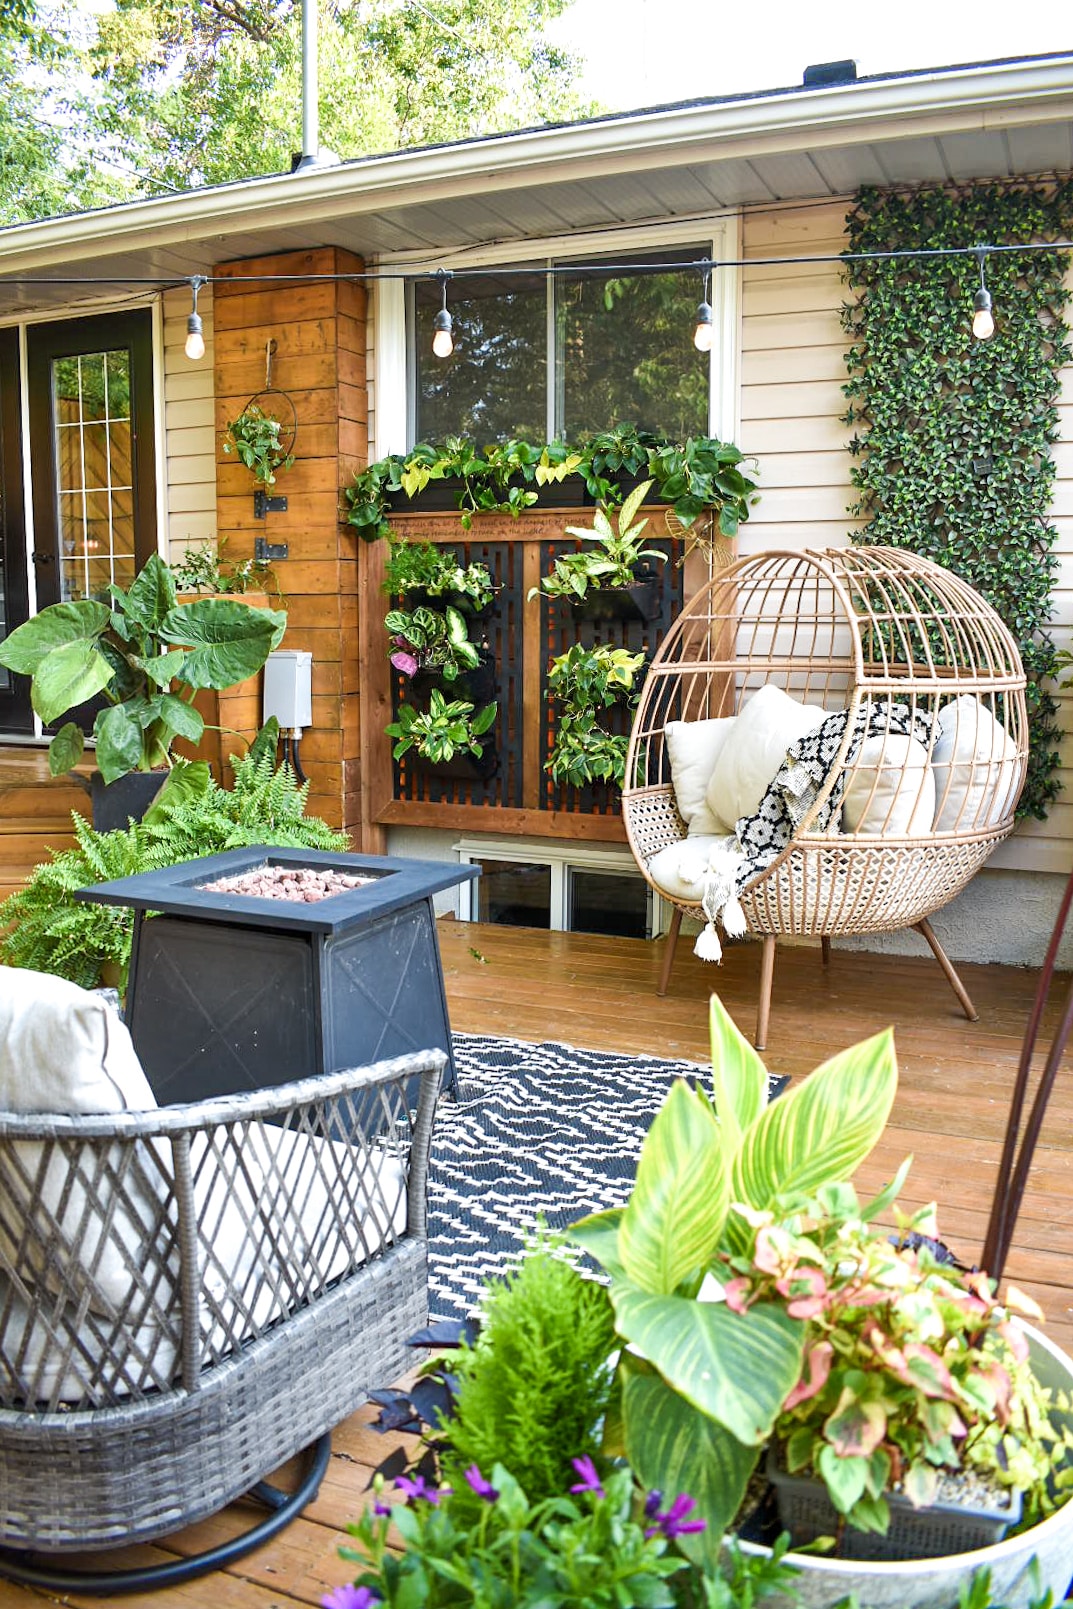
A transformation happened! Our backyard living space was completely changed.
Initially, our goal was simple: build a deck to host family BBQs and birthday parties. But what we didn’t realize was how quickly we’d fall out of love with it. In just one year, the deck went from being our favourite lounge spot to a big, wooden pathway. This was especially tough for me since I had put my heart and soul into building that deck.
I take a lot of pride in my property, so I needed to breathe some new life into my once-beloved deck. And then it hit me – we needed something natural to break up the straight lines and dead wood. I spend most of my time building gardens for people passing by my house, but I had neglected the space I built for my own family. So, one day, while topping up my porch planters with some Miracle-Gro® moisture control potting soil and Miracle-Gro® plant food, I had an idea. We needed planters to bring life and contrast to this barren wooden platform. Since our deck had no rails or border, we decided to create some planter benches for both functionality and beauty.
Here’s my step-by-step guide on how to create your own planter benches. This project is designed to be modular, repeatable, and simple enough for even a beginner DIYer with minimal tools. We’ll walk through constructing two planters and one bench, but you can expand or reduce the project to fit your space. That’s the beauty of this design.
Here’s what you’ll need:
Tools You’ll Need
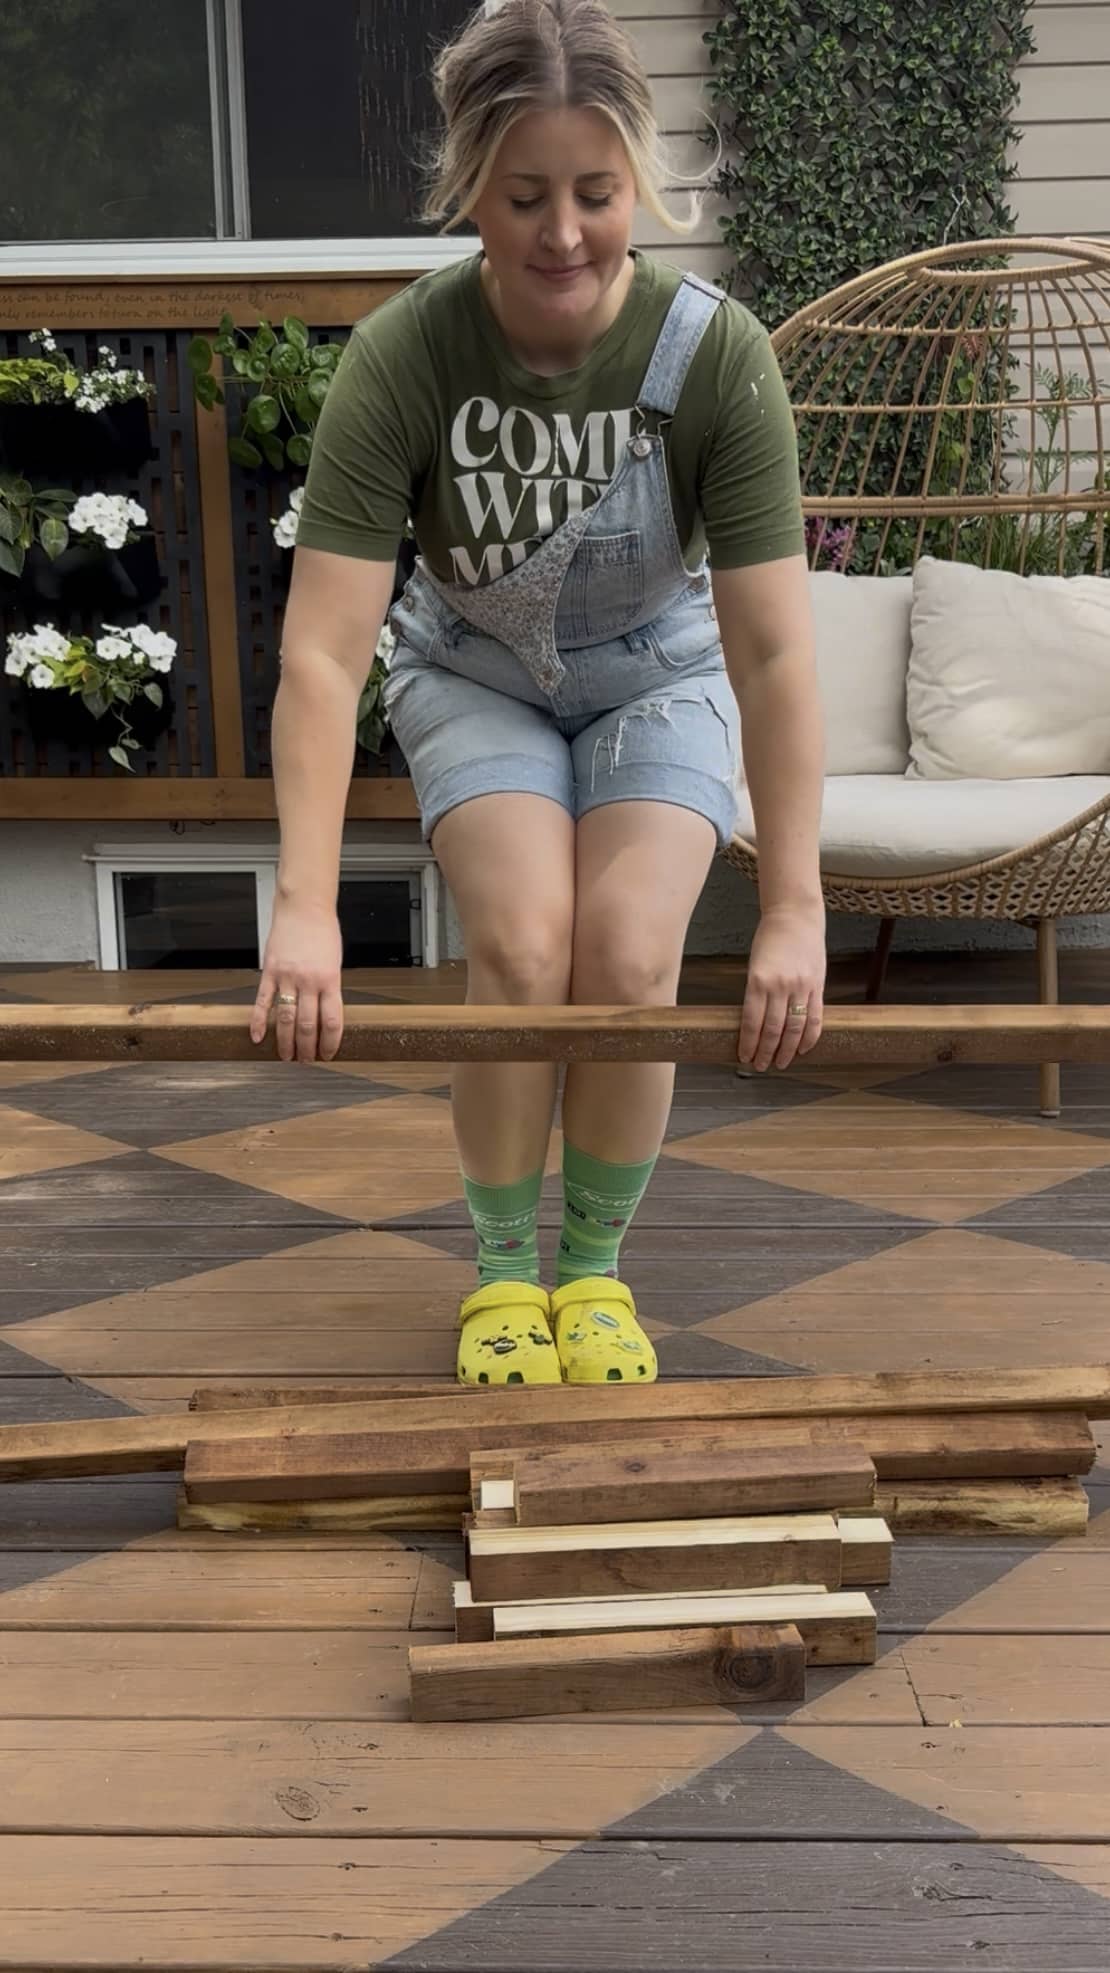
Clickbait alert! “You can complete this project with a screwdriver, a saw, and a measuring tape!” While that’s technically true, here’s a more comprehensive list of tools I suggest:
Measuring tape – Must have. You’ll use it a lot.
Drill – I used two: one for drilling pilot holes and one for fastening.
Saw – Essential. You could bring the cut list to your local lumber dealer, but I suggest cutting your own wood to ensure accuracy and reduce waste.
Level – To make sure your benches don’t slope.
Drill bits / pencil – Necessary for the fasteners listed in the materials section and for marking measurements.
Nice to have:
Second drill for pilot holes – This prevents wood from splitting. You can swap bits if you only have one drill.
Speed Square – Makes measuring and marking easier.
Chop Saw / Miter Saw – A big upgrade for cutting wood, great for making repeat cuts.
Clamps – Handy when you need an extra pair of hands and you’re working alone.
Materials You’ll Need
This guide will yield one bench and two planters:
2×4’s, 8 feet long (qty. 15) – Pressure treated or rot-resistant wood like cedar for longevity.
Deck Boards, 8 feet long (qty. 10) – Must be pressure treated, typically labeled 5/4 x 6.
1 ½ “ Deck screws (qty. 144) – Exterior grade. Buy a box; they’re handy elsewhere. Used only for fastening deck boards.
2 ½ “ Deck screws (qty. 104 ish) – Exterior grade. Buy a box; they’re handy elsewhere.
4” Framing screws (qty. 40) – Exterior grade. These make siding the planters simpler and provide a strong structural hold.
15” Square plastic planters (qty. 2) – For easy maintenance and to protect the wood.
Cut List
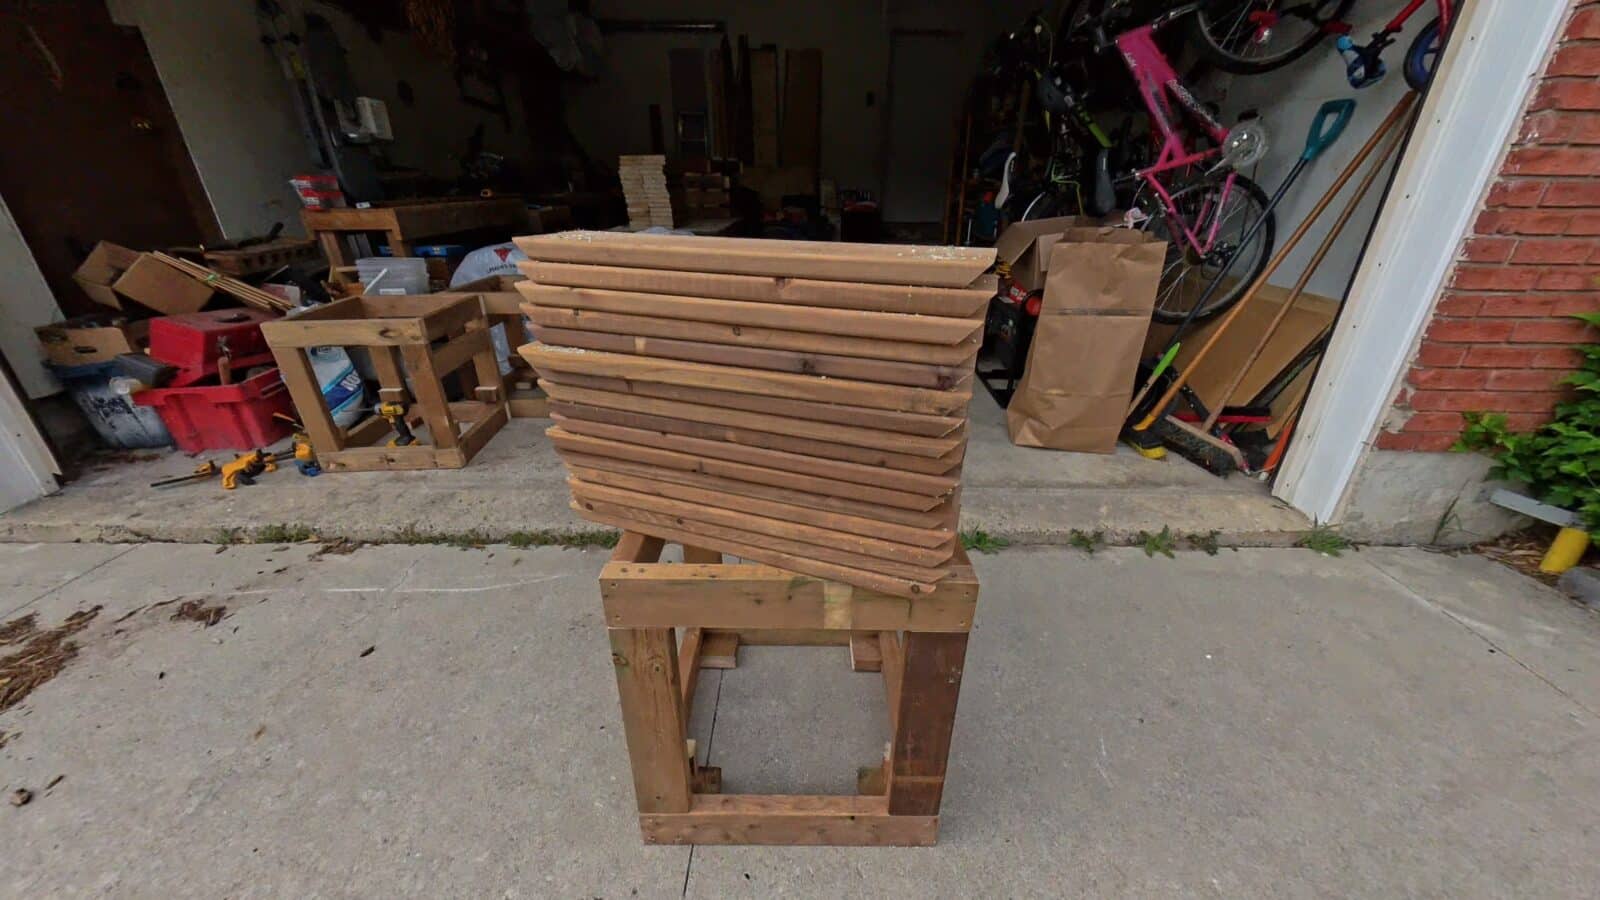
I’ve broken the build into components for easier assembly. Make these cuts and label them for later. I suggest making all the cuts before starting assembly.
Planters x2
Platform:
[2×4] – 4x 17.5”
[2×4] – 4x 14.5”
[Deck board] – 4x 17.5”
Uprights:
[2×4] – 8x 16.5”
Supports:
[2×4] – 2x 18”
Squares:
[2×4] – 4x 18”
[2×4] – 4x 21”
Siding:
[Deck Board] – BEGINNER 16x 23” & 16x 21”
[Deck Board] – INTERMEDIATE 32x 23 1⁄8 (These should be cut with a 45-degree miter on both sides)
Bench
[2×4] – 2x 17”
[2×4] – 6x 48” (This assumes a 4-foot-long bench but can be altered to fit your space)
The Full Build Walk-Through
step 1.
Start by building the platform pieces. These are the most forgiving and a great introduction to the rest of the build. Turn the 2×4 components into a square by fastening the two 14.5” pieces inside the 17.5” pieces. Use 2 screws at each joint with pilot holes (implied for each joint moving forward). Ensure you’re fastening through the 17.5” piece into the 14.5” piece, creating a 90-degree angle. Attach the two deck board pieces to the top of the square and repeat. Set aside for later. [16x 2 ½“ screws & 16x 1 ½“ screws]
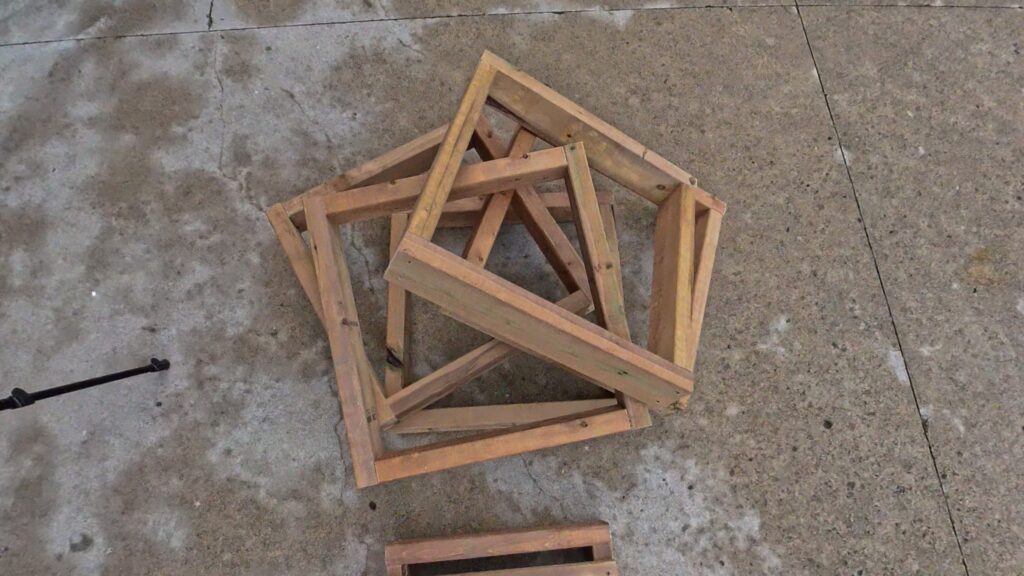
step 2.
Build 4 more squares. This will be the beginning of your planter. Fasten two 18” pieces and two 21” pieces to create a square, just like the platform square (longer cuts on the outside). Repeat 4 more times. [16x 2 ½“ screws per planter]
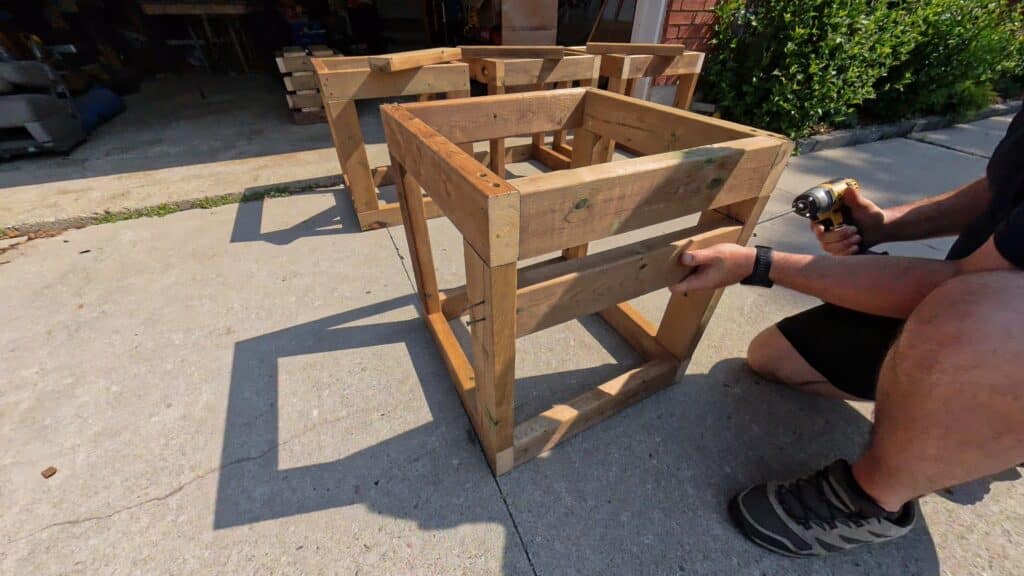
step 3.
Combine two squares from the previous step with four 16.5” upright pieces to create a box. Using the 4” framing screws, drill down through the 21” pieces into the 16.5” uprights, creating a 90-degree angle. Repeat until all 4 uprights are installed, creating your planter skeleton. Make 2 of these. [16x 4” framing screws per planter]
step 4.
Measure 18” up from the bottom of the box for the bench height. This will be the top of your bench support. Fasten the bench support so the top of the 2×4 is at 18” from the ground. [4x 2 ½“ screws per planter]
step 5.
Create feet on the bottom side of the planter box to anchor it to the deck. Use 2×4’s of approximately 3” length and fasten them to the inside of the bottom square from the outside with 3 screws per foot. [12x 2 ½“ screws per planter]
step 6.
Set your platform blocks. This makes the build customizable to plastic planter pots up to 18”. Measure 16.5” down from the top of the planter box. This ensures the 15” planters sit flush with the top of the box. Repeat on all 4 uprights. [8x 2 ½“ screws per planter]
step 7.
Now for the siding. This is when you feel like you’ve truly made something. I chose a miter joint, which might be more challenging but looks great. Set your top boards first, ensuring the inside of the miter joint is in line with the corner of your box. For beginners, make 4 more squares, fastening the deck boards to the box to form a square. Set your top boards first and move down, fastening all 16 deck boards. [64x 1 ½“ screws per planter]
The hard part is done, and you’ve created 2 planters. Now, let’s move on to the bench.
step 8.
Using two 17” pieces and six of the pieces cut to your desired length, ensure the boards are all showing the narrow side. Create a rectangle using the two 17” pieces and two of the length pieces, fastening through the 17” pieces. The remaining four length pieces should fit perfectly in this rectangle with equal spacing of a 2×4. [24x 2 ½“ screws]
step 9.
Mount the bench between your 2 planters using a level. Fasten the bench to the planters using the 4” framing screws from inside the planter through the bench support and into the 17” end pieces of the bench. Ensure the bench height matches the supports at 18”.
This project will add much-needed seating and plant life to your deck or patio. I hope you enjoyed the guide. Happy planting!
Follow @brandonkoruna on Instagram and TikTok for more garden tips!
We use cookies on our website to give you the most relevant experience by remembering your preferences and repeat visits. By clicking “Accept All”, you consent to the use of ALL the cookies. However, you may visit "Cookie Settings" to provide a controlled consent.
This website uses cookies to improve your experience while you navigate through the website. Out of these, the cookies that are categorized as necessary are stored on your browser as they are essential for the working of basic functionalities of the website. We also use third-party cookies that help us analyze and understand how you use this website. These cookies will be stored in your browser only with your consent. You also have the option to opt-out of these cookies. But opting out of some of these cookies may affect your browsing experience.
Necessary cookies are absolutely essential for the website to function properly. These cookies ensure basic functionalities and security features of the website, anonymously.
Cookie
Duration
Description
cookielawinfo-checkbox-analytics
11 months
This cookie is set by GDPR Cookie Consent plugin. The cookie is used to store the user consent for the cookies in the category "Analytics".
cookielawinfo-checkbox-functional
11 months
The cookie is set by GDPR cookie consent to record the user consent for the cookies in the category "Functional".
cookielawinfo-checkbox-necessary
11 months
This cookie is set by GDPR Cookie Consent plugin. The cookies is used to store the user consent for the cookies in the category "Necessary".
cookielawinfo-checkbox-others
11 months
This cookie is set by GDPR Cookie Consent plugin. The cookie is used to store the user consent for the cookies in the category "Other.
cookielawinfo-checkbox-performance
11 months
This cookie is set by GDPR Cookie Consent plugin. The cookie is used to store the user consent for the cookies in the category "Performance".
viewed_cookie_policy
11 months
The cookie is set by the GDPR Cookie Consent plugin and is used to store whether or not user has consented to the use of cookies. It does not store any personal data.
Functional cookies help to perform certain functionalities like sharing the content of the website on social media platforms, collect feedbacks, and other third-party features.
Performance cookies are used to understand and analyze the key performance indexes of the website which helps in delivering a better user experience for the visitors.
Analytical cookies are used to understand how visitors interact with the website. These cookies help provide information on metrics the number of visitors, bounce rate, traffic source, etc.
Advertisement cookies are used to provide visitors with relevant ads and marketing campaigns. These cookies track visitors across websites and collect information to provide customized ads.
join our passionate plant community and gro your garden!
By registering, I am allowing Scotts Canada Ltd. to contact me with news, articles and promotions. I understand that I can withdraw my consent at any time.