
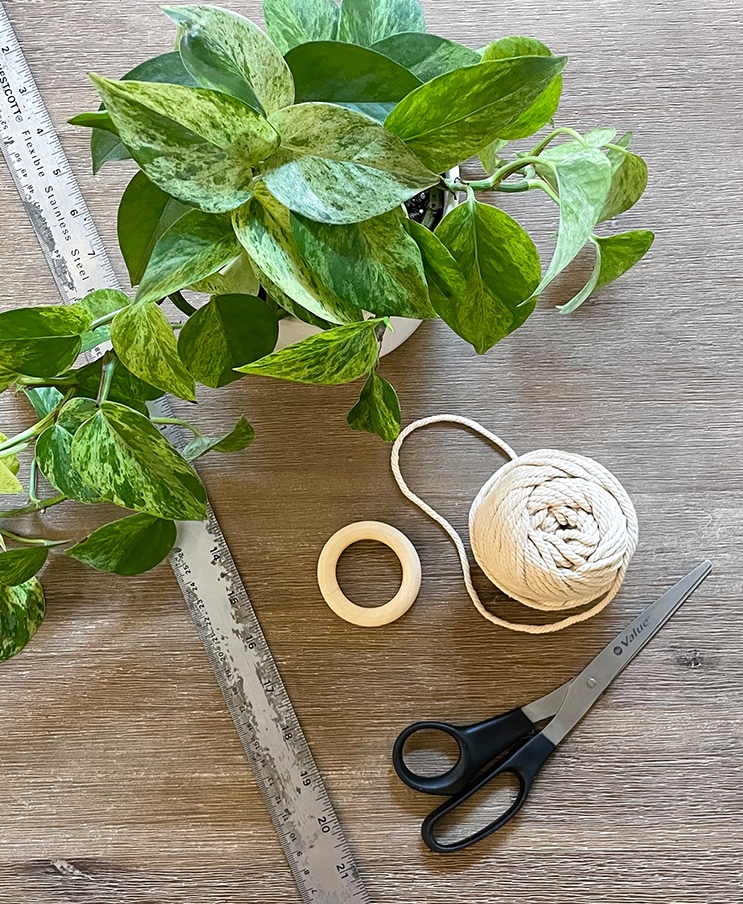
- Natural macrame cord (3mm or 4mm is great to start with)
- A metal ring (any size)
- Your potted plant
- Scissors
- Measuring tape
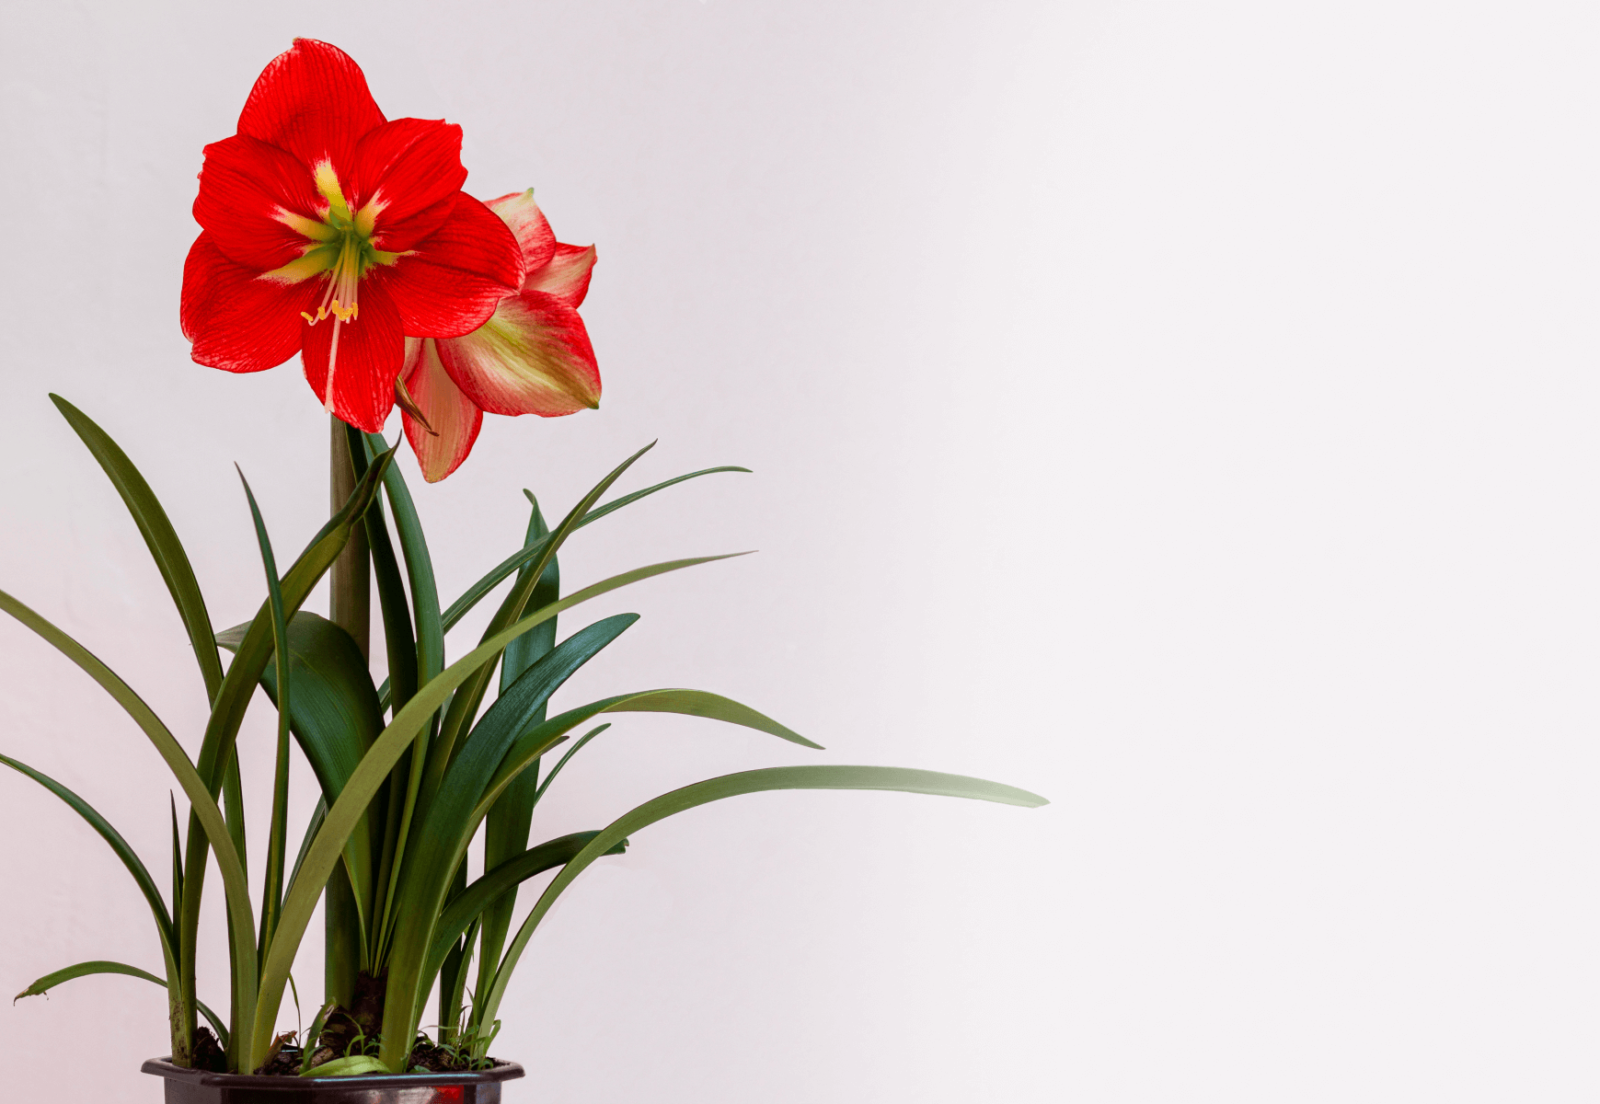
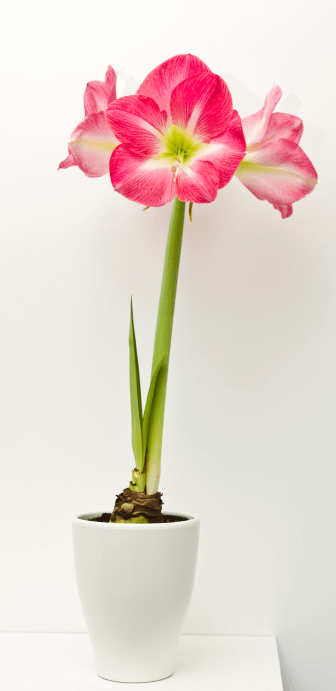
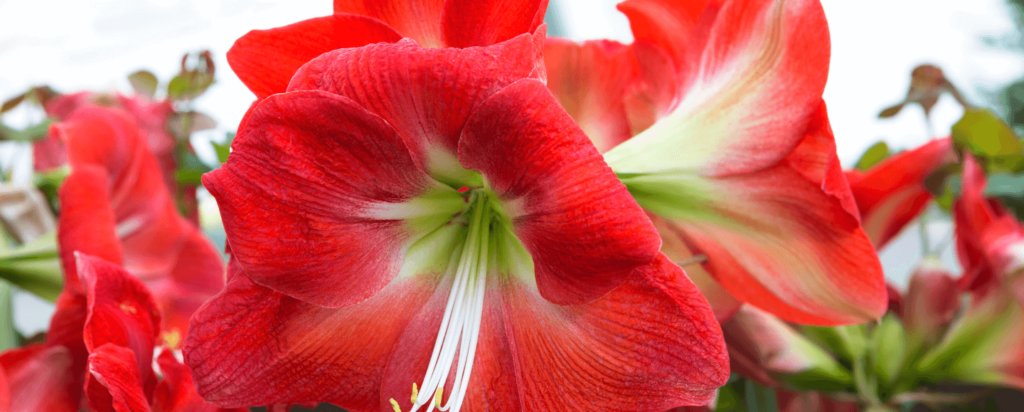
amaryllis
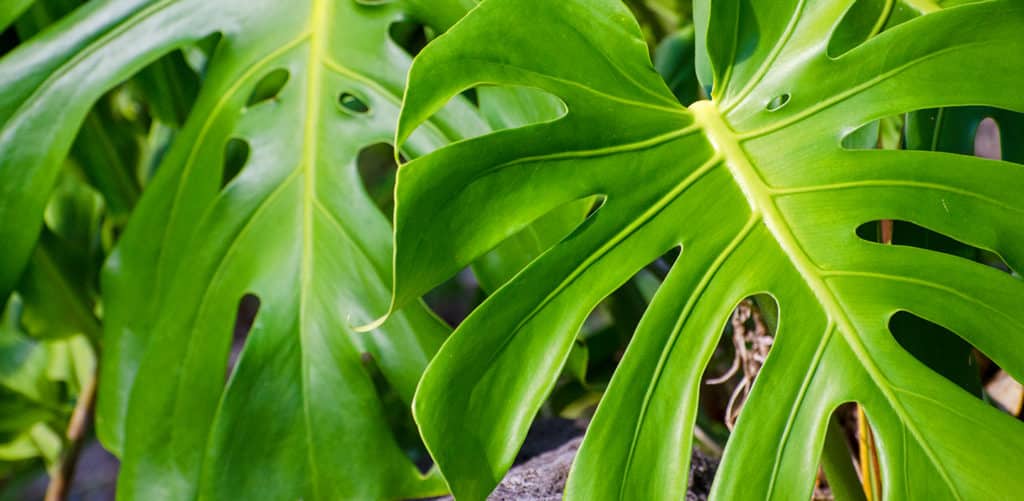
aka hippeastrum genus
a plant native to warm, tropical climates. There are over 1600 species in this plant family.
variations
Ferrari’ Amaryllis, ‘Dancing Queen’ Amaryllis, ‘Mont Blanc’ Amaryllis, ‘Papillio Improved’ Amaryllis, ‘Faro’ Amaryllis, ‘Estella’ Amaryllis, ‘Athene’ White Amaryllis, ‘Double Dragon’ Amaryllis

light
bright, direct
Needs a sunny window to get at least 4 hours of sun daily

water + feeding
not too thirsty
Only water once the top 2 inches of soil have dried.

toxic
yes
The bulbs are the most toxic, but blooms can also be hazardous if eaten

location
picky pals
Need lots of bright, direct sunlight

humidity
not too much
Amaryllis don’t need misting

size
medium
Can grow up to 4 – 6 inches

pro tip
big bulbs mean lots of flowers
That’s right. We like big bulbs, and we can not lie. The bigger the bulb the more blooms you can expect. In fact, a Jumbo bulb (34/36 cm) can produce 3 stems with about 4 to 5 flowers per stem.

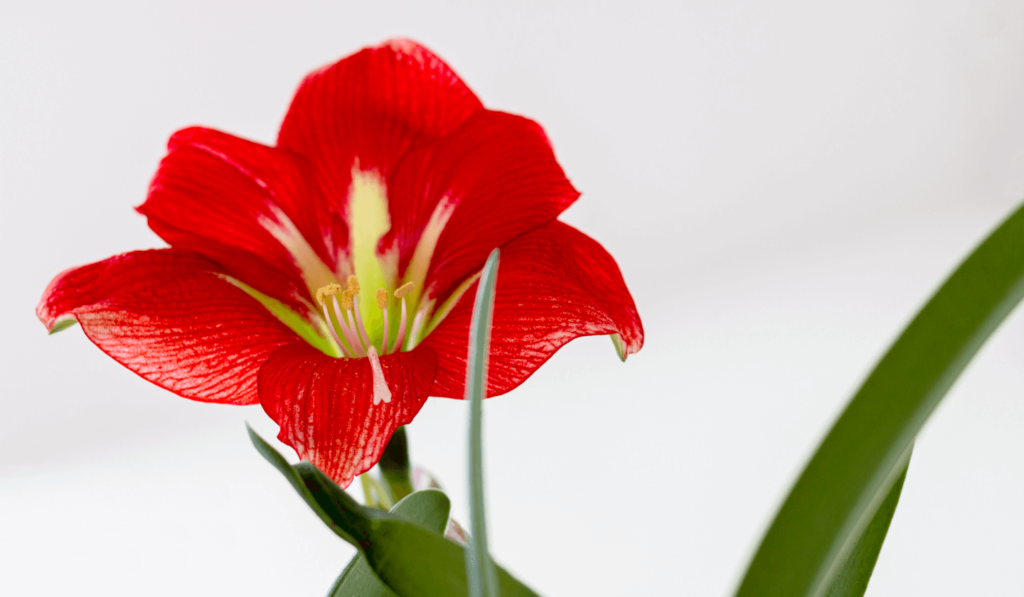
fun fact
It’s a look-a-like
The flowers on an amaryllis look very similar to a lily but they are not actually the same flower. They are very distant relatives!
beyond the basics
-
soil + potting
Amaryllis needs to be planted in a light, well draining potting soil. Consider using Miracle-Gro® Indoor Potting Mix. The combination of coconut coir and perlite help control moisture and release water when your plant needs it. If you’re growing a single amaryllis bulb, you can plant it in a 6-inch pot. If you’re growing multiple bulbs (about 2 –3) use a bigger pot, closer to 10 – 12inches. As always, make sure your pot has a drain hole and be sure to leave the top 1/3 of your amaryllis bulb sticking out of the soil.
-
when to repot
Your amaryllis won’t need to be repotted very often. In most cases, you will only need to repot your amaryllis after 3 – 4 years. It’s best to repot once your amaryllis has gone through a dormant stage, typically this means repotting in the spring.
-
propagation
There are 3 ways to propagate amaryllis:
- Through Seeds. Look for seed pods about four weeks after your amaryllis begins to flower. When the seeds are ready, they’ll split open a bit and turn yellow. Then you can gently shake out the little black seeds.
- Separating bulbs/offsets. Look for firm bulblet that are about a third of the size of the “mother” bulb. Trim back any extra foliage to 2 inches above the bulb. Gently remove the bulblets and replant as soon as possible. You can remove the bulblets with either a small knife or just your fingers.
- Choose a bulb at least 6 inches in diameter. Cut into four pieces, vertically, making sure each section has at least two scales. Plant with the basal plate (bottom) of the bulb pointing down, covering only a third of the bulb with soil.
-
pest control
Keep an eye out for common pests like mealybugs and fungus gnats. If you spot these pesky bugs, you can use a gentle insecticide like Ortho® Bug B Gon® ECO Insecticidal Soap to get rid of them without damaging your plant.
troubleshooting
-
Why won’t my amaryllis bloom?
There could be a few reasons. The main reason could be that your amaryllis isn’t getting enough light. Once you’ve moved your plant to a bright window that gets light for about 4 hours a day, you should see blooms. Still nothing? Try adding a little plant food to bump up the nutrients. Consider using a tropical plant food like Miracle-Gro® Tropical Plant Food.
-
Why are my amaryllis leave drooping?
Over or underwatering. The issue could also be that your amaryllis isn’t getting enough light. If you know that your watering schedule is okay, then try moving your plant to a more direct light source.
-
How do I know if my amaryllis bulb is rotten?
Look for colour and texture. If your bulb has a uniform colour and firm texture, it’s a healthy bulb. If you spot signs of a pest infestation, mold or any damage to the actual bulb, these are red flags that indicate your bulb will likely rot. Seeing shriveled or brown skin on the outside? That’s totally normal.
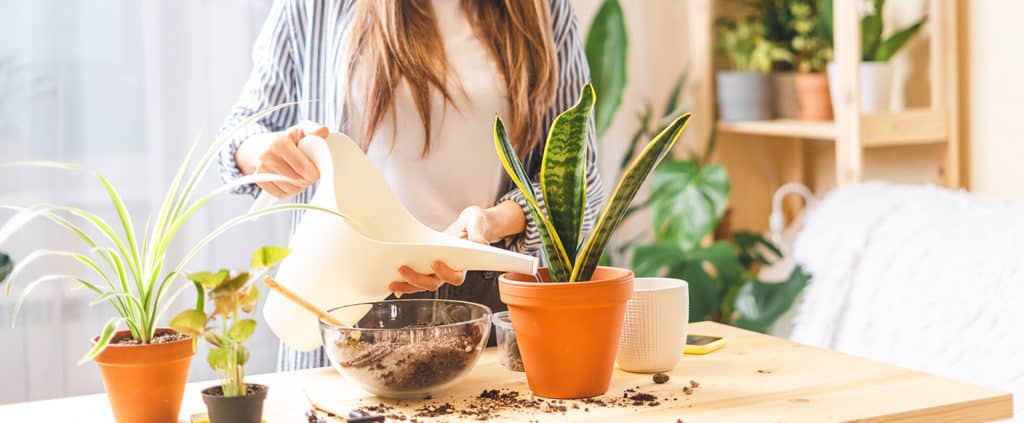
Are your indoor plants looking a little weary and dejected? Just like a grouchy toddler, a sad-looking plant can often be a signal that it’s time for a snack. Your potting soil may be rich with nutrients at the start, but after several weeks have passed, it’s time to refuel.
But hold up—there are some rules you should know before you serve up the good stuff to your potted friends.
Here’s how to feed your plants and help bring them back to life.
for everything, there is a season
Houseplants enjoy the benefits of fertilization during the growing season—but when exactly is this magical time of growth? We’re so glad you asked.
Indoor plants follow the ways of their outdoor companions, flourishing in the spring and summer seasons. As the days get longer and temperatures start to climb, you’ll want to ramp up your plants’ food intake.
What do your plants need during the fall and winter months? The same thing we all crave—a break. During your plants’ dormant season, the indoor air from your heating system triggers the plants to stop exerting energy and rest up until the next growth cycle begins. Lay off on the food and let your houseplants hibernate—this is one diet regimen you should actually stick to.

3 ways to feed your houseplants

1
Water Soluble Plant Food
If you’re looking for a fool-proof nourishment solution, Miracle-Gro® Water Soluble All Purpose Plant Food is for you. This all-purpose plant food mixes easily with water and provides super speedy results.
2
Food Spikes
If you want something tailormade for houseplants, Miracle-Gro Plant Fertilizer Spikes are the way to go. These fertilizer-filled pals feeds plants for up to 2 months and only need to be replaced every 30 days in spring/ summer and every 60 days in winter/ fall. It’s truly that easy. Check out our how-to article in Plants 101 for more.
3
Liquid Plant Food
For a weekly feeding ritual, try Miracle-Gro® Indoor Plant Food, which instantly feeds all indoor houseplants including edibles! Simply apply directly to the soil or mix it with water. It’s a quicky and easy solution to keep your indoor plants thriving.
too much of a good thing
It’s tempting to try to nourish our plants to the max, but make sure not to over-feed. Too much fertilizer can cause some nasty side effects like:
• stunted growth
• burned or dried leaves
• wilting
• plant death
That’s a scary list—but if you notice symptoms of over-fertilizing, you can save your plant with these simple fixes:
• Remove visible fertilizer from the soil
• Leach fertilizer by running water through the soil and roots
• Remove damaged stems and leaves
• Wait about a month before fertilizing again—!
elephant ear
aka colocasia esculenta
Always the centre of attention, these big beauties make a statement indoors and out. They can grow to an impressive height with leaves that mimic hearts, or the shape of elephant ears.
variations
alocasias and colocasias
light
full sun
Even dappled shade will work
water + feeding
thirsty
Keep the soil moist. In summer months you may have to water your potted plant almost every day.
toxic
toxic to people and animals
Ingesting stems or leaves can cause a burning sensation or cause swelling. In some cases touching the plant can cause a skin irritation.
location
flexible
Elephant ears do well on patios and indoors. Keep your plant in indirect light to avoid it getting sunburnt.
humidity
love it
Elephant ears are tropical plants that thrive in warm, humid environments.
size
large friend
Can grow to 3 – 5 ft
pro tip
Leave lots of room
Elephant ears need a big pot to grow to their fullest potential.
fun fact
A tropical bulb
Elephant ears have tuberous roots that are often referred to as bulbs. Unlike common garden bulbs, these ones are not cold hardy so you’ll need over-winter the bulbs inside.

beyond the basics
-
soil + potting
Consider elevating your elephant ear slightly by adding a layer of rocks and pebbles between the planter and its saucer. This helps increase the humidity and prevents root rot. Use a well-draining soil for your elephant ear. Consider using Miracle-Gro Cactus, Palm & Succulent Potting Mix or Miracle-Gro Moisture Control Potting Mix for a happy plant.
-
when to repot
The best time to repot your elephant ear is during the spring months. When repotting your elephant ear, make sure to use a well-draining soil. Consider using a soil like Miracle-Gro Cactus, Palm & Succulent Potting Mix or Miracle-Gro Moisture Control Potting Mix to help refresh the soil.
-
propagation
While you can’t propagate an elephant ear with a cutting, you can divide tubers of a healthy adult plant. The tubers have a texture similar to that of a potato. You can easily cut through it with a sharp knife. Plant the divided tuber immediately into your potting soil and keep it moderately wet.
-
pest control
Common pests for elephant ears are aphids, spidermites and mealybugs. Use a gentle insecticide like Ortho® Bug B Gon® ECO Insecticide Ready-to-Use and make sure the leaves of your plant are treated as well.
troubleshooting
-
why is my elephant ear turning yellow?
Too much sunlight or overwatering. You can cut the dying leaves close to the base of the stem. This should prevent more leaves from yellowing. Then adjust your watering schedule or move it away from direct sunlight.
-
why are my leaves crying?
Usually due to overwatering. The leaves of an elephant ear are long and heart-shaped, which naturally draws water to the tip of the leaf. If there aren’t other signs of overwatering, like soft stems or yellow leaves, you can likely hold off on watering for a few days.
-
why are my plant’s leaves turning brown?
It’s a sunburn. Your plant is too close to bright, direct light. Elephant ears tend to thrive in bright, indirect light. Scorched leaves won’t kill your plant, it just doesn’t look pretty.
-
Why does my plant’s leaves have spots?
Fungal leaf blight. If this fungus isn’t caught early, it will cause the whole leaf to collapse and travel to the rest of the plant. To prevent this, make sure you’re using high-quality, well-draining soil.
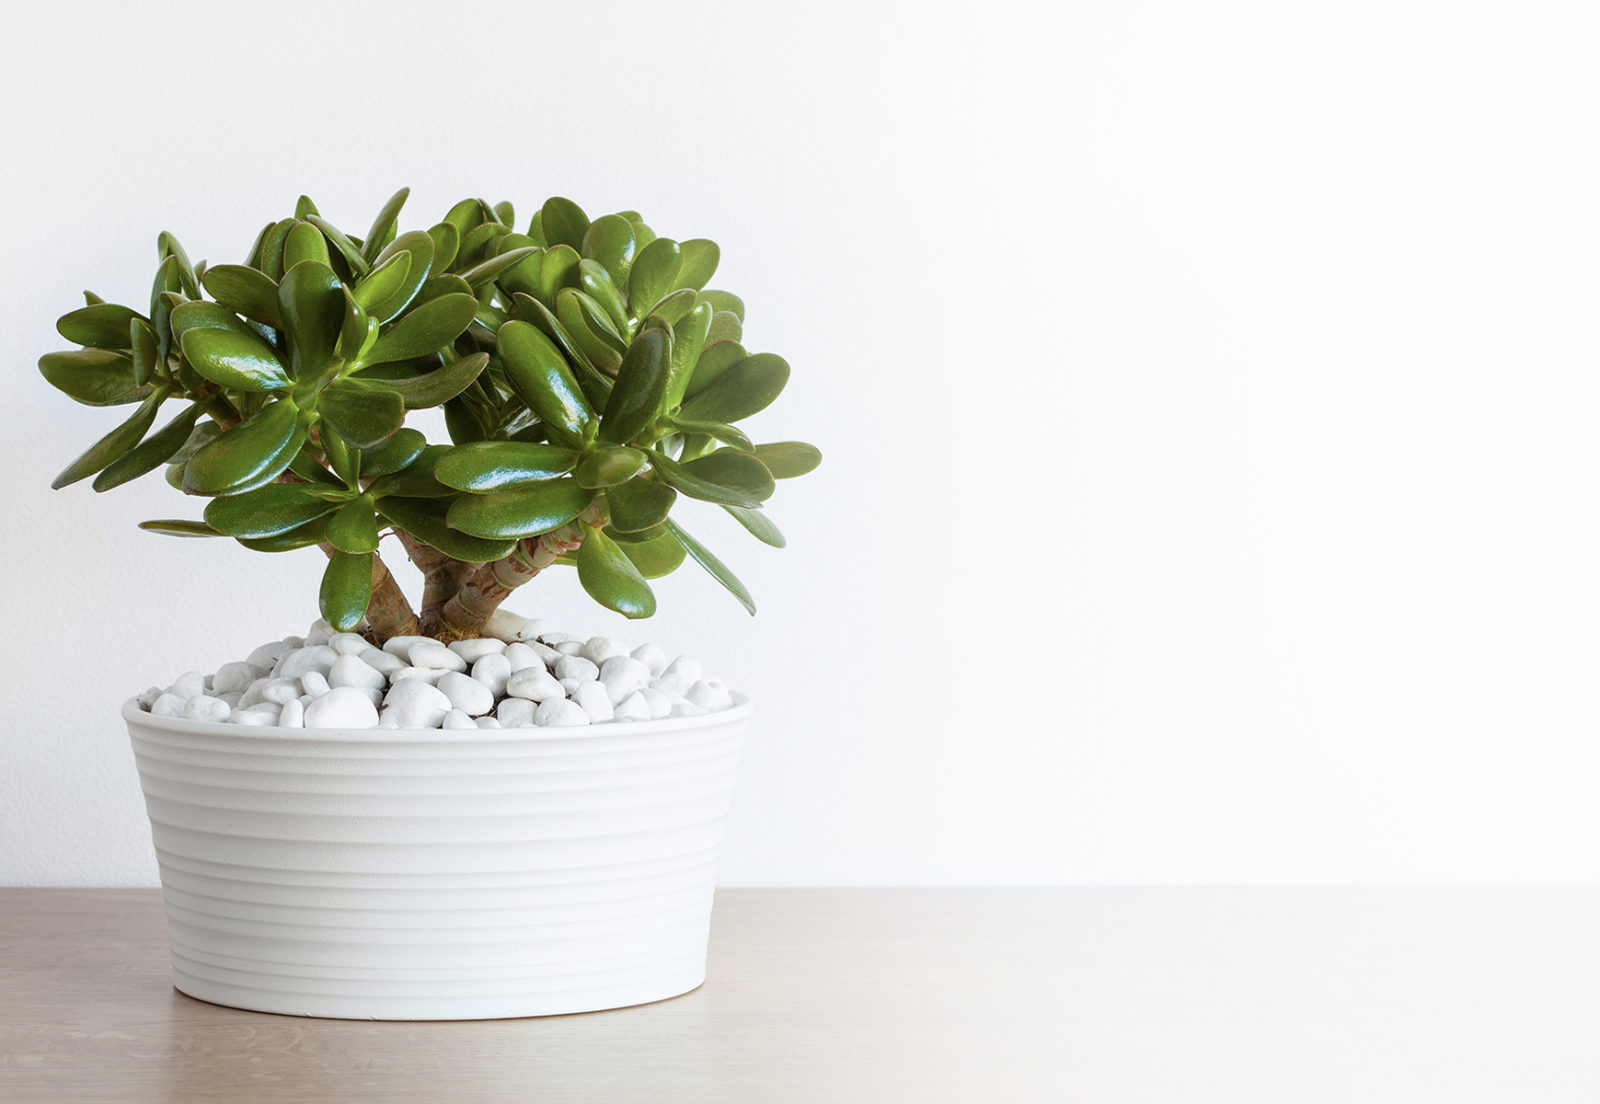
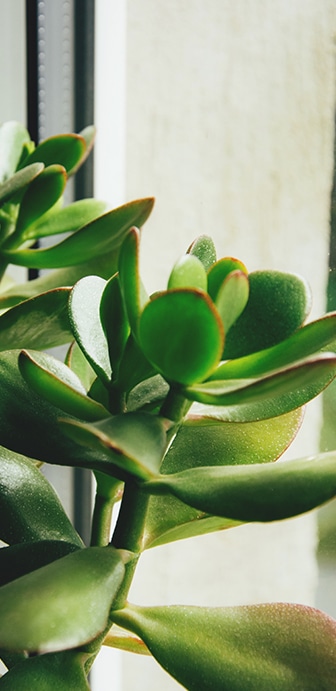
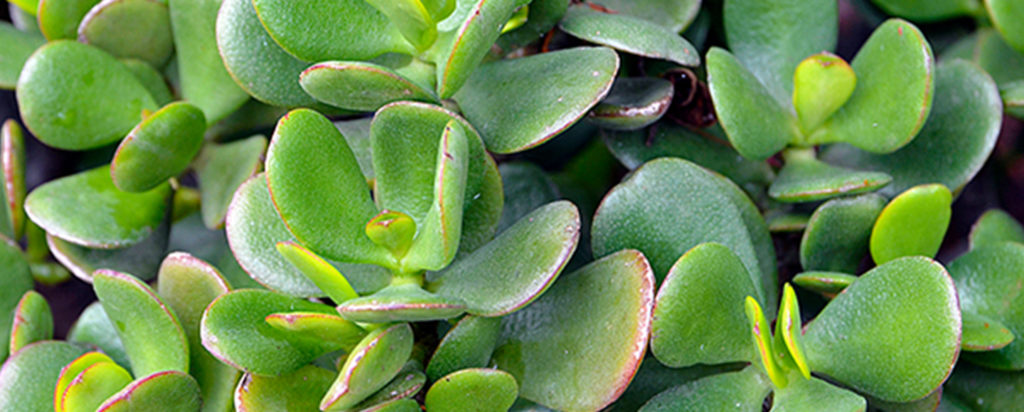
jade
aka crassula ovata
Jade plants are native to South Africa and are classified as a succulent. Jade plants have oval shaped, fleshy leaves and stems that look like tiny tree trunks.
variations
there are a variation of jade plants available that range from the common green-leaf to more rare variegated varieties. Variegated jade plants can include the tricolour, ET’s Finger or the Hummel’s Sunset variety.
light
bright, indirect.
Jade plants, especially young plants, should get about 6 – 8 hours of light a day.
water + feeding
somewhat thirsty
In spring and summer your jade plant should be watered consistently so that its soil is moist, but not super wet.
toxic
Yes
Jade is toxic to pets.
location
Adaptable
These beautiful plants do well in most indoor settings, but prefer to be close to bright, indirect light. Jade does their best growing in room temperature 18° to 24°C (65° to 75°F).
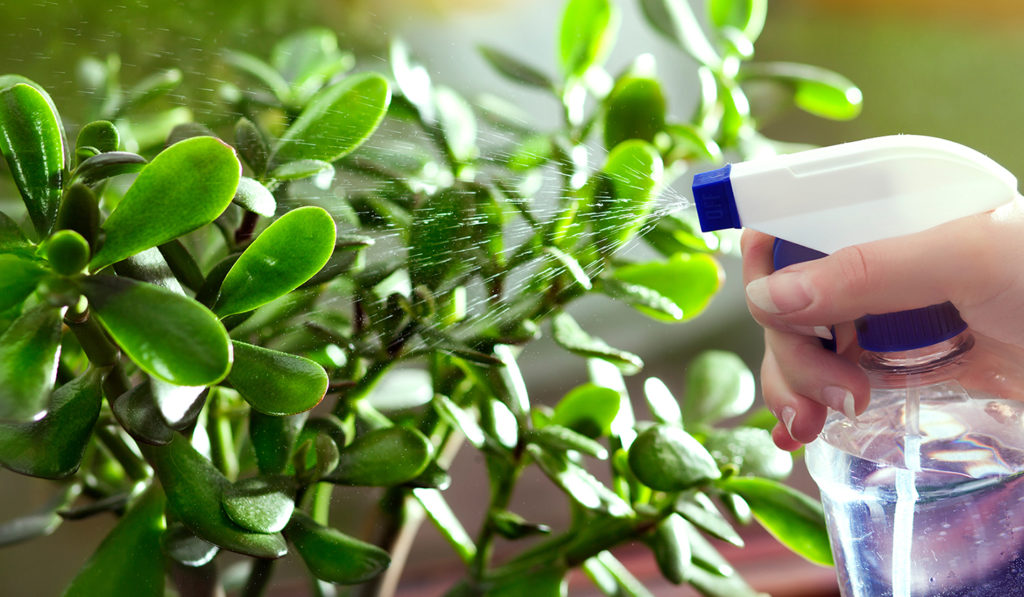
humidity
a little finnicky
Overwatering and standing water are the most common mistakes made with jade plants. Be sure to monitor your jade for signs of too much moisture.
size
it depends
Jade plants can grow up to 5 ft tall but can stay small if they are rootbound in a small pot.
pro tip
rare flowers
Jade plants don’t regularly flower when grown indoors. To get your jade plant to flower keep it rootbound and in a small pot. Cut back slightly on watering, and you may see a bloom come through.
fun fact
bringers of good luck
Jade is often given as a housewarming gift because it’s thought to bring good luck.
beyond the basics
-
soil + potting
Succulents thrive in porous, well draining potting mix. These usually have less organic matter than regular indoor potting mix. A mix like Miracle-Gro® Cactus, Palm & Succulent Potting Mix is well-draining and won’t compact. Don’t forget to feed your plants consistently during the feeding season.
-
when to repot
Repotting a young jade plant every 2 – 3 years will encourage growth. If you want to keep your jade plant small, they enjoy being slightly rootbound and can stay in a small pot to maintain a manageable size. Always repot in the spring.
-
propagation
Propagating a jade plant is super easy! You can start a whole new jade from just a single leaf or cutting. Remove a leaf or stem cutting from a healthy, mature plant, making sure it’s about 2-3 inches long and has at least 2 leaf pairs. Let the cutting sit in a warm, bright place for several days to develop a little callous. Place the cutting in moist, well-draining soil, keeping it propped upright with rocks. Be sure not to water your jade cutting at this point. After a week or two roots should start to form. Gently water the soil once roots have formed, and allow soil to dry between watering.
-
pest control
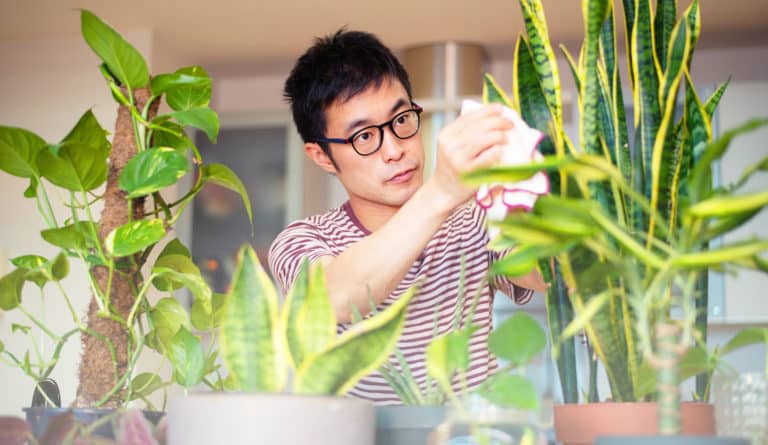
Jade is prone to mealybugs and scale. Mealybugs may hide under the leaves of your plant. During your routine leaf cleaning, inspect the underside. Most pests can be managed by using an insecticidal soap such as Ortho® Bug B Gon® ECO Insecticidal Soap. For more tips, check out our Pest control section in Plant 101 for how to identify and deal with pests on your plant!
troubleshooting
-
why are my leaves dropping?
Overwatering. While young jade plants need thorough watering, if your jade’s leaves are squishy and dropping it’s definitely getting overwatered.
-
why are my leaves shrivelling?
Underwatering. These are clear signs that your jade is asking for more frequent or deeper watering.
-
why are the stems getting squishy?
Root rot. Do a quick inspection of your plant’s root ball. A healthy root will be firm a white. If your plant’s roots are looking brown or slimy, it’s definitely root rot. To avoid this, be sure the soil is drying out completely between watering.
-
why are my leaves spotty?
You’ve got scale. These insects feed on the sap in your jade’s leaves. You can quickly remedy this problem by applying Ortho® Bug B Gon® ECO Insecticidal Soap.
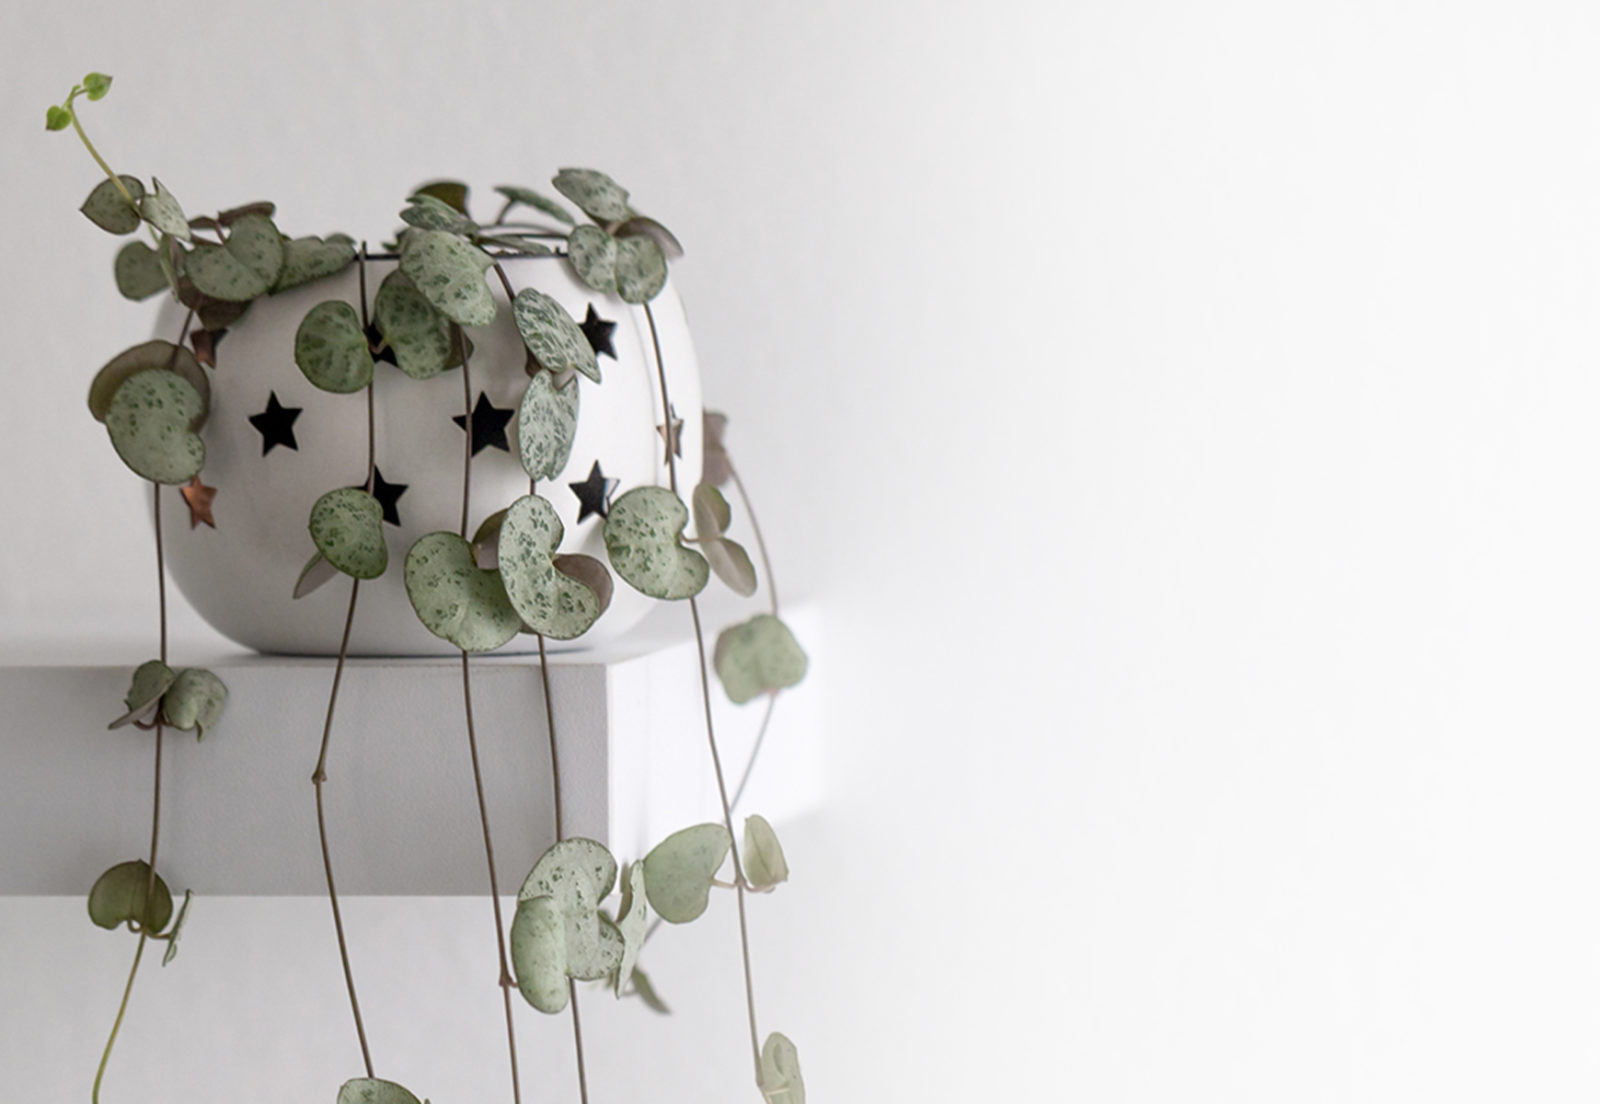
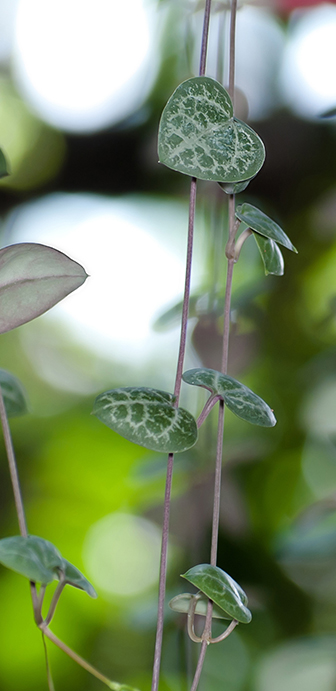
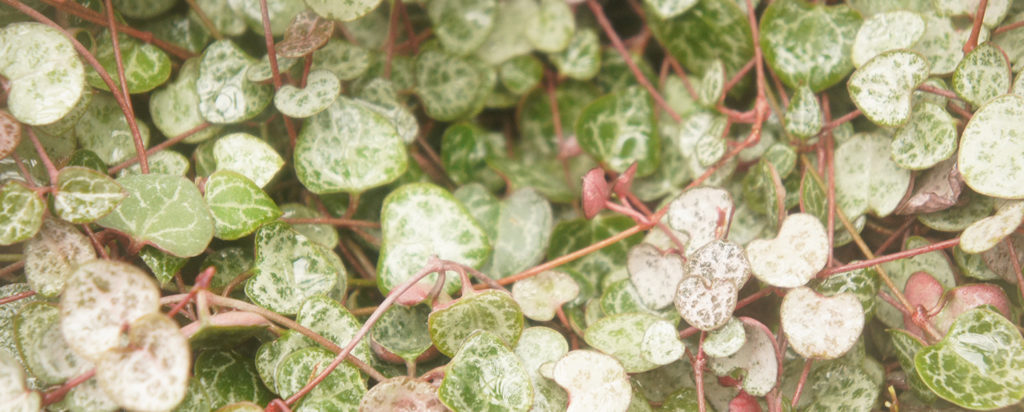
string of hearts
aka ceropegia woodii
this beautiful trailing succulent is native to South Africa, Swaziland and Zimbabwe. This plant is named for the sweet, heart-shaped leaves.
variations
the more sun it gets, the more variegated the leaves will get. Leaves can get silver, cream or even pink markings.
light
bright, indirect.
Ample bright, indirect light will lead to greater variegation in the leaves.
water + feeding
somewhat thirsty
Can be watered 1-2 times a week in the spring and summer, once every week or two during the fall and winter.
toxic
no
This plant is safe for pets.
location
somewhere bright
Place near your brightest window. South or West facing windows is recommended
humidity
not too fussy
Can tolerate drier climate but thrive in about 40-50% humidity.
size
small-ish
Can grow up to 3 inches tall and have trailing stems that can grow to 3 – 9 ft long.
pro tip
sun baths
Colour can be revived by placing your plant by a bright window. Leaves can return to their vibrant colours and even turn pink.
fun fact
fast Growers
They’re fast growers and very easy to care for, making them popular houseplants for beginners.

beyond the basics
-
soil + potting
String of heart plants are a member of the succulent family, so they need a porous, well-draining potting mix that doesn’t retain a lot of moisture because these beauties are prone to root rot. It’s recommended to use a succulent specific potting mix, like Miracle-Gro® Cactus, Palm & Succulent Potting Mix.
-
when to repot
String of hearts tend to be okay with staying slightly rootbound, so you don’t need to keep a strict schedule when repotting. A good rule of thumb is to repot about every 1 – 2 years. Use a pot that is a few inches bigger than its current pot and has a drainage hole.
-
propagation
Start by trimming your string of hearts just under a nodule. Place your cutting in moist soil and watch your new plant take root. This process will likely take about a month. Make sure the soil is kept moist during this growing period.
-
pest control
String of hearts are prone to root rot, so make sure your plant’s soil is drying out between watering. Other pests like aphids or mealybugs can be managed by using an insecticidal soap such as Ortho® Bug B Gon® ECO Insecticidal Soap.
troubleshooting
-
why are there big gaps between my leaves?
Not enough light. Move your string of hearts to a place where it can sit in ample indirect, bright light.
-
why are my leaves turning mushy and droopy?
Overwatering or root rot. Root rot is caused by overwatering. The easiest way to tell if it’s root rot or just overwatering is to give it a sniff. If your plant smells bad, it’s root rot. If it smells okay, just hold off on watering it for a little the soil dries out a bit.
-
why are my leaves turning brown?
Sunburn. It looks like your string of hearts is getting too much sun. These plants enjoy bright, but indirect light. Move your plant away from direct sunlight, but keep in a nice, bright room.
-
why are my plant’s leaves curling?
Underwatering. Thinning or curling leaves is a clear indicator of underwatering. Give your string of hearts a good soak and your plant should be happily re-hydrated.
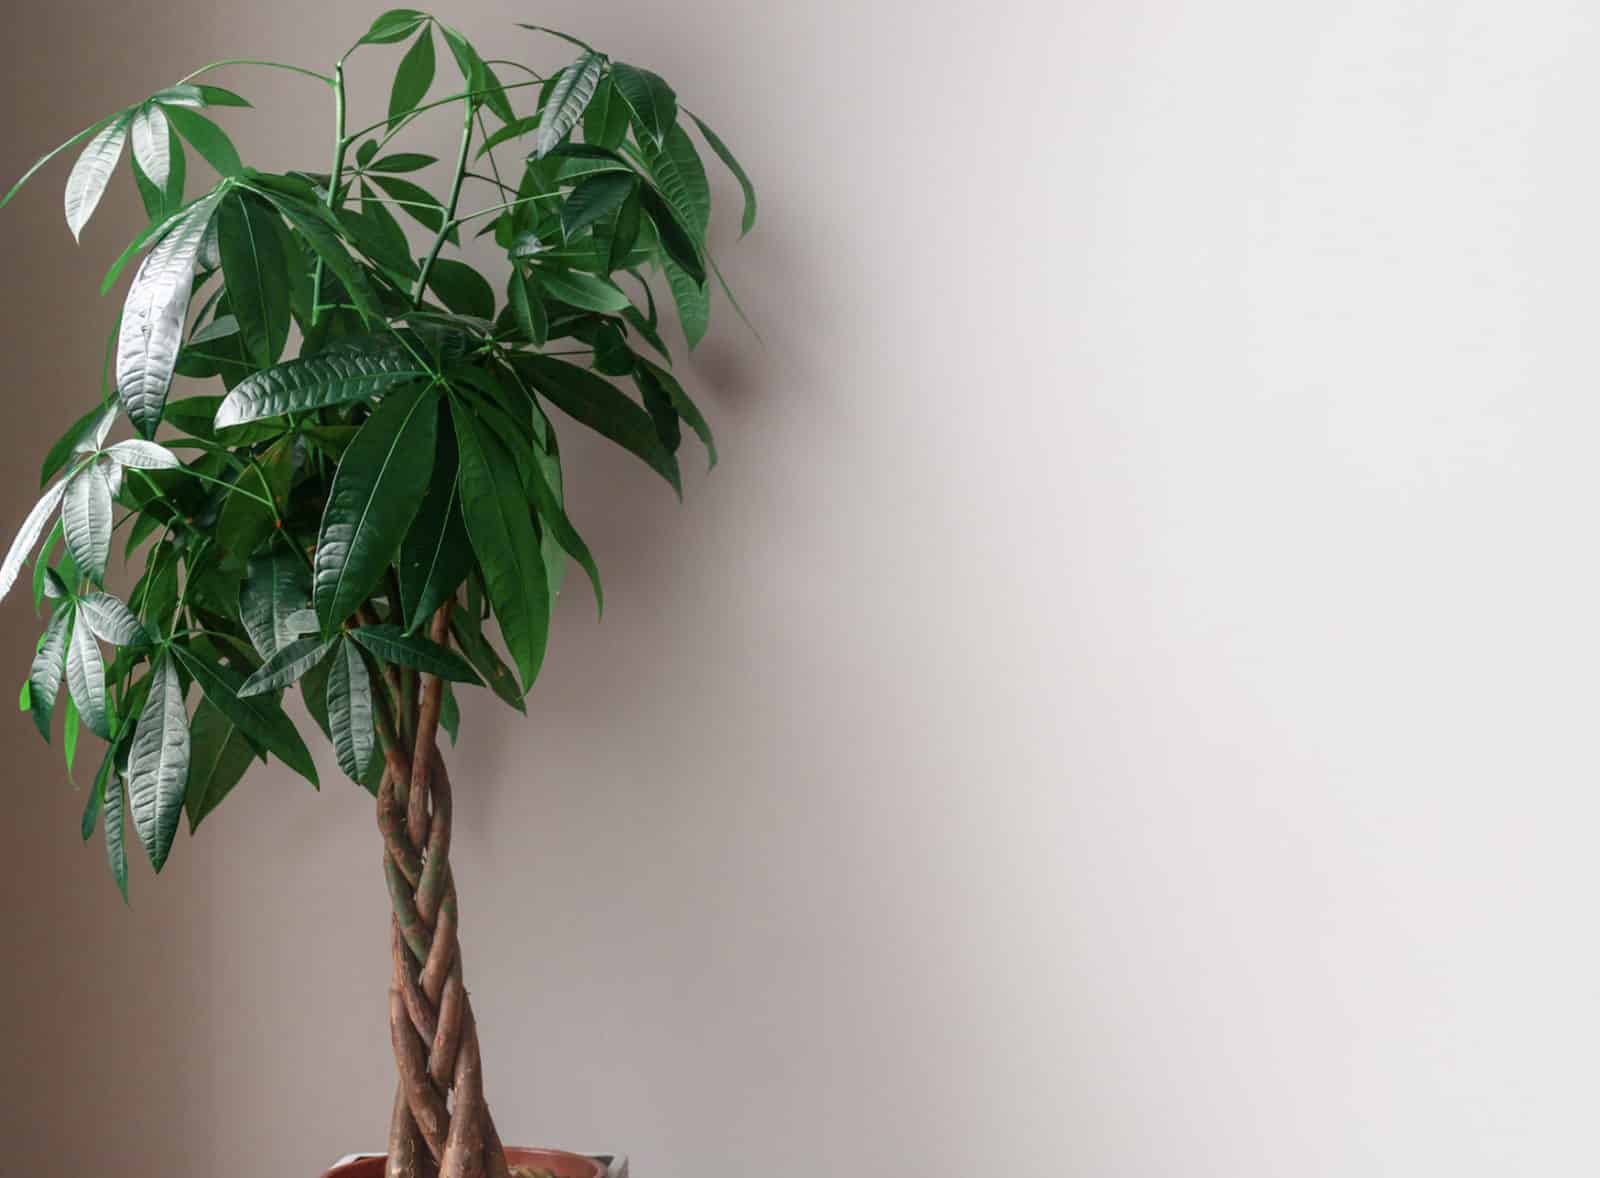
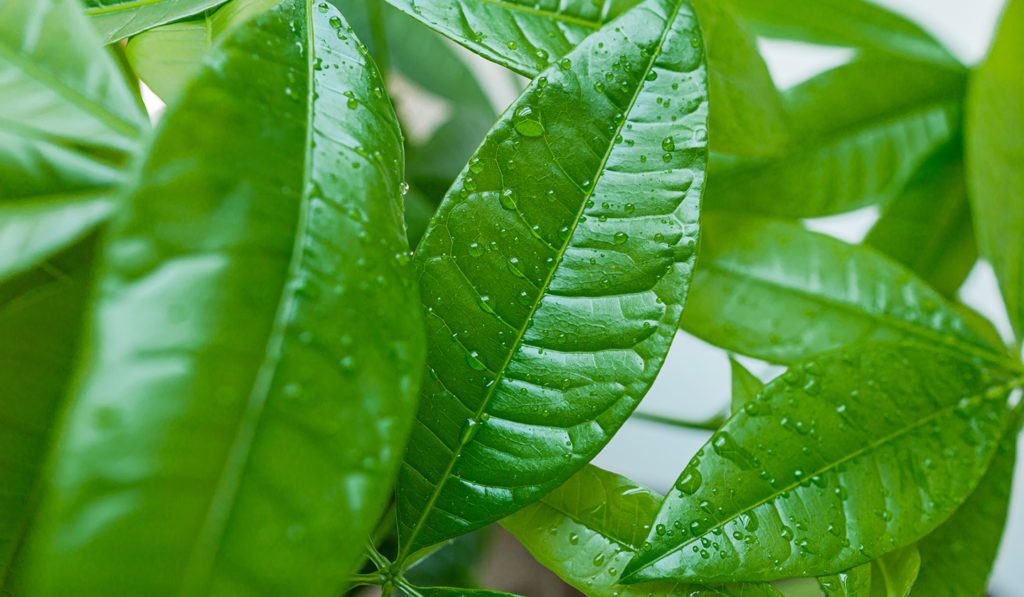
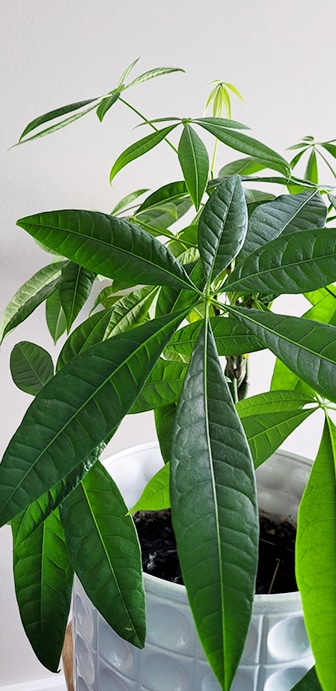
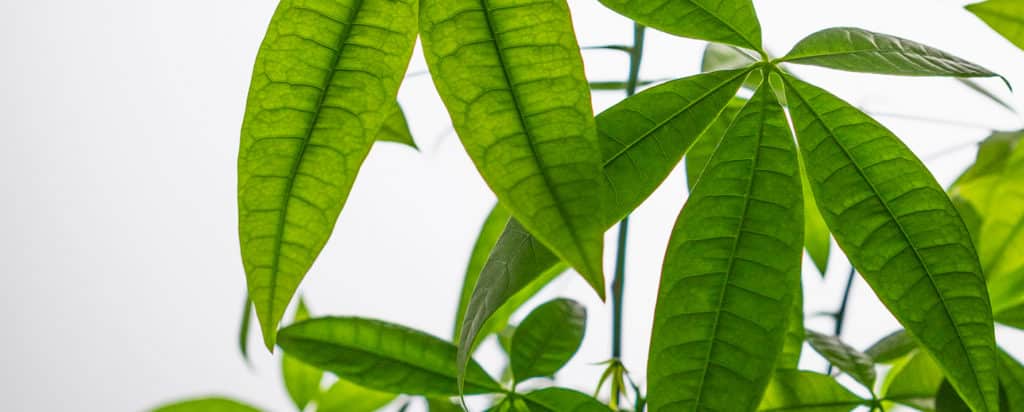
money tree
aka pachira aquatica
Money Trees originated from Central and South America. The braided trunk of the tree isn’t naturally occurring. This feature is created by cultivators braiding young trees manually.
variations
Variations include Malabar Chestnut, Provision Tree, Guiana Chestnut and French Peanut.
light
avoid direct sunlight
Too much direct sunlight will cause the leaves to curl, yellow or burn.
water + feeding
water when dry
However, these plants can still do well without watering too frequently.
toxic
safe for humans and pets
Money Trees are even recommended for people with allergies or asthma.
location
adaptable
Although it’s recommended not to keep this plant in your bathroom because it’s believed this will “flush” good vibes away.
humidity
love it!
Money Trees appreciate a humid climate, with about 50% humidity.
size
small to medium
At home, your money tree could grow between 3 to 5 feet. In the wild, these trees can grow up to 60 feet tall.
pro tip
get a humidifier
Prevent yellowing and dying leaves by increasing the humidity in the plant’s environment.
fun fact
popular in feng shui
This plant usually sprouts 5 leaves on a stem, and 5 is a very important number in Feng Shui.
beyond the basics
-
soil + potting
Money Trees need a sandy, peat-moss based soil. Consider adding Miracle-Gro® Sphagnum Peat Moss to your plant’s soil. Don’t forget to use a pot with drainage!
-
when to repot
Money Trees usually need to be repotted every three years. The best time to repot is during the spring time, to promote growth. While you can cut back on some root growth, be sure not to take off more than 25% of the roots.
-
propagation
The best way to propagate your Money Tree is through a cutting. Take your 6 inch branch cutting, with several leaf nodes, and allow to root in water. Promptly transfer to a soil mixture with peat moss.
-
pest control
Money Trees are very attractive to aphids and mealybugs. You can use a gentle insecticide like Ortho® Bug B Gon® ECO Insecticide Ready-to-use to prevent these creepy crawlies from returning.
troubleshooting
-
why are my plant’s leaves drooping or turning yellow?
Watering issues. If your Money Tree’s leaves are drooping it could be as simple as inconsistent watering. Keep a schedule and check the soil’s moisture level to understand its needs. If the leaves are yellowing, it’s likely due to overwatering. It’s time to water when the top 2 to 4 inches of soil are dry.
-
why is my plant’s trunk spongey and soft?
Sounds like root rot. This happens when a fungus has attacked your plant’s roots and is a sign that you’ve been overwatering. Root rot can be fatal if it’s not caught early. The best chance you can give your Money Tree for survival is to repot immediately, removing as much old soil as possible.
-
what is this gross, sticky sap?
Guttation. This it totally normal! If the rest of your Money Tree looks healthy, there’s nothing to worry about. But… if you see little dark bumps on your plant, it could be a pest infestation.
-
why are my plant’s leaves curling?
Overwatering. Avoid excessive watering and finger test your plant’s soil when you’re about to water. Make sure you’re only watering when the first 2 to 4 inches of soil are dry.
-
why are my plant’s leaves falling?
Too much sunlight. Too much bright, direct sunlight can cause your Money Tree to drop leaves. Another common cause is if your Money Tree has recently moved to its new home. Dropping a few leaves as your plant adjusts to its new home is totally normal.
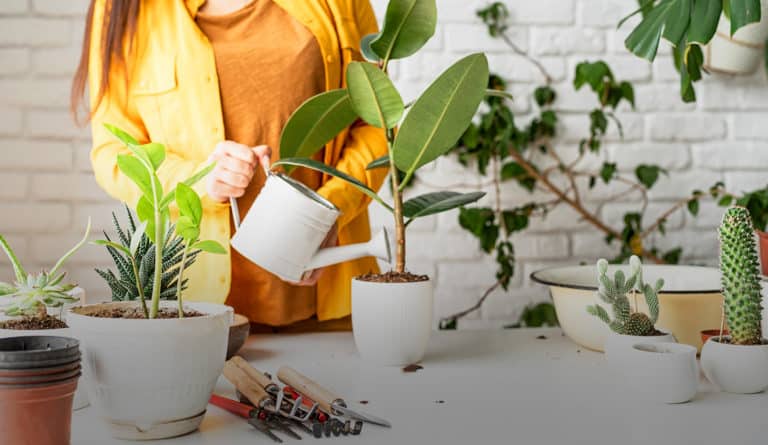
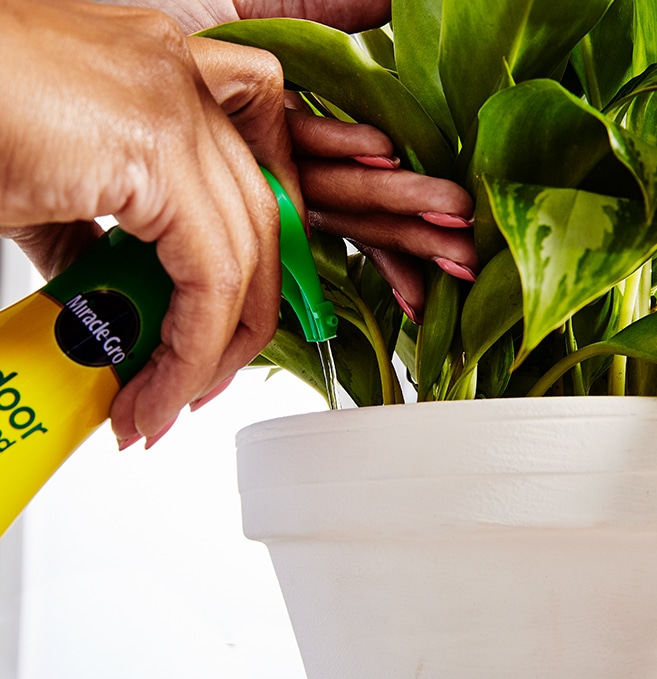
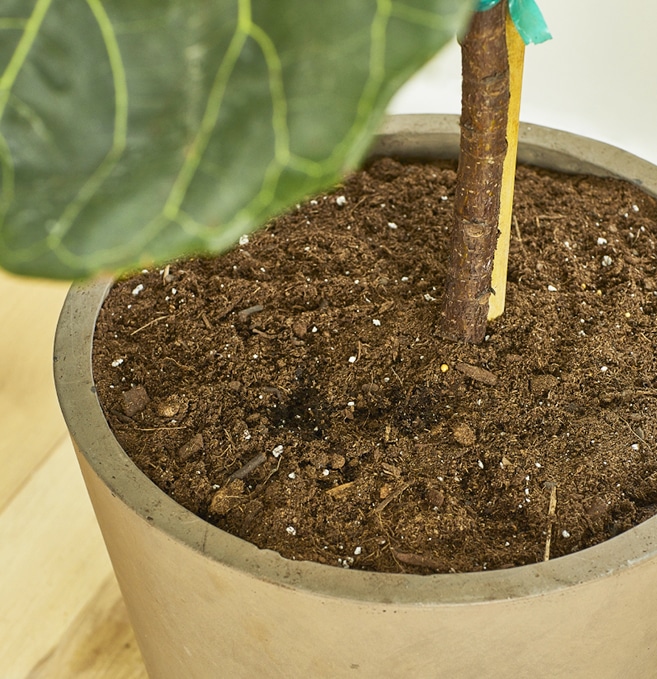
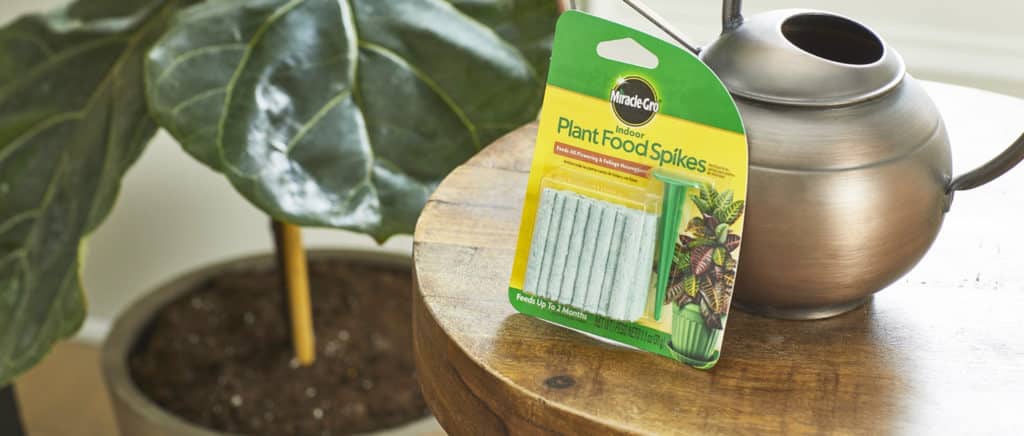
You adopted some new plants and are ready to introduce them to the rest of your collection, but now your leafy friend is looking a bit lack lustre. There could be a very easy fix… just feed your plant! It’s easy to get your plant pal to perk up when they’re adjusting.
feed me!
We’re talking food spikes! These little fertilizer spikes are a great addition to your indoor plant care. Using them is as easy as 1-2-3!
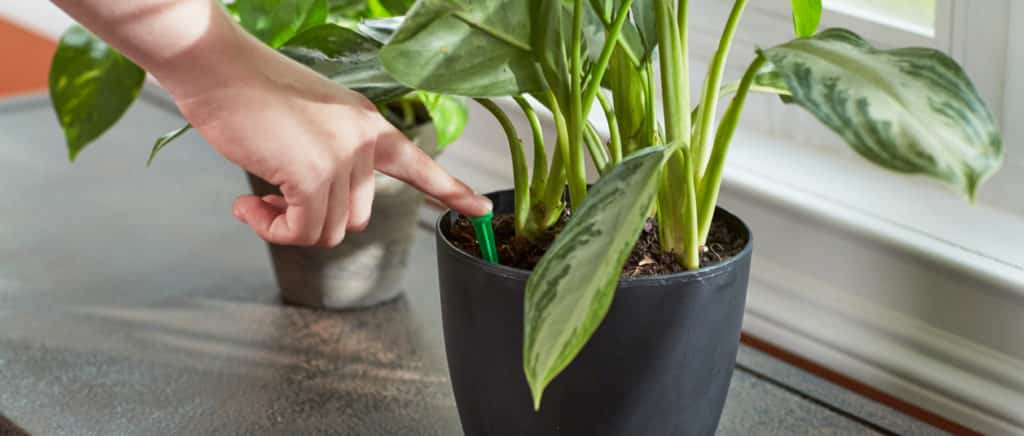
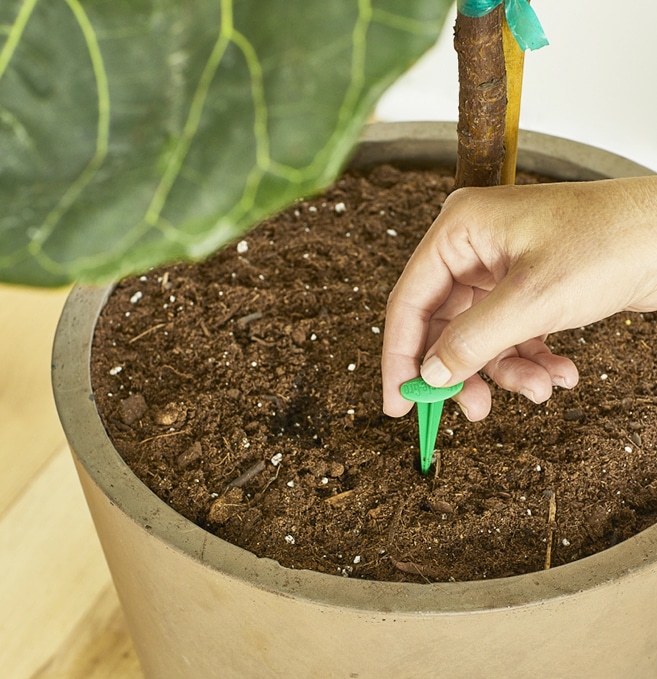
1
Measure your pot and make some holes! The packaging of Miracle-Gro Plant Food Spikes doubles as a ruler. Measure your plant’s pot to see how many food spikes you need. Then make a little hole between the plant stem and the pot.
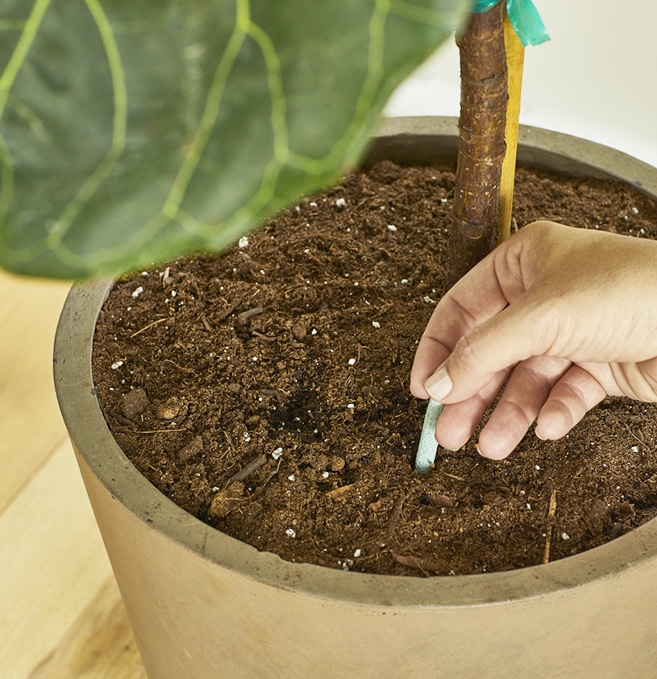
2
Set it and forget it! Place the food spike in the little hole and cover it with some soil. Keep watering as you usually would.
3
Seasons matter! You don’t have to worry about your food spike for a couple of weeks. In the spring and summer months, you should replace the spikes about every 30 days. During the fall and winter, replace them every 60 days.
And just like that, your plants are set up to thrive! Share your flourishing home gardens and help other home gardeners build up a beautiful plant collection.
Building your indoor jungle can mean that a lot of your flat surfaces are taken up by your plant babies. This can mean only one thing: it’s time to take to the skies! Help your plants thrive by giving them unfettered access to sunlight, without having to compete with other plants on your shelves. We’ve got a macrame plant hanger that’s perfect for your space!
Easy and quick to work up, these hangers can be customized to suit your home’s style.
step 1. cut the cord
Start by cutting 8 very long pieces of macrame cord, about 10 ft long for a larger planter. Loop the cord through the hoop, so that the cord is folded at the half-way point. You should now have 16 pieces of cord hanging from the loop.
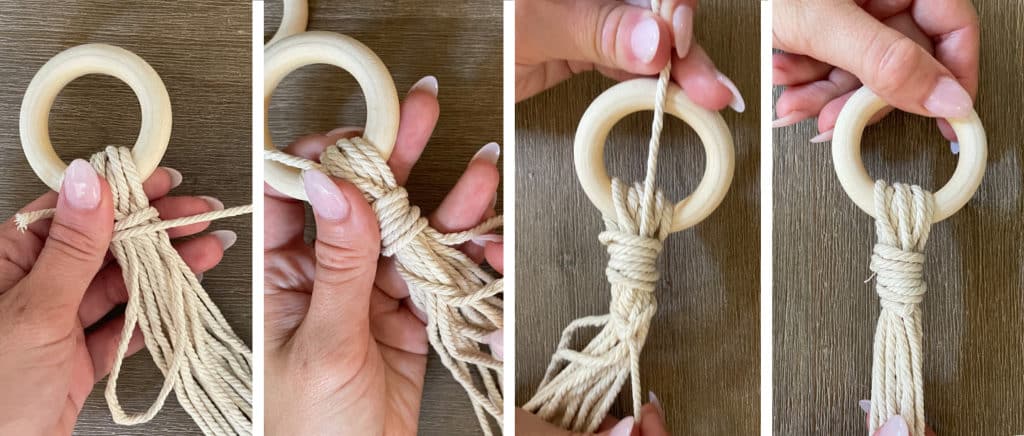
step 2. use a wrapped knot.
A wrapped knot is pretty easy to do and gives you a polished effect. Here’s how to do a wrapped knot:
- Cut a short piece of cord over the looped cord. Make sure the short tail is to the left, a loop pointing down and the long tail to your right.
- Wrap the long tail over the looped cords and the loop of the short cord.
- Continue wrapping the long tail. Make sure to keep it tight and leave the bottom loop of the short cord uncovered.
- Once you’ve wrapped to your desired length, thread the long tail through the bottom loop.
- Pull up on the short tail to tighten the knot. Then pull it under the wraps.
- Cut the tail as close to the knot as you can.
step 3. prep your first row of knots.
Start by dividing the 16 long pieces of cord into 4 groups of four strands. To make sure they’re evenly spaced around the pot, use a measuring tape to measure the same distance from the wrapped knot, and mark each of the 4 groups of cord. Start with about 20 inches down from the knot, then adjust to your preferences. Keep the 16 cords into 4 groups of 4.

step 4. start tying your knots.
This is your first row of square knots. Here’s how to start your first row fos each group of 4 cords.
- Take the left cord and lay it over the centre strands, and under the outside cord on the right.
- Thread the right strand under the center cords, and over the strand on the left. Pull to tighten, and lining it up with the measuring mark we made in the previous step.
- Repeat the process, going in the opposite direction. Lay the right cord over the centre ones and under the far left. Thread the left cord under the centre strands and over the cord on the right.
- Pull tight. Your first square knot is complete. Proceed in the same way with the other 3 groups of 4 cords.
step 5. measure your second row of knots.
Now it’s time to form the second row of knots. Again, group the cords in 4 groups of 4. This time, take two cords from each adjacent grouping of the previous 4 cords. One centre cord and the right from one and one centre cord and the left from the other. Measure out how far below the first row you’d like these knots to sit. Start with 5 inches below and then adjust to your preference.
step 6. start tying your second row.
Tie two square knots to the length you measured and marked. It should start to look like a tube. You’ll have to turn your project to finish the last row of knots.
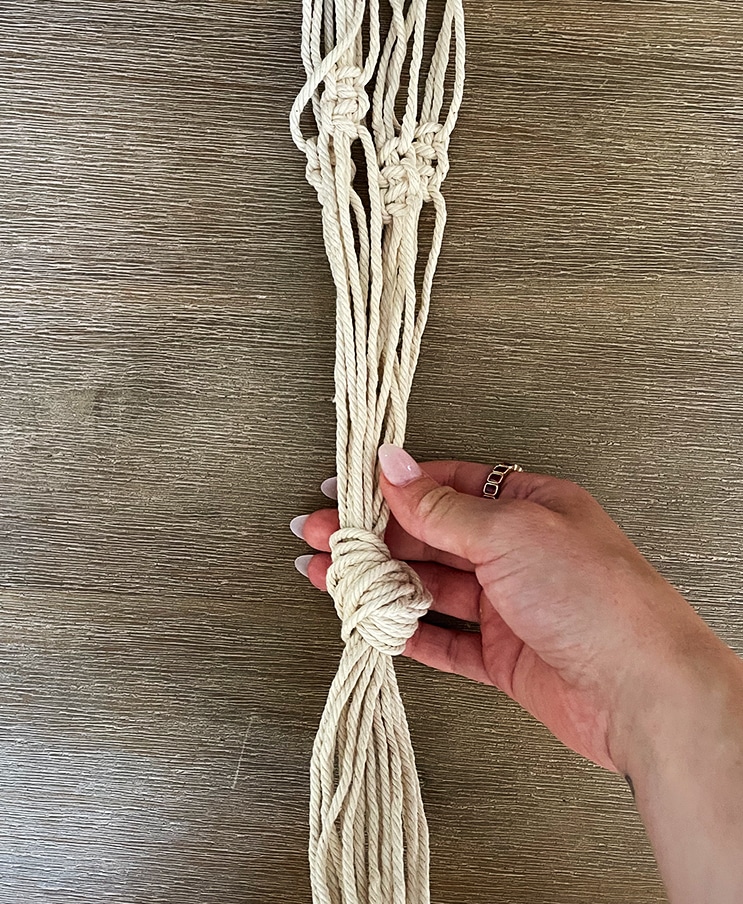
step 7. knot and trim.
To finish off, grab all cord lengths and measure how far below the previous set of knots you’d like this final one to sit. This is the base that your plant will rest on. Start with 7 inches below the previous row, then adjust to your preference. Loop the cords together and pull through to secure the knots. Trim the ends so it’s all even.
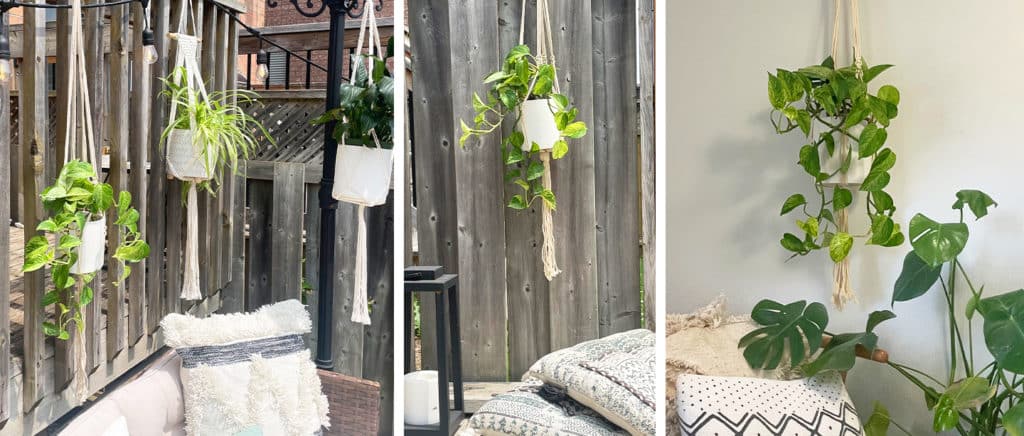
step 8. add your plant and hang.
Add your plant pal and choose the perfect spot for your planter. Make sure your planter is securely attached to the ceiling before hanging it up. Enjoy!
#easypeasy
We’re telling all the secrets here, keeping your plant healthy – and alive – all you need to do is picture it’s homeland, and do what you can to replicate those conditions.
Your plants might have spent their formative first few months in a greenhouse but their species has spent a long time adapting to their native territory. Give them an environment that meets their needs, it will reduce the work and fussing you have to put in to keep your plant looking fabulous.
the finger test & weight test
An effective and lo-fi way to feel for moisture in your plant is to Poke your finger into the soil. This method is so simple you can’t go wrong! Poke a finger into the soil and stop when you feel moisture. Water your plant when you poke the soil and it’s dry up to your first knuckle.
Go by weight. Water is heavy, and your dry container will be a whole lot lighter than a well-watered one. Get familiar with how much your plant weighs when thirsty and quenched and use that as a guide. Use both methods at the same time for extra confidence.
ahh sunshine and light
Plants from different areas of the world have different requirements, light isn’t a one-size-fits-all thing. Tropicals love to soak up the sun, but aren’t used to getting direct rays and can even be prone to sunburns. Check the tag on your plant to get an idea of its unique needs and find a spot in your home that best suits it – while plants don’t like being moved around too much, you can always give it a new POV if you need to.
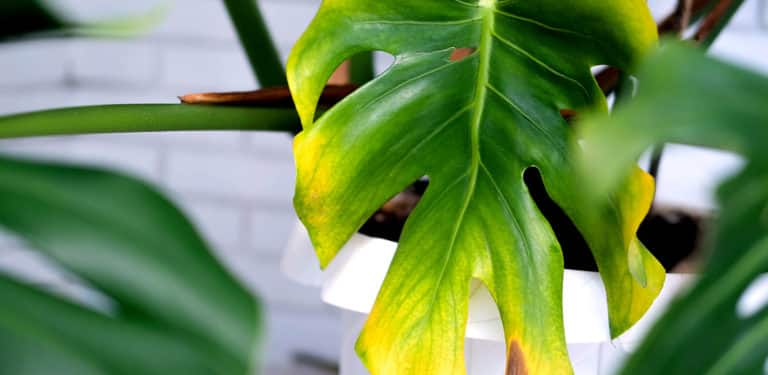
Your beautiful tropical can’t talk to you, but in it’s own way it does communicate. You can see signs of what it needs. Look out for pale or yellowing leaves, or a “stretching” plant that seems lanky – these are signs your tropical needs a little more sun. Brown spots on the leaves could be a sign of burning from too much direct light.

your little ones grow up so fast
When your plant is happy and healthy, you’re going to eventually need to give it a bigger home to let it stretch out its roots! When the plant looks “rootbound”, when almost all of the soil and space in the container is roots, it’s time to go up in size. You may even see visible roots at the top of the container, growing out the bottom, or that you need to water your plant more because it has less soil to hold on to water.
get the size right
Right sizing is as easy as getting a larger container and repotting. No moving van required. It’s simple, but it can get messy. Here are some of our tips for sizing up a healthy, growing tropical:
Start by only going one or two sizes bigger. You might be tempted to go larger but the proportions of your chic living decoration can be off and the excess soil will hold too much moisture and may invite rot into your container.
Buy Choose a container with good drainage. No matter the size, water needs to get in and then get out the bottom. It happens sometimes we fall in love with a decorative pot without drainage, never fear! You can DIY by drilling holes yourself or cheat by planting your beautiful tropical in a container with drainage, and simply hiding that well-draining container inside your decorative one.
Buy potting soil suited to your tropical beauty. When you use tropical-focused soil it will give you both the drainage and nutrition your plant’s needs. Planting from a sterile bag instead of taking soil from outside helps to keep pests out of your home and away from your plant.
#easypeasy
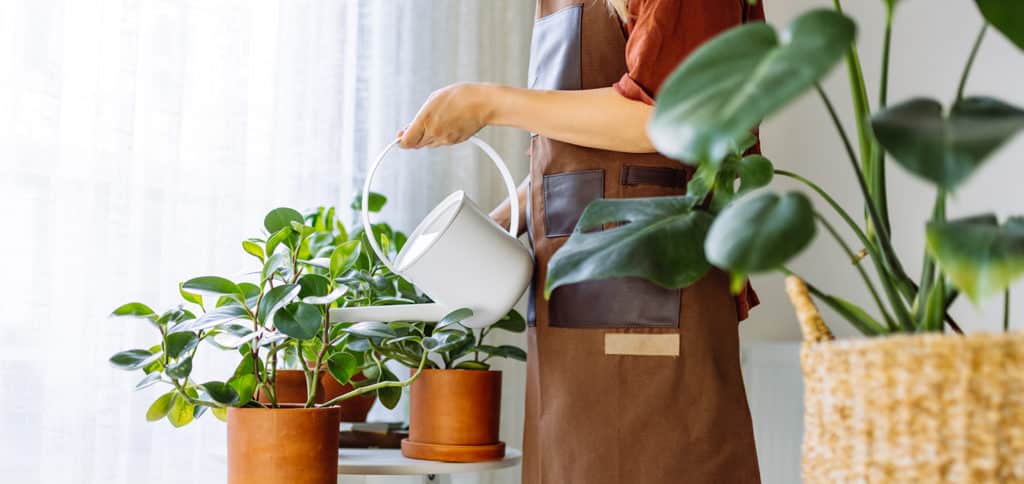
Knowing when and how to water your potted plants is an easy way to ensure your house plants are happy and thrive in your home. Here are a few simple dos and don’ts to keep in mind when it comes to watering your botanical buddy.
DO
pick a pot that is the right size for your plant and has good drainage holes.
DO
understand the unique needs of your plants. Succulents are desert plants and like to be kept on the drier side. They are susceptible to rot if over watered. Tropicals like to be kept moist. Some other types like to dry out between watering sessions. It’s all very personal.
DO
consider seasonality. Plants tend to take it easy in the winter, as a result they require less water. Spring and summer is a whole new ball game, that’s when your plant uses all its energy to grow.
DON’T
let water sit. Dump out any excess water. To prevent rot, water thoroughly and let the water run fully out of the pot, then discard the excess water to avoid soggy soil.
DON’T
water the leaves. We’ve said this a million times. When you’re watering your plant, avoid watering from overhead. Aim that watering can below the leaves and at the soil. This helps prevent bacterial and fungal infections.
DON’T
favour one side of the plant. Your plant may have it’s good side but to keep your plant friend full and lush, evenly water around the whole pot.
QUICK TIP
House plants love music! A bopping playlist also encourages growth.