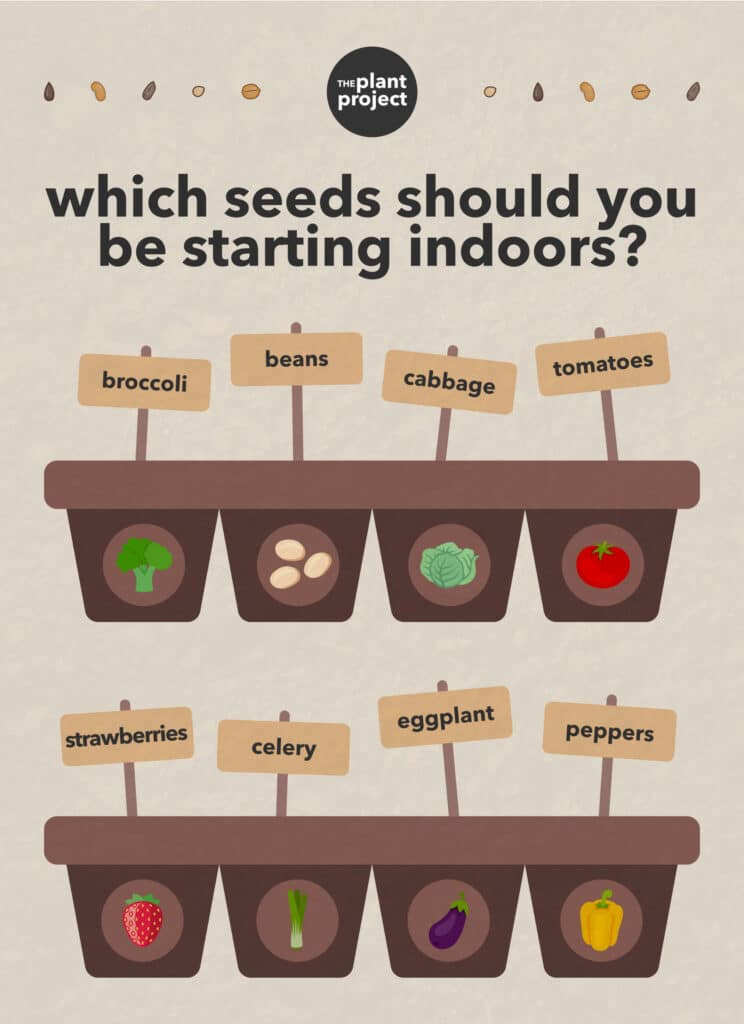
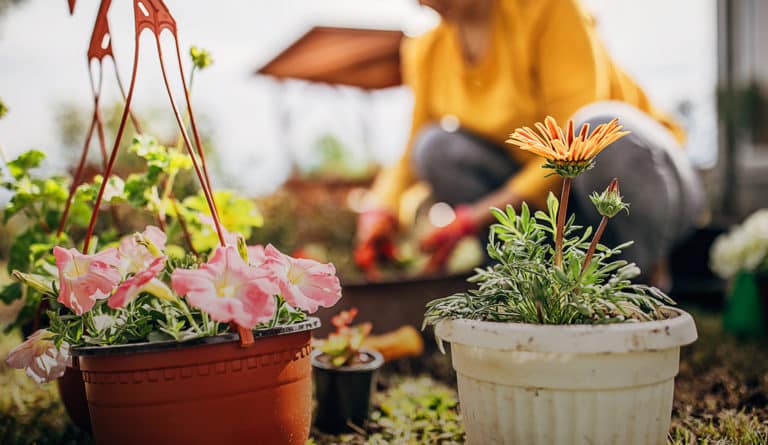
Indoor sowing is the process of starting your seeds indoors, and then gradually exposing and transplanting them outdoors. Almost every seed can be started using this method – but particularly long-season crops, which, as the name implies, take a longer time to grow.
your go-to guide to seed starting for late starters
If the idea of starting seeds just crossed your mind, or you simply didn’t have the time to tackle this project earlier in the year, do not fear!
Because yes – contrary to popular belief, you absolutely CAN start your seeds in April. It’s not too late.
Especially if you’re into delicious late bloomers, like asparagus, beets, peppers, and even catnip (your furry friends will love you forever!).
let’s get started! but first…
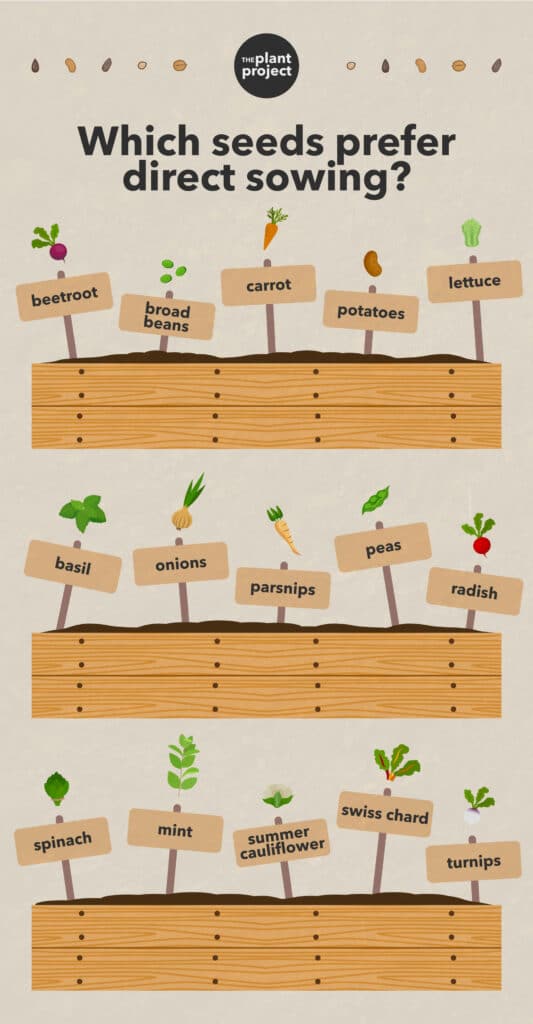
Check the last average frost date in your region with this helpful chart. It includes useful guides for which seeds you can start now, which seeds prefer direct over indoor sowing, and when the best time to transplant your indoor seedlings would be.
there are two ways to sow your seeds. Let’s get into them!
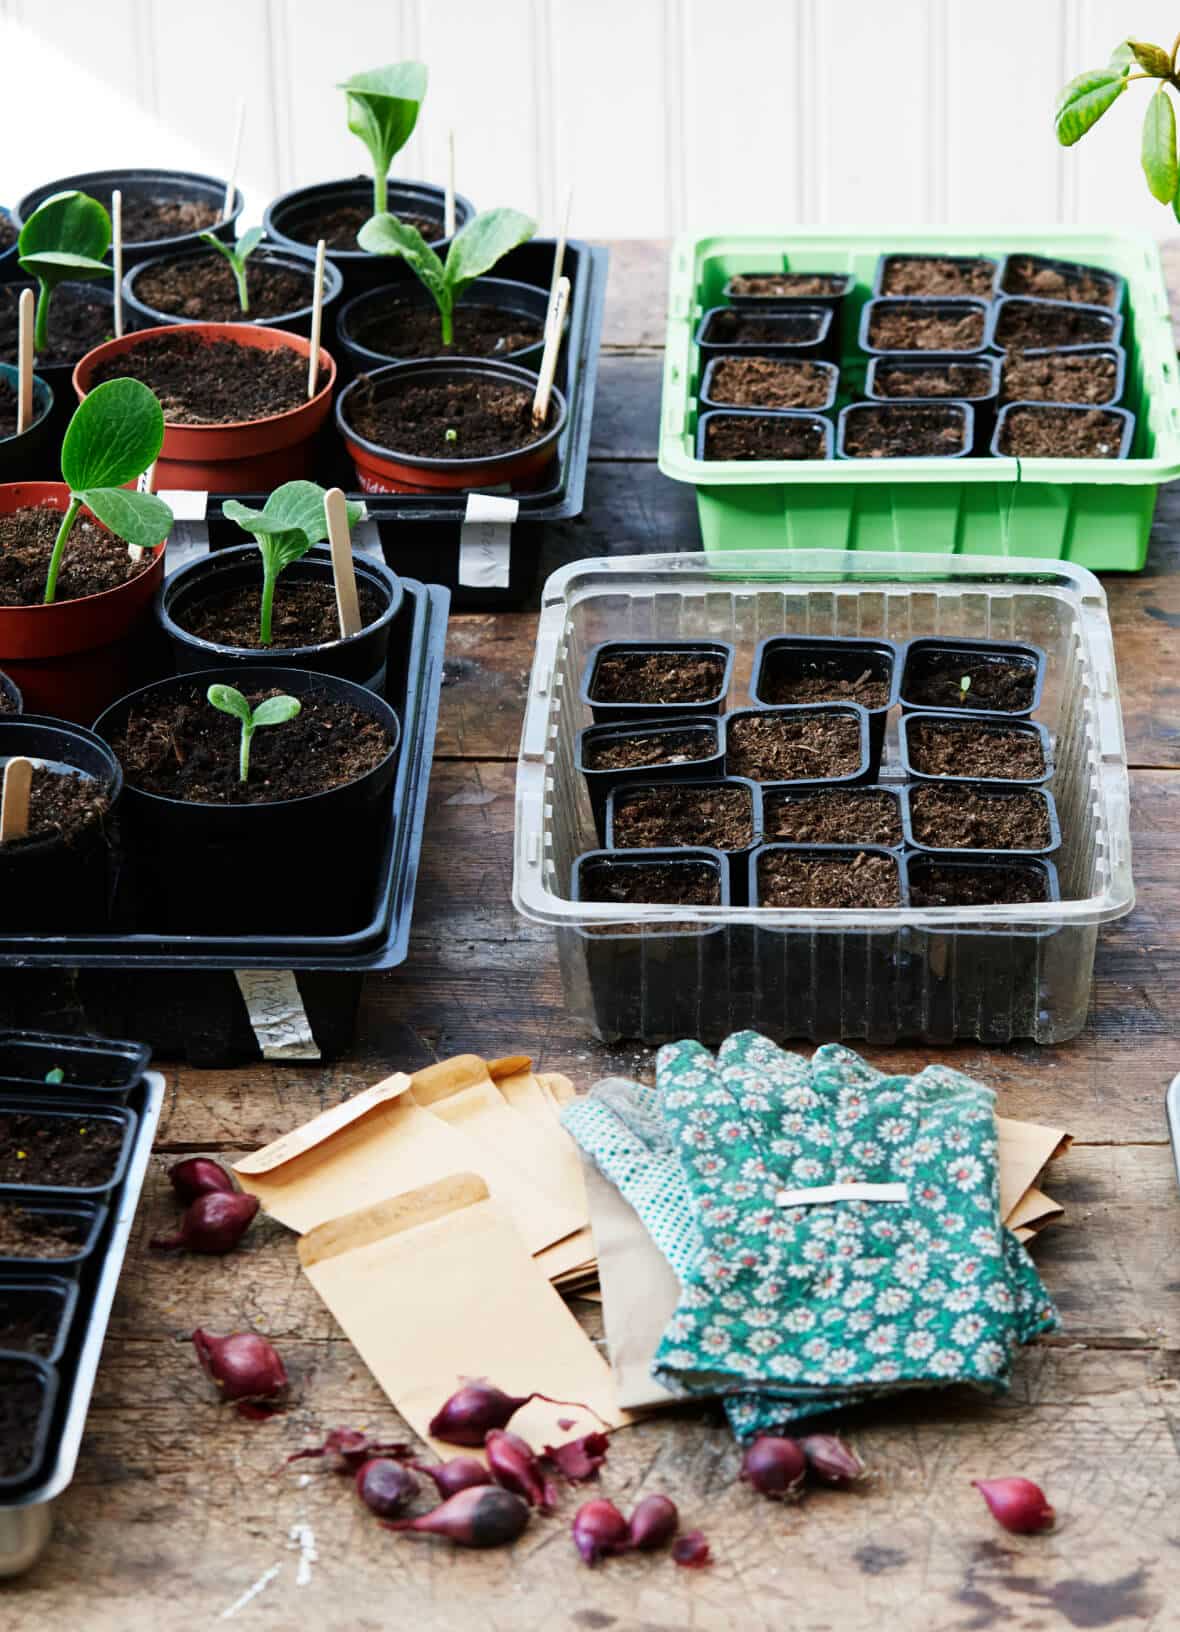
here’s what you need to get started:
- Your seeds
- Miracle-Gro® Seed Starting Potting Mix
- A seed tray
- A drip tray
- A heat mat
- LED or glow lights
- A plastic seed starting cover
- Stickers for labeling
1
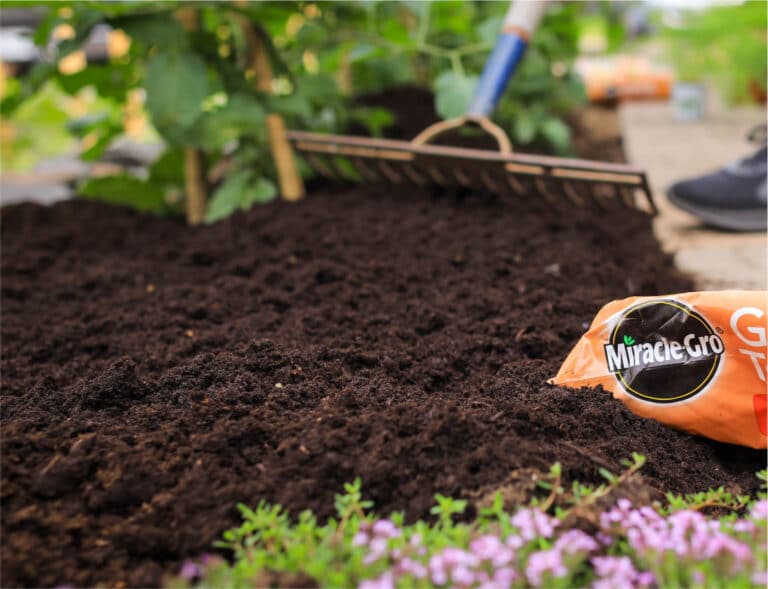
step 1: prepare your potting mix
Fill a large bowl with your potting mix, and add in a sprinkle of water to ensure even soil moisture.
2
step 2: prepare your seed tray
Place your seed tray inside your drip tray, and fill each cell with soil, just below the top of the cell.
3
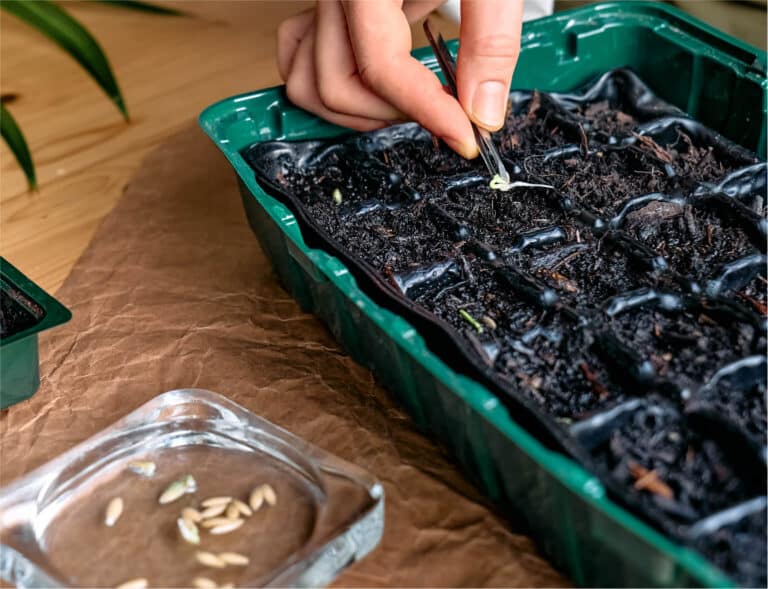
step 3: sow your seeds
The rule of thumb with seed sowing is: plant yours two to three times as deep as they are wide. So if your seeds are tiny, you can sprinkle a few over the soil. If they’re larger, you can push a couple of them into the soil in each cell, ensuring they’re covered by a layer of it. To better understand how deep you need to place your seeds, read the packaging they come in.
4
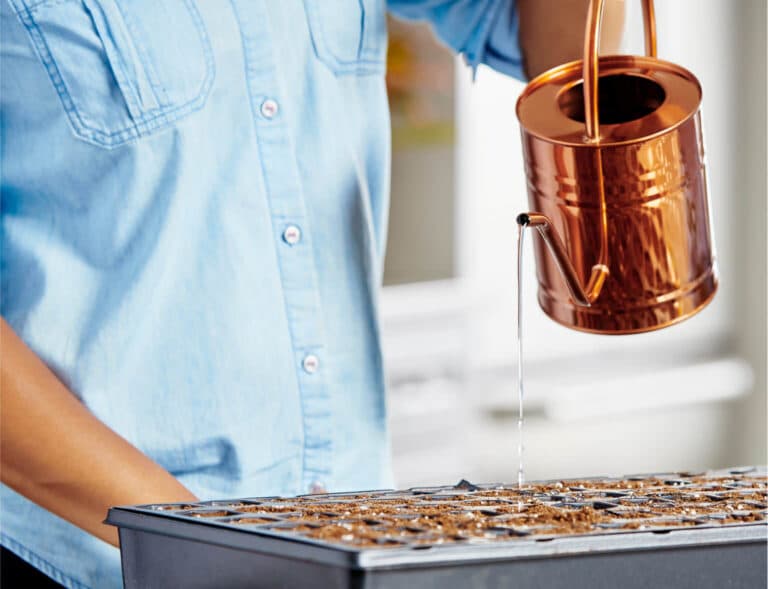
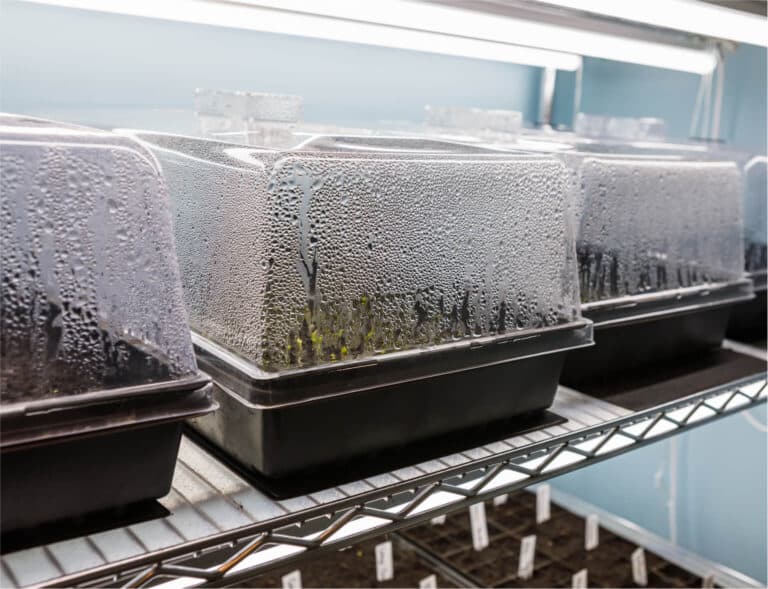
step 4: prepare for growth!
Add labels to each seed container. Then, place your plastic cover on top of your tray, and put it on the heat mat, under your LED or glow lights. Once your seedlings start growing, gradually expose them to the outside environment. Then, mid May or June, they’ll be ready to be transplanted.
option 2: direct sowing
This method involves planting your seeds directly into your garden or outdoor space, rather than sowing them indoors first, and then transplanting. While indoor sowing gives you more control over your seeds’ environment, direct sowing allows for the development of stronger, healthier plant roots.
here’s what you need to get started:
- Your seeds
- Craft sticks for labeling
1
step 1: prepare your soil
Take the time to get your soil fully ready, by removing all the weeds, rocks, and debris. Then, loosen your soil with a garden fork, raking it until you have a level surface.

2
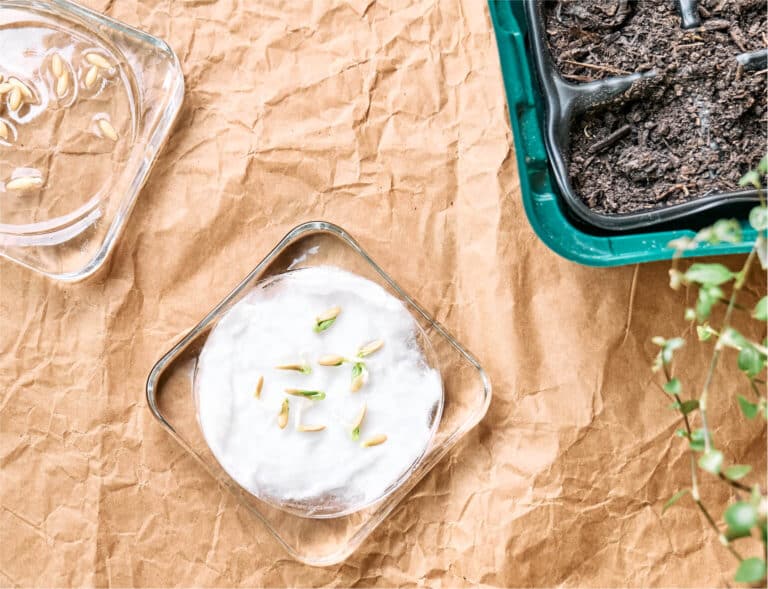
step 2: prepare your seeds
Depending on the type of seeds you have, you might need to manipulate them slightly before placing them in the soil. For example, some seeds need to be softened, by being soaked in water prior to planting. Others need to be scarified, by being rubbed against sandpaper to thin their hard shells. Read your seeds’ instruction packet to ensure you’re preparing them properly.

3
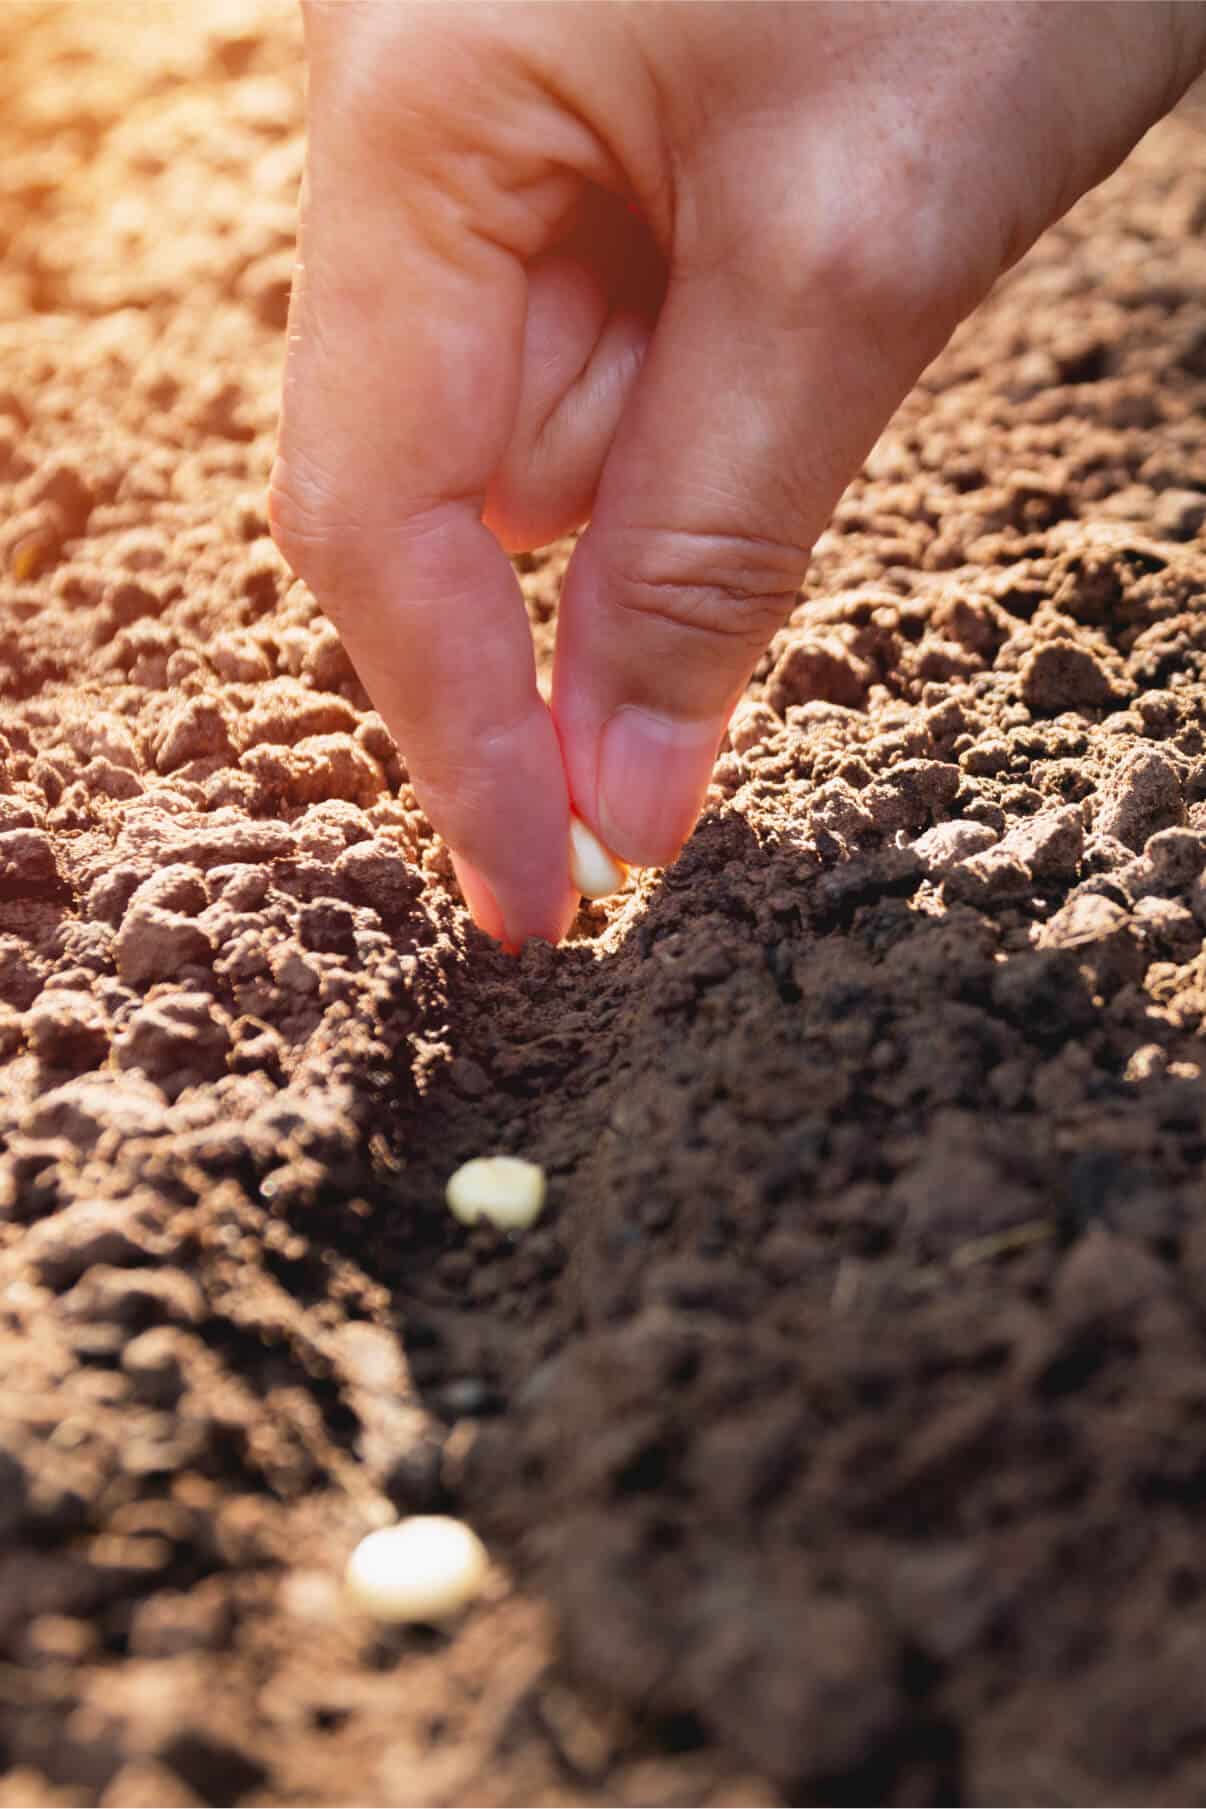
step 3: plant your seeds
Just like with indoor sowing, try to stick to the seed size-to-soil depth rule. The bigger the seed, the deeper you want to sow it. Tiny seeds can simply be sprinkled on top of the soil, while bigger seeds will need to be buried at a prescribed depth. But don’t stress! Seeds aren’t particularly picky, and will likely germinate regardless of soil depth.
4
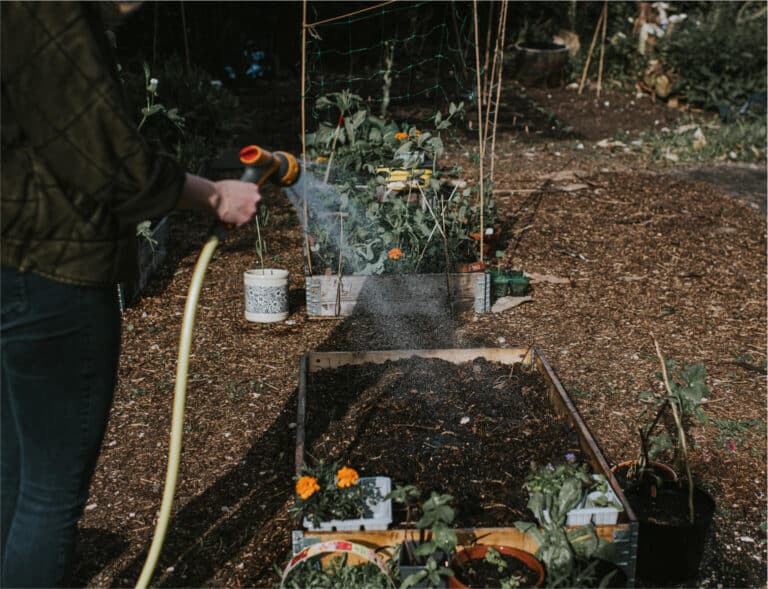
step 4: moisten your soil
Never – we repeat, NEVER- let your soil dry out fully after planting your seeds. Nothing gets in the way of seed growth more than dry soil. To give your seeds the best chance for success, gently water them using a light-pressure setting on your hose, and make sure to not leave any puddles – or you risk overwatering.

5
step 5: X marks the seeds
Use your labeled craft sticks to mark where you planted your seeds. This will help you keep track of their germination, monitor their growth, and not accidentally overcrowd them with new seeds or mistaken them for weeds.
Still got questions about the seed starting process? Let our experts help, by leaving a comment in our Plant Chat!
#HappySeedStarting
Looking to “spruce” up your porch this holiday season? Create a beautiful and inviting entry way that will make your guests want to snap insta-worthy pictures before coming inside!
Looking to “spruce” up your porch this holiday season? Create a beautiful and inviting entry way that will make your guests want to snap insta-worthy pictures before coming inside!
Here are 5 festive ways to decorate your porch for the holidays.

1
Wrap your door. There are a few ways to make your home look like the perfect present. Try your hand at giftwrapping your front door with wrapping paper. If that’s too much for your vibe, consider a big ribbon with a Christmas bow. Kick up the present theme with a gift tag too!

2
Be generous with greens. Wrap columns in garlands and introduce evergreen wreaths for a classic holiday look.

3
Buffalo plaid accents. Add a pop of vibrant colour to your porch by including buffalo plaid accents. A few outdoor throw pillows strategically placed on all season furniture will punch up your patio. These red accents will really pop against natural, evergreen décor.

4
Make small spaces pop. A statement wreath and a few accents are a great way to make small spaces feel welcoming. Transition your summer lanterns to winter by filling them with Christmas ornaments.

5
Add some lights. The addition of white string lights add sparkle to your porch. Bonus points to these lights for letting your décor be seen at night!
There are so many ways to make your home festive for the holidays. Share your tips on holiday décor in Plant Chat!
#TisTheSeason
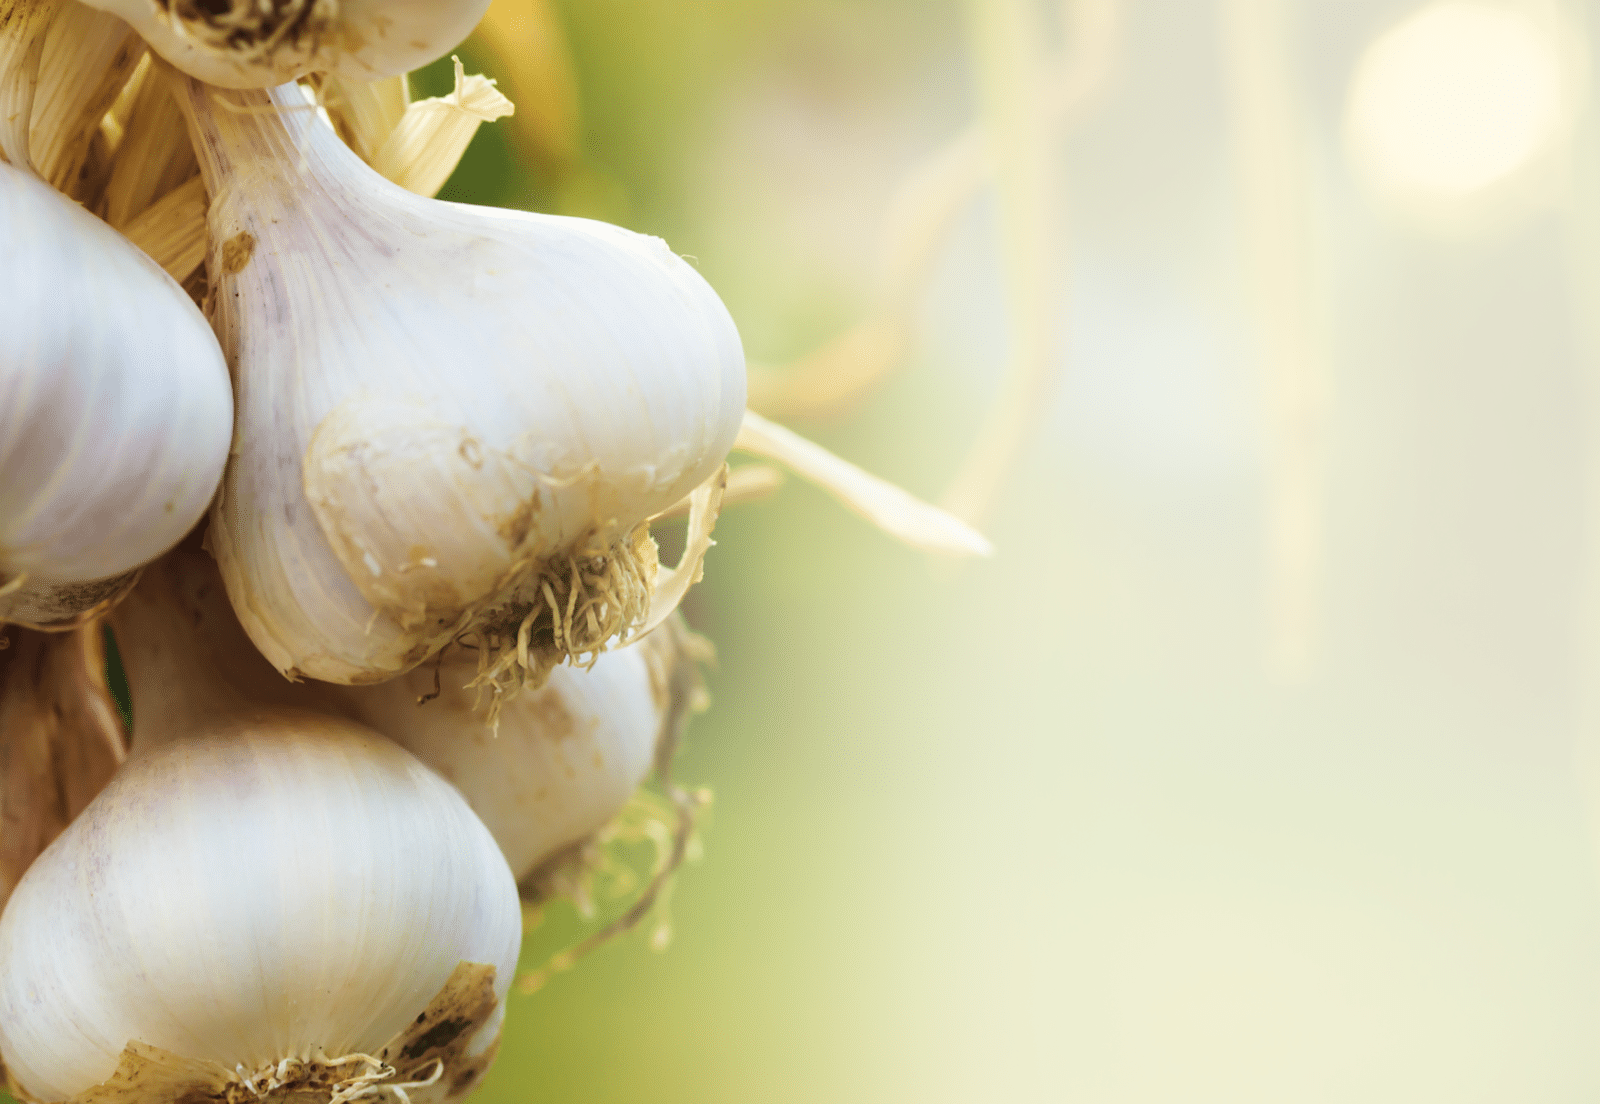
garlic
aka allium sativum
Garlic is one of the most commonly used vegetables in cooking. It offers a variety of health benefits and can be consumed in a myriad of ways including cooked, preserved in oil or even eaten raw.
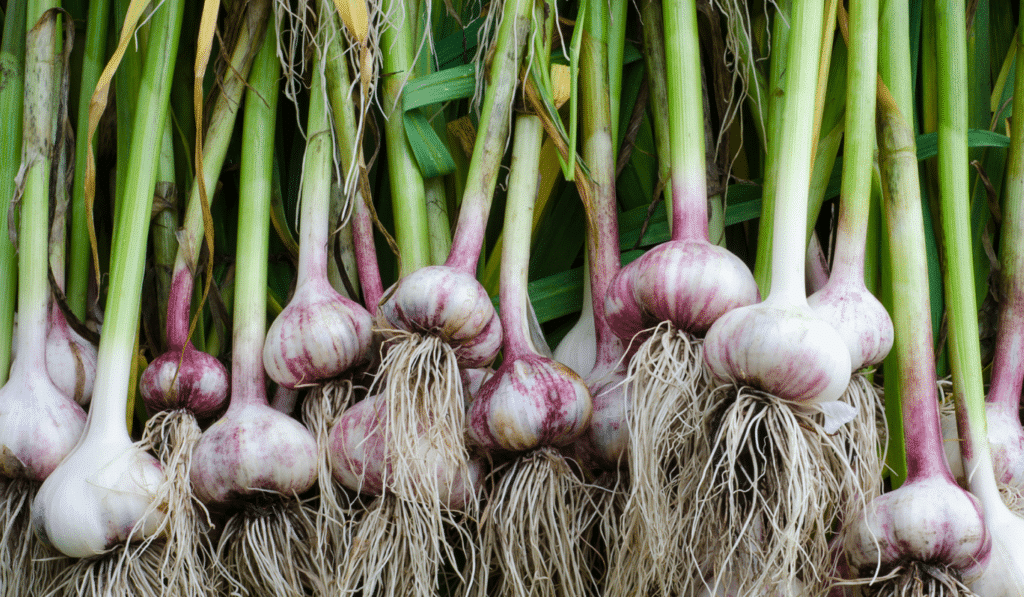
variations
There are about 11 different types of garlic. They are classified as “hard neck” or “soft neck” variations.

light
full sun
Plant in a place where they can get 6 – 8 hours of sun

water + feeding
not too thirsty
It’s best to water deep, but garlic only requires between a half to a full inch of water per week.

toxic
yes and no
Garlic is toxic for cats and dogs, but delicious for humans

size
small-ish
Average garlic bulbs have about 6-10 cloves, but their foliage can reach up to 2ft in height.

pro tip
plant in the fall
Plant your garlic 4 – 6 weeks prior to first frost

fun fact
keeps more than vampires away
Garlic is known as one of the healthiest foods, containing healing properties such as: anti blood coagulation, antioxidant, antiviral, antimicrobial, lowers cholesterol, reduces blood pressure, anticancer properties and can be used to help fight off colds.
beyond the basics
-
soil + planting
Plant garlic cloves 4 to 8 inches apart, and about 2 inches deep. Be sure you plant the cloves with the root side pointing down. Your garlic needs well-draining soil, such as Miracle-Gro® All Purpose Garden Soil. Add a little compost to bump up the nutrients of soil.
-
companion planting
Garlic can be planted next to other veggies such as beets, celery, lettuce, potatoes, strawberries or even tomatoes. It’s best to avoid planting near peas or beans.
-
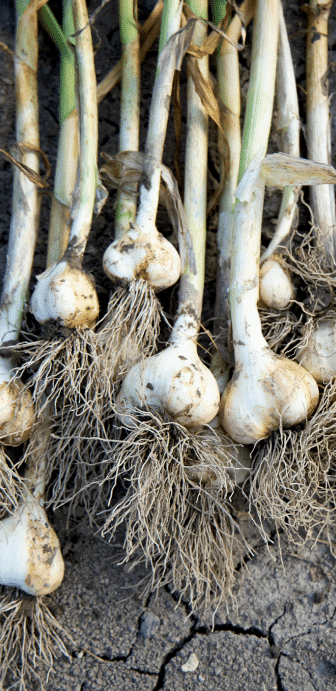
harvesting
Once your garlic has sprouted some leaves, and a few of the lower leaves have turned brown, your garlic is ready to pick. The only way to tell is to pick a few bulbs as a test. If the cloves have filled the skin, they’re ready to harvest. Be sure not to let them wait too long once you notice the lower leaves browning, otherwise the protective layers around the cloves will be too thin. This means the garlic won’t store well.
-
pest control
White rot is a common disease that can wipe out an entire garlic crop. This is identified by little poppy seed sized bumps on the stem, and white fuzzy growth on the bottom of the bulb. If left untreated it can remain in the soil for many years. Keep an eye out for symptoms from mid-summer to autumn. If you’re noticing this has been a problem where you’re planting, apply a fungicide. For best results, apply the fungicide in a 6 inch band over the planting trench. This should happen immediately before planting.

troubleshooting
-
why is my garlic drooping and brown?
Could be time to harvest. When garlic is ready to be harvested, a few of the bottom leaves will turn brown and droop. The easiest way to tell if your garlic is ready to harvest is to count back. Garlic needs about 240 days to mature.
-
no, really why is my garlic drooping?
Nutrient problems. Your soil could be lacking in some key nutrients like nitrogen, potassium, calcium, and magnesium. Consider using a plant food like, Miracle-Gro® Shake ‘N Feed® Tomato, Fruits & Vegetables Plant Food.
-
why is my garlic not sprouting?
Extreme weather conditions. Sometimes after a particularly harsh winter, garlic crops can come out a bit crumpled or very small. One way to prevent this is to water and mulch immediately after planting. Be sure not to add too much mulch though! Too much mulch applied too late in the season will insulate the ground and delay it from going dormant. This can cause root rot once the real cold weather sets in.
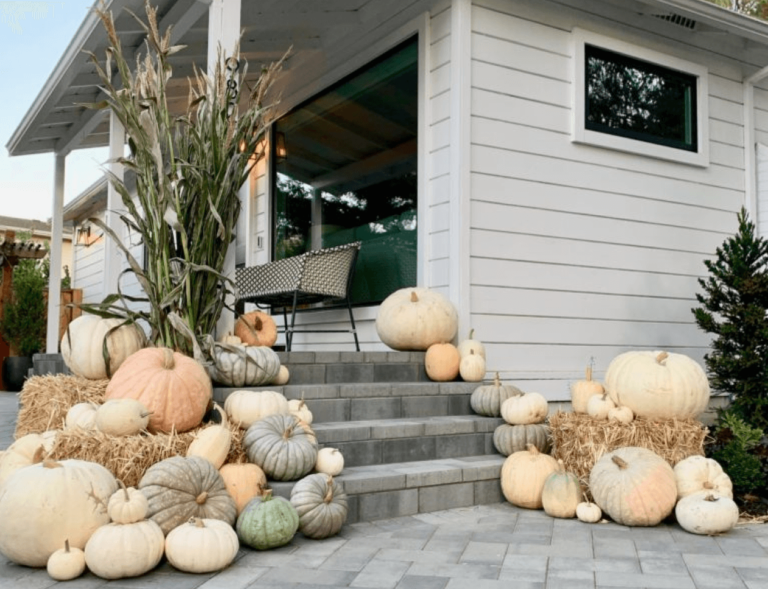
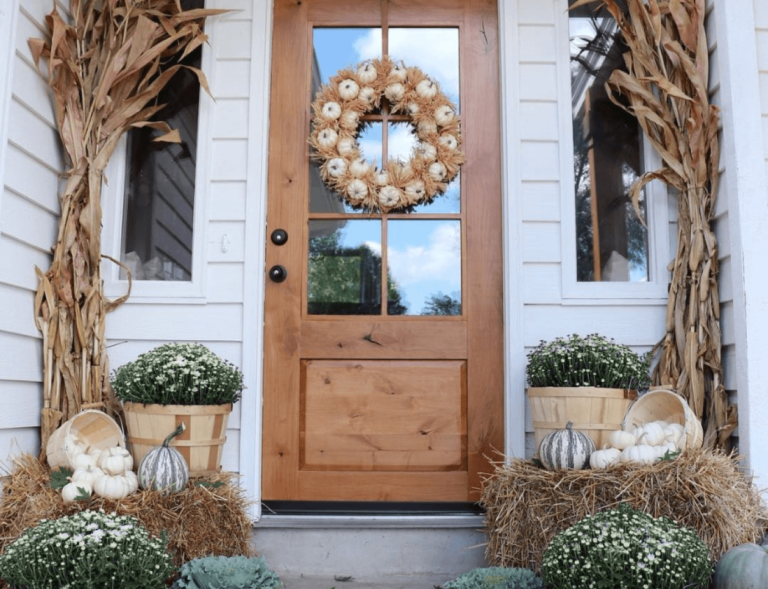
Autumn is in the air. This means it’s time to switch up your seasonal décor! Not ready for a full switch to winter holiday décor? We’ve got tips to help you swap your summery porch vibe for a more festive fall space
Here are 4 tips to get you started.
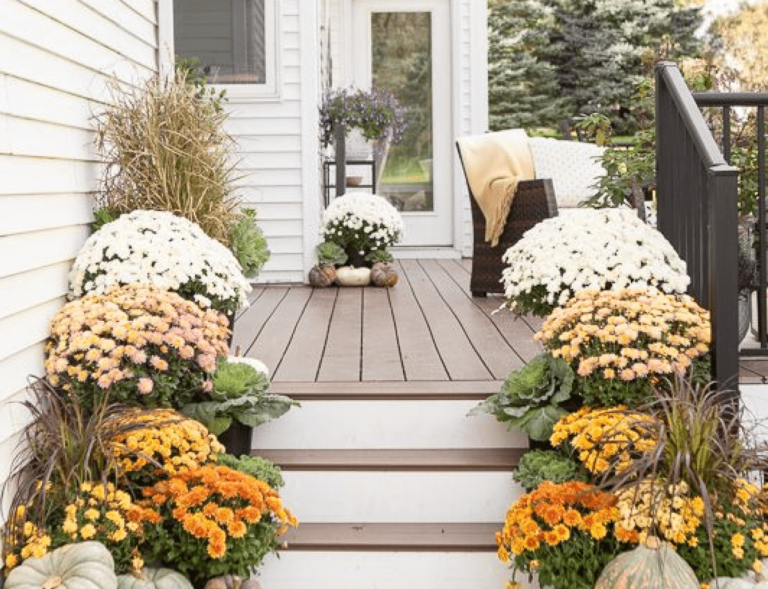
1
Refresh your flowers. Summer blooms have come and gone, but fall florals can make an impact. Consider a selection of chrysanthemums, violas, or pansies.

2
Nothing says fall like pumpkins. Whether they’re placed symmetrically or stacked on stairs, the addition of pumpkins will make your entry-way look picture perfect. Try out white, pastel, or the classic orange for added drama.
3
Hay isn’t just for horses. Hay can be a versatile way to showcase your front door. Add hay bales of different sizes to create levels to show off your mums, pumpkins or other fall faves.
4
Wreaths aren’t just for Christmas. A new season means a new wreath! Experiment with different textures and colours to add that finishing touch to your front door. Pro tip: be sure to measure the width of the door so you don’t overpower the space with too large of a wreath.
#HelloAutumn
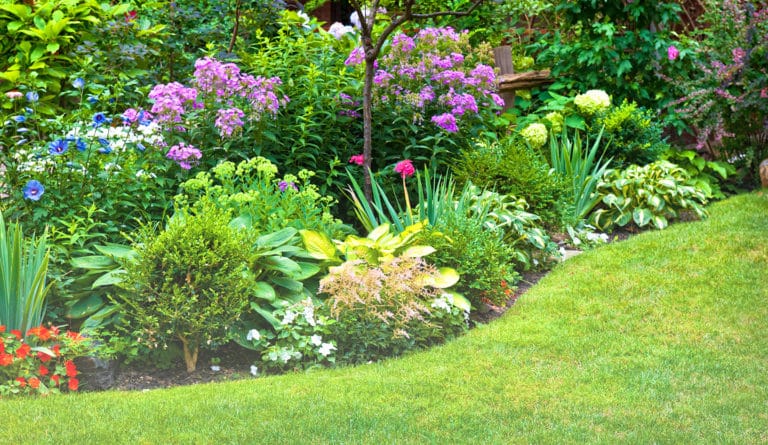
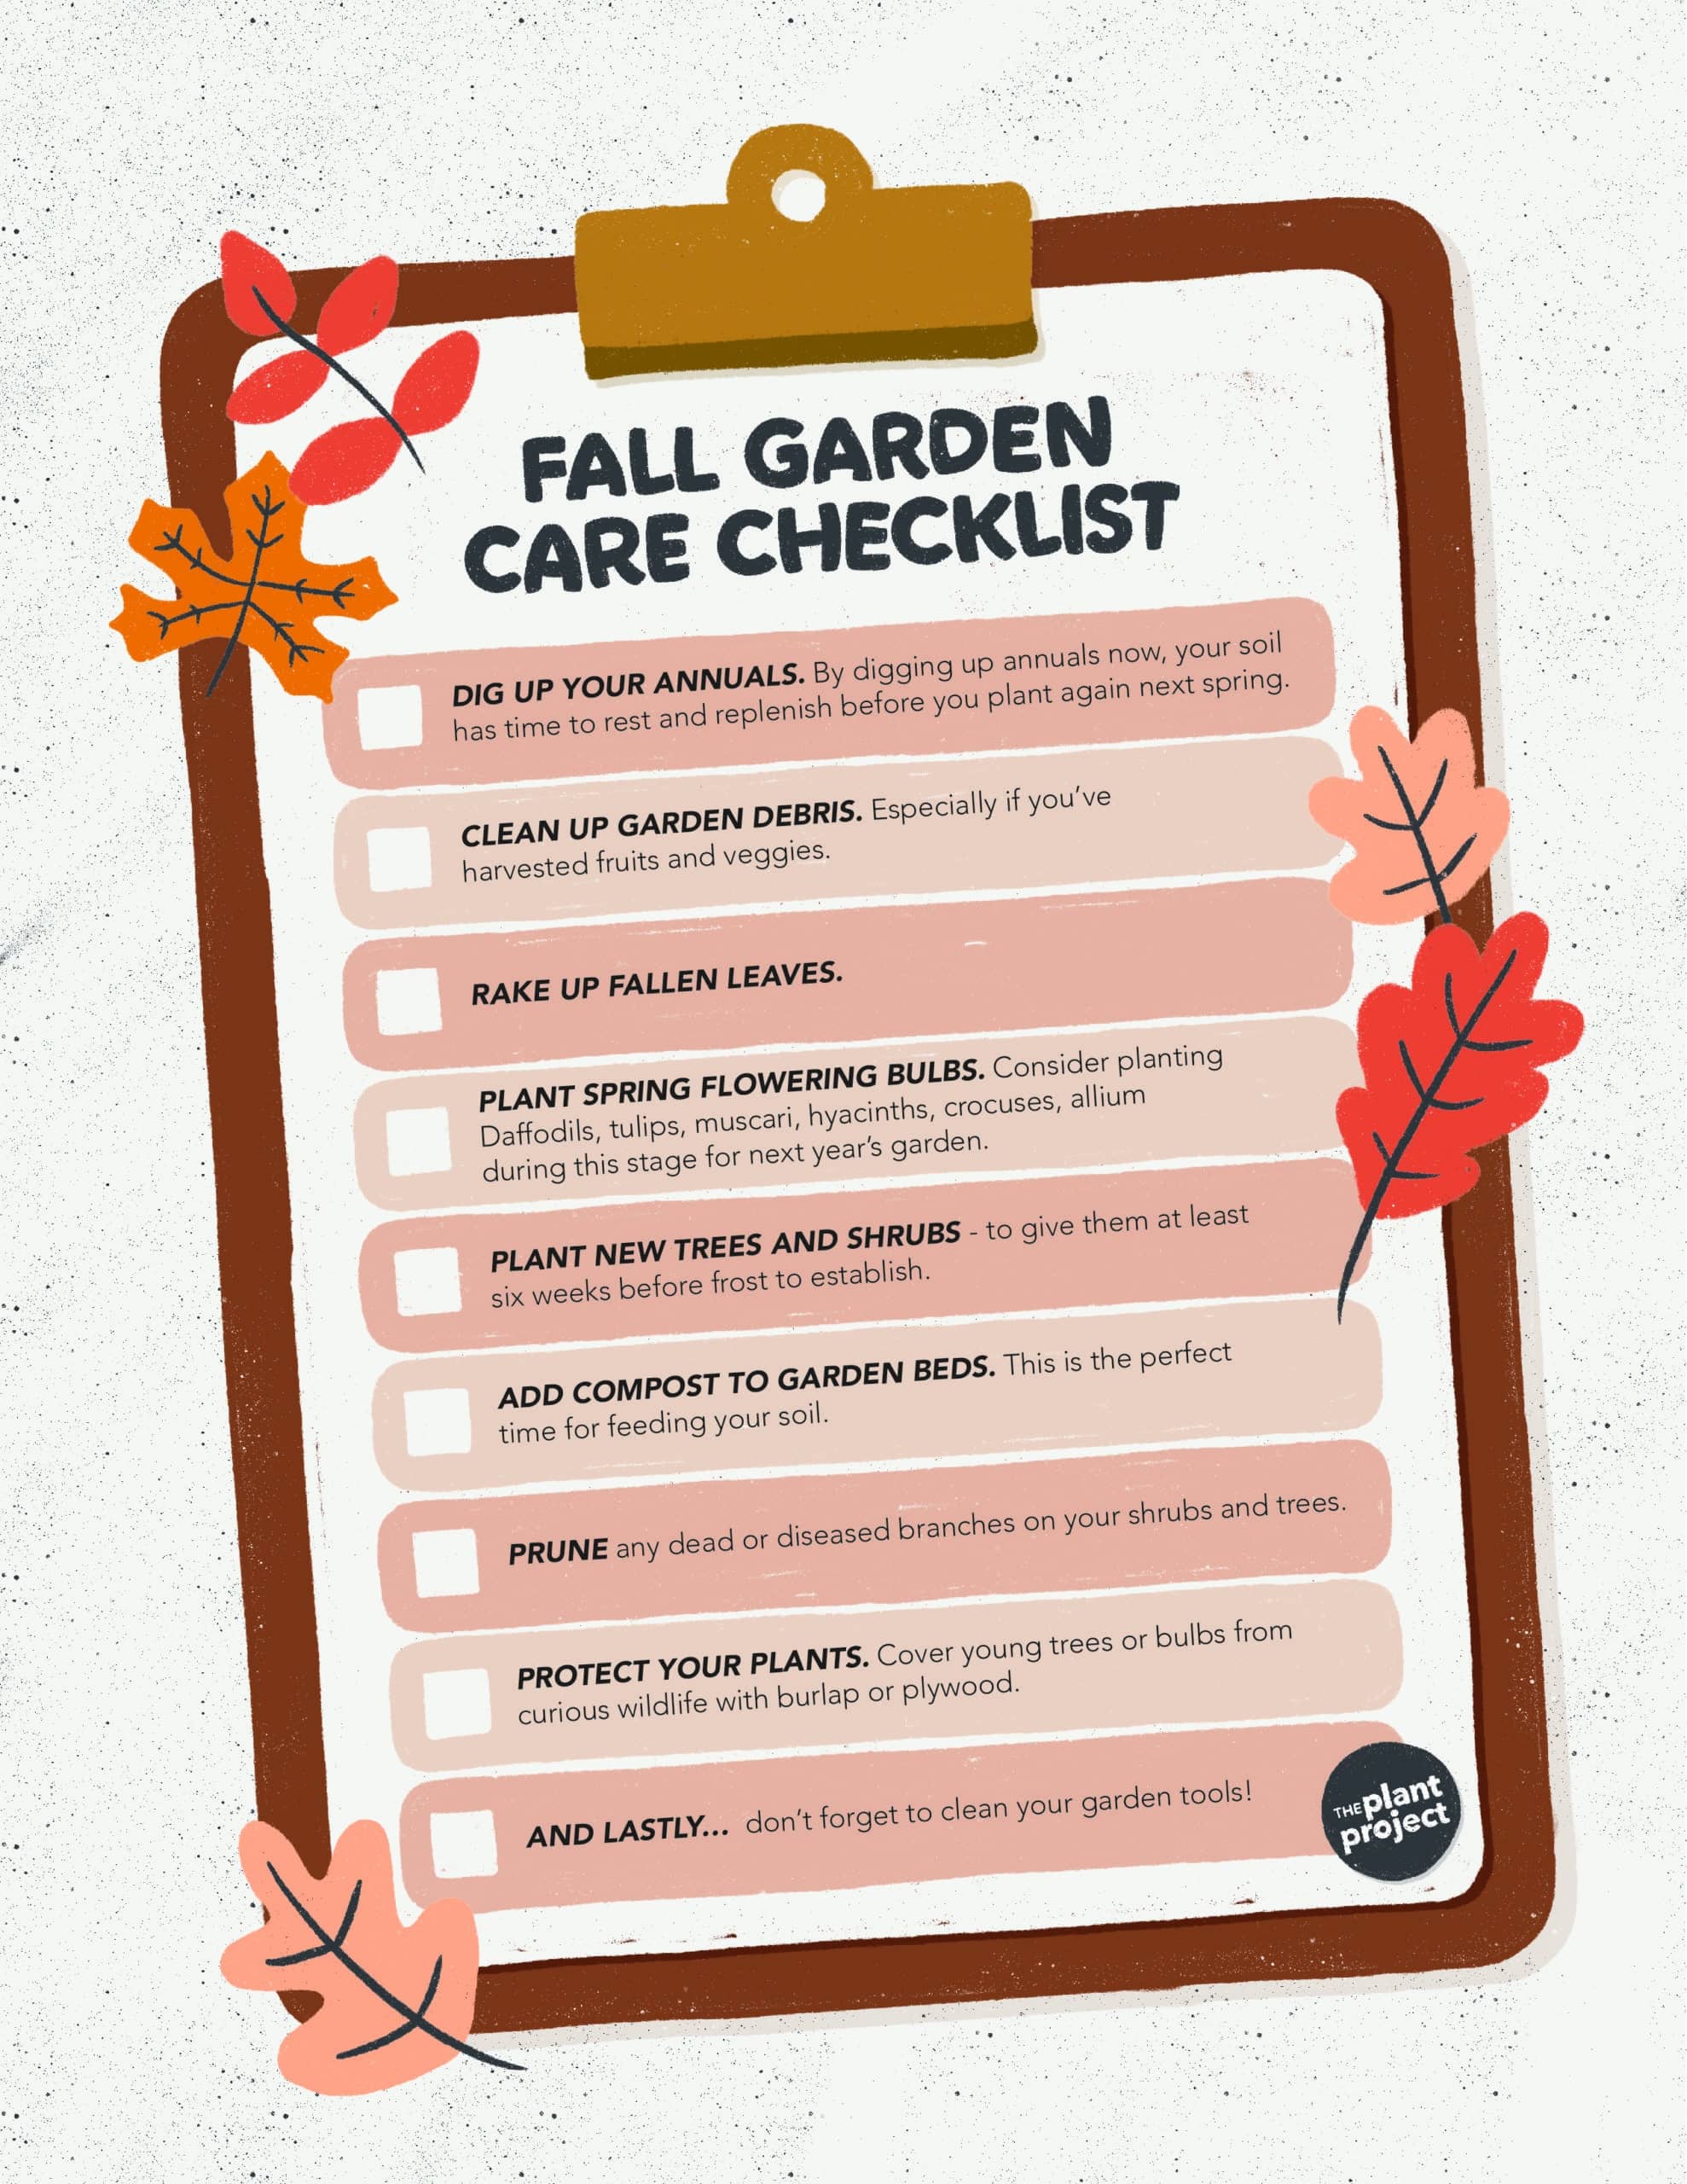
Patio season is coming to a close and it’s time to prep your garden for next year.
Taking the time now to clean up your garden will make a HUGE difference next spring. Not sure where to start? Use this checklist to prep your garden for next year.
Do you have any tips or tricks you use to make sure your garden is primed for the next spring? Share your knowledge with the community in the Plant Chat.
#easypeasy


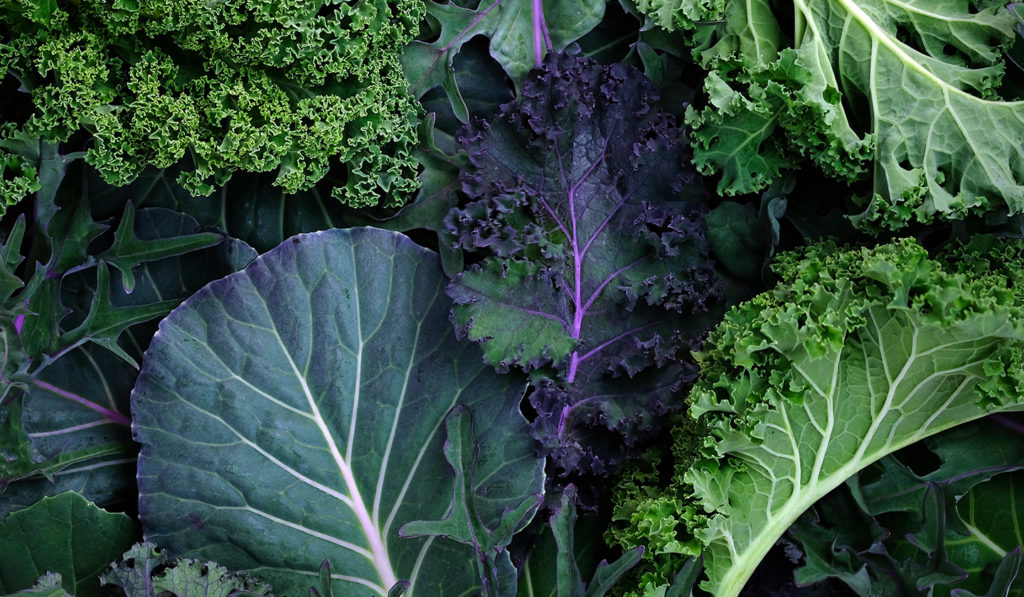
kale
aka brassica oleracea var. sabellica
Kale is a cold-hardy and resilient green veggie.
variations
Red Russian, Lacinato, True Siberian, Vates Blue Curled, Winterbor
light
just a little
Kale only needs about 3 hours of sunlight to grow
water + feeding
keep it watered.
Kale needs consistent watering. Your kale needs about 2 inches of water a week.
toxic
okay for humans
But could cause kidney and bladder stones for dogs.
size
small-ish
Can grow between 1 – 2 ft
pro tip
sweetened by frost.
Kale can be harvested until it’s 20°F/-7°C outside. In fact, the first nips of frost can make your kale taste better.
fun fact
technically a biennia
It’s a 2-year plant that produces leaves in the first year and a flower stalk in its second year.

beyond the basics
-
companion planting
Kale works well when planted by artichokes, beets, celery, cucumber, lettuce, onion, peas, potatoes. Avoid other brassicas being planted alongside kale. These include broccoli, kohlrabi, cauliflower, brussels sprouts, and Swiss chard.
-
Harvesting
When your kale’s leaves are about the size of your hand, it’s ready to harvest. Be sure not to pick more than a third of your plant’s leaves at a time.
-
pest control
What are these little white flies? They are literally Whiteflies. They drink sap and excrete a sticky ‘honeydew’ which also encourages mould. Use sticky traps or Ortho® Bug B Gon® ECO Insecticidal Soap to keep your plants healthy.

troubleshooting
-
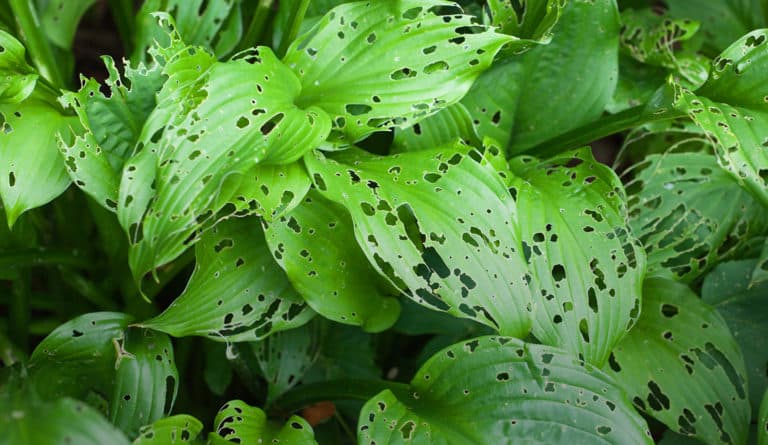
why are my leaves full of holes?
Cabbageworms. You can use companion plants to help naturally combat these pests. Quickly hand pick your kale, and don’t forget to use row covers to help keep your kale safe.
-
what are these weird yellow V-shape on leaves and rotting stems on my kale?
Probably black rot. This is a fungus that leave yellow v-shapes on your kale’s leaf edges. To prevent this, make sure to rotate your crops and remove debris from your garden. Don’t forget to make sure your garden has good drainage.
-
why are my kale’s leaves misshapen?
Could be aphids. To prevent aphids from infesting your kale plants be sure not to water the foliage. If aphids persist, you can use an insecticide like Ortho® Bug B Gon® ECO Insecticide Ready-to-Use.
.
The sun in shining. The BBQ is going. The backyard is thriving. The only thing stopping you from level 100 enjoyment? The bugs. Whether it’s mosquitoes, wasps or ants that are preventing you from getting the most out of your summer nights, read on to learn more about how to get rid of these uninvited guests!
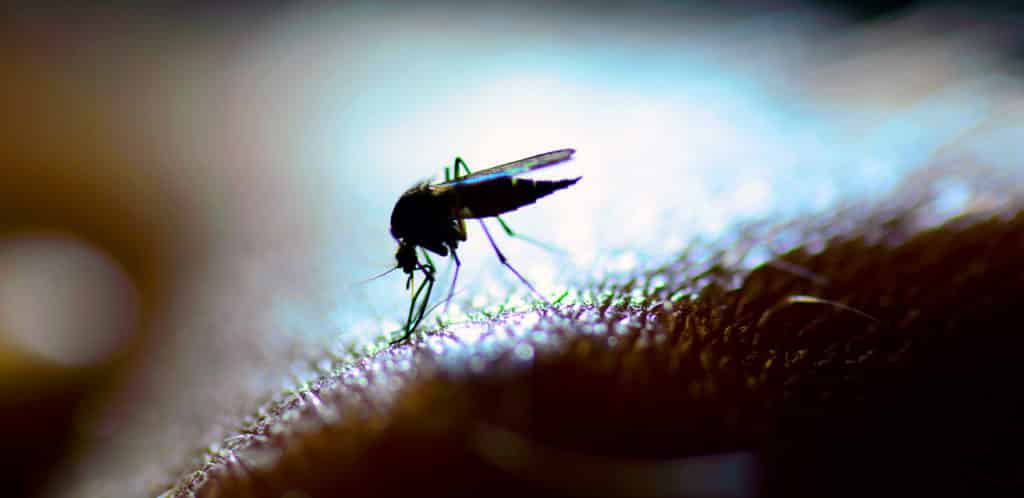
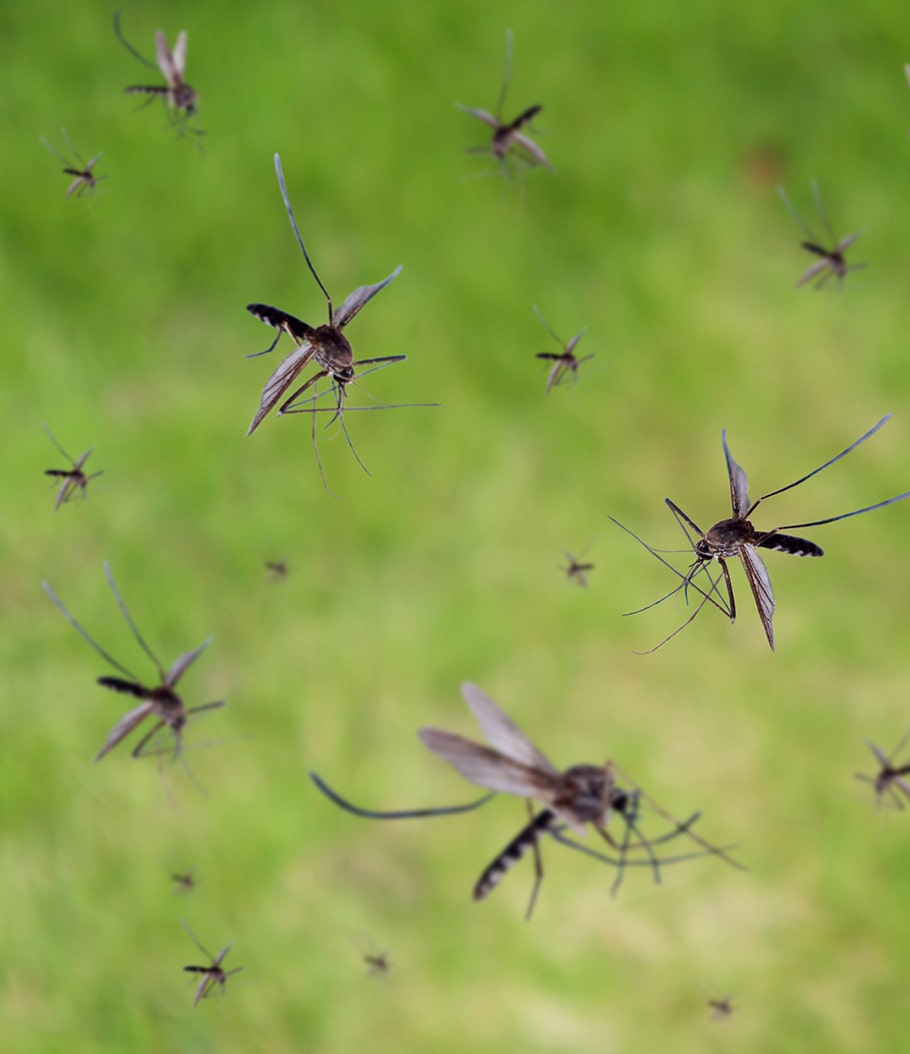
mosquitoes biting?
Mosquitoes are super annoying! From bites to their whining buzz, these bugs can easily ruin a nice night outdoors. Due to climate changes, we’re at greater risk of mosquito-borne illnesses, like West Nile Virus. First, be sure to get rid of any standing water. These little guys love standing water like kiddie pools, birdbaths, even empty flowerpots. Make sure you empty and change out any standing water.
Are mosquitoes drawn to you? Consider using Ortho® Mosquito B Gon™ Max. It is easy to apply and provides an effective solution to control mosquitoes in your outdoor space Ideal for use in backyards and on patios… really anywhere mosquitoes will be bothering you and your guests.
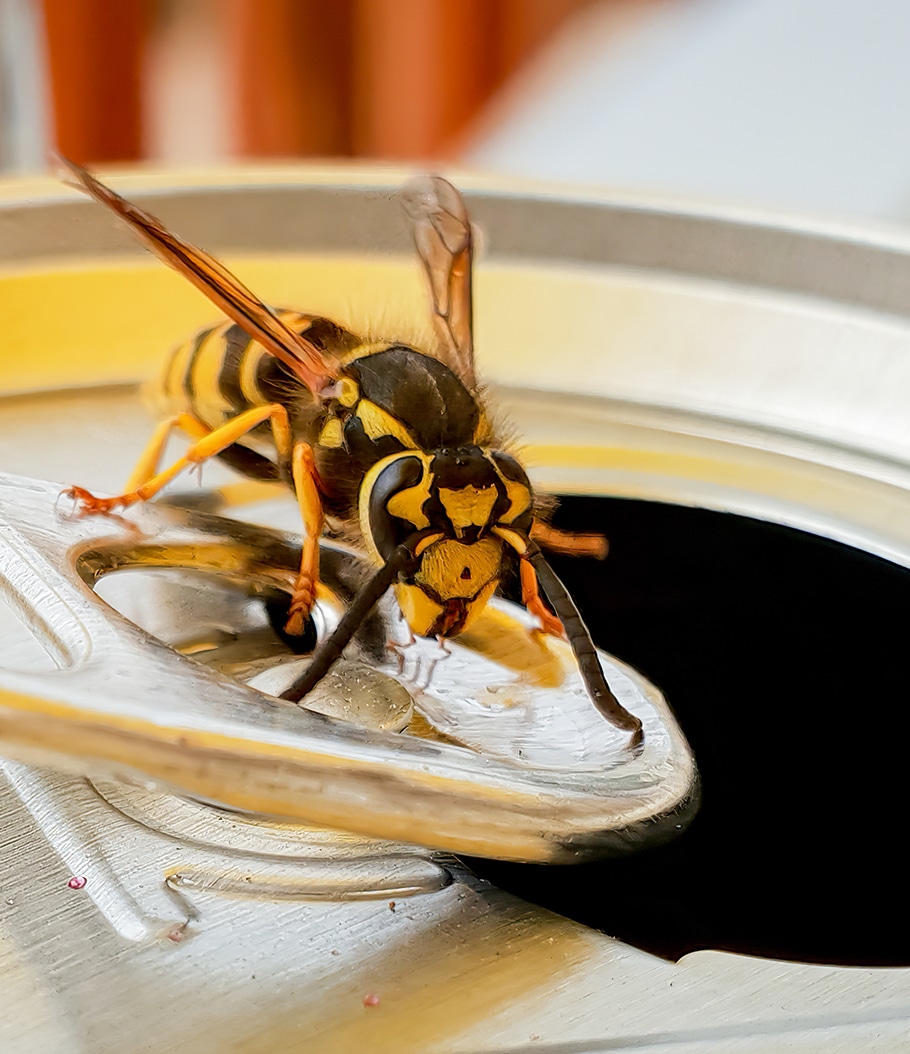
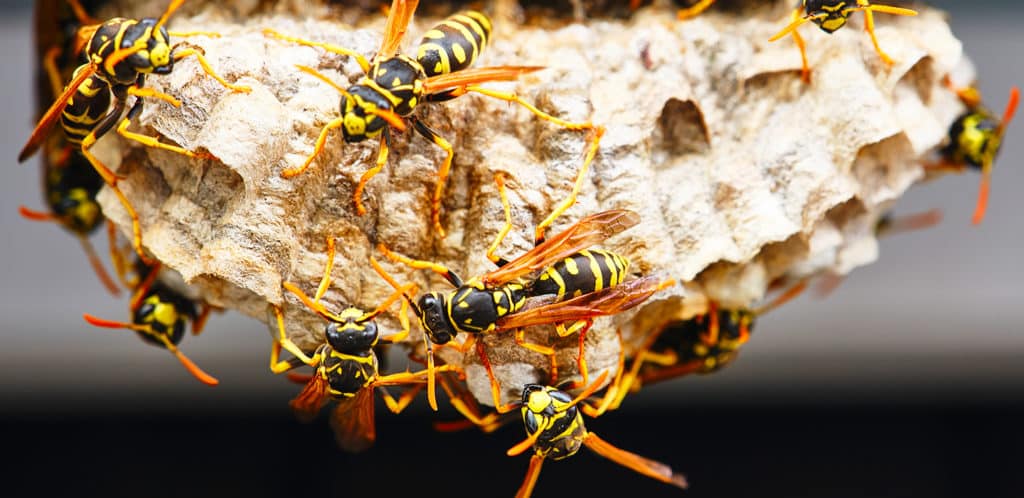
uninvited guests invading your backyard party?
These winged devils aren’t just scary and annoying, but they can quickly ruin outdoor festivities. There are over 4,000 types of wasps,, including common types like mud daubers, paper wasps and yellow-jackets. Some of their nests may not look like the typical paper-like wasp nest you’re used to seeing. For example, mud dauber’s nests look like a little mound of mud. To keep your backyard free from wasps and hornets, inspect your eaves, deck and even patio furniture regularly to spot the first signs of nests.
If you are seeing wasps, use Ortho® Wasp B Gon MAX® Wasp Killer Spray or Foam to safely saturate their nests. Always follow the directions for the product and wear your gloves when removing the treated nest.
ants invading your backyard BBQ?
When you and your friends are enjoying your feast outside, be sure to keep all your food, drinks and condiments covered. You can use other plates; pot lids or silicone covers to keep your food fresh and free of ants.
If ants are persistent, even outside of BBQ time, you have some options! If you can clearly spot their home, you can use Ortho® Ant B Gon® MAX. Not quite sure where those six-legged critters are coming from? Not a problem! There are a lot of different products you can explore. You can find gels, sprays and traps. For example, if your ant problem is making its way inside, Ortho® Ant B Gon™ MAX Ant Eliminator Liquid is an excellent tool. Only a few drops are needed to attract ants to the liquid. The ants will take it back to their nest, where the rest of colony will be destroyed.
Now that your backyard is pest-free, it’s time to open a bottle of wine and invite some friends over to share it with. Check out Plant Chat and share your tried-and-true backyard bug control tips!
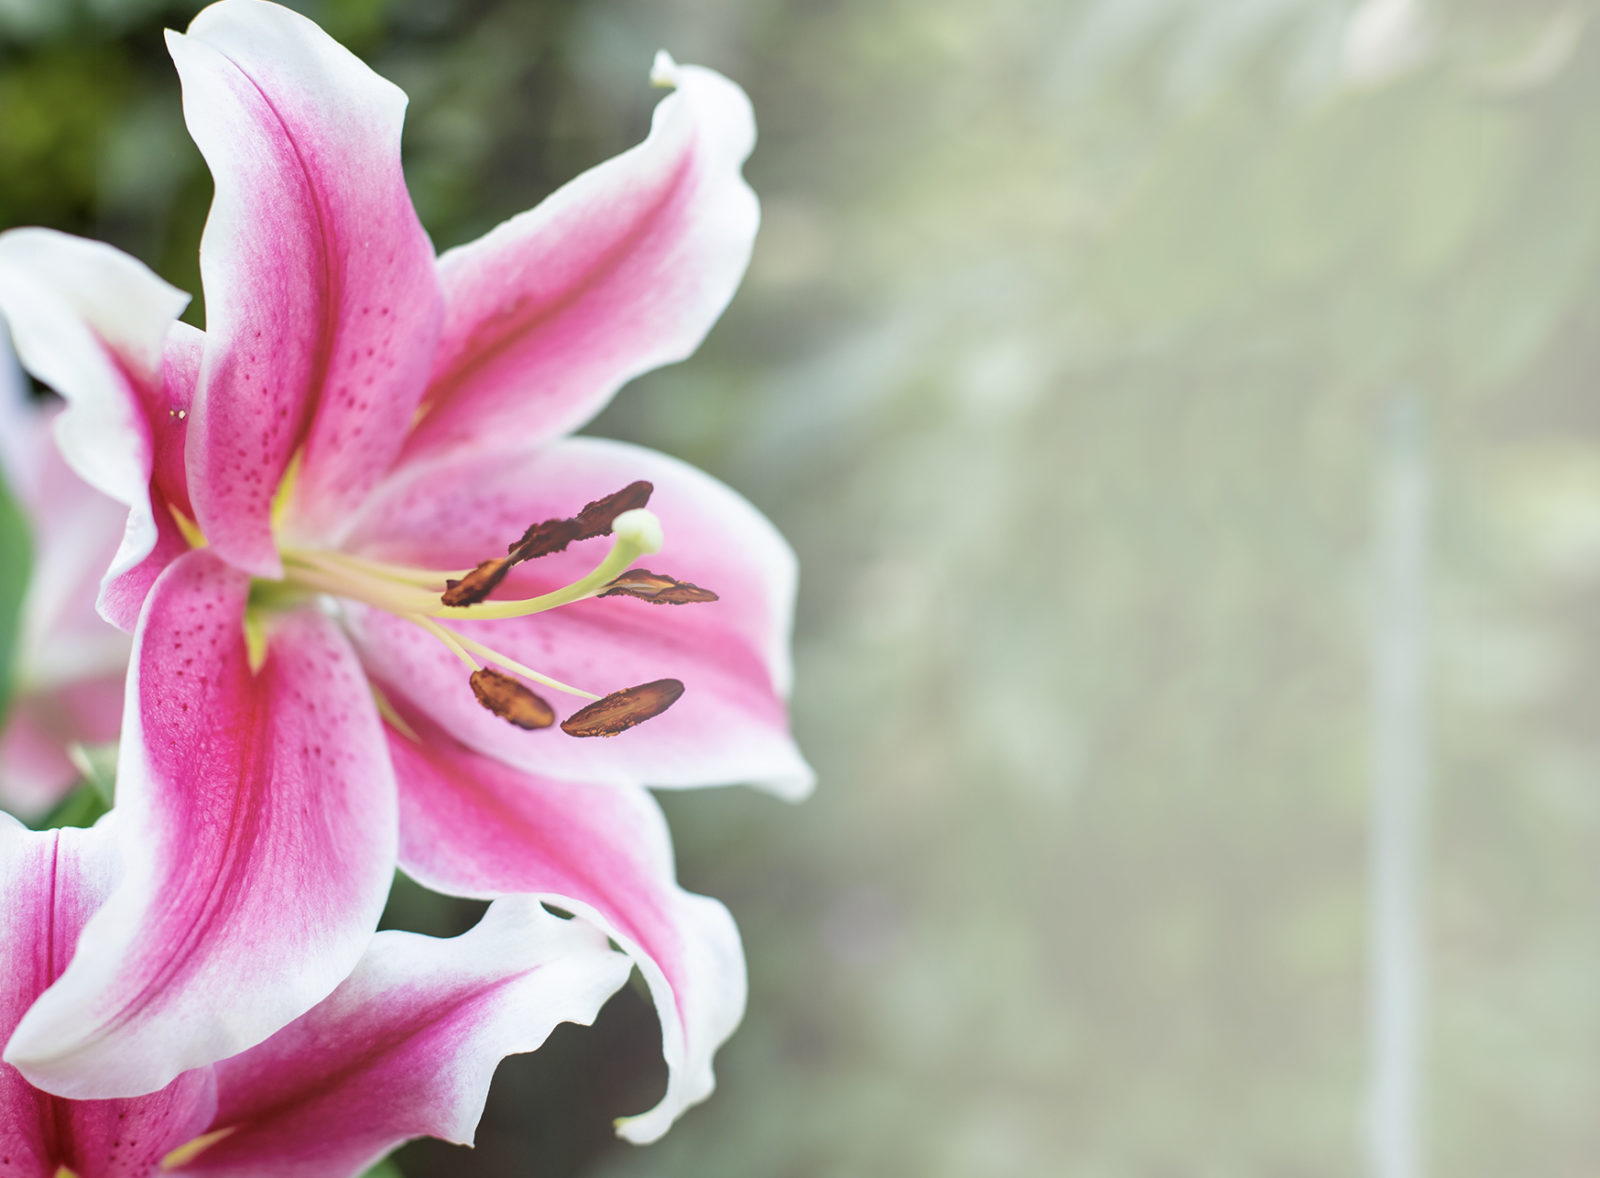
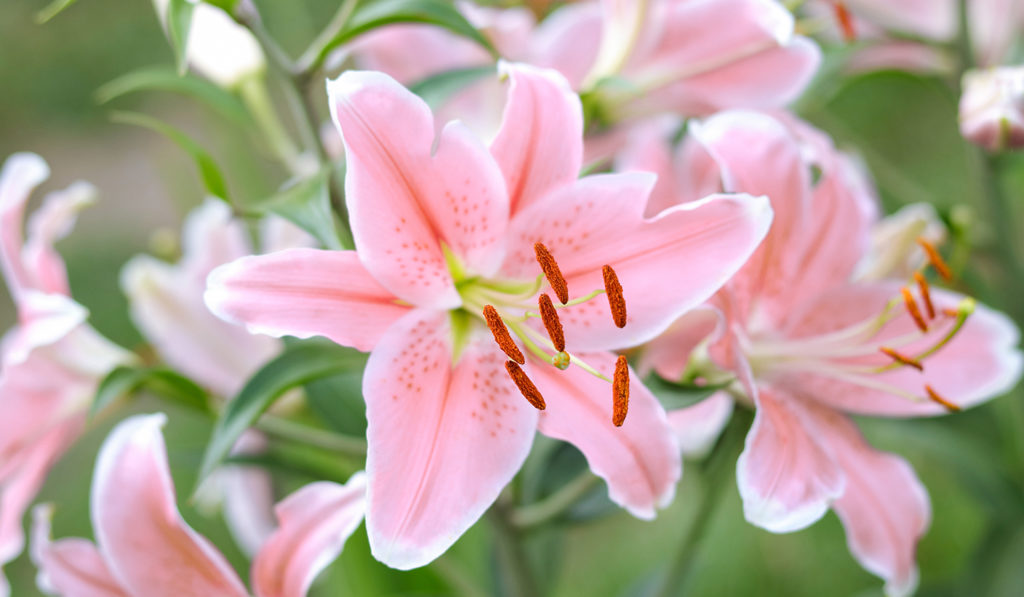
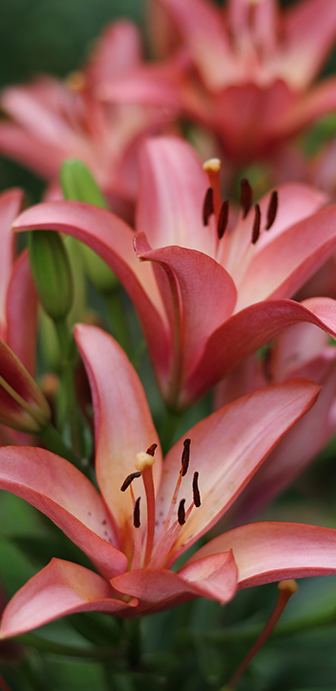
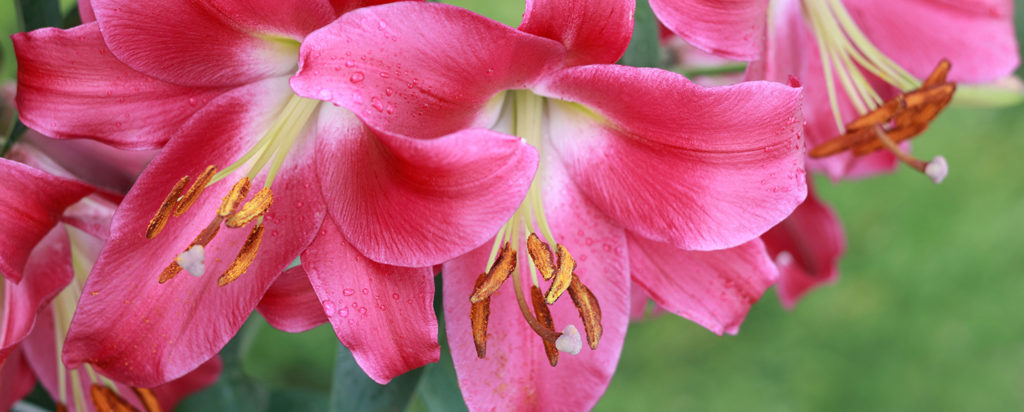
Lily
aka Lilium
lilies are an exotic and elegant perennial flower that are quite easy to grow. Lilies start as onion-like bulbs and require good soil and lots of sun to flourish.
variations
trumpet lilies, Asiatic lilies, Easter lilies, Oriental lilies
light
full sun
Your lilies will enjoy about 6 – 8 hours of sunlight but be sure to keep their roots cool.
water + feeding
thirsty
Water your lilies freely, especially if you’re not in a climate that gets much rainfall in the summer months.
toxic
yes, the whole plant
The entire plant is toxic to humans and pets. Even the water that fresh cut lilies sit in can make you and your fuzzy friends sick.

location
in the sun
A good rule of thumb is that lilies like their head in the sun and their feet in the shade. To help keep your lily’s roots cool, consider planting with low profile annuals or perennials, or ornamental grasses.
size
medium to large
Lilies can grow between 2 – 8 ft tall!
pro tip
lots at stake
Lilies can grow quite tall. Consider staking your lilies to keep them tall and upright.
fun fact
powerful native plants
Lilies are attractive to many insects because of their bright colours and sweet nectar. They can be pollinated by either the wind or bees!
beyond the basics
-
soil + potting
Lilies love to have their roots in cool soil, and their heads in the sun. The best soil option to keep your lilies happy is a rich, moist soil. that is also well-draining. Consider adding in just a little bit of organic compost.
-
companion planting
You can find a wide variety of companion plants from annuals, bulbs to
other perennials. Consider using annuals such as dill, geraniums, pansies, or new guinea impatiens. Dahlias, daffodils, or irises make great companions when planting other bulbs. Perennials such as peonies, daisies and lavender are excellent companions for lilies. -
Blooms
Lilies only bloom once per season. You can remove, or deadhead, faded flowers to keep your plant from wasting energy making new seeds.
-
pest control
The most common pest issues for lilies are infestations of scarlet lily beetles. These little guys like to hang out on the underside of leaves. The easiest way to get rid of these little pests is to catch them manually by holding a bottle of warm water under the leaves you’re inspecting. The bugs will be startled and drop off into the water waiting below.
troubleshooting
-
what are those oval-shaped spots on my leaves?
Lily disease. This is a fungal infection that creates oval-shaped dark spots on your lily’s leaves. Make sure you use clean tools before you get started. Then clear out the infected soil and debris and get rid of the infected plant. Be sure to not plant lilies in an infected spot again.
-
why are the tips of my leaves turning brown?
Could be overwatering, sunburn, or underwatering. If the tip of the leaf is brown and crunchy, this means the soil is likely too dry.
-
why are my buds rotting?
Likely a fungus. Many fungi (Rhizoctonia, Phytophthora, Pythium, Fusarium, and Cylindrocarpon) attack the bulb and cause the roots to rot. This will also cause the plant to wilt, and eventually die. Be sure to remove the infected plants and check all bulbs carefully before planting.
-
why aren’t my lilies blooming?
Could be the result of small bulbs or over-crowding in the soil. Planting your lily bulbs too shallow could also lead to your lily not producing big blooms. If you cut away the leaves after a lily has flowered, it may also decrease the likelihood of flowering the following year. Keep in mind, some lilies won’t flower in their first year of planting due to transplant shock.
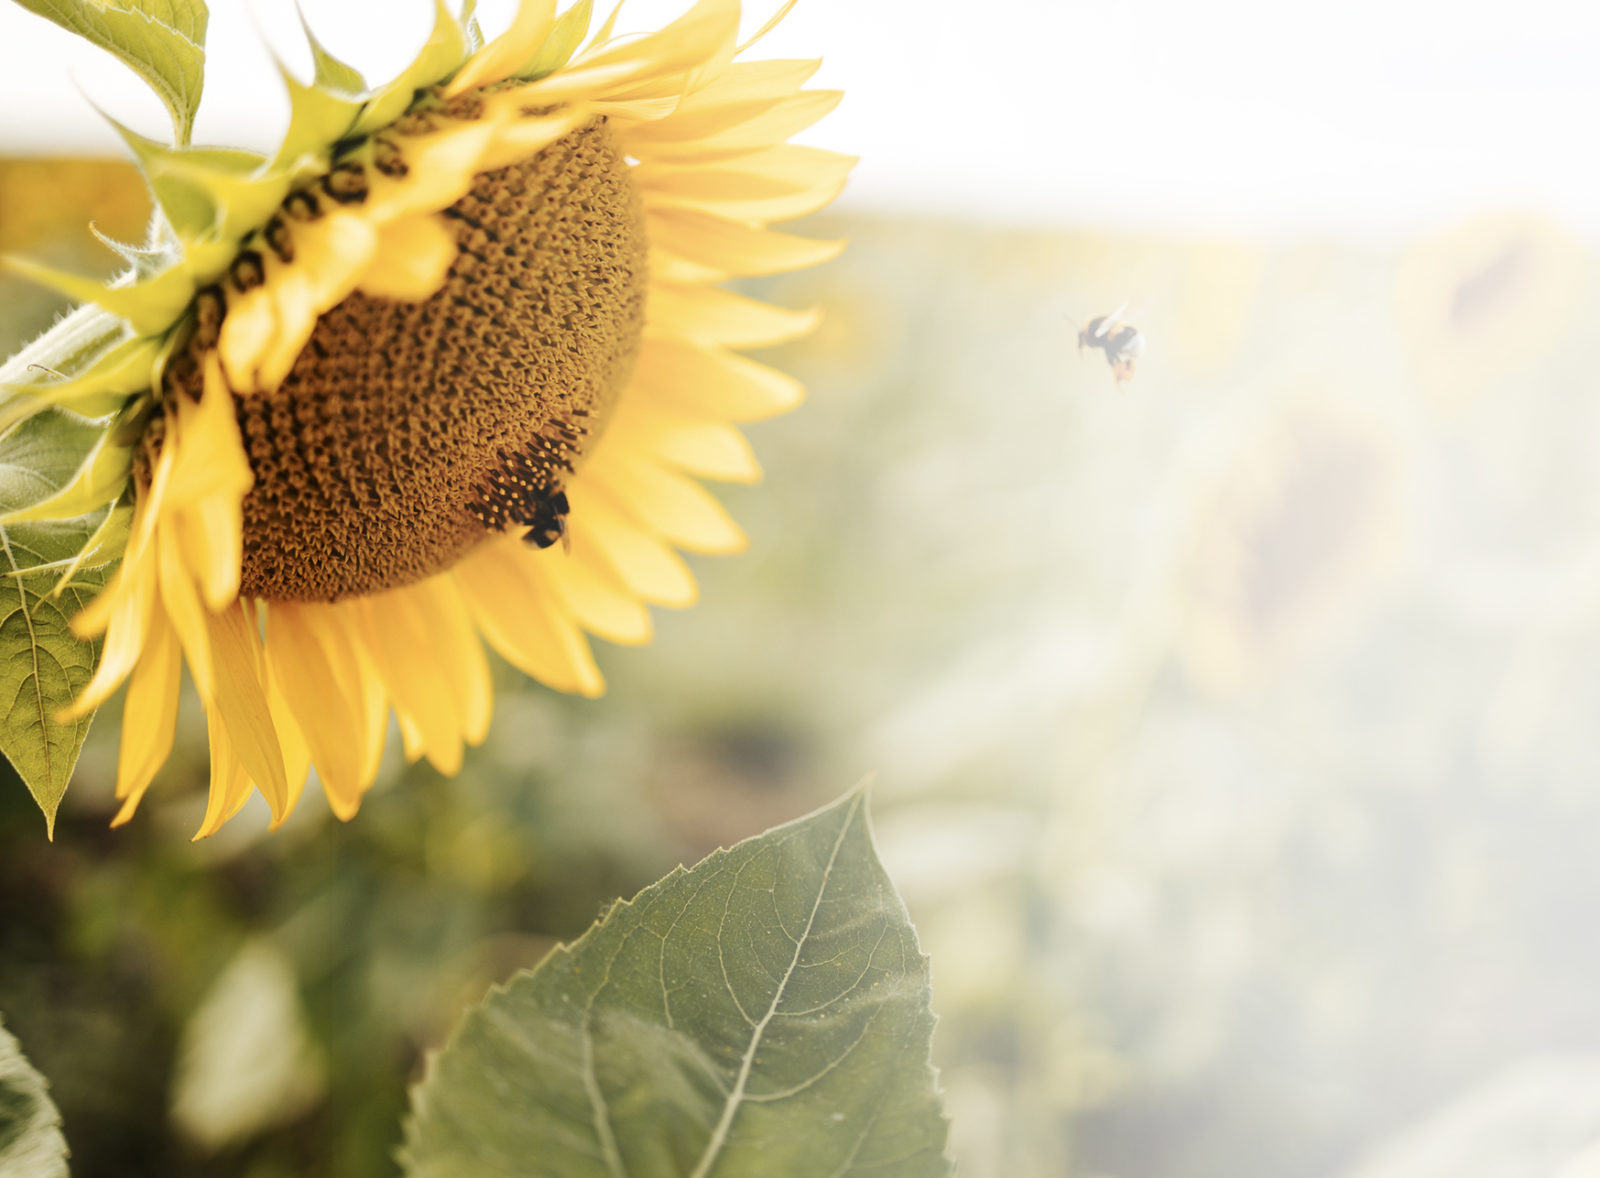
sunflowers
aka helianthus anuus l.
Sunflowers are an annual plant with a big, daisy-like flower head. These flowers are heliotropic, meaning they turn their heads to follow the sun across the sky.
variations
There are many variations of sunflowers, but most commonly there are sunflowers with branching stems or single stems. You can also choose from sunflowers that produce pollen, pollen-free or ones that produce edible seeds.
light
full sun
Sunflowers need full sun for optimal growth, about 6 hours of sunlight daily.
water + feeding
not too thirsty
Once established, sunflowers don’t need frequent watering. But they do need deep watering. Overfertilizing can cause stems to break as well. Dillute any fertilizer and avoid the sunflower’s base.
toxic
non-toxic
Sunflowers are safe for humans and animals.
size
medium to large
The smaller, indoor grown varieties grow to about a foot tall. The bigger, outdoor varieties can grow up to 16 feet tall.
pro tip
stationary beauties
Sunflowers don’t like having their roots disrupted. It’s best to plant them in the spots that they’re intended to stay.
fun fact
herb or flower?
Sunflowers are kind of both. They’re listed as a herb in Encyclopedia Britannica, but also have big flowering heads.


beyond the basics
-
soil + potting
Sunflowers are not sensitive to the pH level of soil. Use an well-draining soil like Miracle Gro® All Purpose Garden Soil and introduce a water soluble fertilizer about halfway through the summer.
-
companion planting
Sunflowers pair well with many other plants. Consider pairing with shade-loving plants. Sunflowers can cast some shade on veggies like cucumbers or lettuce. Due to their flexible soil needs, they can be planted alongside plants like bush bean varieties, like lima beans or green beans.
-
blooms
To encourage side blooms, cut indoor varieties on the main stem just before the flower bud has a chance to open. Cut stems in the early morning vs the afternoon to avoid flower wilting. For cut sunflower bouquets, ensure their container provides enough support for their heads. Change the water daily to keep them fresh.
-
pest control
Birds and squirrels love to scavenge sunflower seeds. Consider covering the head of the plant with garden fleece or protect them with a tall, wire barrier.

troubleshooting
-
what are these tiny worms?
They’re probably gray moths. Sunflowers are pretty much pest-free. If you see tiny worms in the head of the sunflower, it’s likely they’re gray moths. Just pick them off the plant.
-
why are my sunflowers losing leave?
Could be grasshoppers and caterpillars. These little guys enjoy snacking on the leaves of sunflowers. This doesn’t usually damage the plant, but if there are a lot of these pests, they can defoliate your sunflower quickly.
-
what do spotty leaves mean?
Could be rust, verticillium wilt or mildew. The damaged leaves will fall off as the disease progresses. Control fungi through proper removal and disposal of infected plants and with a general fungicide.
-
why are my sunflower’s leaves wilting?
Probably white mold. This is a fungus that causes wilting leaves, stem cankers and root rot. Crop rotation can usually prevent this from happening, as well as maintaining proper watering practices.

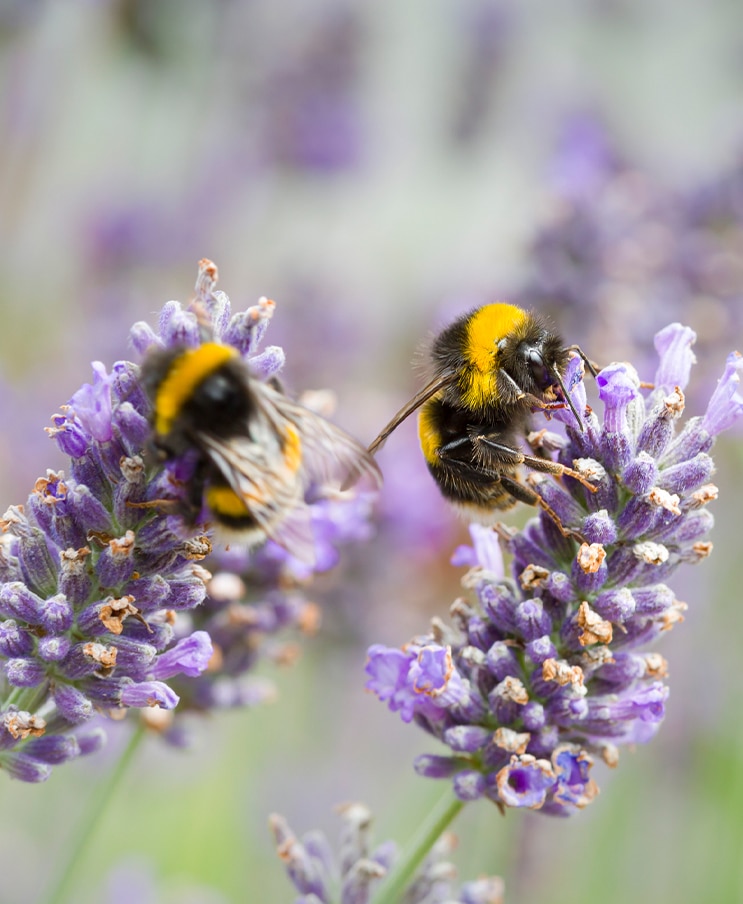
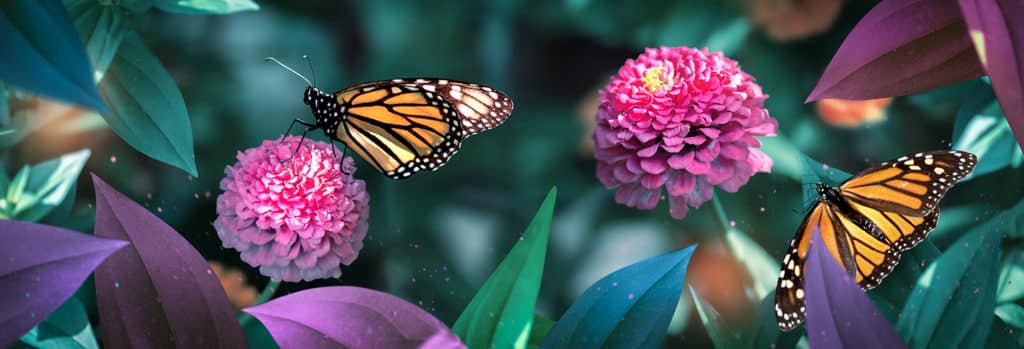
What are pollinator gardens, and why are they important? Pollinator gardens are essential to the reproduction of native plants. Native pollinators are very sensitive to environmental and man-made threats, and require very specific plant selection to thrive. From small rooftop gardens to vast gardens, even the smallest space can have a big impact and can help struggling pollinators.
here’s how to start your own pollinator garden at home:

step 1. choose native plants.
This can be tricky because some plants are marked as safe for supporting pollinators may be ineffective or harmful. For best results, your local botanical society can provide you with a list of plants that support native pollinators that are local to your region.
step 2. learn the components of a pollinator garden.
There are 5 important components to a happy pollinator garden:
- Adult Food: a selection of native plants with lots of pollen and nectar that are planted in groups and produce throughout the growing season.
- Baby Food: host plants that support butterfly and moth reproduction.
- Water: spots where insects can easily get to water and minerals found in soil. These areas should be well-draining and not have standing water.
- Habitat: hollow stemmed plants, leaves, grass and bare soil to help support the life cycle of the pollinators.
- Protection: Protect your pollinators by eliminating chemicals and pesticides.
step 3. select and analyze the site.
Make sure you’ve got the right plants for the right place. The important site attributes to consider are: sunlight, soil type and treatment, moisture levels, wind exposure, which animals are naturally present and, of course, aesthetics.
step 4. prep your garden site.
Start to prepare your site by removing all the old sod, if necessary. All weeds and other invasive plants should be removed as well. Once the site has been cleared, till the soil and add a top soil. Add a few inches of organic compost. Check out our article about building your own compost.
step 5. plan your garden and select your plants.
An important part of planning your garden is creating “massings” which are groups of 4 or 5 plants. This makes it easier for foraging. Pro tip: group moisture loving plants together! This can help you save on watering. Don’t forget to leave a border of a few inches, this is to give your plants room to grow.
step 6. get planting.
Lay your plants according to your desired design. Get digging and plant your native pollinators. When you’re ready to add mulch, make sure you’re not putting mulch right against the plant.
step 7. care for your garden.
Aside from the regular watering, there is some maintenance required to keep your garden happy. Keep an eye out for weeds and other invasive species, and weed by hand. The purpose here is to help your garden thrive naturally, so avoid using pesticides. During the fall, you can leave see heads and stalks. This provides a natural habitat for birds and insects. Cut back in the springtime and add compost.
And just like that, you’re well on your way to a fully functioning pollinator garden! Don’t forget to share your progress with our community in the Plant Chat.
