Hello Everyone! My name is Shavonne, and my social media channels are called Once Upon a Bungalow! I’m here on Plant Project Canada’s webpage with instructions on how to build this stunning planter and privacy wall. I hope you enjoy creating this project as much as we did!
This was built for my cousin’s house. We thought her pool’s seating area could use some flair, so this is what my husband, Stuart and I came up with. We couldn’t be happier with how this turned out, and they love it so much! Check out the reel for this project on Instagram here. Here we go!…
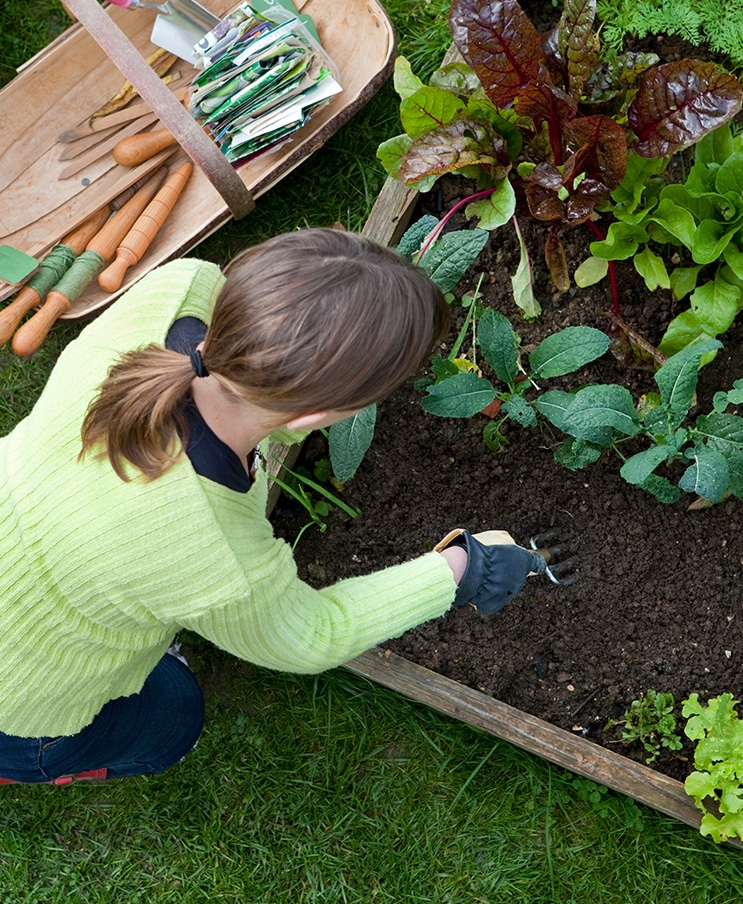
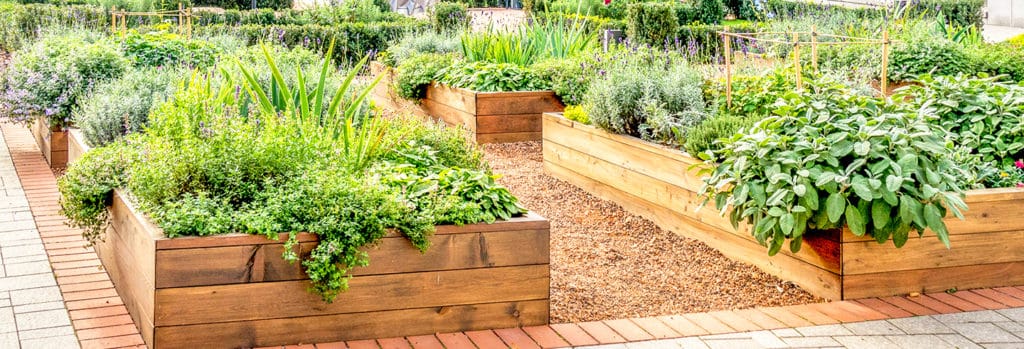
These planter boxes are ideal for many different foliage and flowers as they have an 8” depth of soil, which is ample soil space for your plants to thrive.
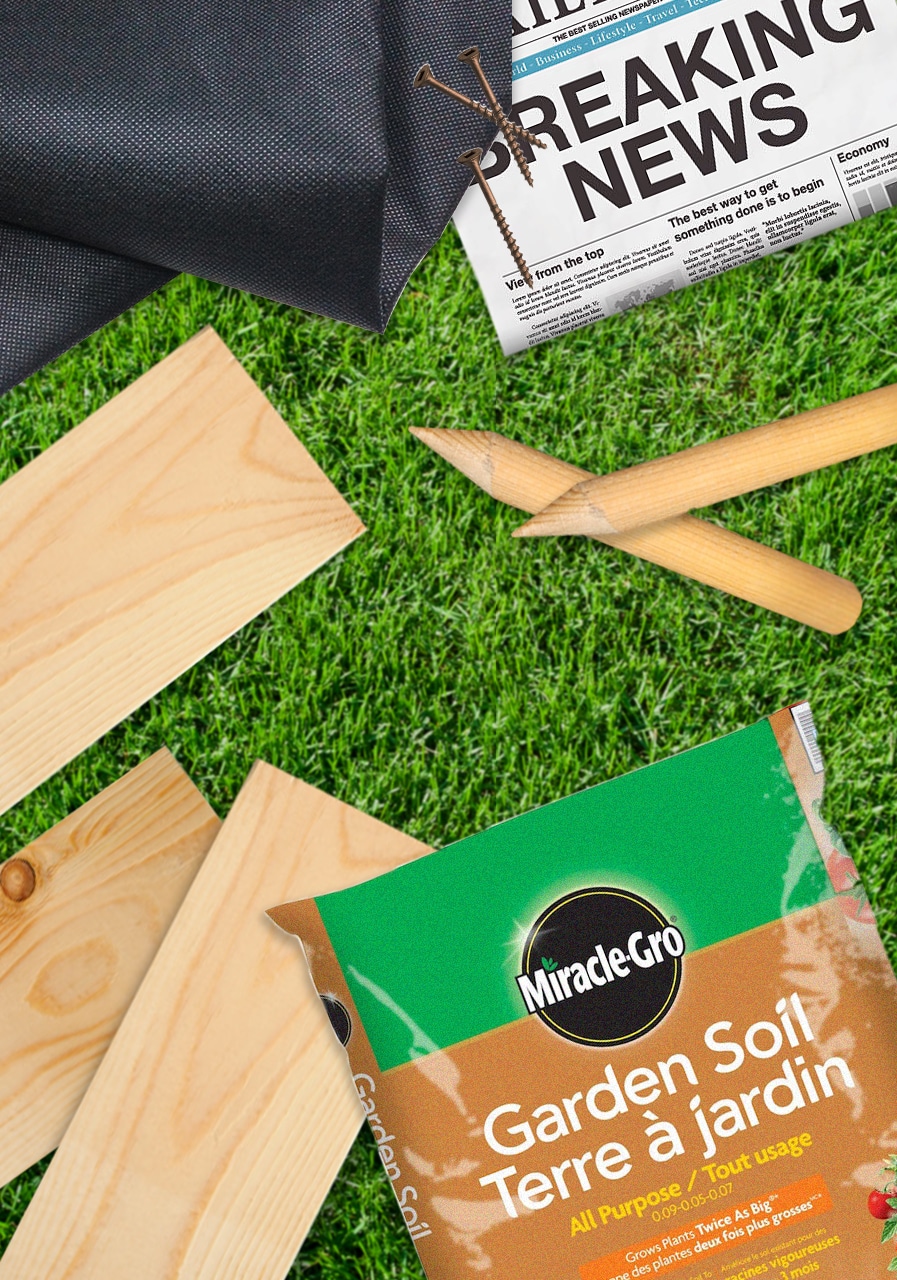
The instructions below will build two planter boxes and the privacy wall portion. To form the 90-degree look hugging my cousin’s sectional, one finished planter box will be 18” W x 38” H x99” L and the other planter box will be 18” W x 38” H x 80” L. Her sectional measured 76” L x 76” W and 32” H. If the furniture you are building this for has different dimensions, you may want to alter the cuts and measurements to customize it to your needs, but you still can follow the steps below for the assembly process. I used pressure-treated pine to create my planters. This can be substituted for any ideal preferred type of wood. However, I recommend pressure-treated wood as it is worth the investment because the wood won’t need a stain for the first few years.
Building the frame of the first (larger) planter box.
Note: Follow these exact instructions to make the second (smaller) planter box. Instead of cutting 96” pieces, replace this measurement with 80.” The instructions below will take you through the process of building the larger box.
Step One: Cutting the pieces
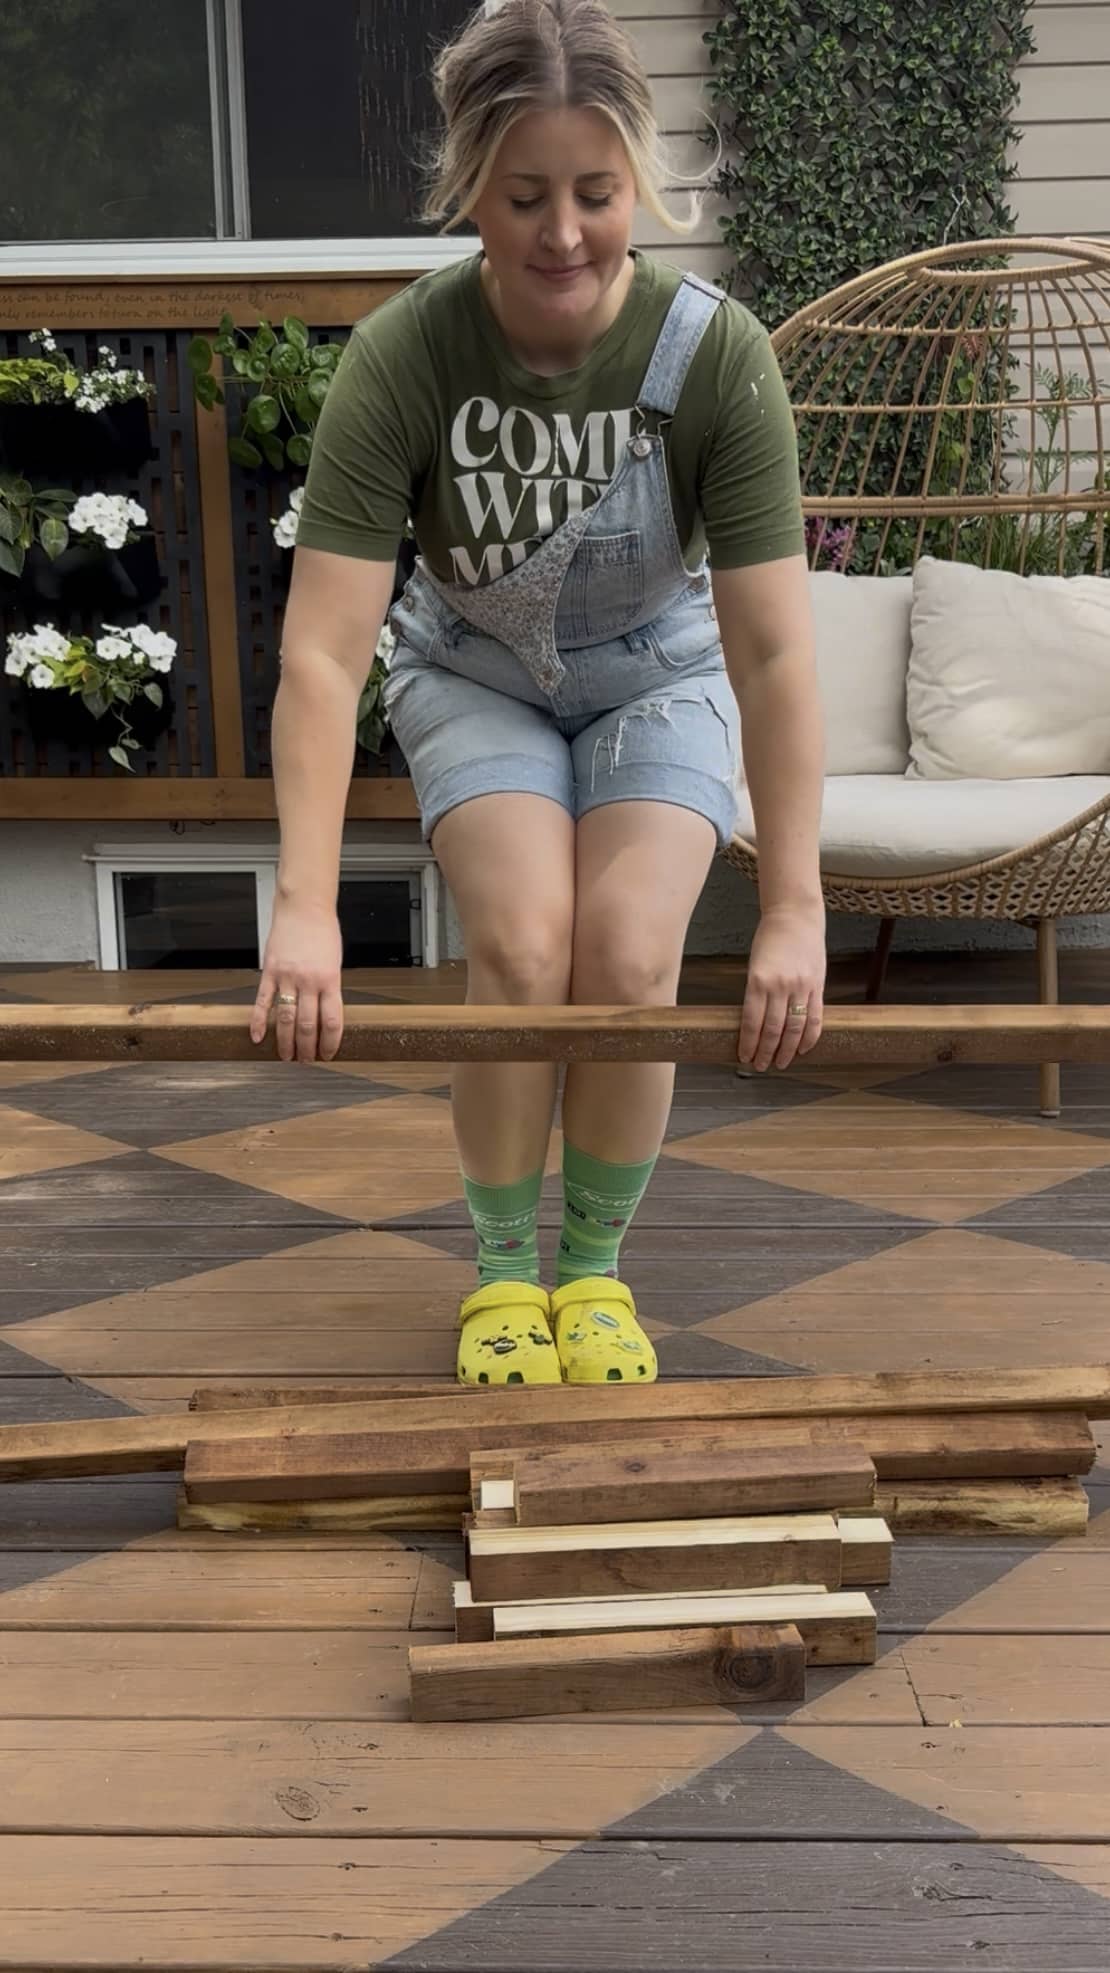
Using a table saw, cut six 2”x 4” pressure-treated pine in half so that you have 1” x 2” strips. Next, cut the strips made into eight 33” pieces, twelve 12” pieces, and six 96” pieces using a mitre saw.
The cut list for the first frame is as follows:
Six at 96”
Eight at 33”
Twelve at 12”
Step Two: Building the frame of the two long sides of the planter box
Lay the materials on a flat surface. Two 96” pieces on the bottom and top, and four 33” inch pieces on either side and two in the middle. Using a power drill, pre-drill holes at the bottom of the 96” piece upwards into the 33” pieces. Use 3” screws to secure the to end pieces in place. Space the two middle 33” pieces evenly. I chose to space mine 27 3⁄4” in from each side. Pre-drill holes at the bottom of the 8’-0” piece upwards into the 33” pieces and secure with 3” screws. Next, using 2” screws, toenail those screws from the 33” pieces into the 96” pieces making the frame extra secure. Repeat this process to end up with 2 frames. Refer to the images below.
Step Three: Adding the deck boards to the frame
Starting at the top, attach the 8’-0” deck boards to the frame by pre-drilling holes with a power drill and then using 2” screws to fasten the boards to the frame. Use 2 screws at each frame location (where the “studs” are located). Six full-width decking boards will fit on this frame. The seventh decking board will have to be cut to size using a table saw. To measure what is needed to cut off, place the board on the frame and trace using a pencil where it hits the top of the frame. Cut that portion off with a table saw and use the same steps as above to secure it to the planter’s frame. Repeat this process on both frames created in step two. Refer to the images below.
Step Four: Attaching the 12” pieces
On a flat surface lay one of the planter sides created in the previous step, flat, with the inside of the frame facing upwards. Begin to attach the 12” pieces created in step one perpendicular to the frame. Attach one 12” piece to each of the four corners, four 12” pieces on the top and bottom in line with your frame, and four 12” pieces going across the center.
For the center 12” pieces, measure down 8” from the top of the planter and place those pieces there. These middle pieces will provide your planter with more support, but will also be the future frame for the bottom of the soil area. Using 3” screws toenail each 12” piece on two different sides into the frame making sure they are square and at a 90-degree angle. Refer to the images below.
Step Five: Attach the other side of the planter
Take the side of the planter that was just completed in step four and flip it over on to the other side of the planter that does not have 12” pieces with the inside of this side facing up. Make sure it is aligned as square as possible. Once the side with the 12” pieces already attached has been placed face down on top of the side without 12” pieces, begin using 3” screws to toenail the 12” pieces to the other side of your planter. Two screws per 12” piece. Refer to the images below.
Step Six: Creating the bottom of the soil area
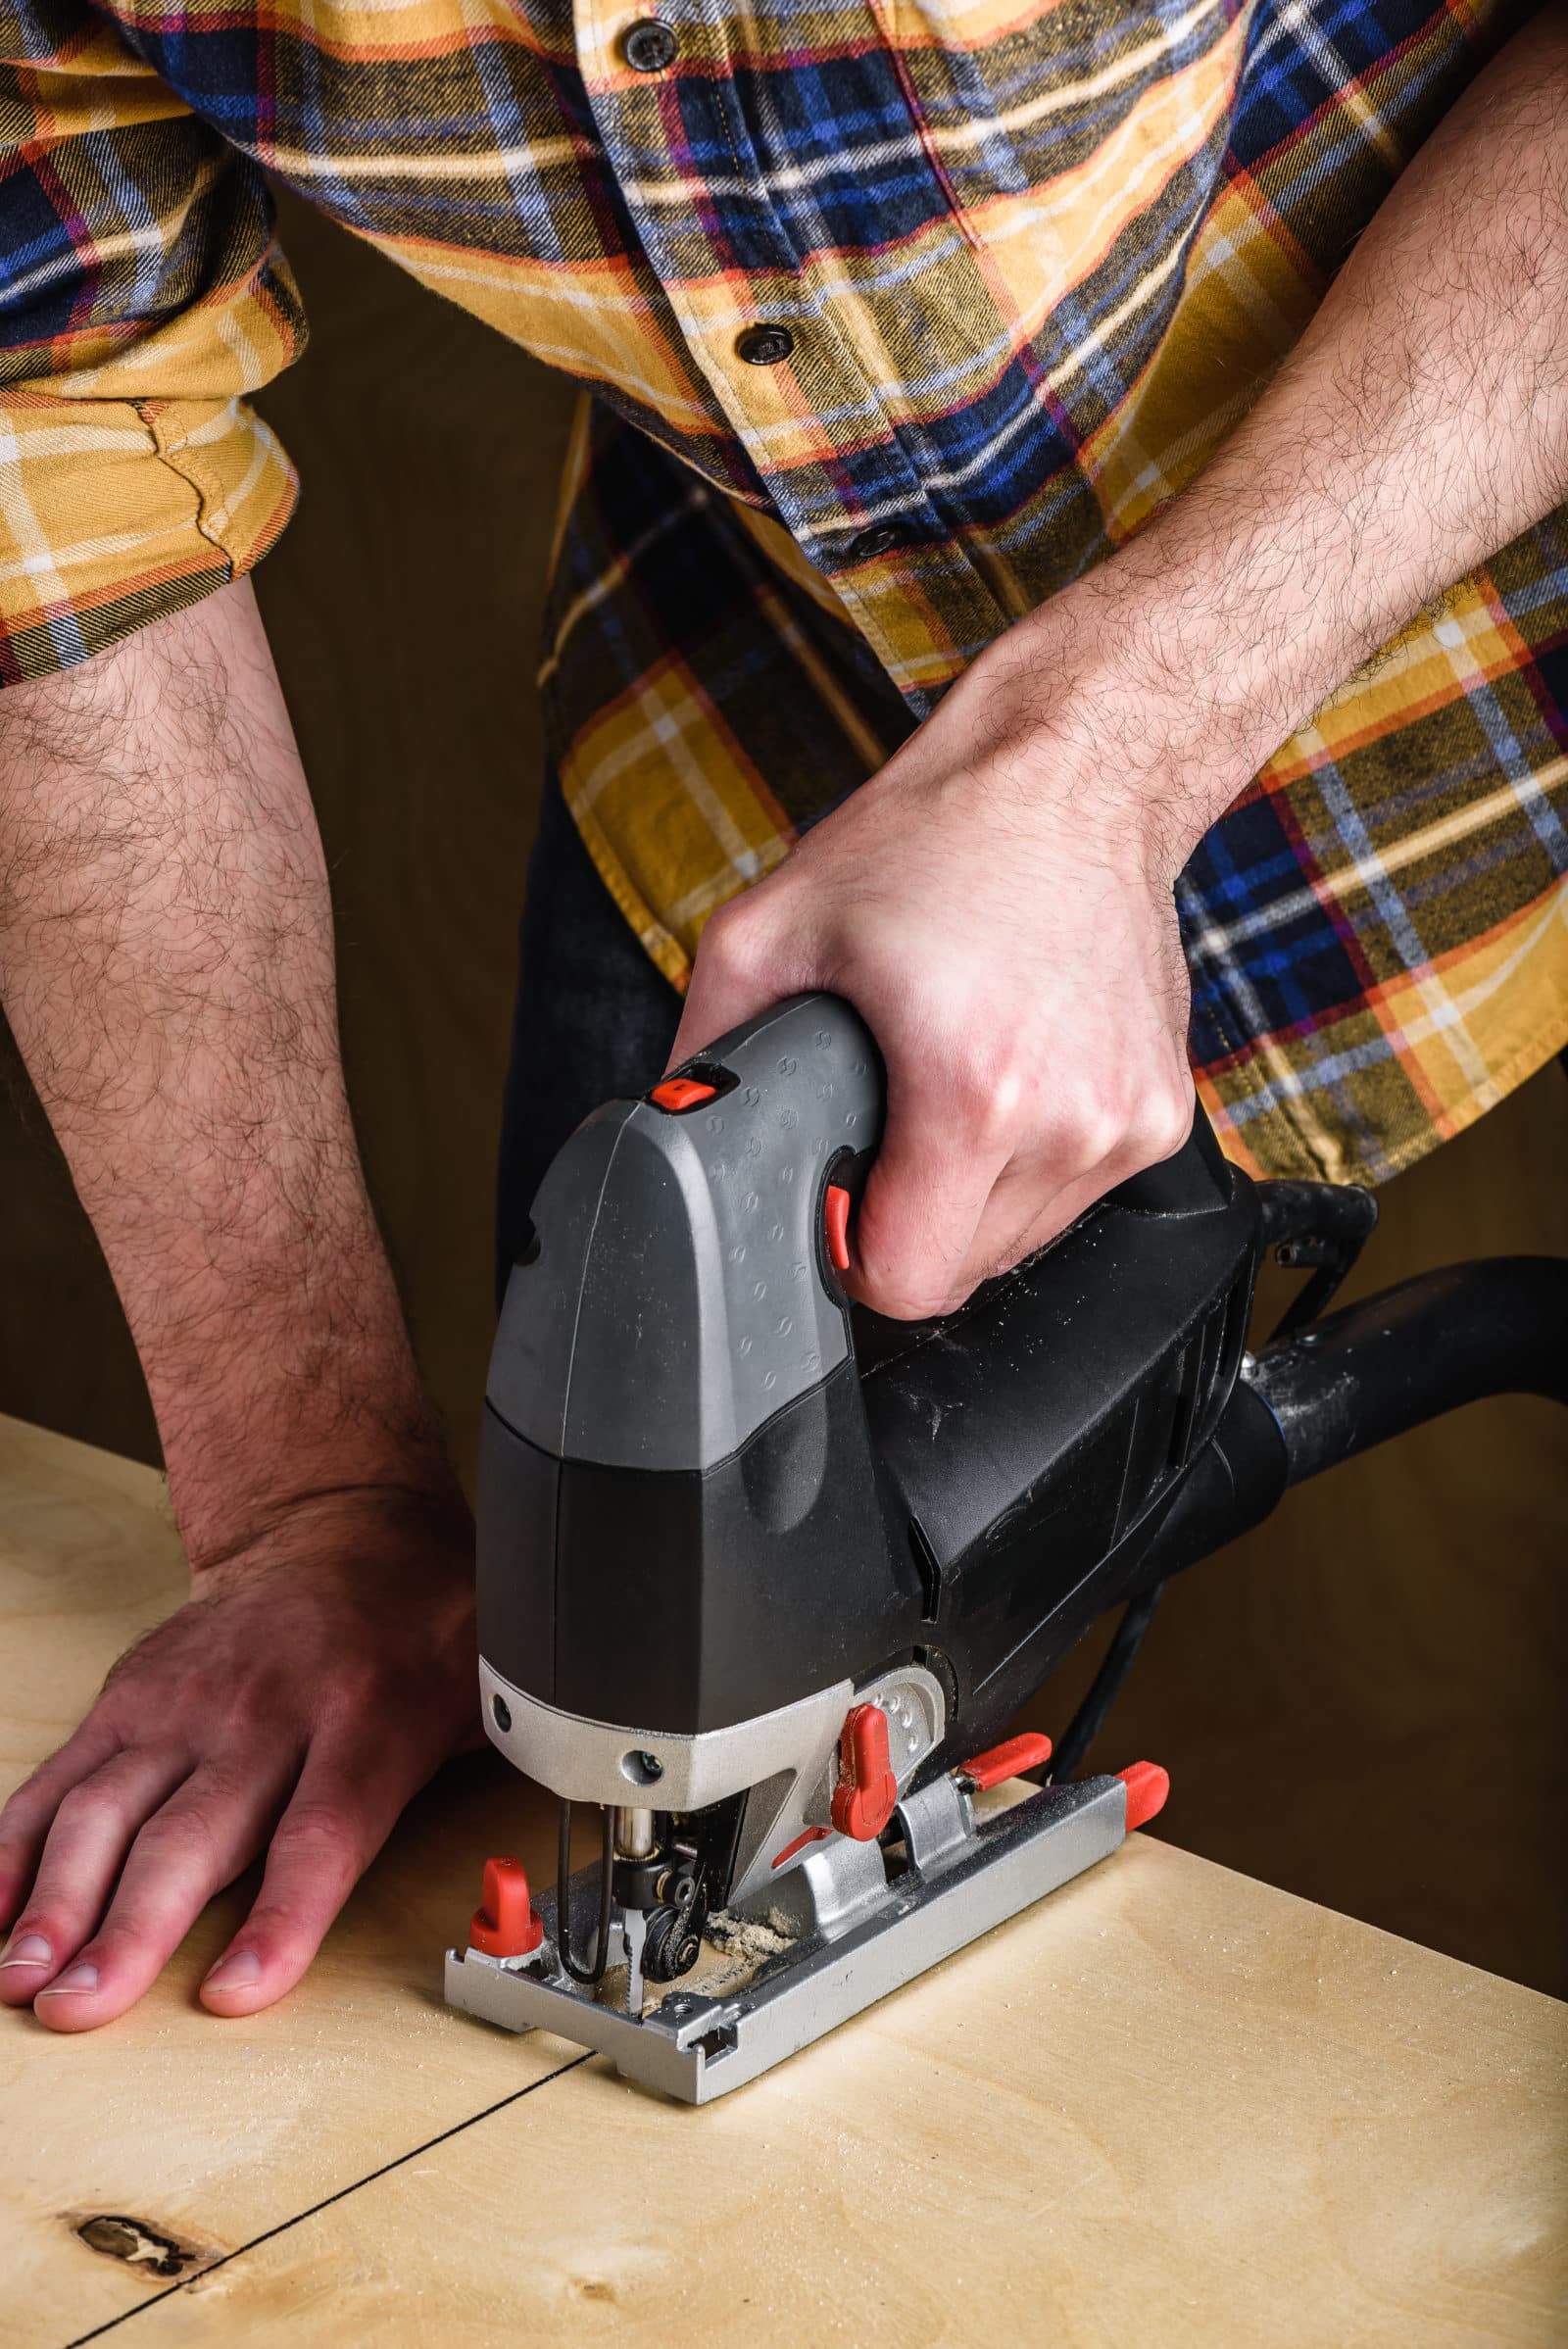
Because this planter is so large, there isn’t a need for soil to go all the way to the bottom of the planter. Before closing up the sides of the planter with more decking boards, install the bottom of the soil area. Place two 96” decking boards in the planter and mark the sides of the wood where these boards hit the inside frame. Measure how deep the notches will need to be cut. Remember, this doesn’t need to be perfectly tight to the frame, as drainage is important for healthy plants, so a little bit of imperfection is a good thing for this step.
Using either a jigsaw, multi-tool, or reciprocating saw, cut the marked notches out of the 8’-0” decking boards. Slide these into the planter from the sides and make sure they fit correctly around the frame of the interior. The two full-size decking board pieces will go on either side, and for the middle of this soil area, use the scrap wood that was cut off in step three. It should be a good fit here, allowing for movement between the boards and water drainage. Refer to the images below.
Note: Follow these exact instructions to make the second (smaller) planter box. Instead of 96” pieces, replace this measurement with 80.”
Building the privacy wall/backdrop & assembling the structure together
If the design is the same “L” shape design we created, make two of these. The instructions are to create one. If you are creating the same design as we did, proceed to make two of the following.
Step One: Making the cuts
Cut two 2×4’s at 67 5⁄8”. Cut two 1 1⁄2” x 1” pieces at 31 1⁄2”. These 31 1⁄2” pieces are cut from a 2×4 cut in half lengthwise on a table saw. The cut list for the privacy wall is as follows:
Two 2×4’s at 67 5⁄8”
Two 1 1⁄2” x 1” pieces cut at 31 1⁄2”
Two 4×4’s left as is at 8’- 0” long. Ensure they are the same height.
Step Two: Assembly of the black panel frame
Lay two 4x4s flat on the ground. Place the 67 5⁄8” piece flat and at a 90-degree angle between the two 4×4’s. The bottom of this piece of wood should be 42” above the bottom of the 4×4. Toenail 3” screws from the 67 5⁄8” pieces into the 4x4s from the top and bottom.
Next, place the 31 1⁄2” boards perpendicular up from the 2×4 that was just attached. Secure the 31 1⁄2” piece to the 4×4 by pre-drilling and then securing with 2” screws to the top and bottom. Next, add the other 67 5⁄8” piece to the top of these two boards, toenailing this piece to the 4×4 on the top and bottom of the piece. This is the frame created for the black acrylic panels.
Next attach the black privacy screen to the frame that was created using 1” screws. This will be the back of your privacy wall. Refer to the images below.
Step Three: Cutting and assembling the top piece of the “pergola” privacy wall
This is the step that will add the top part of the “pergola” style of this privacy wall. First, take two 8’-0” long 2×6’s and add a 45-degree angle to their ends. Measure 1 1⁄2” down from the top of the board and use a speed square to mark a perfect 45-degree angle with a pencil.
Using a mitre saw, cut the 45-degree angle to match the pencil marking. Repeat this process on both 2×6’s. Next, attach one of these to the 4×4. Attach this 2×6 3 1⁄2” down from the top of the 4×4. There should be 10 3⁄4” measurement on either side of the 2×6 from the edge to the start of the 4×4, making this piece centred on top.
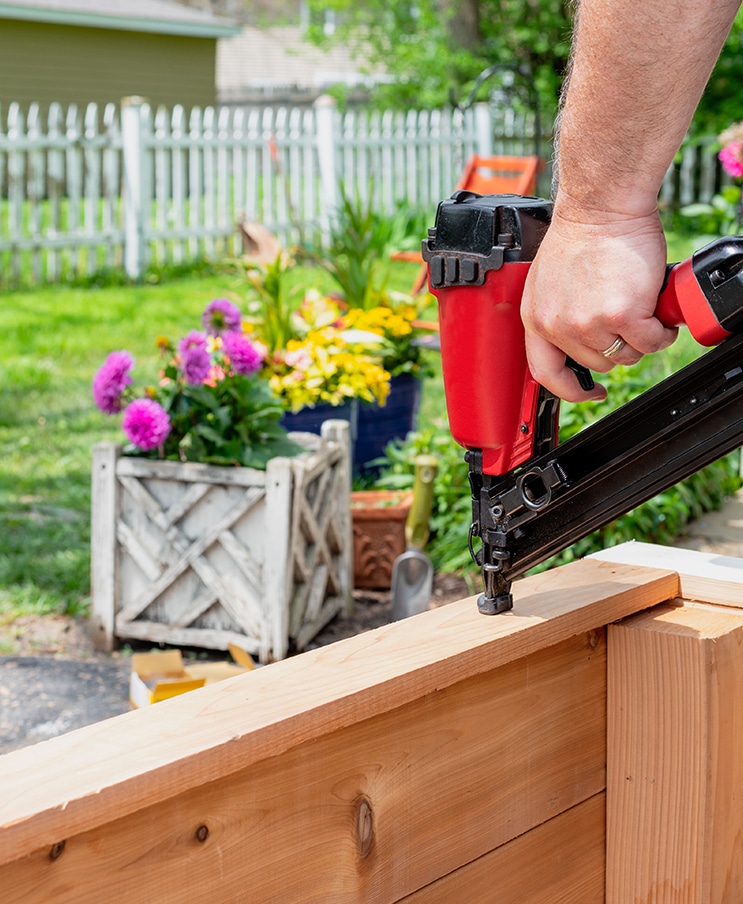
Pre-drill holes first, and then attach with three 3” screws. Flip over the privacy wall, and repeat these steps on the opposite side of the privacy wall. Refer to the images below.
Step Four: Attaching the two planters together
At this point in the project, we transported the planters and privacy walls to my cousin’s backyard to assemble the rest of it there. ….. Place the larger garden box at the back of the project, and the smaller garden box perpendicular to the face of the larger one. Attach by pre-drilling, then using 3” screws through the interior of the smaller planter into the larger planter to secure these together. Insert the privacy wall structure into the planter boxes and push it to the far side of each planter to ensure that they do not overlap or intersect at the top. Anchor the 4×4’s in to the planter by pre-drilling, then using 5” screws.
Using a jigsaw, cut out a 4” x 4” spot for the 4×4 to go through the base of the soil area. After everything is attached and anchored properly, add one layer of landscaping fabric to the base of the planter, securing the fabric with staples. Refer to the images below.
Step Five: Add the top pergola pieces
Cut fourteen 2×4’s at 18” long. Then, measure 1” down from the top of the 18” 2×4” piece on either side and mark this with a pencil. Using a speed square, mark a 45-degree angle on both sides. Using a mitre saw, cut this 45-degree angle. Place the seven pieces on each privacy wall, space them out evenly on top. They will be placed about 14 1⁄2” apart. Secure these to the top by toenailing these top pieces onto the structure up through the 2×6 into the 2×4 pieces. Refer to the images below.
Step Six: Add the Trim
To make the top trim: Using a table saw, cut the 5/4” deck boards at 3 1⁄2” width. To form the trim around the top, measure the length and width of the planter, and then cut these at a 45-degree angle. Pre-dill, then attach with 2” deck screws.
To make the side trim: Using a table saw, cut the 1”x6” deck boards in half using a 45-degree angle lengthwise. Cut the boards into 36” pieces and attach these to the sides of the planters, creating a mitered joint on the outer, and inner corners, concealing the raw edges of the planter boxes. Attach by pre-drilling, then using 2” deck screws. Refer to the images below.
Step Seven: Add the soil and plants
Using Miracle-Gro Garden soil, fill the planters that have been lined with landscaping fabric. This all-purpose planting mix helps grow plants twice as big and helps plants develop strong, healthy roots. I purchased purple, red, and yellow petunias for the planters and make sure to give them a good trim after planting them in the planters. This will help encourage new blooms to grow. I wanted something that would continuously bloom in her yard all summer. It’s recommended to fertilize with Miracle-Gro Water Soluble, All-Purpose plant food as well. Refer to the images below.
Step Seven: Add the soil and plants
This project was so much fun to complete with my husband, Stuart. My cousin and her family are so happy with the result, and we think it looks amazing in their yard. Check out the before and after shots below. What a difference!
Be sure to check out the reel of this project here. If you make a project inspired by ours, be sure to tag @PlantProjectCanada and @OnceUponaBungalow so that we can see your project!
(spoiler: yeah you do!) This is a great way to make sure your plants are getting enough water while saving yourself time to enjoy all the fun activities summer has to offer.
here is what you will need to get started.
drip irrigation system set
drill
sharp scissors or shears
water barrel
let’s gro #plantproject
step one
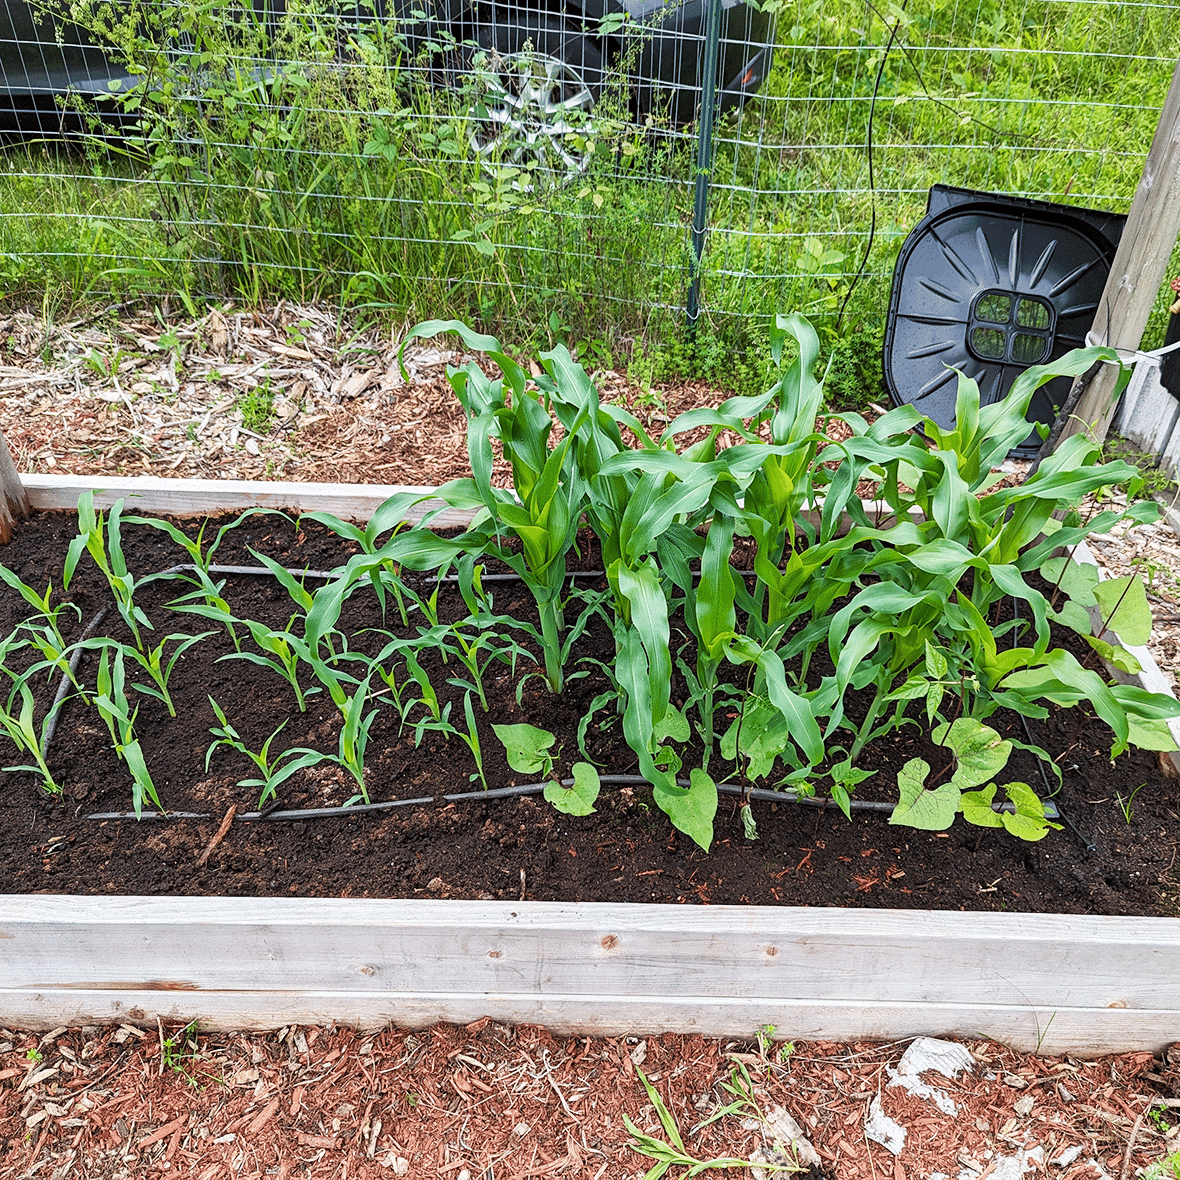
Choose a drip irrigation system that’s right for you and your garden. Some systems connect to a hose and water at intervals set on a timer, and others are automated solar systems that pull water from a rain barrel.
For the watering mechanism itself, you can get a system with little openings that will deliver droplets of water exactly where you want, or a system with a permeable hose that will slowly leak water along the whole length of the hose. The one we used is a solar-powered mix of the permeable hose and water droplet systems.
step two
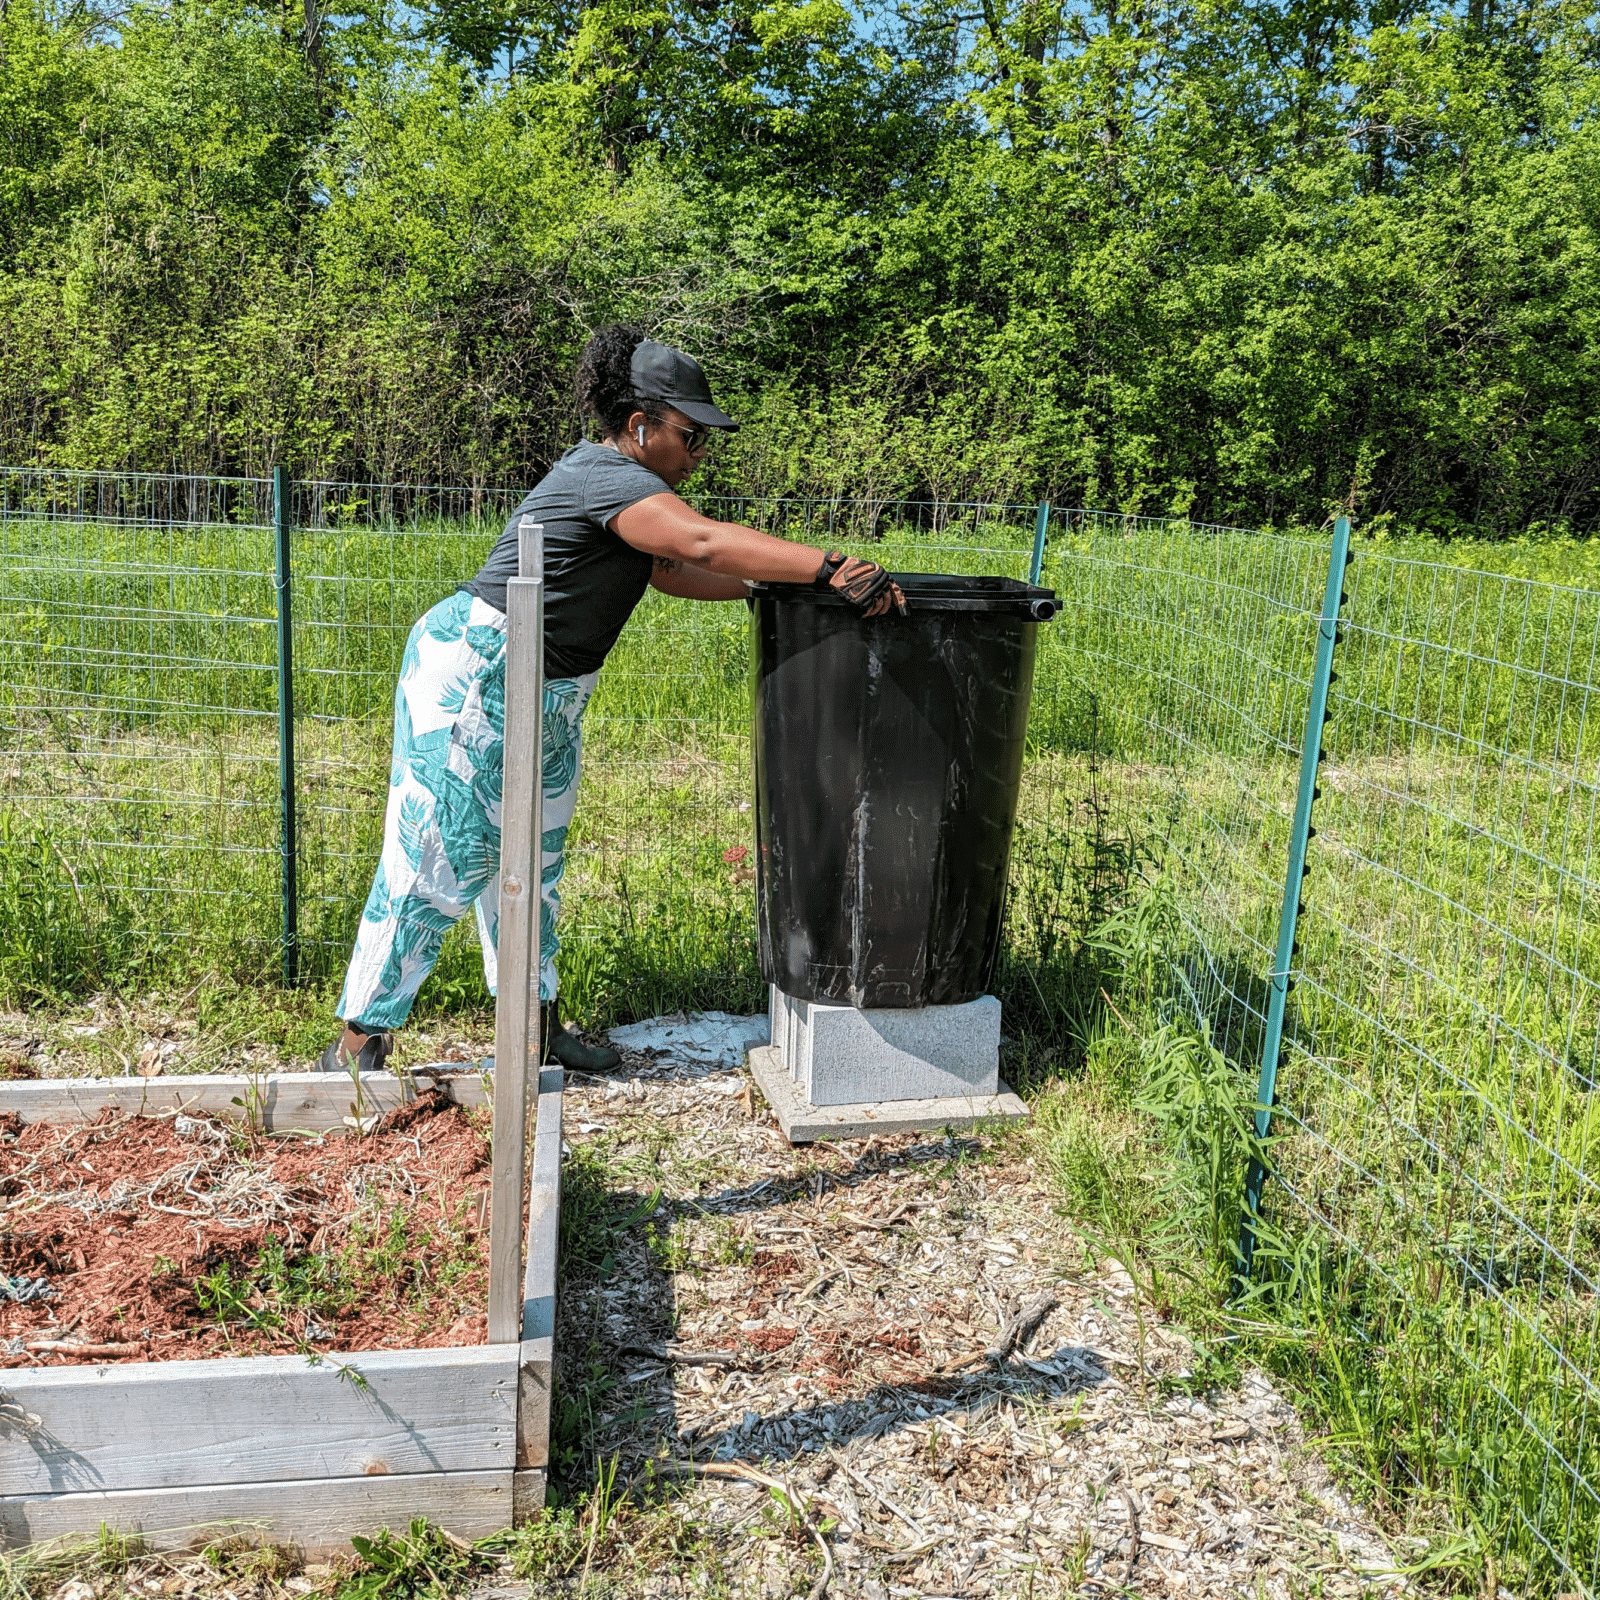
Prep the rain barrel. For our system, we drilled two holes in the barrel to insert the water intake tube and water level sensors.
step three
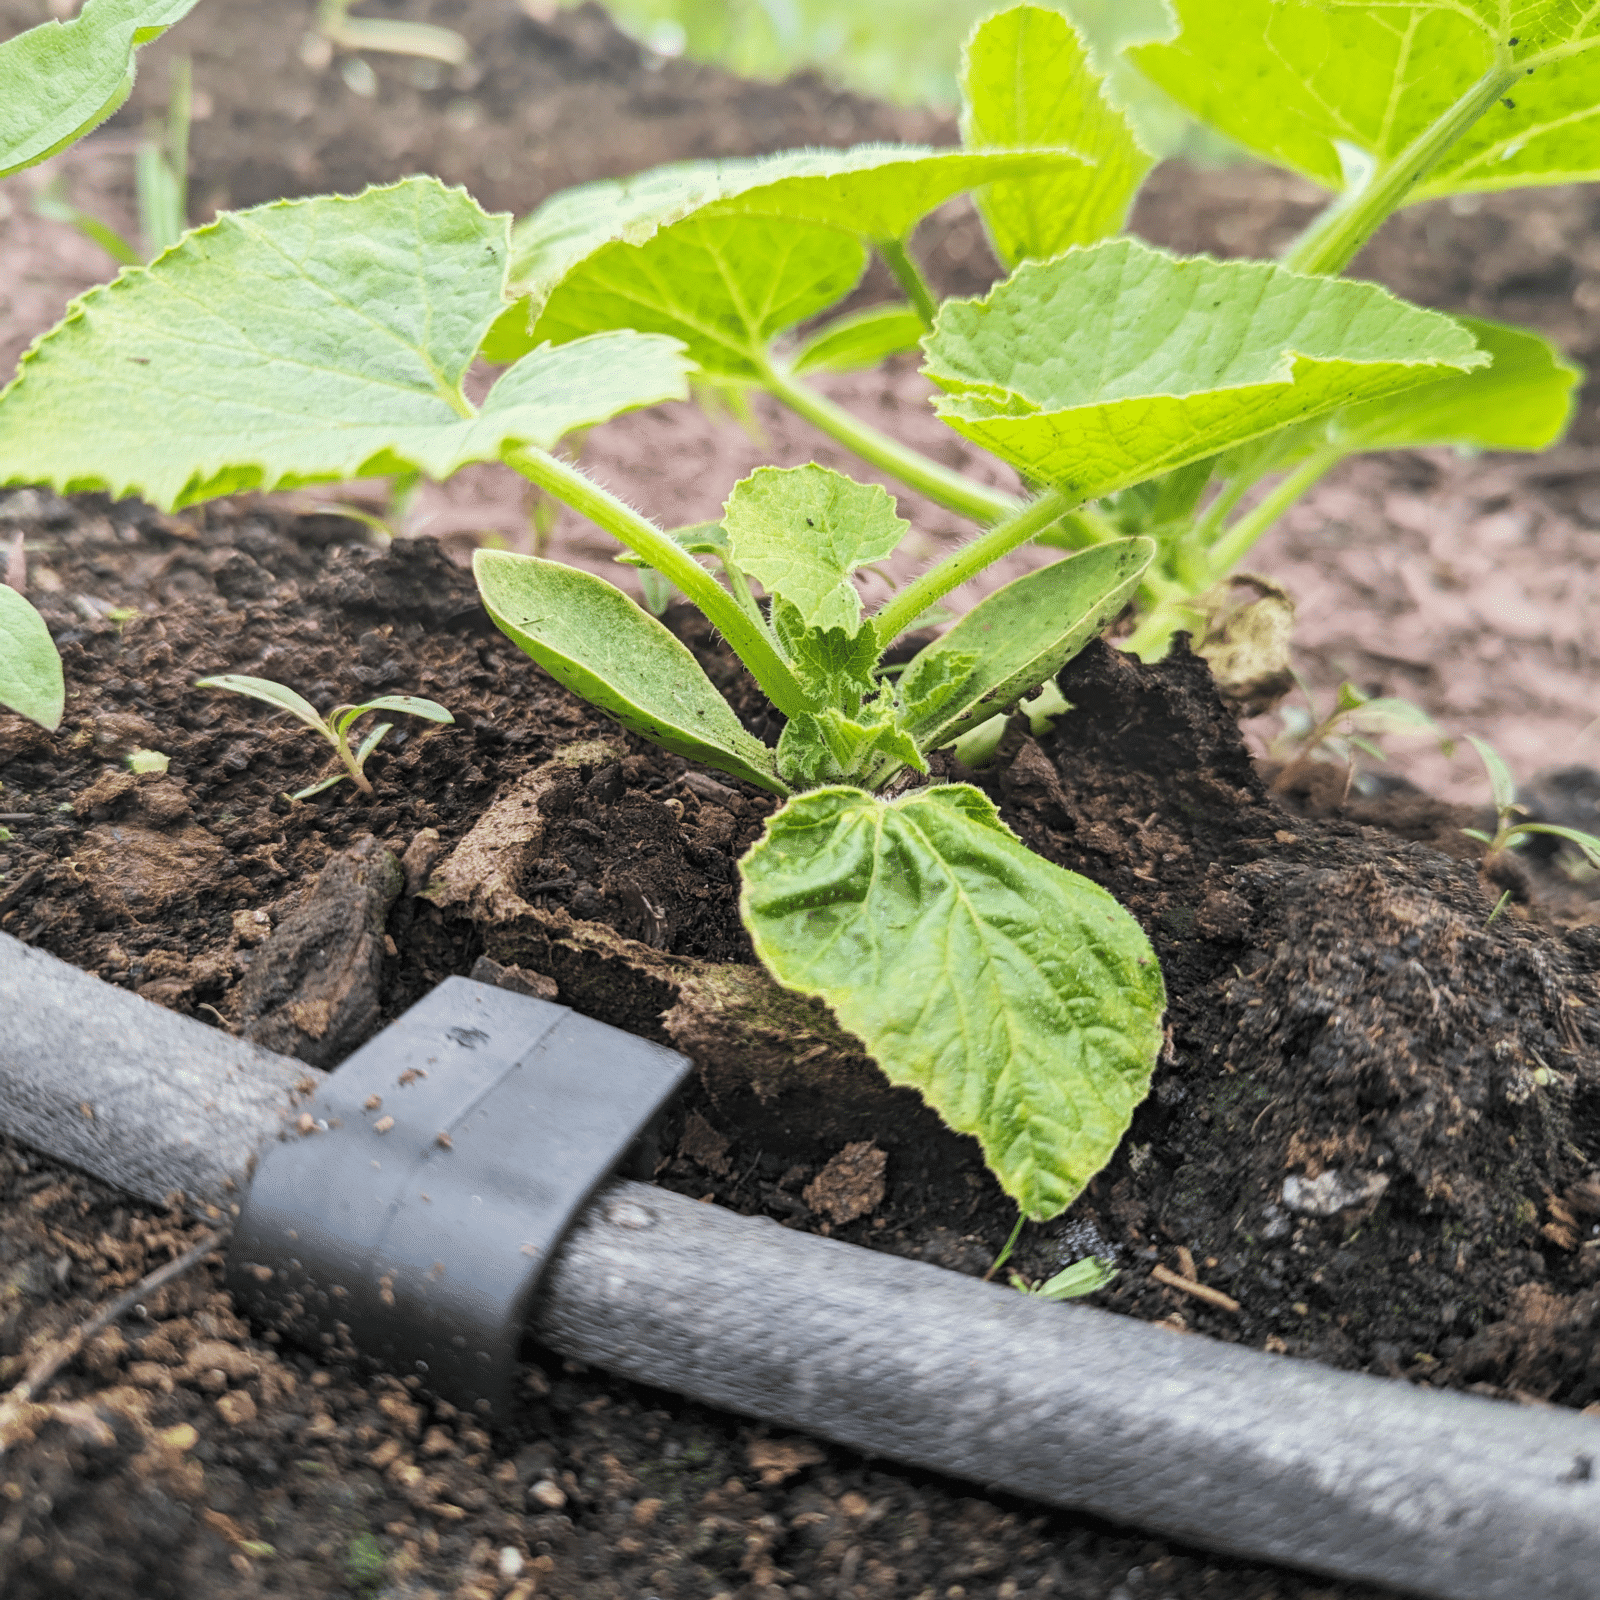
Run the water supply lines to each garden bed. Use sharp scissors or shears to cut lengths of tube so that the water will drip where you want it or so that the permeable tube will fit the lengths of your garden bed.
step four
Turn the on the system to test to see if it works. If there are leaky connections, you may need to adjust.
step five
Keep an eye on your garden over the next few days. Is the soil soggy? The system may be overwatering. Wilty plants and dry soil? Could be underwatering. Adjust until your plants seem happy with the setup.
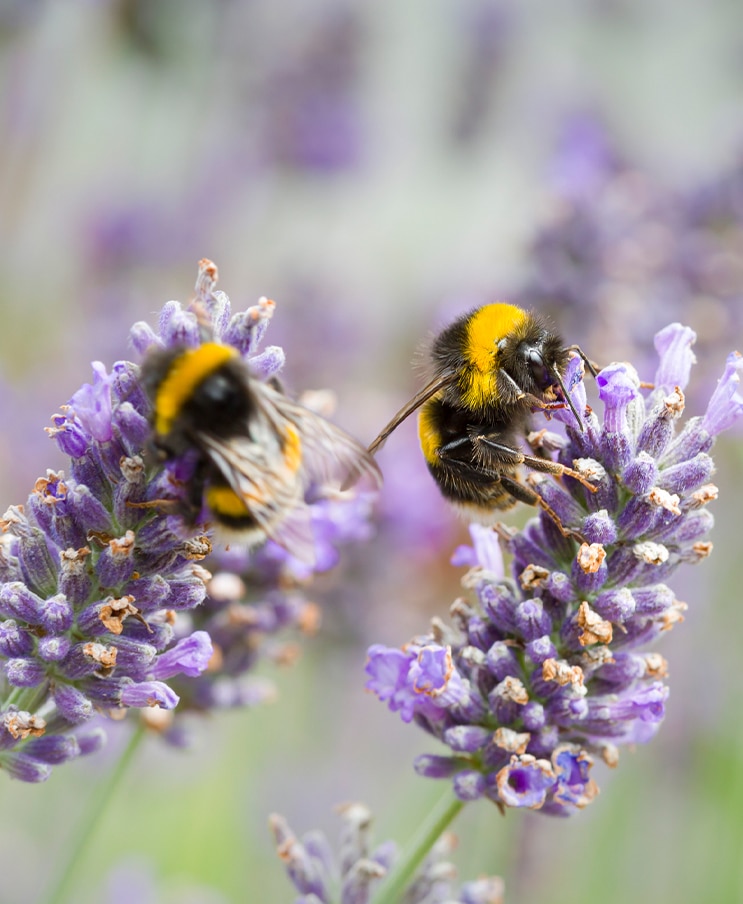
What are pollinator gardens, and why are they important? Pollinator gardens are essential to the reproduction of native plants. Native pollinators are very sensitive to environmental and man-made threats, and require very specific plant selection to thrive. From small rooftop gardens to vast gardens, even the smallest space can have a big impact and can help struggling pollinators.
here’s how to start your own pollinator garden at home:
step 1. choose native plants.
This can be tricky because some plants are marked as safe for supporting pollinators may be ineffective or harmful. For best results, your local botanical society can provide you with a list of plants that support native pollinators that are local to your region.
lets gro #plantproject
step 2. learn the components of a pollinator garden.
There are 5 important components to a happy pollinator garden:
Adult Food: a selection of native plants with lots of pollen and nectar that are planted in groups and produce throughout the growing season.
Baby Food: host plants that support butterfly and moth reproduction.
Water: spots where insects can easily get to water and minerals found in soil. These areas should be well-draining and not have standing water.
Habitat: hollow stemmed plants, leaves, grass and bare soil to help support the life cycle of the pollinators.
Protection: Protect your pollinators by eliminating chemicals and pesticides.
step 3. select and analyze the site.
Make sure you’ve got the right plants for the right place. The important site attributes to consider are: sunlight, soil type and treatment, moisture levels, wind exposure, which animals are naturally present and, of course, aesthetics.
step 4. prep your garden site.
Start to prepare your site by removing all the old sod, if necessary. All weeds and other invasive plants should be removed as well. Once the site has been cleared, till the soil and add a top soil. Add a few inches of organic compost. Check out our article about building your own compost.
step 5. plan your garden and select your plants.
An important part of planning your garden is creating “massings” which are groups of 4 or 5 plants. This makes it easier for foraging. Pro tip: group moisture loving plants together! This can help you save on watering. Don’t forget to leave a border of a few inches, this is to give your plants room to grow.
step 6. get planting.
Lay your plants according to your desired design. Get digging and plant your native pollinators. When you’re ready to add mulch, make sure you’re not putting mulch right against the plant.
step 7. care for your garden.
Aside from the regular watering, there is some maintenance required to keep your garden happy. Keep an eye out for weeds and other invasive species, and weed by hand. The purpose here is to help your garden thrive naturally, so avoid using pesticides. During the fall, you can leave see heads and stalks. This provides a natural habitat for birds and insects. Cut back in the springtime and add compost.
And just like that, you’re well on your way to a fully functioning pollinator garden! Don’t forget to share your progress with our community in the Plant Chat.
Does the idea of a DIY wood garden bed make your knees buckle? Follow our 5 easy steps and you’ll be building your own 4X4 garden bed (and your neighbours will be admiring it.)
Head to your favourite home improvement store, get two 8-foot-long 2×12 boards and ask them to cut them in halves. The best type of wood is something rot-resistant like pressure-treated lumber, white oak, or cedar. You’ll also need to get four packages of 2X2 wooden stakes. While you are there, grab your deck screws and Miracle-Gro® soil and plant food as well.
step two. assess your garden
Find an area of your yard that is level, exposed to sunshine and is near a water source. If you have chosen a grassy area, mow it short first before adding your new garden bed.
step three. get frame
To build the raised garden bed frames, place the boards in a square on their edges. To avoid the wood splitting apart, drill holes in each corner and fasten the boards together with four screws.
step four. make your bed
Put the landscape fabric over the spot you chose for your garden bed, extending it beyond the frame to help protect the wood. Set down the bed frame. Through the fabric, hammer one 2X2 stake into the ground on the inside of the frame to fortify the corners. Next, cover the fabric with the cardboard or a few layers of newspaper. This will help prevent weeds from growing through. Now it is time to fill the square box with soil, using a rake to level it.
step five. planting time
Plant the seeds of your favourite plants, or if you are keen to get growing, plant sprouted vegetable and herb plants. Nourish your plants to reap a good harvest using your Miracle-Gro® Organics Plant Food Granules for Vegetables and Herbs coupled with the garden soil, these products will harvest three times more over the growing season.
Congrats, it was easier than you expected, right? Perhaps it won’t be just plants but your collection of garden beds will grow, too.
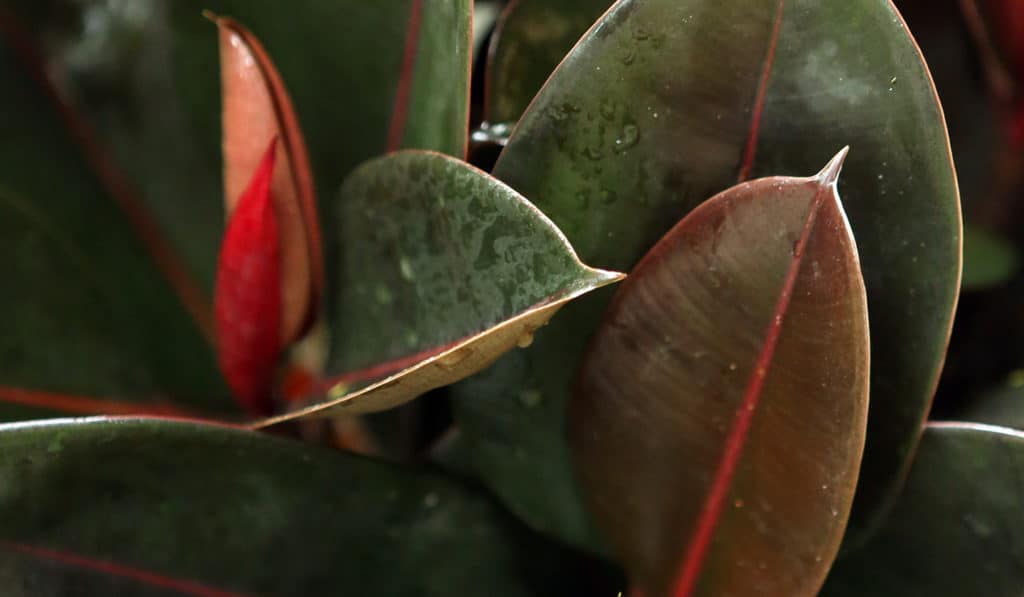
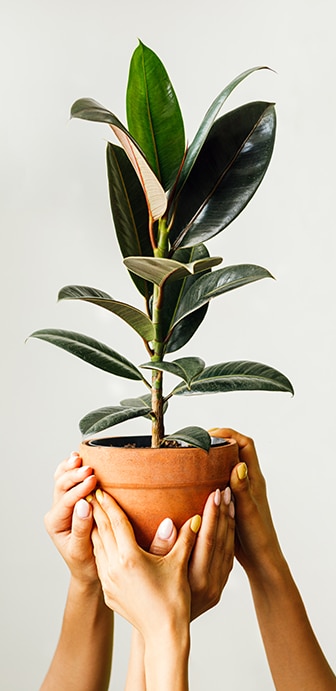
Nothing fills out a room like the tall dark and handsome rubber plant. Left untrimmed, it can soar to almost 10 feet. The all-star quarterback of your plant team.
Description: Leathery leaves that can be deep dark green to burgundy or black in colour / India Malaysia / tropical / fiddle leaf fig cousin
variations
The rubber plant has many variations in colour Robusta, Tricolor, Tineke, Decora, Doescheri, Burgundy, Abidjan, Melany, Red Ruby, Black Prince, and Yellow Gem.
share
light
bright, indirect light
Ficus loves plenty of bright, indirect light. It can handle lower light but won’t grow as quickly. Sometimes that’s a good thing because Rubber plants really like to grow upwards. Avoid long periods of direct sun because those big, broad leaves can burn.
water + feeding
allow soil to dry between watering
This plant really likes to dry out between waterings, so make sure the top two inches of soil are dry. Then give it a big, thorough watering. Don’t overwater to the point you see it pooling in the tray or turning the soil soupy on top.
toxic
toxic to humans and pets
Ingestion will cause mouth, stomach irritation and possible vomiting. The milky latex-like sap (for which the rubber tree is named) can also irritate the skin.
location
flexible
Good with most average indoor temperatures but prefers a warmer room. Watch out for drafts and blasts of hot or cold air from vents as this will cause leaves to drop.
humidity
loves it
Extra humidity from misting or a humidifier is welcome.
size
large friend
A true vertical champion. Indoors will grow 6 to 9 feet tall with a 3 to 4 foot spread. It’s a statement plant.
pro tip
keep those leaves clean
Those broad leaves easily collect dust and therefore dust mites. Polish them regularly, gently with a damp cloth. Check under the leaves for pests while you’re at it.
fun fact
sap is natural rubber
That white milky sap is natural latex. Before synthetic rubber was invented, it was the only source of rubber for tires and latex gloves.
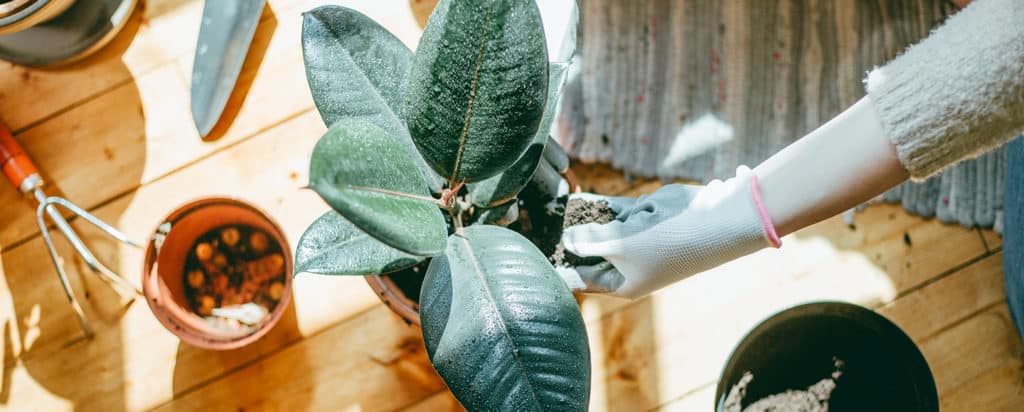
Use a rich, well-draining, indoor potting soil, like Miracle-Gro® Indoor Potting Mix. Ensure your pot has good drainage. Don’t let it sit in water and if you notice water pooling in the drainage tray, empty it.
Repot every 1 to 2 years in the Spring, especially with younger plants. Increase pot by 2 inches every time. When your Rubber plant is older and becomes a big fella, repotting gets hard! Soyou can just replace the top few inches of soil.
Be careful what you start, because these plants get big! Pick a stem showingthick, healthy leaves and cut halfway up the stem. Milky sap will come out, and it’s an irritant you want to avoid. Remove the bottom leaves to give yourself a nice stretch of stem. It’s not the easiest propagator, so you’ll need rooting hormone to encourage roots. Dip your stem in the hormone and pot it moist soil, like Miracle-Gro® Indoor Potting Mix.
Look for mealybugs, scale insects, and spider mites. During your regular leaf cleaning, inspect the underside of each leaf. Check out our Pest control section in Plant 101 for how to identify and deal with pests on your plant!
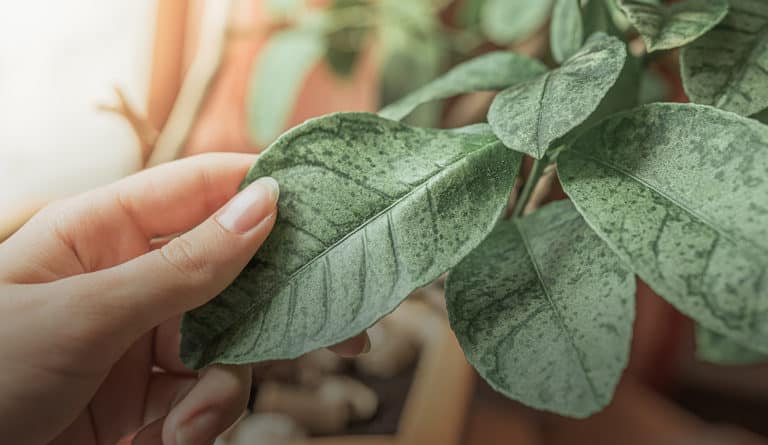
Too much direct sunlight. Rubber plants don’t like direct sun. It’s too hot on those big, broad leave, and they’ll lose moisture, causing these patchy pale spots. Shade the window or move your plant away from this direct sun. Sadly, the spots don’t heal, so consider removing the most damaged ones.
Rubber plants get stressed out easily.Any sudden change is likely to trigger leaf drop. Blasts of air conditioning or furnace heat. Cold drafts under a door. Being taken home from the nursery is also a big change in your plant’s life! Expect droppage. If you have not moved it recently and you can’t source any sudden temp changes then it could be overly dry air, or under watering and feeding. Review your care routine and your Rubber plant should… bounce back.
Possible sunburn, or worse, leaf spot.If your Rubber plant is sitting in direct sunlight, it’s probably sunburn. Especially if it’s getting hot Summer sun. Move to still-bright indirect spot. If it’s not sunburn, it could be leaf spot, a fungal disease. Overwatering, especially in the winter, is usually the cause. First, avoid spreading to other plants by separating them physically. Remove all spotty leaves and check for plant debris in the pot. If you’re misting, stop. You want the leaves to get dry. Treat with fungicide.
Probablyroot rot from overwatering. Do you also notice mushy stems and/or slower growth? These are all signs of root rot. Not to worry, when caught early this is easily fixable. Reduce watering and ensure the soil dries out before watering. Check your pot’s drainage. Does it have a hole that allows excess water to escape? Help things dry by poking holes in the soil. This will get oxygen to the roots. You can also put the pot (with drainage holes) in a tray that’s lined with a layer of dry soil. It acts like a sponge to draw out extra moisture. Now, let’s check for root rot. Dig down and cut out any that look affected. If things are really bad, consider repotting entirely with new soil.For more information check out our Plant 101 section.
Nothing fills out a room like the tall dark and handsome rubber plant. Left untrimmed, it can soar to almost 10 feet. The all-star quarterback of your plant team.
Description: Leathery leaves that can be deep dark green to burgundy or black in colour / India Malaysia / tropical / fiddle leaf fig cousin
variations
The rubber plant has many variations in colour Robusta, Tricolor, Tineke, Decora, Doescheri, Burgundy, Abidjan, Melany, Red Ruby, Black Prince, and Yellow Gem.
share
light
bright, indirect light
Ficus loves plenty of bright, indirect light. It can handle lower light but won’t grow as quickly. Sometimes that’s a good thing because Rubber plants really like to grow upwards. Avoid long periods of direct sun because those big, broad leaves can burn.
water + feeding
allow soil to dry between watering
This plant really likes to dry out between waterings, so make sure the top two inches of soil are dry. Then give it a big, thorough watering. Don’t overwater to the point you see it pooling in the tray or turning the soil soupy on top.
toxic
toxic to humans and pets
Ingestion will cause mouth, stomach irritation and possible vomiting. The milky latex-like sap (for which the rubber tree is named) can also irritate the skin.
location
flexible
Good with most average indoor temperatures but prefers a warmer room. Watch out for drafts and blasts of hot or cold air from vents as this will cause leaves to drop.
humidity
loves it
Extra humidity from misting or a humidifier is welcome.
size
large friend
A true vertical champion. Indoors will grow 6 to 9 feet tall with a 3 to 4 foot spread. It’s a statement plant.
pro tip
keep those leaves clean
Those broad leaves easily collect dust and therefore dust mites. Polish them regularly, gently with a damp cloth. Check under the leaves for pests while you’re at it.
fun fact
sap is natural rubber
That white milky sap is natural latex. Before synthetic rubber was invented, it was the only source of rubber for tires and latex gloves.
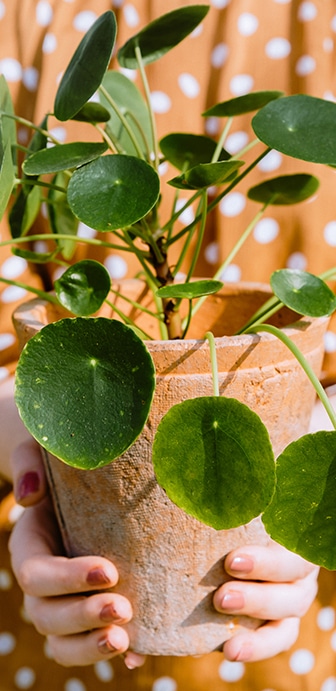
This plant likes a light, well-draining soil like Miracle-Gro Cactus, Palm and Succulent Potting Mix. Or add some potting sand or perlite to regular potting soil. Your pot must have good drainage and don’t let Pilea sit in water. If you see water collecting in the drainage tray, dump it.
Repot every 1 to 2 years in the Spring, especially with younger plants. Increase pot by 2 inches every time.If dealing with a more mature, fully grown plant you can just replace the top few inches of soil.
So easy, because Pilea is self-propagating. It creates tiny offshoots also known as ‘pups’. You can leave them on the plant, orcreate a new one. Wait until your Pilea pup is at least a few inches tall. Gently dig under the pup and cut (or gently pull) the plant free, ensuring you get roots. Put the pup in some water to grow stronger roots, or plant directly in soil. You have a new mini Pilea that makes a perfect gift!
Pileas are bug resistant, but pests are still possible. Inspect under the leaves when doing your regular dusting & cleaning. Check out our Pest control section in Plant 101 for how to identify and deal with pests on your plant!
Light and water are incorrect. If the leaves are curled inwards, your Pilea is probably dehydrated. It’s not getting enough water, or it’s getting too much sun. On the flipside, If the leaves are curled outwards it’s probably too much water or not enough light. Check your soil before watering and ensure the top two inches of soil are dry before watering. Time between watering varies by plant and how much light they’re getting.
Where are they yellowing? If only the bottom leaves are yellowing and dropping, there’s no problem. That’s normal Pilea behaviour. But Ifthe whole plant is yellowing, you’re probably overwatering. When doing your watering routine, make sure the top 1 to 2 inches of soil are dry before watering.
Rotate your plant! Pilea’s love to grow towards the sun. This can cause them to become one side heavy or grow unevenly. You should remember to turn your plant every time you water to allow the plant to grow evenly.
Overwatering, too little time between watering.Mold (and even mushrooms) growing on your soil is not a direct threat. But it IS a sign of overwatering. Root rot can follow if not addressed. Water less frequently and make sure you let the top two inches of soil fully dry before watering. Ensure you have proper drainage. If things look really moldy, you can remove the top inch or so of soil.
Powdery mildew.Like mold, this isn’t dangerous, but it makes your precious Pilea less pretty! So it’s got to go. Bad air circulation is usually the cause.Remove affected leaves and move your plant somewhere withbetter air circulation.
Nothing fills out a room like the tall dark and handsome rubber plant. Left untrimmed, it can soar to almost 10 feet. The all-star quarterback of your plant team.
Description: Leathery leaves that can be deep dark green to burgundy or black in colour / India Malaysia / tropical / fiddle leaf fig cousin
variations
The rubber plant has many variations in colour Robusta, Tricolor, Tineke, Decora, Doescheri, Burgundy, Abidjan, Melany, Red Ruby, Black Prince, and Yellow Gem.
share
light
bright, indirect light
Ficus loves plenty of bright, indirect light. It can handle lower light but won’t grow as quickly. Sometimes that’s a good thing because Rubber plants really like to grow upwards. Avoid long periods of direct sun because those big, broad leaves can burn.
water + feeding
allow soil to dry between watering
This plant really likes to dry out between waterings, so make sure the top two inches of soil are dry. Then give it a big, thorough watering. Don’t overwater to the point you see it pooling in the tray or turning the soil soupy on top.
toxic
toxic to humans and pets
Ingestion will cause mouth, stomach irritation and possible vomiting. The milky latex-like sap (for which the rubber tree is named) can also irritate the skin.
location
flexible
Good with most average indoor temperatures but prefers a warmer room. Watch out for drafts and blasts of hot or cold air from vents as this will cause leaves to drop.
humidity
loves it
Extra humidity from misting or a humidifier is welcome.
size
large friend
A true vertical champion. Indoors will grow 6 to 9 feet tall with a 3 to 4 foot spread. It’s a statement plant.
pro tip
keep those leaves clean
Those broad leaves easily collect dust and therefore dust mites. Polish them regularly, gently with a damp cloth. Check under the leaves for pests while you’re at it.
fun fact
sap is natural rubber
That white milky sap is natural latex. Before synthetic rubber was invented, it was the only source of rubber for tires and latex gloves.
Use a rich, well-draining, indoor potting soil, like Miracle-Gro® Indoor Potting Mix. Ensure your pot has good drainage. If you notice water pooling in the drainage tray, empty it.
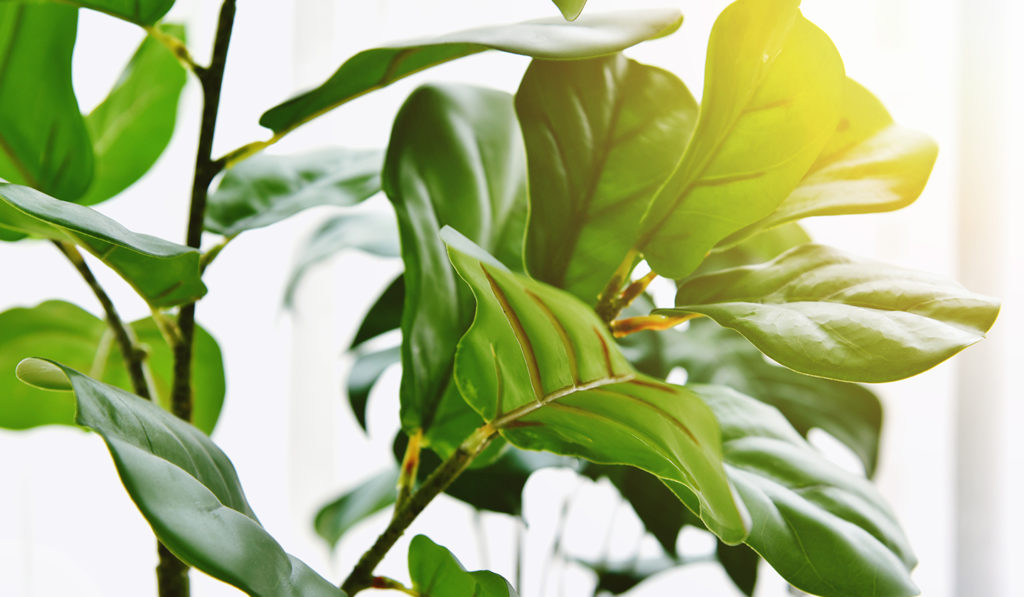
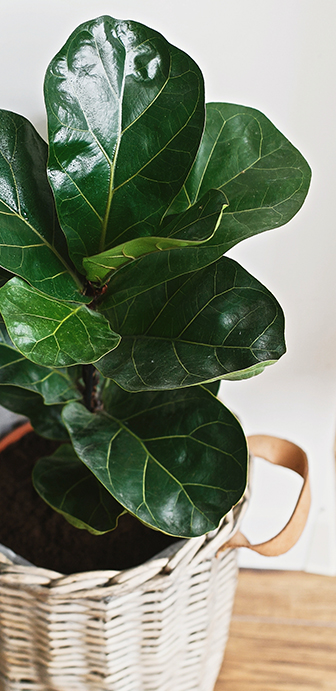
Every 2-3 years in the Spring, especially in the earlier years. Increase the pot size by 2 inches each repotting. When your Fig is all grown up, you can get away with just replacing the top few inches of soil.
Find a stem with 3-4 leaves and cut just below the lowest leaf. Now remove the lower leaves to make room for root growth. Place your stem in a jar of water. Figs can be stubborn to root, so add some rooting hormone to the water.
Fiddle Figs are prone to mealybugs, scale insects, and spider mites. Make a routine of dusting and checking under the leaves. Our pest control section in Plant 101 will help you identify and deal with pesky plant pests!
Your friend is stressed out.Figs don’t like sudden changes to their surroundings. Often it’s blasts of hot or cold air a nearby vent. Moving from the nursery to your home is a shock for this gentle giant. If there haven’t been any sudden changes, it could be overly dry air.It could also be too much or too little water. Or too much or too little food. This plant is not the easiest! Review your placement and care routine, and keep doing your best. The leaves should grow back.
Possibly a sunburn, or maybe leaf spot.If your Fiddle Fig gets direct sunlight it’s probably sunburn. Lots of indirect light is good but direct sun is bad. If that’s not it, it could be a fungal disease called leaf spot. Overwatering or an overly damp environment are the cause. Stop the spread to other plats, make sure leaves aren’t near each other. Remove infected leaves, including any that have fallen into the pot. If you’re misting, stop. Treat with fungicide as directed.
Low humidity, not enough water or irregular watering.Give more attention to watering. Routines matter for this plant. Ensure it’s regular and thorough and that the entire root ball is getting wet. Check the room temp. If it’s over 75 F/24 C and the air feels dry, mist the leaves regularly and consider a humidifier. Or put the pot on a pebble filled tray of water. Make sure the pot doesn’t touch the water.
Make sure you are watering the plant thoroughly and at regular intervals, getting the whole root ball wet.
Probablyroot rot from overwatering. Do you also notice mushy stems and/or slower growth? These are all signs of root rot. Not to worry, when caught early this is easily fixable. Reduce watering and ensure the soil dries out before watering. Check your pot’s drainage. Does it have a hole that allows excess water to escape? Help things dry by poking holes in the soil. This will get oxygen to the roots. You can also put the pot (with drainage holes) in a tray that’s lined with a layer of dry soil. It acts like a sponge to draw out extra moisture. Now, let’s check for root rot. Dig down and cut out any that look affected. If things are really bad, consider repotting entirely with new soil.For more information check out our Plant 101 section.
We use cookies on our website to give you the most relevant experience by remembering your preferences and repeat visits. By clicking “Accept All”, you consent to the use of ALL the cookies. However, you may visit "Cookie Settings" to provide a controlled consent.
This website uses cookies to improve your experience while you navigate through the website. Out of these, the cookies that are categorized as necessary are stored on your browser as they are essential for the working of basic functionalities of the website. We also use third-party cookies that help us analyze and understand how you use this website. These cookies will be stored in your browser only with your consent. You also have the option to opt-out of these cookies. But opting out of some of these cookies may affect your browsing experience.
Necessary cookies are absolutely essential for the website to function properly. These cookies ensure basic functionalities and security features of the website, anonymously.
Cookie
Duration
Description
cookielawinfo-checkbox-analytics
11 months
This cookie is set by GDPR Cookie Consent plugin. The cookie is used to store the user consent for the cookies in the category "Analytics".
cookielawinfo-checkbox-functional
11 months
The cookie is set by GDPR cookie consent to record the user consent for the cookies in the category "Functional".
cookielawinfo-checkbox-necessary
11 months
This cookie is set by GDPR Cookie Consent plugin. The cookies is used to store the user consent for the cookies in the category "Necessary".
cookielawinfo-checkbox-others
11 months
This cookie is set by GDPR Cookie Consent plugin. The cookie is used to store the user consent for the cookies in the category "Other.
cookielawinfo-checkbox-performance
11 months
This cookie is set by GDPR Cookie Consent plugin. The cookie is used to store the user consent for the cookies in the category "Performance".
viewed_cookie_policy
11 months
The cookie is set by the GDPR Cookie Consent plugin and is used to store whether or not user has consented to the use of cookies. It does not store any personal data.
Functional cookies help to perform certain functionalities like sharing the content of the website on social media platforms, collect feedbacks, and other third-party features.
Performance cookies are used to understand and analyze the key performance indexes of the website which helps in delivering a better user experience for the visitors.
Analytical cookies are used to understand how visitors interact with the website. These cookies help provide information on metrics the number of visitors, bounce rate, traffic source, etc.
Advertisement cookies are used to provide visitors with relevant ads and marketing campaigns. These cookies track visitors across websites and collect information to provide customized ads.
join our passionate plant community and gro your garden!
By registering, I am allowing Scotts Canada Ltd. to contact me with news, articles and promotions. I understand that I can withdraw my consent at any time.