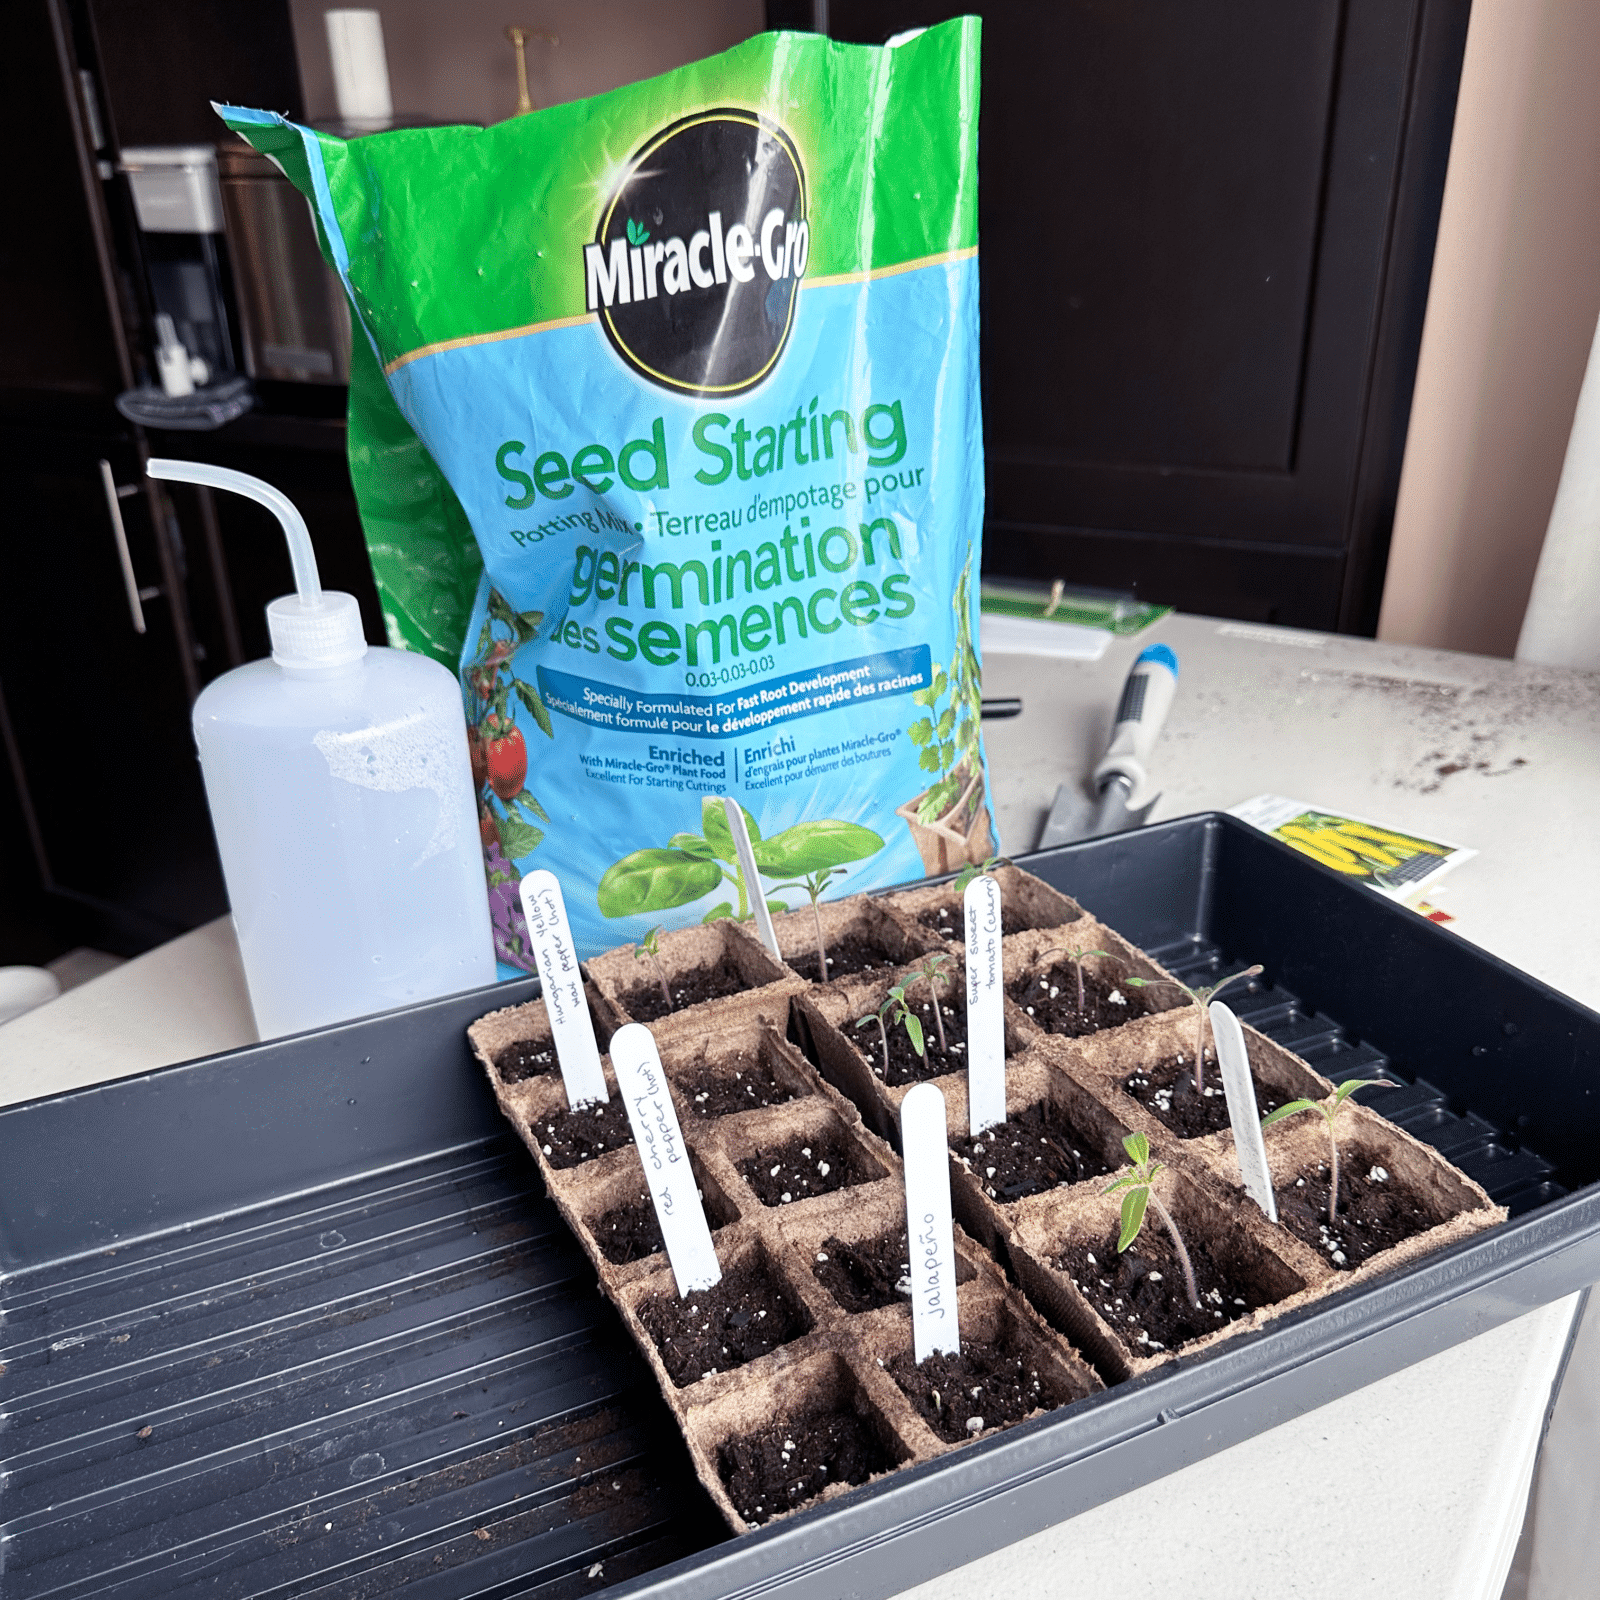
This seed starting setup is as simple as filling the pots with MiracleGro Seed Starting Potting Mix and placing a seed in each pot. Label the future seedlings with permanent marker on plant labels or popsicle sticks and place them on a sunny windowsill. Be sure to water them every day or two to keep the soil moist.

Three Different Ways to Start Your Seeds
It’s the most wonderful time of the year: seed starting season is upon us! Starting your own seeds is by far the most cost effective way to create a lush, bountiful veggie garden in your own backyard. Here are three different ways to start your seeds: one simple setup requiring little equipment, an intermediate setup with a Root Farm Grow Light, and an AeroGarden to really kickstart those seeds.
MiracleGro Seed Starting Potting Mix + Window
This is the simplest seed starting method. Basically requiring sunlight and soil, it is also the method that requires the least investment (sunlight is free!).
To start seeds using this method, you need:
- A sunny window to put your seeds
- Seed starting pots (can substitute for egg cartons or nursery pots)
- Seeds
- MiracleGro Seed Starting Potting Mix
- Plant labels (can use popsicle sticks)
- Permanent marker
MiracleGro Seed Starting Potting Mix + Root Farm Grow Light
Starting seeds this way takes things up a notch by adding in a grow light. Grow lights are great because they give your plants a consistent source of light, regardless of whether the weather decides to cooperate. I love the Root Farm Grow Light because it’s large enough to fit a whole tray of seeds underneath, and it keeps the seeds on the warm side as well.
To start seeds using this method, you need:
- Root Farm Grow Light
- Seed starting pots (can substitute for egg cartons or nursery pots)
- Seeds
- MiracleGro Seed Starting Potting Mix
- Plant labels (can use popsicle sticks)
- Permanent marker
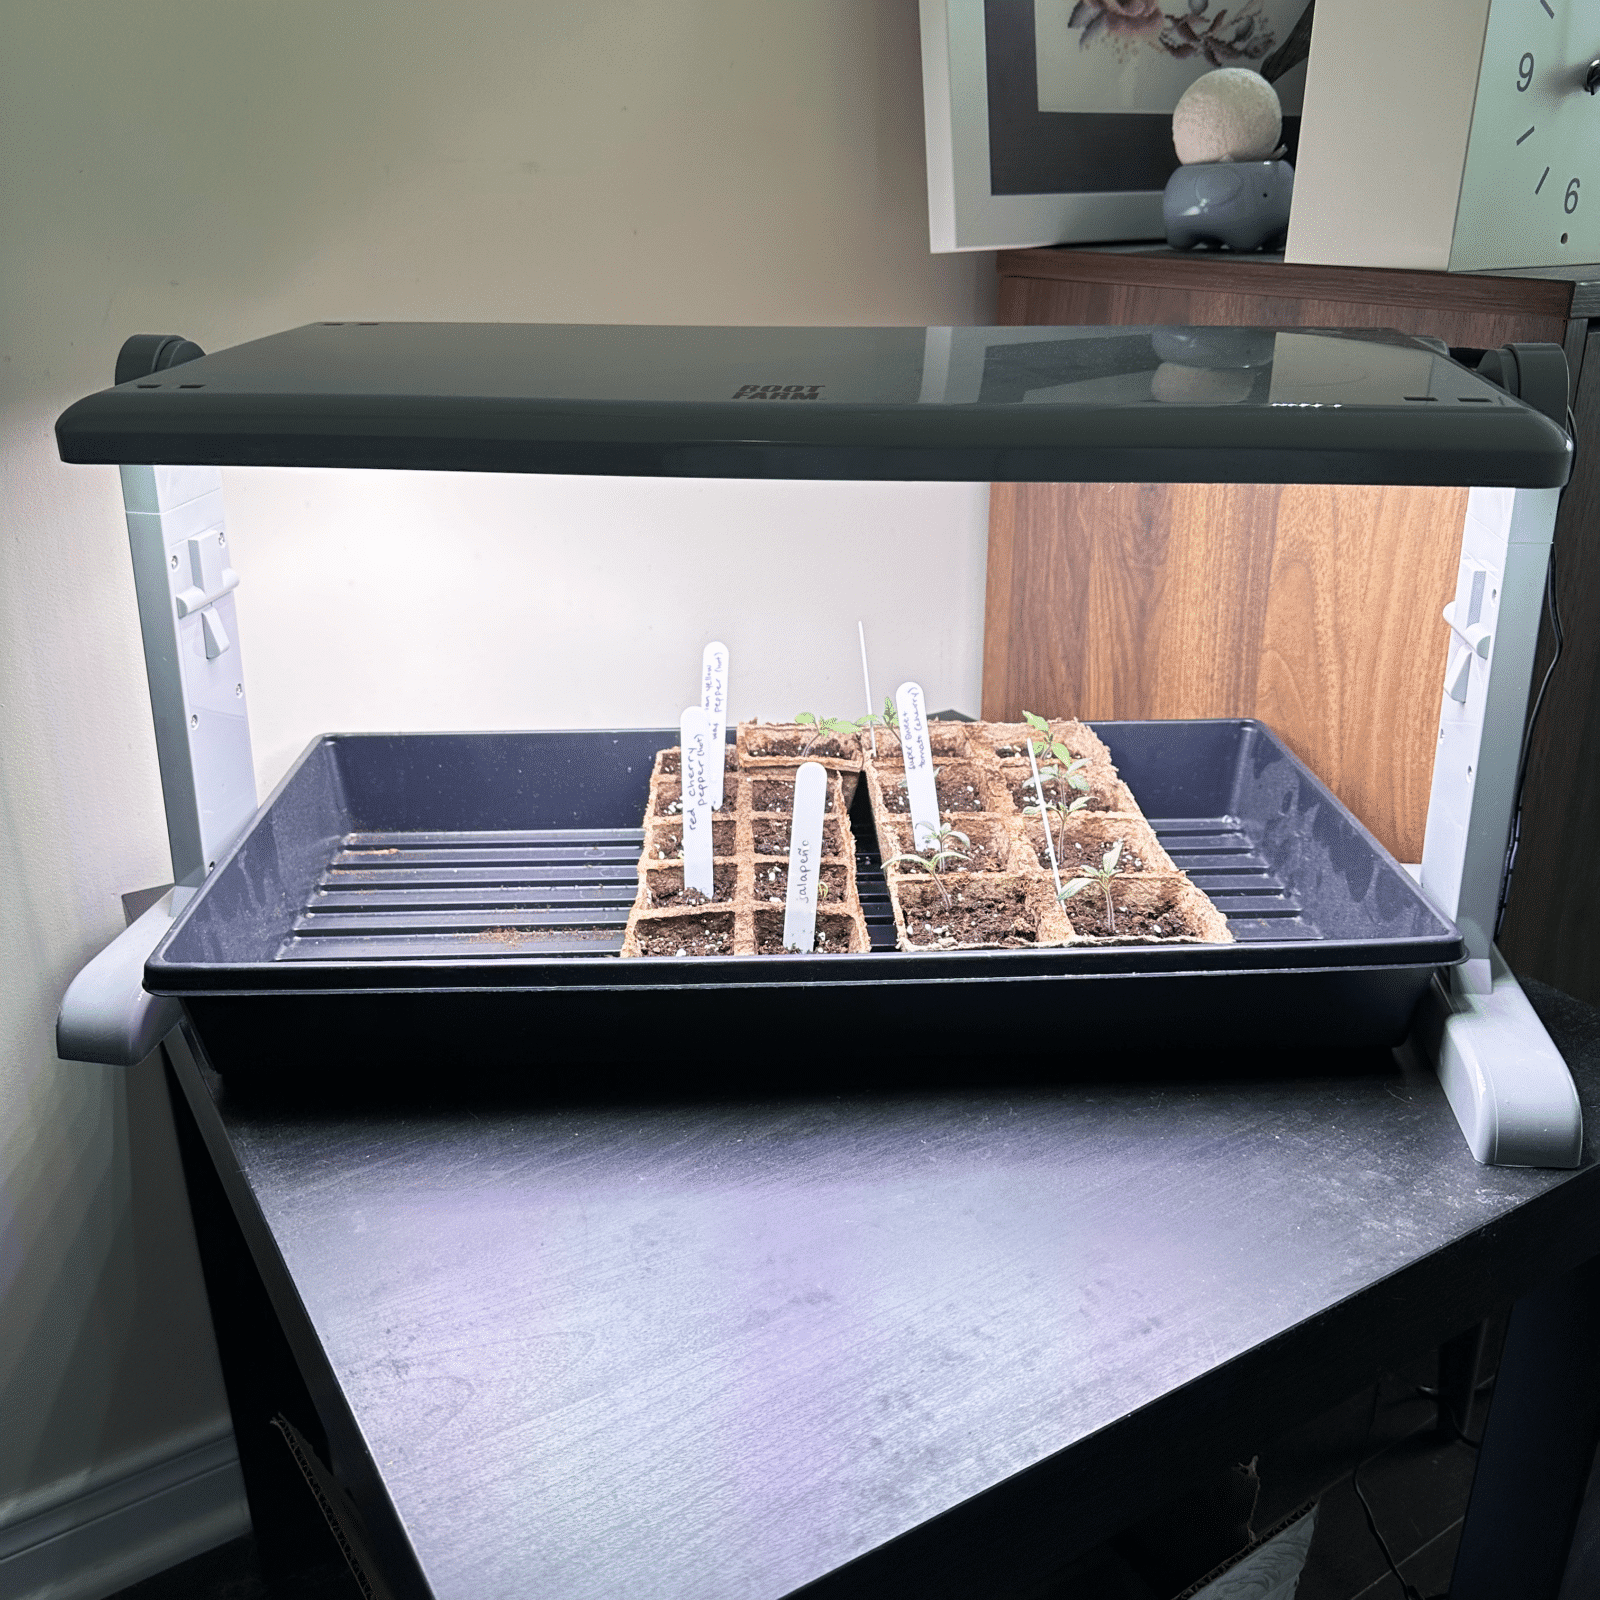
This seed starting setup is similar to the previous one. Begin by filling the pots with MiracleGro Seed Starting Potting Mix and placing a seed in each pot. Label your seedlings with permanent marker on plant labels or popsicle sticks. Assemble the Root Farm Grow Light and plug it in, placing it over the seeds. Water the seeds every one to two days to keep the soil moist.
Pro tip: Try plugging your Root Farm Grow Light into a smart plug. Use the app on your phone to set a schedule so you don’t have to worry about turning it on and off every day!
AeroGarden Seed Starting System
Of these three methods, the fastest way to get your seeds to germinate is, without a doubt, the AeroGarden Seed Starting System. AeroGarden is a hydroponic growing system for 5x faster growth than soil. The AeroGarden Seed Starting System is an accessory that is sold separately from the AeroGarden, and is available for the various models (be sure to choose the Seed Starting System made specifically for your AeroGarden model.)
To start seeds with the AeroGarden Seed Starting System, you’ll need:
- AeroGarden (Harvest Elite is pictured, but you can use any model)
- AeroGarden Seed Starting System accessory (Harvest Elite is pictured; choose the version made for your AeroGarden model)
- Seeds
- Water
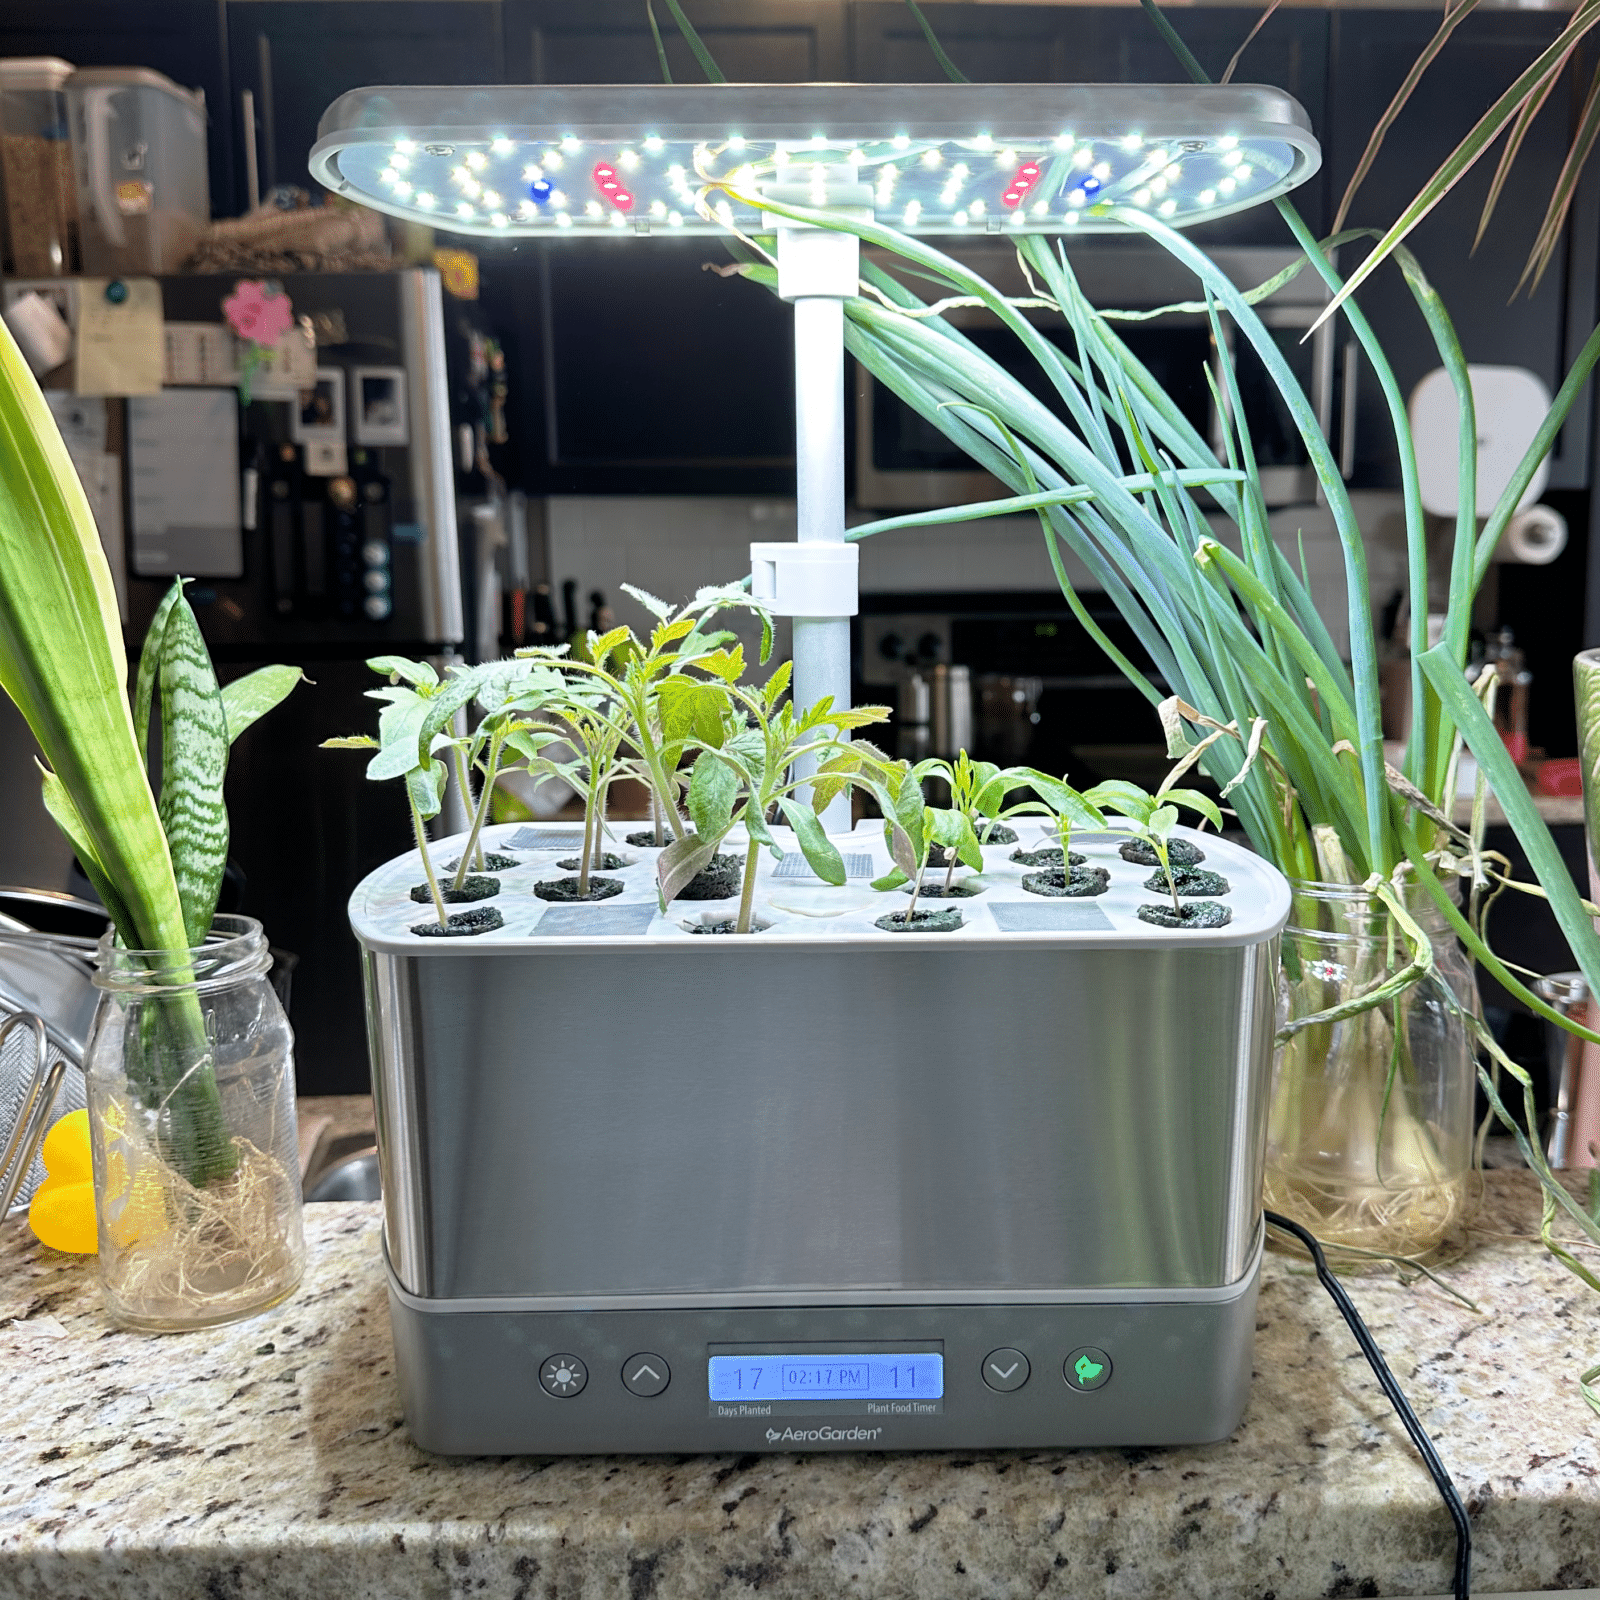
Begin by pre-soaking the grow sponges in water. Swap the standard AeroGarden grow deck for the Seed Starting System grow deck and place one sponge in each of the holes. Place a seed in each of the grow sponges. Plug the AeroGarden in and go follow the steps to start a garden. Fill the reservoir with water and plant food (according to directions on the back of the bottle).
Pro tip: To “label” your seedlings, draw a diagram of the AeroGarden grow deck (or take a photo with a smartphone) and label each space according to which seed you planted where.
For more advice and ideas on Aerogardens, visit www.aerogarden.com.
