- 24” x 48” Good one-side plywood (For 30 propagation stations)
- Tape measure
Straight edge/ruler
Speed square - Painters tape
- Protractor or comparable tool for measuring angles
- Pencil / Eraser
- Test Tubes (20x150mm) Linked here!
- Stain of your choice
- Polyurethane (Optional)
- Mitre saw
- Table saw
- Table saw push tool
- Power drill
- ¾” Spade bit
- Jig saw
- 4” (10) Wood jig saw blade
- Clamps
- String (colour of your choice, I used hemp)
- Yarn needle
- Clear double-sided tape
- Sandpaper
- Electric sander
- Ear protection
- Safety glasses/goggles
- Mask
- Command hooks / Hanging nails

How-To with Once Upon a Bungalow: Propagation Stations
Hello all! I’m Shavonne and I’m back on Plant Project Canada’s page to teach you how to create these beautiful plant propagation stations. This was one of my first-ever woodworking projects and I’m so glad to be able to offer you the highly requested plans to make them yourself! One sheet of 24” x 48” Plywood should make around 30 propagation stations so you’ll have plenty to gift to your favourite people or make an incredible plant wall for your home.
Have you checked out our other projects on Plant Project Canada’s blog? Click the links to the project plans and videos here:
- Garden Planters with Blooming Archway (Article)
- Garden Planters Video
- Light-up Living Plant Wall (Article)
- Light-up Plant Wall Video– Outdoor Holiday Arrangements (Article)
- Outdoor Holiday Arrangement Video
My social channels are Once Upon a Bungalow, and you can find me on Instagram, Facebook, TikTok, and YouTube. We are always up to something in our little bungalow, so please come and join the fun. I am looking forward to seeing you there! Alright, Let’s get building…


step 1.
Start with a 24” x 48” sheet of good one-side plywood. Mark 8” upwards from the 48” side and use a pencil and a straight edge to draw a line. Continue this to make three lines, all measuring 8” wide. Using a table saw, make three cuts lengthwise along the wood. This will create three strips of 8” x 48” plywood. There will be a few inches extra, discard this, as it’s not needed for this project. Refer to the images below.


step 2.
These propagation stations are cut at a 60-degree angle. This makes each side of the triangle exactly 8 equal inches. Using a protractor (or tool of preference to find an angle), mark the triangle lines at a 60-degree angle. Only measure this angle for one triangle, then use the first triangle as a template for the rest of the propagation stations.
Cut the first triangle using a mitre saw at the exact angle marked on the wood. Flip the wood over, and use the triangle that was just cut to mark the next triangle. This way, there will be no waste and no adjustments to make on the angle of the mitre saw. Continue to flip the wood, mark the angle, cut, flip, mark, and cut! There will be 30, 8” x 8” x 8” triangles. Refer to the images below.


step 3.
Estimate the center of the triangle and place painter’s tape on the front and back of the propagation station. The use of painter’s tape is important for a nice clean cut on plywood. Find the center by placing the speed square in line with the bottom point of the triangle. The center point should be around 4” in the middle of the triangle, but it’s best to measure up from the bottom to find the center.
Using a speed square mark the center point of the triangle with a pencil. Once the center is marked, use a tape measure to mark a ¾” spot for the test tube to fit snuggly into. To make the ¾” spot, measure from the centerline ⅜ of an inch out each way.
Next, measure 5” from the top of the propagation station to find the bottom of the test tube spot on that center line and mark this as well. Place the top of the test tube perpendicular to the propagation station, and on top of the 5” marking to find the exact curve of the test tube, mark the curve with a pencil. Make a straight line by using the speed square overtop of the markings. See the example below of the ideal markings for the 20x150mm test tubes. Refer to the images below.


step 4.
Clamp the propagation station firmly to a work bench on each side. Using a ¾” spade bit in a power drill, make a hole at the bottom of the test tube spot and go completely through the wood. Next, equip the jigsaw with a 4” (10) Wood jigsaw blade. Set the jigsaw to the wood setting. (On a Greenworks Jig saw, this is setting number 3). This blade and setting should give the cleanest cut.
Start at the top of the propagation station and cut as straight as possible following the markings made on the painter’s tape. Cut down to meet the hole cut previously. This will result in a snug test tube resting place. Use a test tube after cutting to check if it fits in the hole snugly. Trim as necessary to ensure the test tube fits. Remove the clamps. Refer to the images below.


step 5.
Remove the tape from the plywood very slowly and carefully. Pull the tape in the direction of the non-cut part of the wood toward the cut part of the wood to avoid the wood from lifting and chipping. Use an electric sander to buff the raw edges, face, sides, and back of the triangle. Next, use a drill with a small drill bit to make a hole on each edge of the triangle. These holes will be used to put string or hemp through to hang the propagation station. These holes will be roughly ¼” in from the edge. Refer to the images below.


step 6.
Stain the propagation stations to the colour desired. A Polyurethane sealant will seal the propagation station for extra waterproofing and durability, however, it’s not necessary. Once the stain is dry, add string or hemp. Use a yarn needle to guide the string through the holes created in the previous step and double knot the string to ensure it is secure and will not slip through the hole when hung.
If making a set of propagation stations, use the first completed propagation station as a guide to making sure the string length is the same and they all look cohesive. Next, cut a small piece of clear double-sided tape and place one small strip of it onto the test tube. Once the double-sided tape backing is removed, place the test tube in the niche created for it. Refer to the images below.


step 7.
Hang them up! Using clear command hooks or hanging nails, hang the propagation stations. To propagate a plant, such as a pothos, take a healthy section of the plant stem, typically 4-6 inches long, just below a node (where leaves are attached). Remove the leaves from the lower half of the cutting, and place the cutting in the propagation station with water in it.
you’re done!
Within a few weeks, there should be some root growth in the test tubes. Once there is substantial root growth, transplant with Miracle-Gro® Indoor Potting Mix. This lightweight mixture will help the roots spread out and further form. To give the cuttings the nutrients they need to thrive, try Miracle-Gro® Quick Start Fertilizer Planting and Transplant Starting Solution. This starting solution will improve root growth and give the plant the ability to grow big and strong.
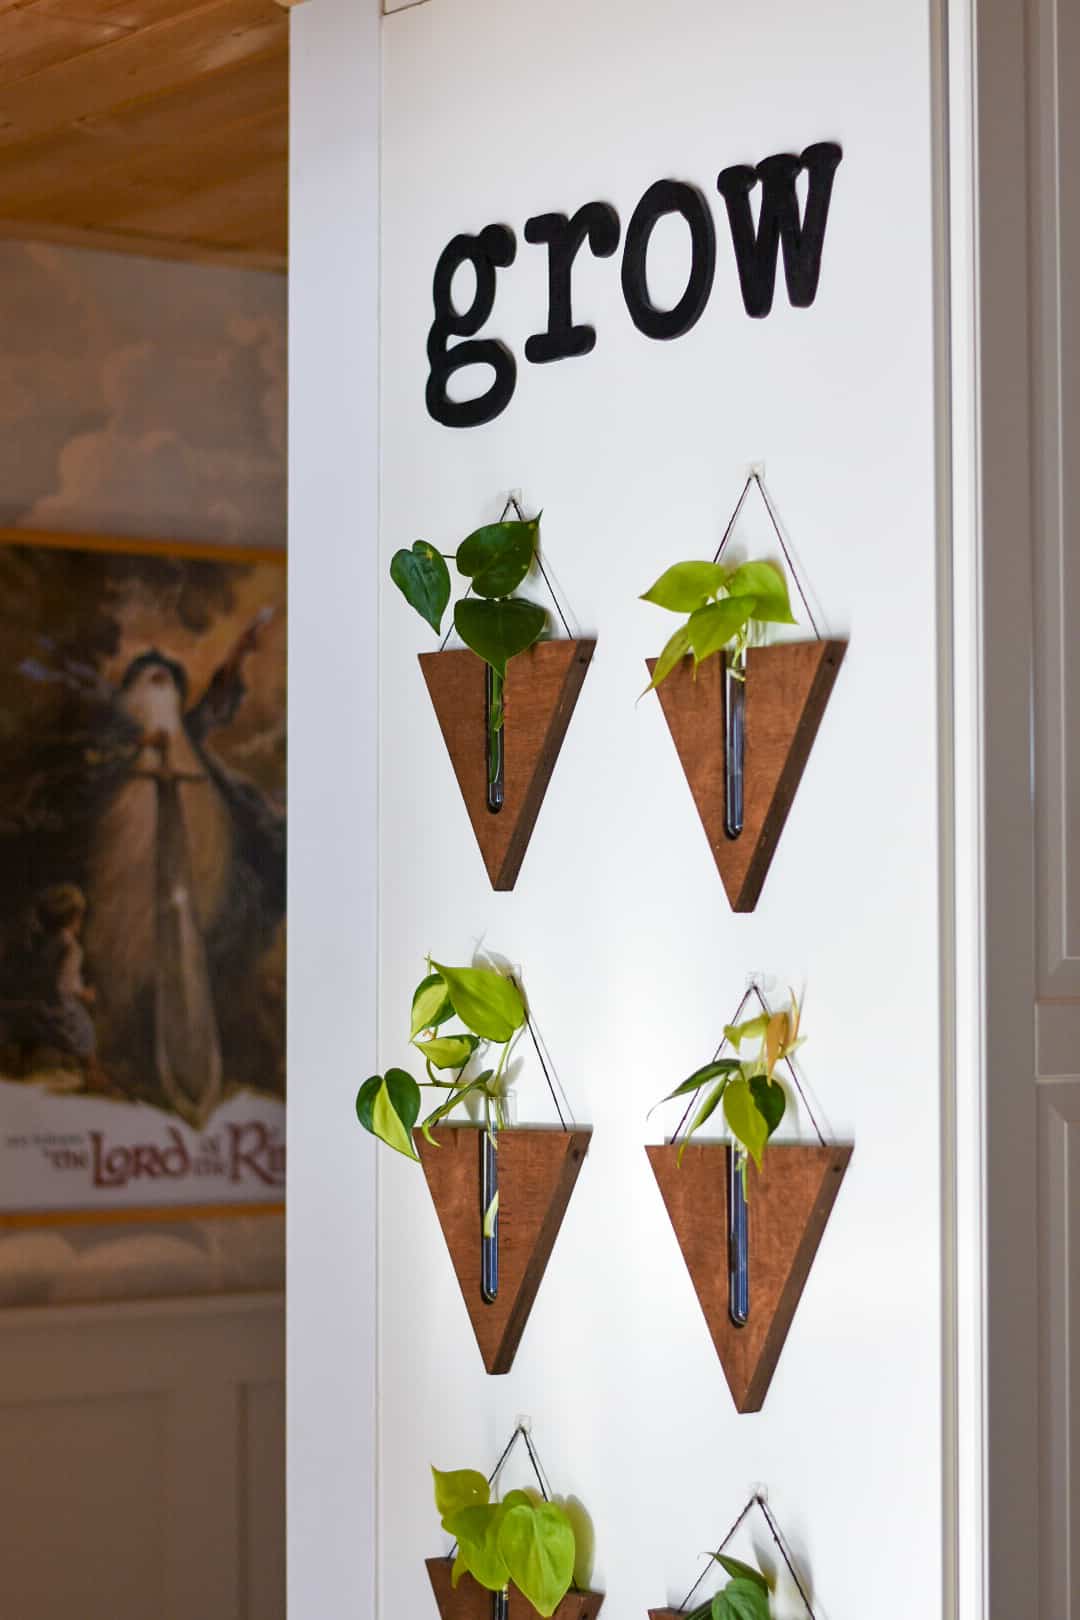
There you have it, plant propagation stations! I hope you enjoyed this tutorial. For my propagation wall, I added a wooden cutout of the word “Grow.” This was ordered from a small Canadian business, Knotty Design Co.
Thank you so much, Plant Project Canada for having me once more! I look forward to seeing all of the Propagation stations you create! Be sure to tag me in your creations. Thank you for stopping by!
Xo Shavo


