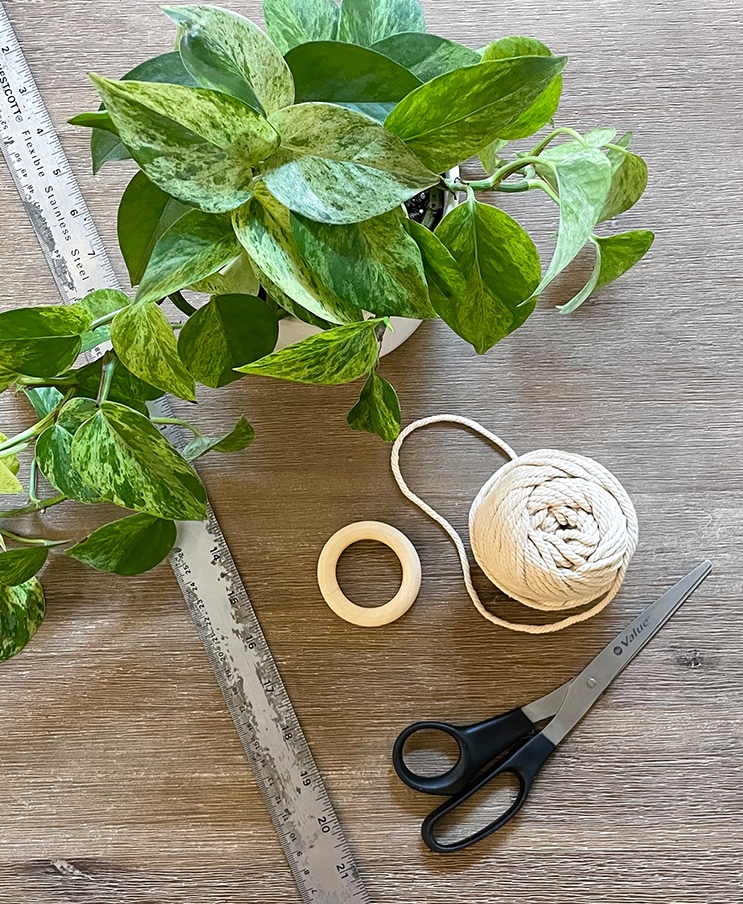
- Natural macrame cord (3mm or 4mm is great to start with)
- A metal ring (any size)
- Your potted plant
- Scissors
- Measuring tape
how to make a macramé plant holder
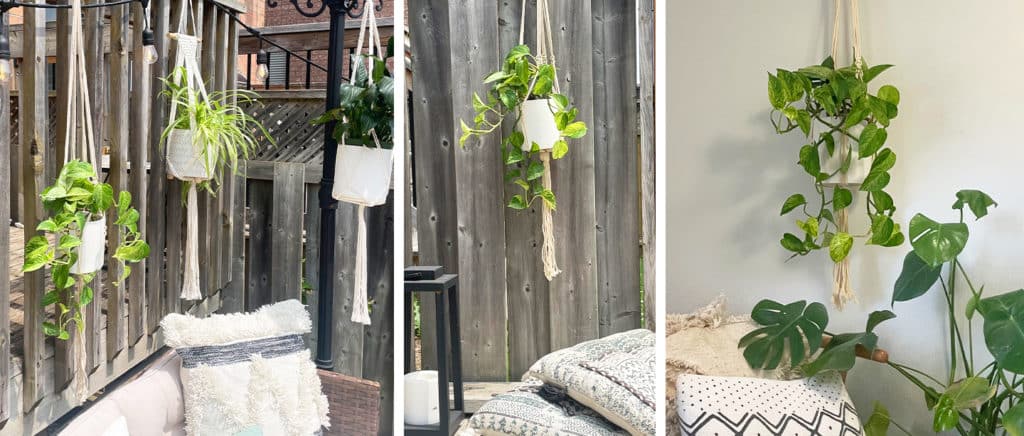
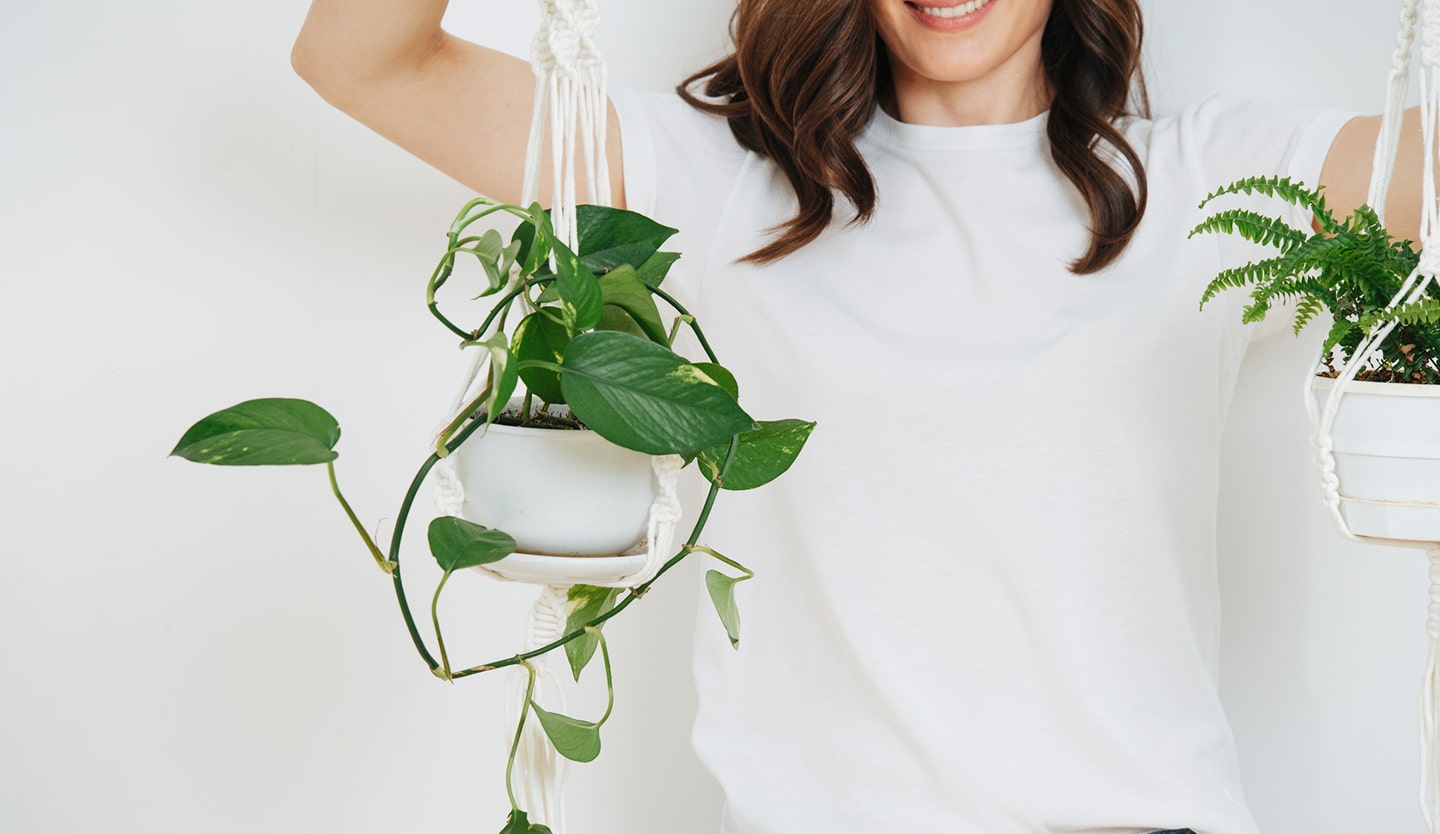
Building your indoor jungle can mean that a lot of your flat surfaces are taken up by your plant babies. This can mean only one thing: it’s time to take to the skies! Help your plants thrive by giving them unfettered access to sunlight, without having to compete with other plants on your shelves. We’ve got a macrame plant hanger that’s perfect for your space!
Easy and quick to work up, these hangers can be customized to suit your home’s style.
step 1. cut the cord
Start by cutting 8 very long pieces of macrame cord, about 10 ft long for a larger planter. Loop the cord through the hoop, so that the cord is folded at the half-way point. You should now have 16 pieces of cord hanging from the loop.
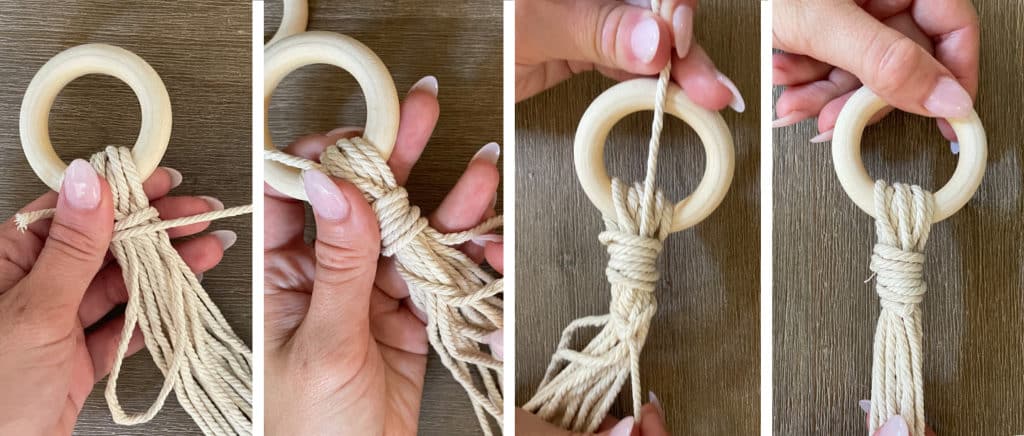
step 2. use a wrapped knot.
A wrapped knot is pretty easy to do and gives you a polished effect. Here’s how to do a wrapped knot:
- Cut a short piece of cord over the looped cord. Make sure the short tail is to the left, a loop pointing down and the long tail to your right.
- Wrap the long tail over the looped cords and the loop of the short cord.
- Continue wrapping the long tail. Make sure to keep it tight and leave the bottom loop of the short cord uncovered.
- Once you’ve wrapped to your desired length, thread the long tail through the bottom loop.
- Pull up on the short tail to tighten the knot. Then pull it under the wraps.
- Cut the tail as close to the knot as you can.
step 3. prep your first row of knots.
Start by dividing the 16 long pieces of cord into 4 groups of four strands. To make sure they’re evenly spaced around the pot, use a measuring tape to measure the same distance from the wrapped knot, and mark each of the 4 groups of cord. Start with about 20 inches down from the knot, then adjust to your preferences. Keep the 16 cords into 4 groups of 4.

step 4. start tying your knots.
This is your first row of square knots. Here’s how to start your first row fos each group of 4 cords.
- Take the left cord and lay it over the centre strands, and under the outside cord on the right.
- Thread the right strand under the center cords, and over the strand on the left. Pull to tighten, and lining it up with the measuring mark we made in the previous step.
- Repeat the process, going in the opposite direction. Lay the right cord over the centre ones and under the far left. Thread the left cord under the centre strands and over the cord on the right.
- Pull tight. Your first square knot is complete. Proceed in the same way with the other 3 groups of 4 cords.
step 5. measure your second row of knots.
Now it’s time to form the second row of knots. Again, group the cords in 4 groups of 4. This time, take two cords from each adjacent grouping of the previous 4 cords. One centre cord and the right from one and one centre cord and the left from the other. Measure out how far below the first row you’d like these knots to sit. Start with 5 inches below and then adjust to your preference.
step 6. start tying your second row.
Tie two square knots to the length you measured and marked. It should start to look like a tube. You’ll have to turn your project to finish the last row of knots.
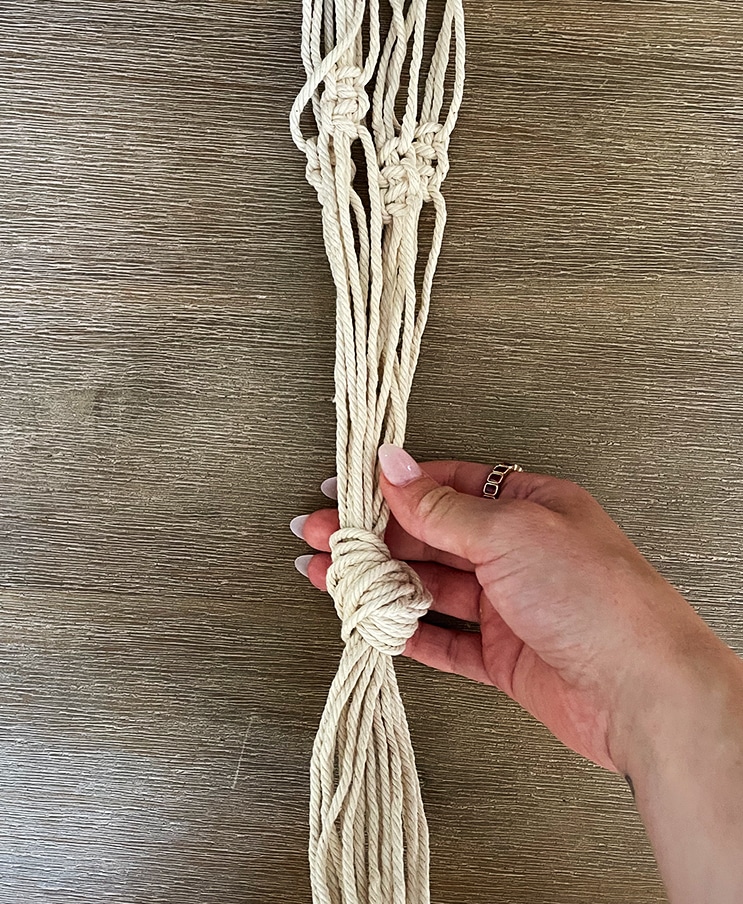
step 7. knot and trim.
To finish off, grab all cord lengths and measure how far below the previous set of knots you’d like this final one to sit. This is the base that your plant will rest on. Start with 7 inches below the previous row, then adjust to your preference. Loop the cords together and pull through to secure the knots. Trim the ends so it’s all even.
step 8. add your plant and hang.
Add your plant pal and choose the perfect spot for your planter. Make sure your planter is securely attached to the ceiling before hanging it up. Enjoy!