Keeping up with watering your garden can feel like a full-time job. And when your house runs on a well like mine does, every drop of water counts. That’s why I’ve been eyeing self-watering garden beds for a while (also called self-wicking beds or sub-irrigated planters). And this year, I finally decided to try building one myself!
These beds are designed to water your plants from the bottom up, using a built-in water reservoir. It’s a super efficient way to keep your garden hydrated, without constantly dragging out the hose or worrying about overwatering.
After learning more about how they work, I realized this could be the perfect mix of sustainability and practicality for my garden oasis! If this one thrives, I’m definitely upgrading all my beds next season.
Here’s exactly how I built it, so you can try one too!
MATERIAL LIST
Lumber & Structure
(6) Cedar 1×6″ fence boards, 6 ft long (garden box)
(1) 2x4x8 cedar board (cut into 6 vertical supports)
2″ deck screws
Water Reservoir & Lining
(1) 10 ft – 4” perforated PVC pipe
(1) 4” 90° elbow joint
(2) End caps (to seal pipe end and keep critters out)
PVC Primer & PVC Pipe Glue (optional but recommended)
(6–8) bricks or blocks
(4–5 cu. ft) washed gravel
5 ft x 5 ft heavy-duty pond liner
Heavy-duty landscape fabric (for soil separation)
Soil & Plants
4 bags of Miracle-Gro Raised Bed Soil
Seeds or starter plants of your choice
Tools
Chop saw or circular saw
Drill
Reciprocating saw
Staple gun
Utility knife or scissors
Measuring tape
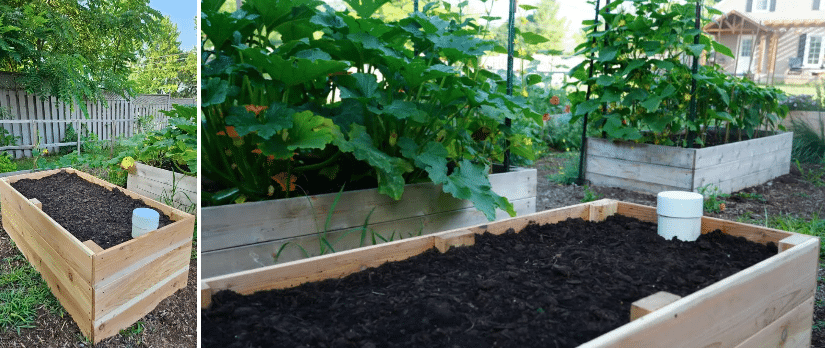
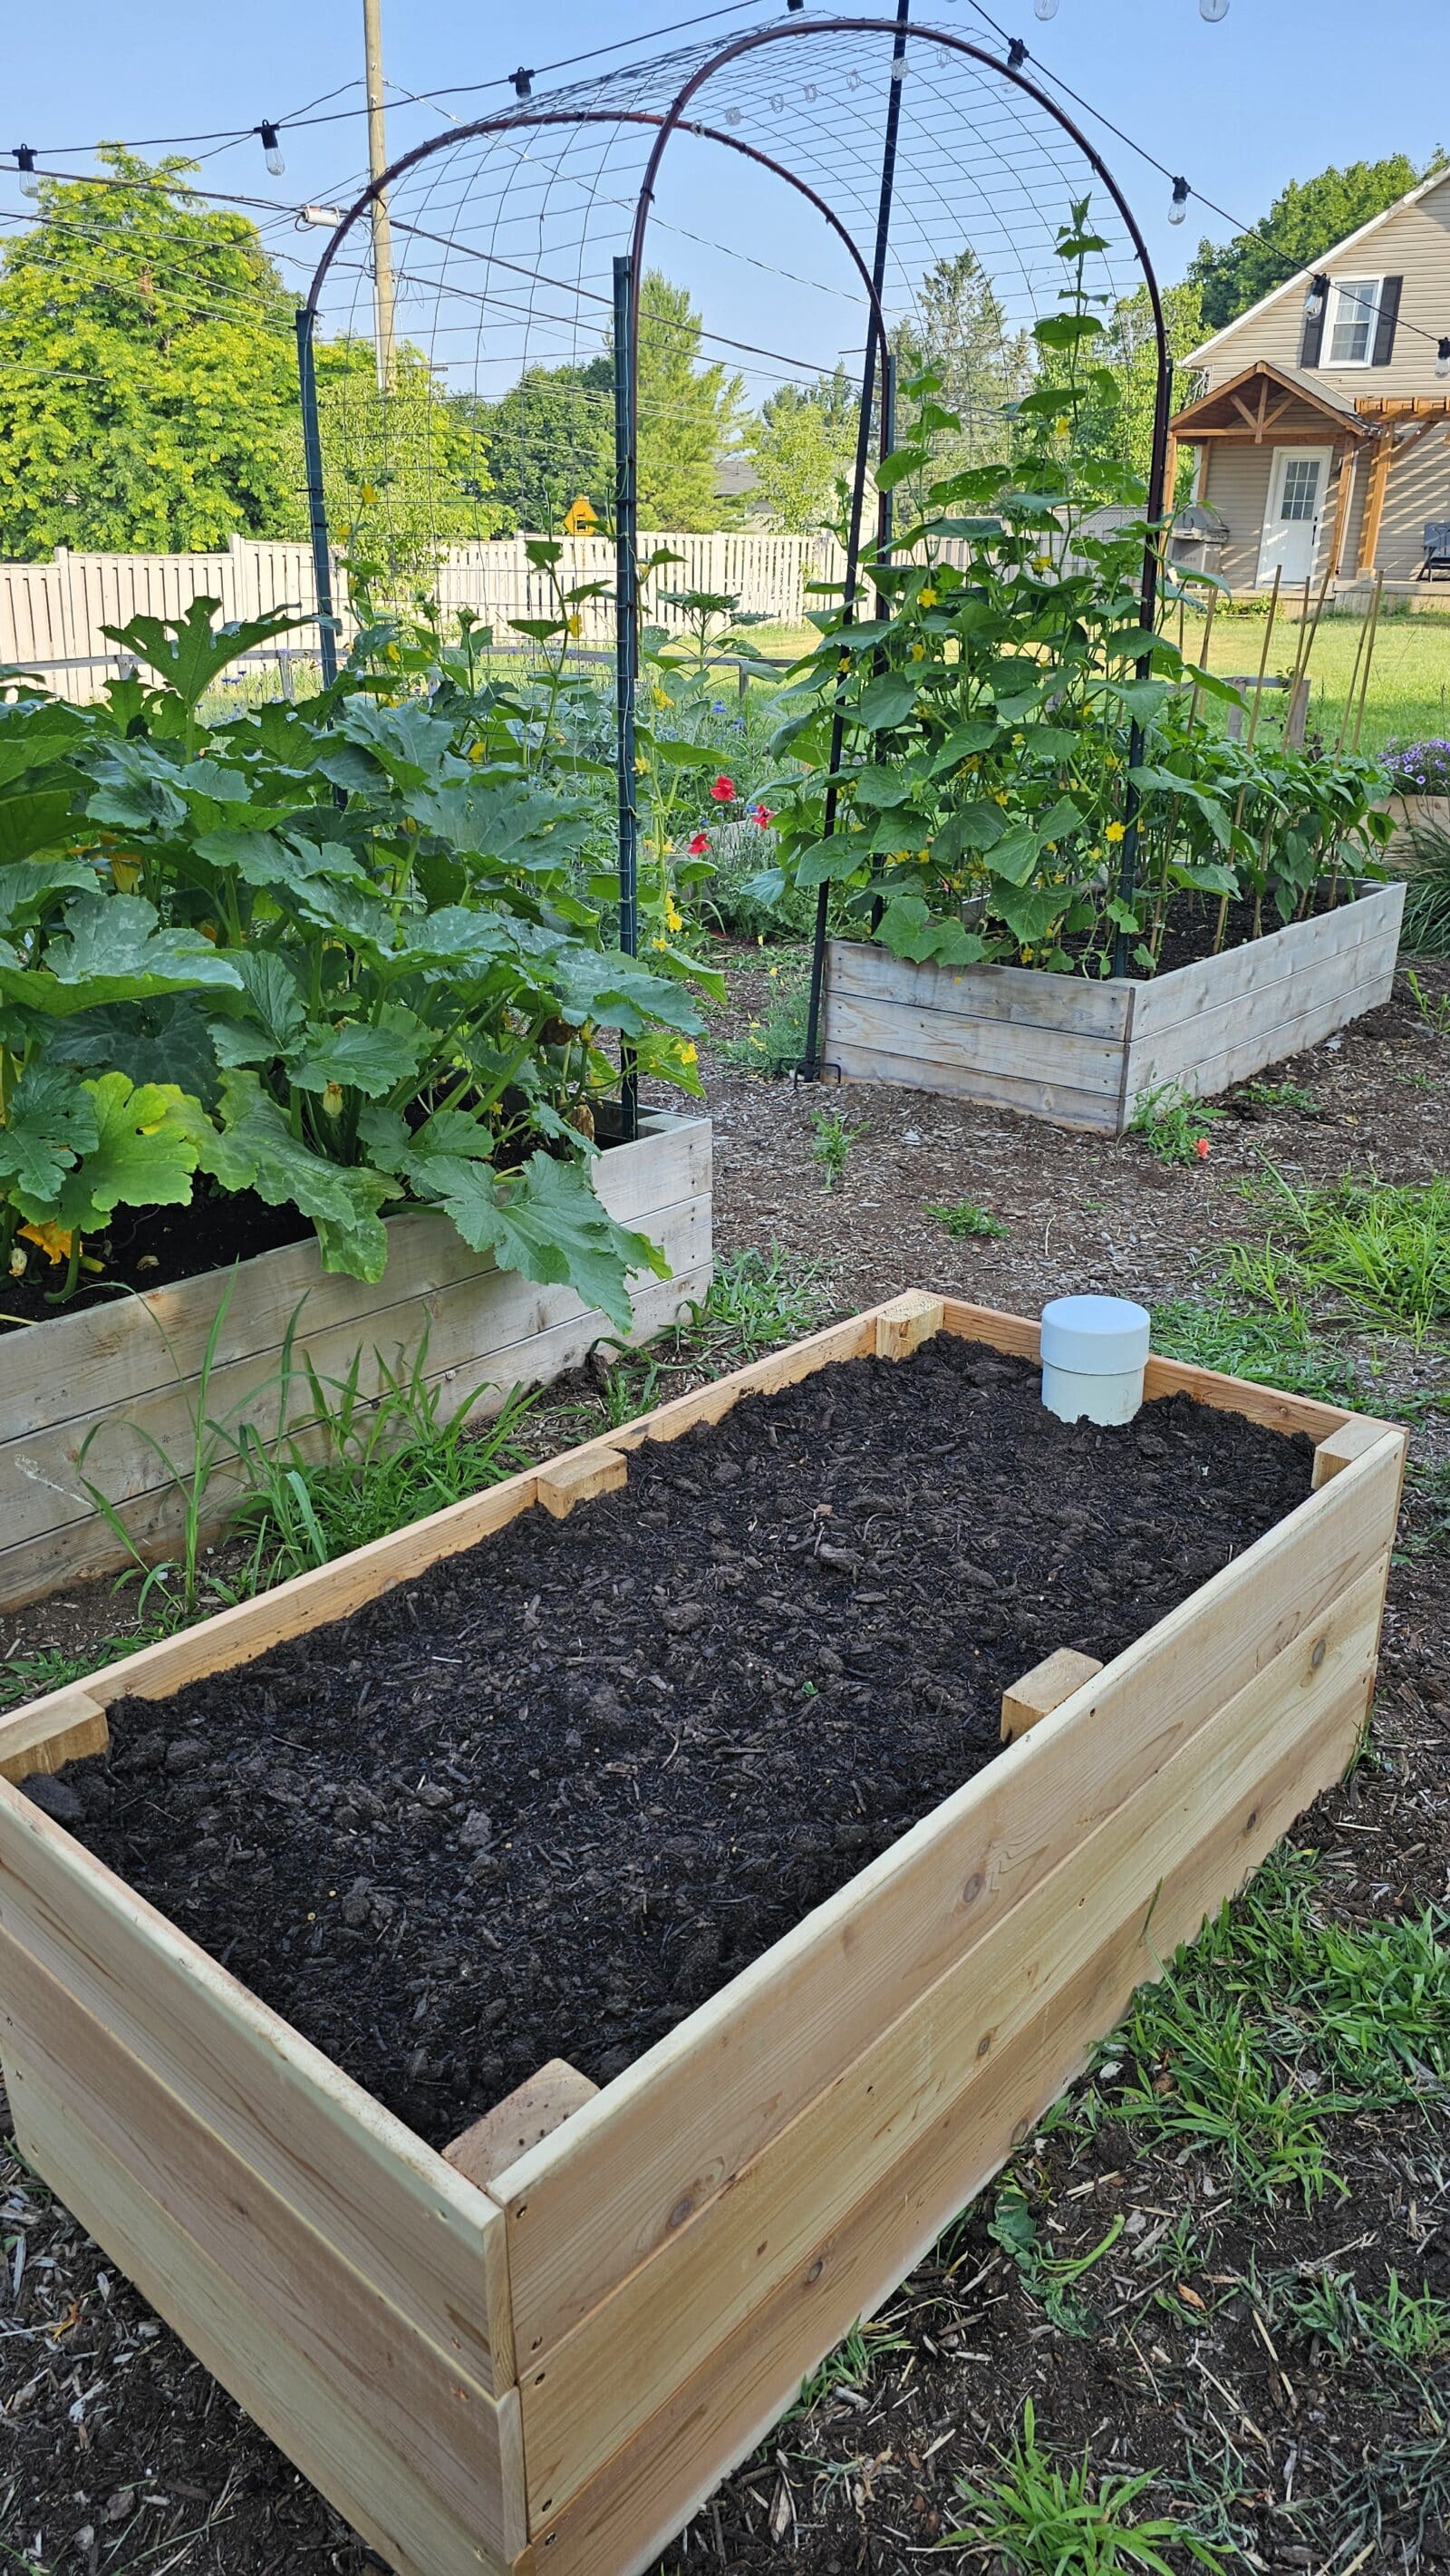
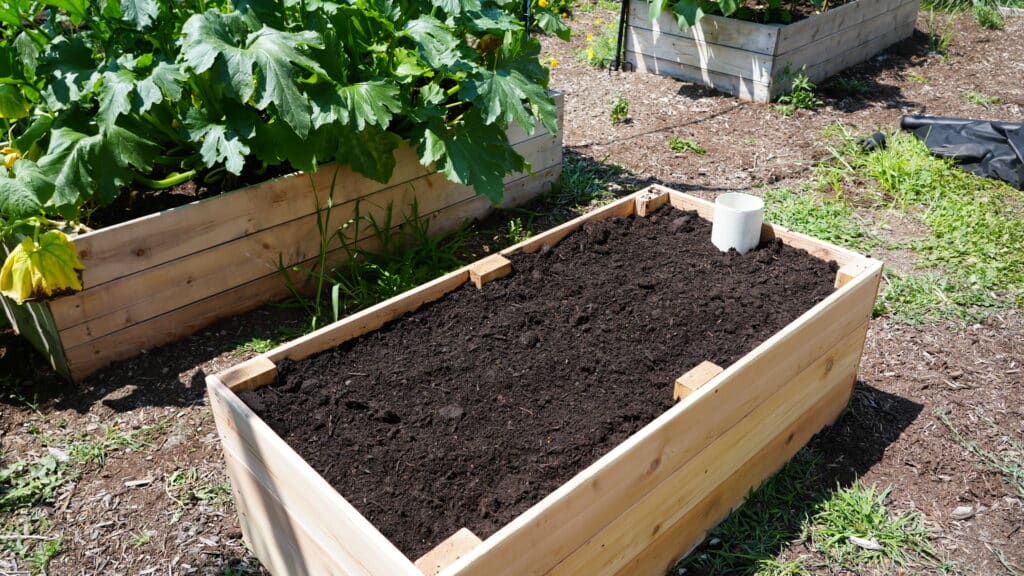
Step 1: Build Your Box
I built my garden box to be 2 ft x 4 ft and about 16.5” tall – plenty of space for root growth without eating up your whole yard.
Start by cutting your 1×6 cedar boards down to (6) 24” pieces and (6) 46¾” pieces. Then cut your 2×4 into (6) shorter posts to use as your vertical corner supports.
Build the long sides of the box first. Stack three 46 ¾” boards and add three vertical supports across to keep them secured. Place one vertical piece at each end and one in the middle. Then attach the 24” pieces to create a full planter box. Boom! You’ve got yourself a garden bed.
Step 2: Line It with a Pond Liner
In order for the soil to wick, the garden box needs to hold water. To do this, I’m securing a heavy-duty pond liner with a staple gun. Staple it along the inside walls of the bed, about halfway up the sides. You don’t need to line the whole height – it just needs to sit above your pvc pipe to create a reservoir in the bottom section of the bed.
Pro tip: Don’t skimp on this step. A cheap liner will tear, and then your plants are basically living in a leaky canoe!
Step 3: Set Up the Water Reservoir
Now comes the fun part – let’s create our reservoir! This is what makes your planter “self-watering.”
First, cut the 10-foot PVC pipe down to size. The inside of the planter box measured 40.5 inches. Cut the pvc pipe to this size but consider the end cap and 90 degree elbow in this measurement. In order for the plants to pull water from the reservoir, the pipe needs holes! If your pipe isn’t already perforated, you’ll need to drill ½-inch holes along its length. I made 4 holes approx. 3 inches apart, spaced out at every 6 inches. Cap one end and add a 90° elbow to the other.
Using the leftover PVC pipe, I cut a 13 inch vertical fill pipe that connects to the elbow, in order to easily pour water in from the top.
Optional: use PVC primer and PVC Pipe glue to secure the joints if you want a watertight seal.
Next, fit the pipe inside the garden bed! Add 6–8 bricks along the bottom of your bed to hold your pipe in place. This setup creates a reservoir where water can hang out, ready for your plants to sip on when they’re thirsty.
Step 4: Add Gravel & Fabric
Once your pipe system is in place, it’s time to fill in around it with washed gravel. Pour gravel until it fully covers the pipe and fills the bottom 4–5 inches of the bed. This holds the water and prevents soil from clogging the system.
Lay a layer of landscape fabric over the gravel and secure it in place with the staple gun. This is key! It keeps the soil from seeping into your water reservoir but still lets moisture pass through. Think of it like the bed’s breathable base layer.
Step 5: Fill with Soil
Now the fun part. Pour in your soil – I used Miracle-Gro Raised Bed Soil because it’s pre-mixed with compost and nutrients, and perfect for veggies! Add soil all the way to the top, gently pressing it down but not compacting it too much. Roots still need room to stretch.
Step : Fill Your Reservoir + Plant Away
Pop the cap off your vertical fill pipe and slowly add water until the reservoir is full. Then, get planting! The water will wick up through the soil as needed.
This means you’ll water way less often, and your plants will be less prone to stress from over – or under -watering. This was one of those projects that made me feel like a garden genius! It’s practical, sustainable, and just really satisfying to build. With one watering, your plants are set for days, even during the hottest stretches of summer.
If you’re looking to reduce water waste, take the guesswork out of watering, or just want an excuse to play with PVC pipe, a self-wicking bed is 100% worth trying.
We use cookies on our website to give you the most relevant experience by remembering your preferences and repeat visits. By clicking “Accept All”, you consent to the use of ALL the cookies. However, you may visit "Cookie Settings" to provide a controlled consent.
This website uses cookies to improve your experience while you navigate through the website. Out of these, the cookies that are categorized as necessary are stored on your browser as they are essential for the working of basic functionalities of the website. We also use third-party cookies that help us analyze and understand how you use this website. These cookies will be stored in your browser only with your consent. You also have the option to opt-out of these cookies. But opting out of some of these cookies may affect your browsing experience.
Necessary cookies are absolutely essential for the website to function properly. These cookies ensure basic functionalities and security features of the website, anonymously.
Cookie
Duration
Description
cookielawinfo-checkbox-analytics
11 months
This cookie is set by GDPR Cookie Consent plugin. The cookie is used to store the user consent for the cookies in the category "Analytics".
cookielawinfo-checkbox-functional
11 months
The cookie is set by GDPR cookie consent to record the user consent for the cookies in the category "Functional".
cookielawinfo-checkbox-necessary
11 months
This cookie is set by GDPR Cookie Consent plugin. The cookies is used to store the user consent for the cookies in the category "Necessary".
cookielawinfo-checkbox-others
11 months
This cookie is set by GDPR Cookie Consent plugin. The cookie is used to store the user consent for the cookies in the category "Other.
cookielawinfo-checkbox-performance
11 months
This cookie is set by GDPR Cookie Consent plugin. The cookie is used to store the user consent for the cookies in the category "Performance".
viewed_cookie_policy
11 months
The cookie is set by the GDPR Cookie Consent plugin and is used to store whether or not user has consented to the use of cookies. It does not store any personal data.
Functional cookies help to perform certain functionalities like sharing the content of the website on social media platforms, collect feedbacks, and other third-party features.
Performance cookies are used to understand and analyze the key performance indexes of the website which helps in delivering a better user experience for the visitors.
Analytical cookies are used to understand how visitors interact with the website. These cookies help provide information on metrics the number of visitors, bounce rate, traffic source, etc.
Advertisement cookies are used to provide visitors with relevant ads and marketing campaigns. These cookies track visitors across websites and collect information to provide customized ads.
join our passionate plant community and gro your garden!
By registering, I am allowing Scotts Canada Ltd. to contact me with news, articles and promotions. I understand that I can withdraw my consent at any time.