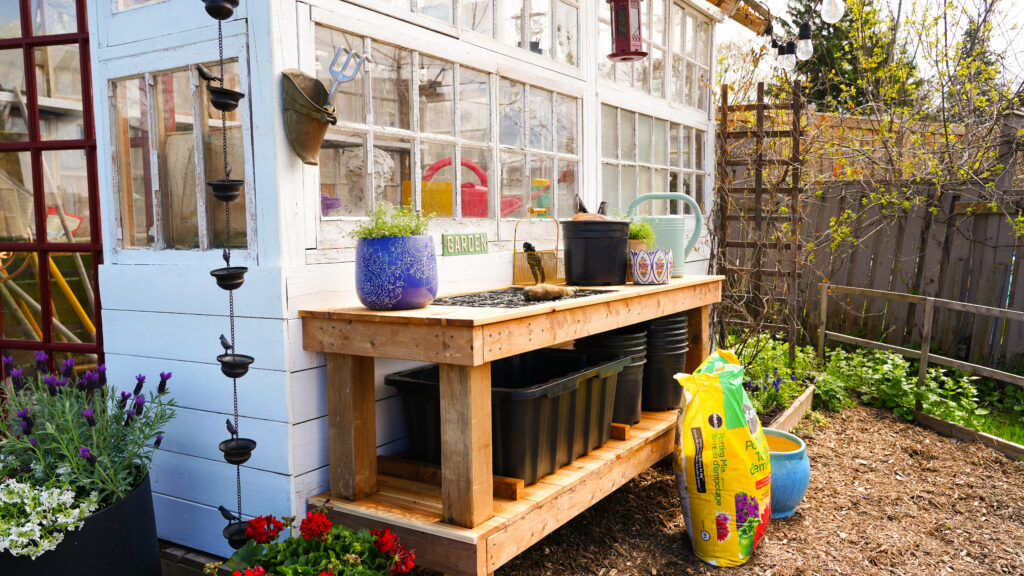

DIY Garden Potting Station With Soil Collector


There’s something incredibly satisfying about repotting plants and giving them fresh space to grow. As the garden season ramps up, our greenhouse quickly runs out of room, which usually leaves us potting plants on the greenhouse floor or right on the ground outside, and with that comes SO much wasted soil.
I decided it was finally time to create a better solution beside the greenhouse: a DIY Potting Bench designed to catch and reuse excess soil instead of letting it disappear into the dirt below.
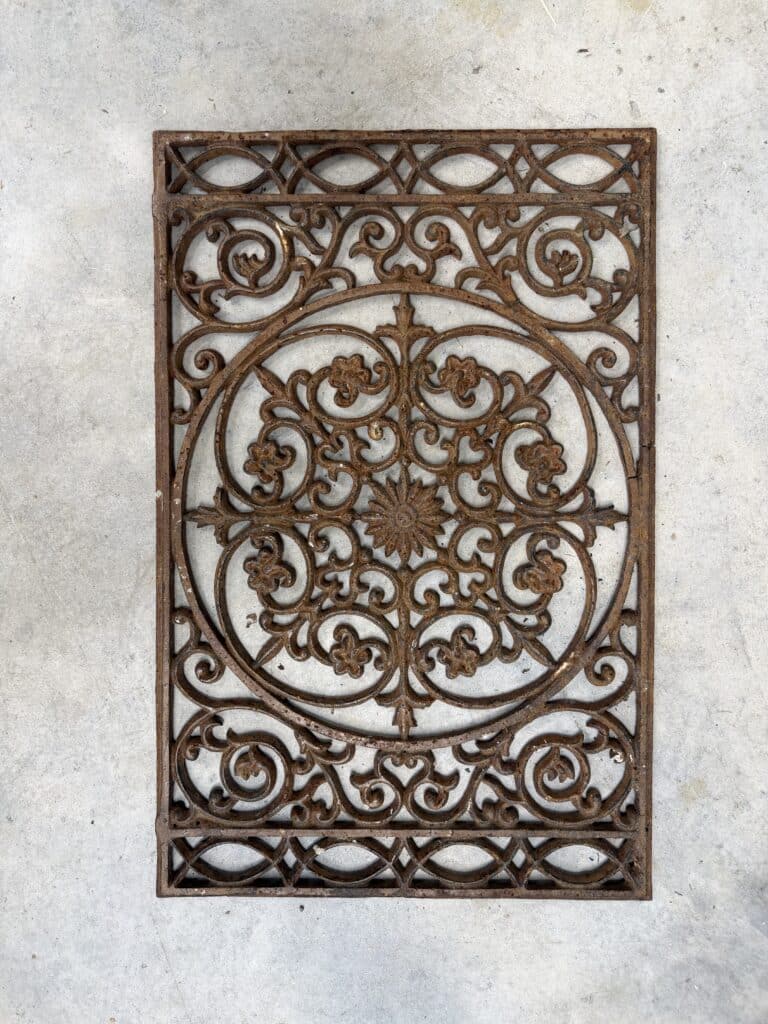
Using a beautiful upcycled antique iron grate as the inspiration for the build, this project feels equal parts functional and whimsical. The vintage grate adds so much character and charm while secretly solving one of my biggest gardening frustrations.
If you’ve been looking for a practical weekend DIY that makes gardening easier, more organized, and just a little more magical, this DIY Potting Station is such a worthwhile addition to any greenhouse, shed, or garden space
Finished Dimensions
70″ (L) x 36” (H) x 21″ (D)
Materials & Tools
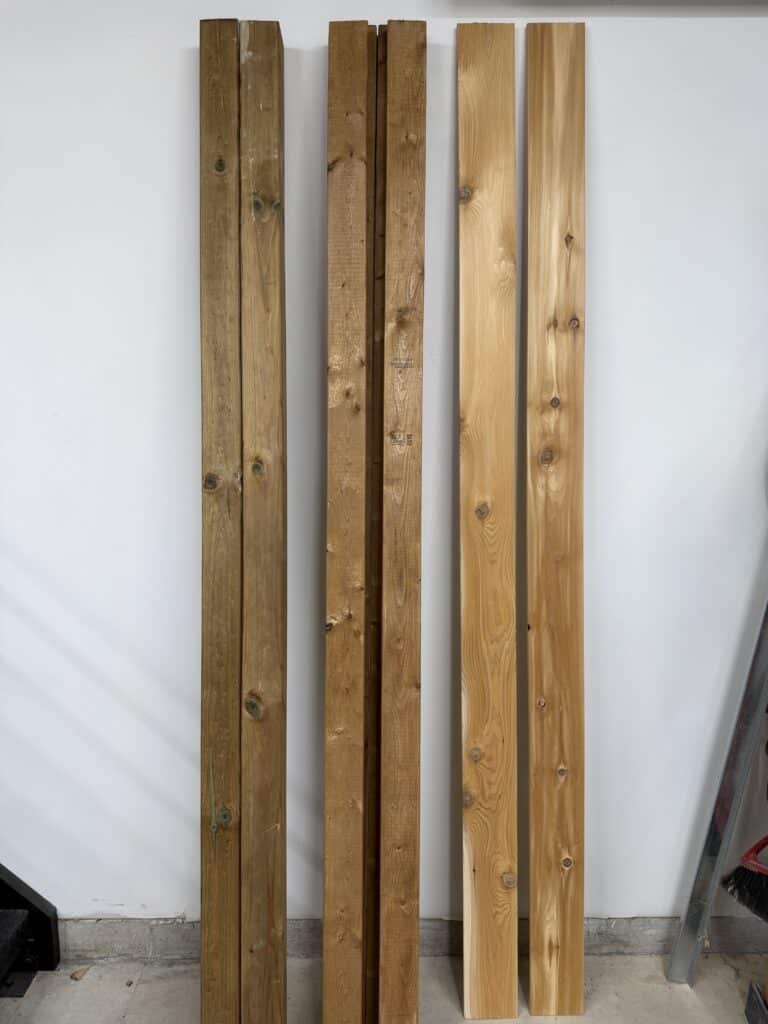
Pressure-Treated Lumber
(2) 4x4x8 (legs)
(7) 2x4x8 (frame)
Red Cedar Lumber
(8) 1″x 6″x 8′ (Top and Shelf)
Large Plastic Bin (roughly same size as grate)
Hardware & Supplies
- 3″ exterior wood screws
- 2.5″ exterior wood screws
- ⅛” pilot hole drill bit
- wood preservative (for untreated PT wood cut ends)
- antique iron grate insert
- black rust-inhibiting spray paint
- rust remover
- 2” Brad Nails (optional)
- (3) 6″ rugged structural screws (optional)
Tools
- Wire brush
- Measuring Tape
- Miter saw (alternative tools: hand saw, circular saw or jigsaw)
- Drill
- Jigsaw
- Clamps
- Brad Nailer (optional)
- Rubber Mallet
- Wire Brush
Step 1: Frame Lumber Cuts
*These measurements are based upon my grate size. Feel free to adjust accordingly.
(Alternative tool options: hand saw, circular saw or jigsaw.)
Using a miter saw, I cut my 4×4 and 2×4 pressure-treated lumber into the following sizes:
4×4 PT Legs
- (4) 35 3/8″
2×4 PT Support Apron
- (4) 67″
- (4) 21″
2×4 PT Cross Supports
- (7) 18″
2×4 PT Grate Support
- (2) 25 1/4″
- (2) 18”
Soil Bucket Supports
- Customize cuts to the size of the bin base on three sides (Back, Left, Right)
PRESSURE TREAT NOTE:
Once all pressure treated lumber is cut, seal all cut ends with an PT wood preservative to help prevent moisture damage and rot.


Step 2: Build Workbench Frame
Fill your container about halfway with a high-quality indoor potting mix. Secure the top support apron. Note: I built this upside down on my work table to simplify the build.
Flush at both ends of one 67″ 2×4, secure two 4×4 legs, clamping in place first.
Pre-drill to prevent wood splitting, then secure with 3″ screws.
Add the 21″ supports flush with the 67” 2×4 at the corner, and secure with screws. Repeat on both sides until you have a sturdy rectangular frame with four legs attached at each corner.


Step 3: Add the Middle Shelf
From the base of the top support apron, I measured and marked 19” on the 4×4 to guide my middle shelf height.
Repeat the same framing process at this new height to create the middle shelf support.


Step 4: Install Support Braces
Secure five 18″ braces evenly (approx. 10” on center) across the inside of the bottom apron. Flip the table on its side if needed for easier access.
Tap each brace into place with a rubber mallet for a snug fit, pre-drill and screw through the outer apron into the support ends.


Step 5: Add Supports for the Grate Insert
Where you place your grate along your table top is completely personal. I favoured the left side to have a larger potting work surface on the right.
Mark and measure 10” from the left outside edge and secure the first 18” cross support brace using 3” screws. Bud up both 25 1/4″ supports to the inside edge of your 18” cross brace, parallel to your apron, and secure from the inside using your 2.5” screws. Bud up the last 18” cross support and secure using a 3” screw.
These measurements provide the grate a half inch ledge to rest upon and keeps that bulky 1.5” 2×4 edge from being visible underneath.


Step 6: Prepare the Cedar Top
I opted for red cedar on my visible surfaces because I love the way the grain looks, it’s naturally rot and insect resistant and continues to look beautiful over time.
Cedar Board Cuts:
- (2) 71″
- (2) 34 1/4″
- (2) 10 1/2″
Note: These measurements were customized to fit length wise around the grate opening. Depending on where you place your grate, these measurements could change. Adjust accordingly.
Cedar Top
The top surface was measured to include a ½” overhang on the front/sides and sit flush with the frame on the back.

Step 7: Cut the Grate Opening
Mark any cedar boards that overlap with your grate and remove this material using a jigsaw.
Since grate sizes vary, it’s best to dry-fit often and trim gradually until the insert sits neatly in place.
Step 8: Secure the Cedar Top
Using your Brad nailer, secure the cedar boards into the cross supports underneath.
(Alternative options: 2” nails with hammer or wood screws)
Step 9: Build the Middle Shelf
Cedar Board Cuts:
- (13) 21”
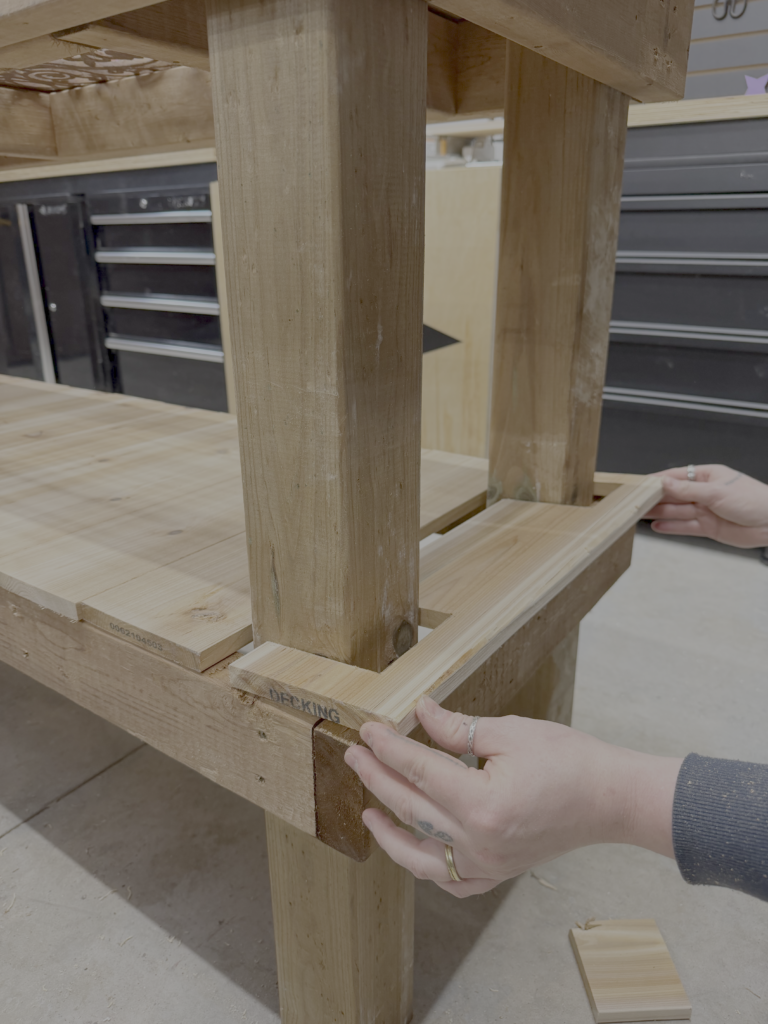
Cut and place lower shelf tops widthwise across the middle apron.
For both end boards, measure and use a jigsaw (or hand saw) to notch around the 4×4 legs for a neat finish.
Use a brad nailer to secure the boards into the support beams underneath.
(Alternative options: 2” nails with hammer or wood screws)
Step 10: Add Soil Bucket Supports *OPTIONAL*
I found a heavy duty plastic bucket at my local hardware store in their storage section.
To keep the bucket from sliding around on the shelf, I used scrap pressure-treated lumber to create small support brackets along the sides and back, securing them in place with brad nails.
This creates a snug fit that holds the bin in place while still allowing it to slide out easily from the front. Be sure to measure your own bucket and cut the supports to fit for a custom, secure hold.


Step 11: Restore the Grate
My grate was old and weathered after being left outside for years, so it needed a little TLC to clean away the rust, grime, and years of buildup.
To refresh it:
Dry brush away any flakey loose rust using a wire brush.
There are many ways to remove rust depending on its level of rustiness. For light rust, submerge it in vinegar and water or lightly scrub a baking soda paste (baking soda and water) then let sit for 24 hours.
For more heavy duty applications like mine, use a rust remover gel or rust remover liquid, scrub with a wire brush and let sit for 30 minutes.
Make sure to rinse with water and soap and let fully dry before applying anything on top.
Spray your grate with rust-inhibiting spray paint. This seals the metal, blocks moisture from getting in, and helps stop any rust from spreading. I chose a semi-gloss finish to create a tough surface that can handle all the dirt, water, and pot scraping this station is about to see. Just a heads up, oil-based paints take a bit longer to cure, so give it a few days before putting it to work!


Step 12: Finish it
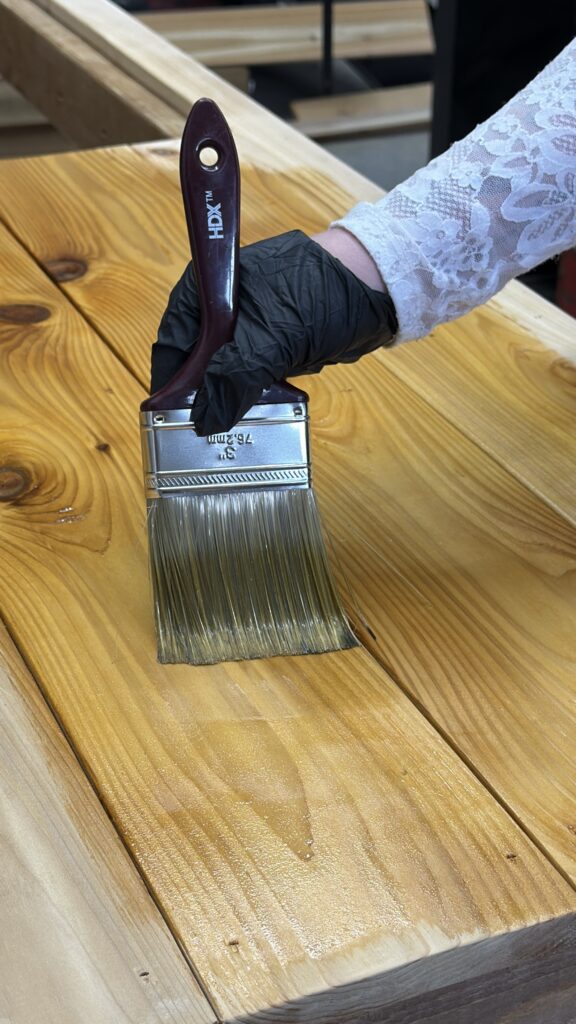
Cedar is naturally rot-resistant, but it will fade in the sun and rain. Use a transparent penetrating oil to soak into the wood to protect it from moisture, add UV resistance, and keep that beautiful natural look intact.
Step 13: Secure Beside the Greenhouse
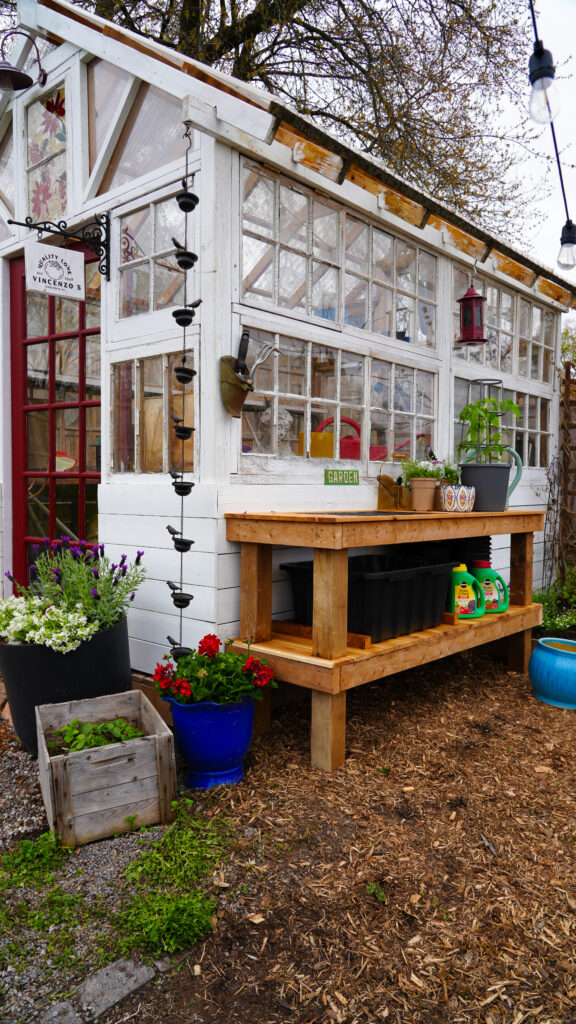
The final step was securing the potting bench to the side of the greenhouse for extra stability.
Using long 6″ rugged structural screws, I fastened the bench from the back side directly into the greenhouse’s structural 4×4 posts to create a strong, sturdy connection.
Final Thoughts
This DIY Garden Potting Station has completely transformed the way I garden. Soil now drops straight through the grate and into my bucket for easy reuse, the cedar shelves keep all my pots and tools within reach, and every little gardening task suddenly feels so much more organized and inspiring!
Honestly, these are my favourite kinds of DIYs – projects that are not only beautiful, but make your everyday life easier every single time you use them. Want to see more of these kinds of projects? Follow me on Instagram, Facebook, Pinterest.
Now bring on the garden magic and thriving plants this season!